• Watch Out for Scammers!

    We've now added a color code for all accounts. Orange accounts are new members, Blue are full members, and Green are Supporters. If you get a message about a sale from an orange account, make sure you pay attention before sending any money!

Gunsmithing Filling the cutout on USGI synthetic M14 stock. Any advice?

BackCountry0311

Private
Full Member
Minuteman
Jul 23, 2012
74
0
36
Oregon
I picked up a USGI stock from treeline last night with plans to fill in the selector cutout and then throw a few layers of duracoat on it. Ive done a fair amount of research on the hide as well as a few other forums and plan on using the west marine epoxy resin with some filler to fill in the gap. All pretty straight forward.

Then a friend of mine suggested that I cut a small piece off a wooden dowel and place it in the cutout, then epoxy all around it so I would not have to use as much resin. It would essentially just fill in some of the empty space. Has anyone tried this before?

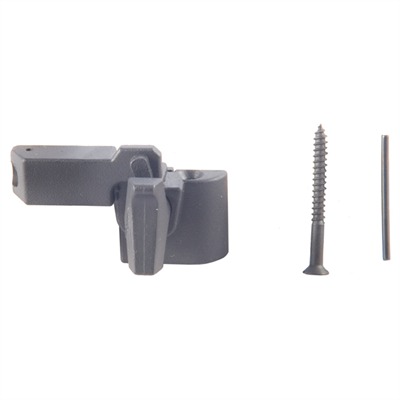
Ive also seen people using nails, ect... stuck into the cutout to re-enforce the epoxy, is this necessary even with the filler?

This will be my first time messing around with epoxy and I want to make sure I go into it with as much knowledge as possible, so any tips or tricks are much appreciated!

Thanks,
BC0311
 
You are on the right track. I would personally use small screws like sheetrock or such. (shortened of course) If you rough up the surface with a dremel or file it likely will stay put. The dowel, nails or screws are just insurance. The voids you are trying to fill are not large enough to consider them as a filler. A can of marine-tex will do several dozen.

Masking or duct tape is your friend. Use it to form a "dam" inside and out.
 
Last edited:
You could install a dummy selector (for the look):

images

p_100005279_1.jpg

FA001011500_50.jpg


I agree this looks like ass:

M1a-selector-switch-cutout-1997.jpg
 
Last edited:
Thanks for the replies. I know there are some alternatives to filling the cutout, but im also looking for a new project to work on, so figured I might as well mess around with it. I think im going to try out using the screws instead of the dowel tho, thanks RJB.

Does anyone know if duracoat will hold onto to the west marine epoxy?
 
Last edited:
I would leave it alone personally, What I'd do is fill the stock with skittles and then when you wanted a tactical snack just lean the rifle to the right and let skittles come out the little skittle dispensery window.
 
  • Like
Reactions: M8541Reaper
I would leave it alone personally, What I'd do is fill the stock with skittles and then when you wanted a tactical snack just lean the rifle to the right and let skittles come out the little skittle dispensery window.

As awesome as tactically tasting the rainbow would be, the extra flavoring of burnt up varget and lubriplate doesn't sound to fun...

Just wondering, any reason you prefer the cutout? Or just personal preference
 
If you want to fill the void with no porosity JB weld flows out and levels nicely. Dam up both sides, level the stock and mix and fill with JB weld and it will do the rest. I would add a few small holes in the cut out area for the epoxy to flow into or use a re-bar type support. Any thick epoxy you try to stuff in the void will have trapped air and need sanded down / filled.
 
If you want to fill the void with no porosity JB weld flows out and levels nicely. Dam up both sides, level the stock and mix and fill with JB weld and it will do the rest. I would add a few small holes in the cut out area for the epoxy to flow into or use a re-bar type support. Any thick epoxy you try to stuff in the void will have trapped air and need sanded down / filled.

Did the same and it sands very nicely and takes paint well.
 
The only "bad" thing about JB Weld is it's not cheap.
 
Pics??????
<a href="http://s1155.photobucket.com/user/yangying123/media/125.jpg.html" target="_blank"><img src="http://i1155.photobucket.com/albums/p543/yangying123/125.jpg" border="0" alt=" photo 125.jpg"/></a> Started out roughing it up with the dremel, then drilling some pilot holes and throwing some screws in for extra support.
<a href="http://s1155.photobucket.com/user/yangying123/media/14.jpg.html" target="_blank"><img src="http://i1155.photobucket.com/albums/p543/yangying123/14.jpg" border="0" alt=" photo 14.jpg"/></a>
Dammed it up with some painters tape and packed it full of some plasticweld, Jb weld. Used a popsicle stick and toothpicks to push out all the air.
<a href="http://s1155.photobucket.com/user/yangying123/media/IMG_2388.jpg.html" target="_blank"><img src="http://i1155.photobucket.com/albums/p543/yangying123/IMG_2388.jpg" border="0" alt=" photo IMG_2388.jpg"/></a> About five minutes with some sand paper and the dremel later and it looks good to go.
 
<a href="http://s1155.photobucket.com/user/yangying123/media/IMG_2389.jpg.html" target="_blank"><img src="http://i1155.photobucket.com/albums/p543/yangying123/IMG_2389.jpg" border="0" alt=" photo IMG_2389.jpg"/></a>

Heres the inside.

Also installed a tanks bipod adapter today and am throwing a karstens cheek rest on tomorrow. Then a few layers of duracoat and she'll be sitting good as new.