
Fitting guard screws is a deceptively simple process. While some are satisfied with blasting a screw against a grinding wheel or belt sander, others look for an alternative.
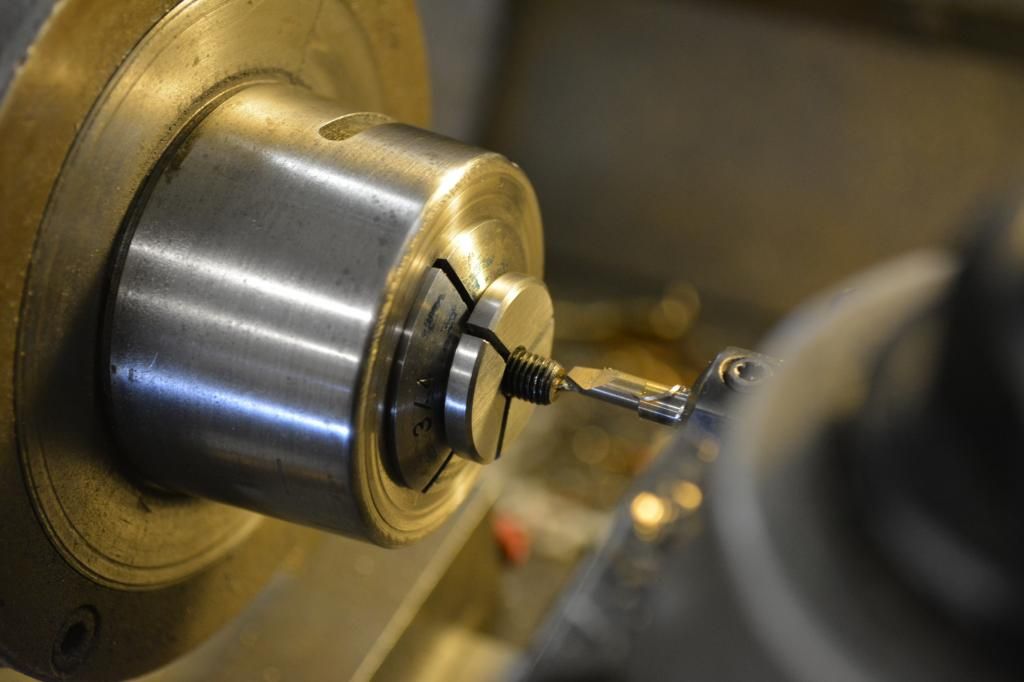
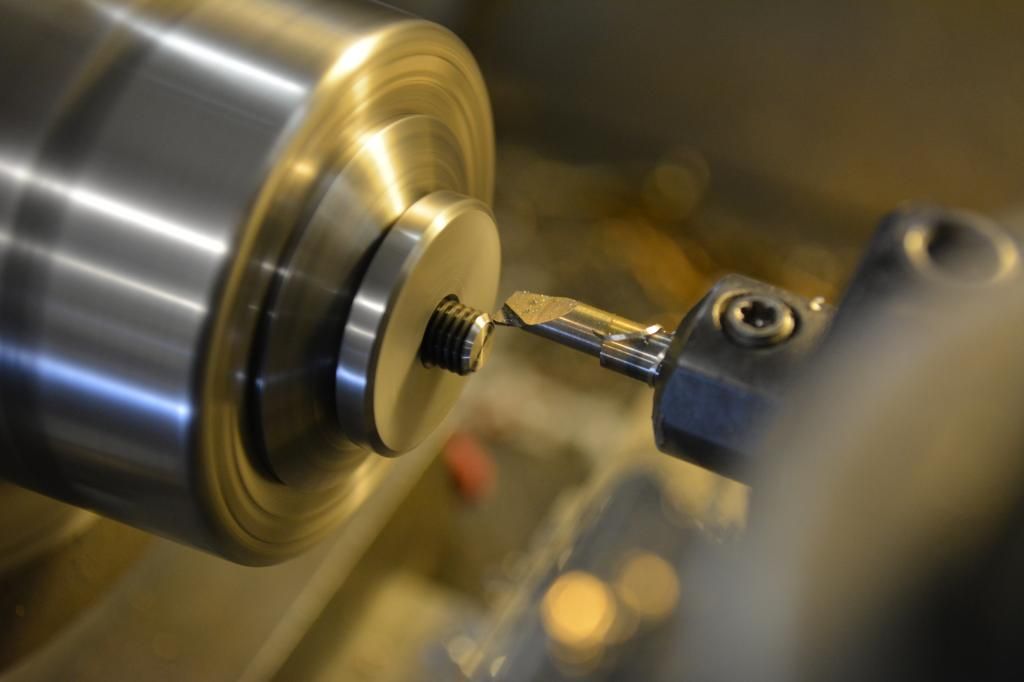
I've made a collet setup that captivates the body of the screw without mashing the threads or having to slide the screw from the rear of a 1/4" 5C collet. This is the latest revision as the previous version had a portion of the O ring exposed above the body that always caught on the inside of the 1" collet.
Tools like this really go a long way towards making stupid jobs quick/dirty and clean. Screw leads are square to the body and the thread chamfer can be easily restored so that the end user doesn't have fits putting his rifle together.
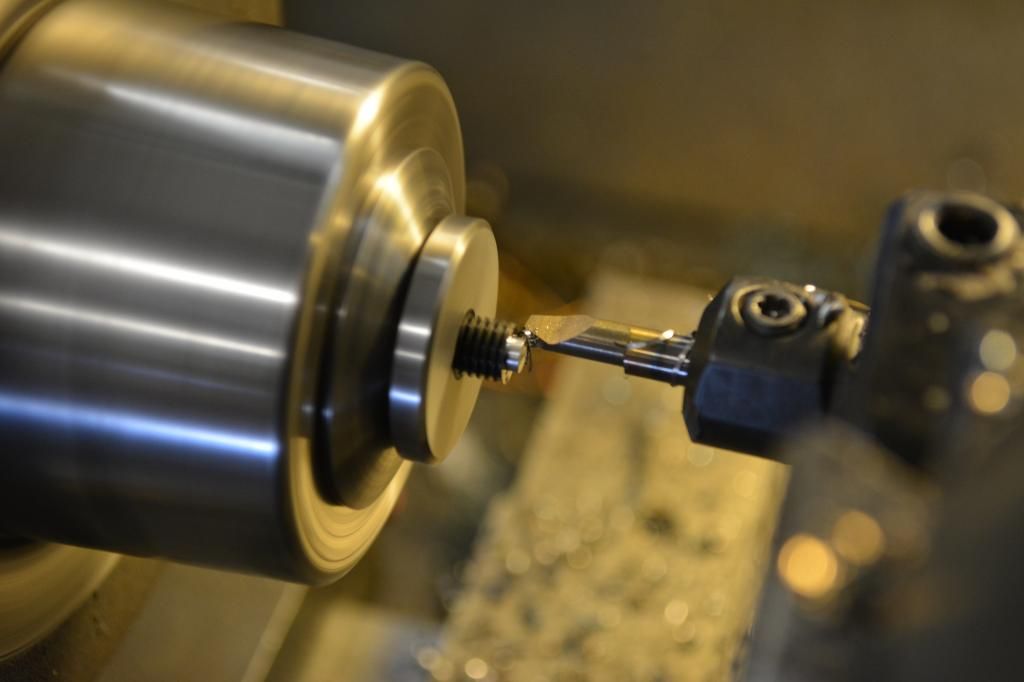
I like using a boring bar to trim these screws. Running the spindle in reverse puts the cutter on the backside so that in one setup I can face the screw and chamfer. If you choose to do it this way, just make sure your tool's on center and your don't go too far past spindle center. The little boring bar inserts I'm using won't tolerate it well. They'll chip at the lead edge of the cutting surface if you mistakenly load them the wrong way. At $47 bucks a piece you can hemorrhage the VISA card pretty quick if your not careful.
Maybe it'll help out a guy down the road somewhere.
Enjoy.
C.
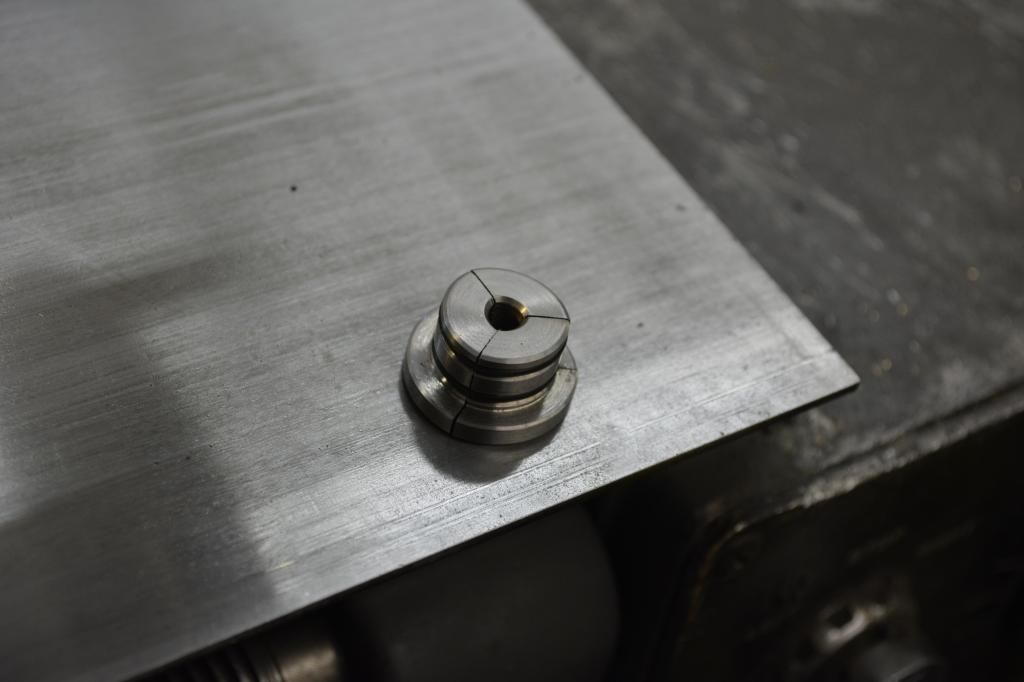
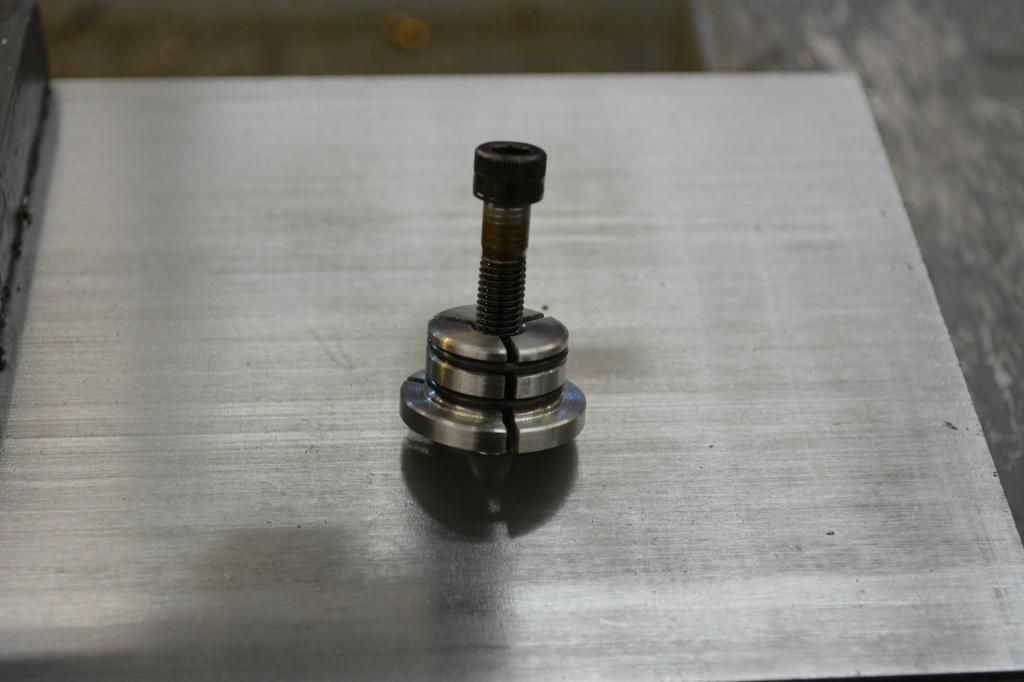
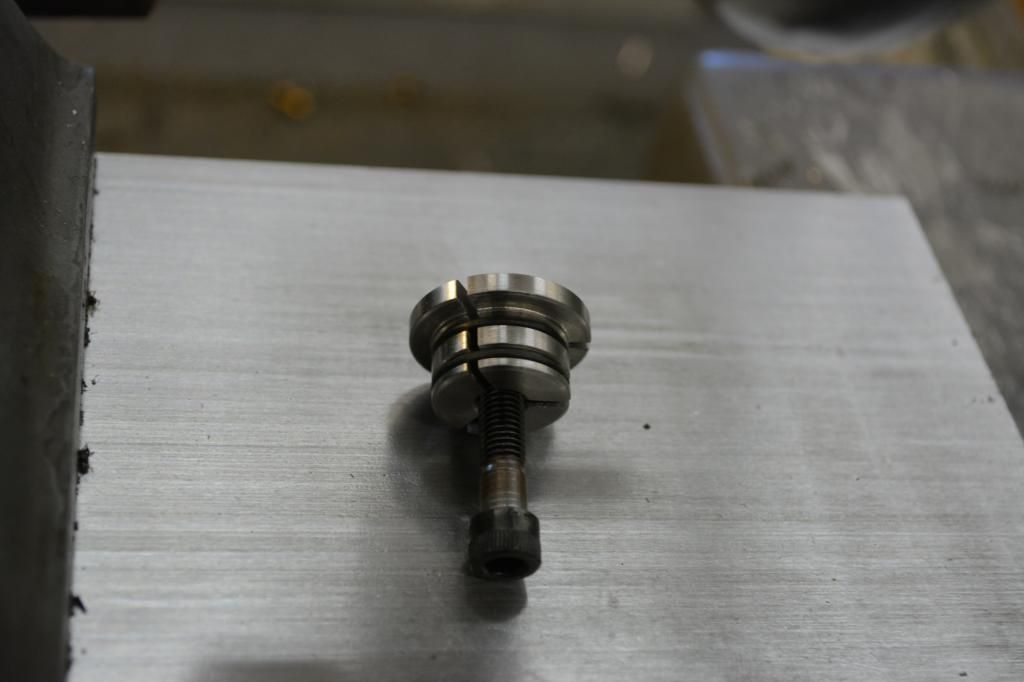
I've made a collet setup that captivates the body of the screw without mashing the threads or having to slide the screw from the rear of a 1/4" 5C collet. This is the latest revision as the previous version had a portion of the O ring exposed above the body that always caught on the inside of the 1" collet.
Tools like this really go a long way towards making stupid jobs quick/dirty and clean. Screw leads are square to the body and the thread chamfer can be easily restored so that the end user doesn't have fits putting his rifle together.
I like using a boring bar to trim these screws. Running the spindle in reverse puts the cutter on the backside so that in one setup I can face the screw and chamfer. If you choose to do it this way, just make sure your tool's on center and your don't go too far past spindle center. The little boring bar inserts I'm using won't tolerate it well. They'll chip at the lead edge of the cutting surface if you mistakenly load them the wrong way. At $47 bucks a piece you can hemorrhage the VISA card pretty quick if your not careful.
Maybe it'll help out a guy down the road somewhere.
Enjoy.
C.
Last edited:
")


