I have always heard almost no torque on the action screws when bedding to prevent stress in the action. I have tried multiple times with just making contact and that's it, it always ends up with bedding on top of the pillars. Now when I torque it up some (maybe around 35 in lbs or so) I get full contact with the action and pillars. I have also never had any barrel movement when doing the bedding stress test, and the rifles shoot great. Does anyone have any advise on how to make full contact with the lugs without torquing it? Also, does anyone else torque it a little bit like I do and still get good results? Thanks
Join the Hide community
Get access to live stream, lessons, the post exchange, and chat with other snipers.
Register
Download Gravity Ballistics
Get help to accurately calculate and scope your sniper rifle using real shooting data.

Install the app
How to install the app on iOS
Follow along with the video below to see how to install our site as a web app on your home screen.
Note: This feature may not be available in some browsers.
You are using an out of date browser. It may not display this or other websites correctly.
You should upgrade or use an alternative browser.
You should upgrade or use an alternative browser.
Gunsmithing How much torque when bedding?
- Thread starter flyfisherman246
- Start date
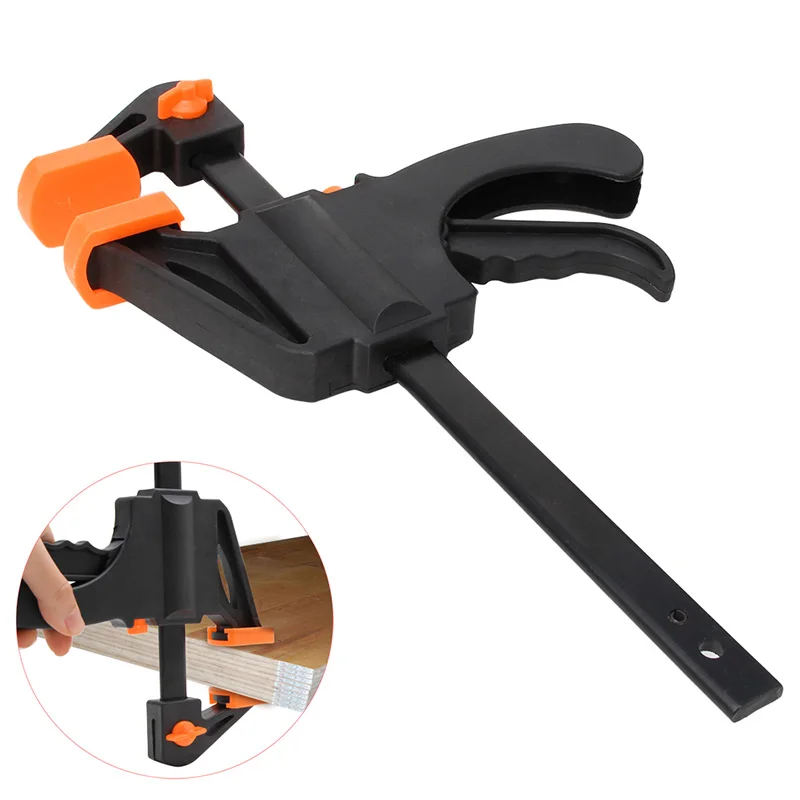
It may or may not be the right thing to do, but I'll usually use a squeeze clamp like this one to seat the action into the stock/bedding compound. My reasoning is that it eliminates the question of getting bedding compound on the action screws or in the action screw holes (I'll usually plug them with wax or something similar). I give it just enough pressure to make sure that the tang is seated firmly.
I have this same question. Most advice is that the action screws don't need to be torqued to spec, but my thought was that by torquing the screws to whatever your spec is will ensure that the action force the epoxy into exactly the correct position.
I have zero to back this up, it's just my uneducated theory and I'd like to know if it's correct or not.
I have zero to back this up, it's just my uneducated theory and I'd like to know if it's correct or not.
Take this with a grain of salt as I am not a gunsmith by trade.. I have always torqued the pillars to spec before bedding. The pillars always have clearance in the stock, as well as the action in the inlet. The only forceable contact is the barrel shimmed to center of the forend, and a small land for the rear tang. The only other contace is the compound. Can't say it's right or wrong, but the results have yet to be in the negative.
If I use action screws I'll go with a very light torque (tighten it down, then back off most of the torque)....most of the time I just use surgical tubing wrapped around stock/action. Great results either way
I have always heard almost no torque on the action screws when bedding to prevent stress in the action. I have tried multiple times with just making contact and that's it, it always ends up with bedding on top of the pillars. Now when I torque it up some (maybe around 35 in lbs or so) I get full contact with the action and pillars. I have also never had any barrel movement when doing the bedding stress test, and the rifles shoot great. Does anyone have any advise on how to make full contact with the lugs without torquing it? Also, does anyone else torque it a little bit like I do and still get good results? Thanks
Ever heard of a torque plate or "concreting" an engine block with block filler to stiffen the cylinder walls?
You do all of this with the fastener preload applied to the cylinder case as it moves the cylinder wall around. That way you hone the walls "straight" while in the distorted condition. Been like this for decades now.
That "stress" you mention is actually distortion. Its caused by the fastener pulling on the receiver body via the threaded holes.
If were going to split hairs on this stuff, then you want your bedding job to mirror the exact shape of your reciever as it sits in the rifle ready to fire. Same for where the barrel goes because that has a thinner wall and therefore is poised to deflect even more. Get it on the action and torqued up prior to bedding.
Just like an engine block sees.
Now how much of a difference does this really make on a bolt gun? It would be an interesting battery of tests to find out. A tremendous amount of expensive as well
Last edited:

If were going to split hairs on this stuff, then you want your bedding job to mirror the exact shape of your reciever as it sits in the rifle ready to fire.
By this, do you mean torque to spec, as though you were reassembling the rifle?
No screws for me, at all.
Headless studs to position the receiver correctly, then surgical tubing wrapped consistently around the stock/action over the full length.
Relatively equal/even pressure to displace the epoxy, no point loads to potentially warp the receiver.
Headless studs to position the receiver correctly, then surgical tubing wrapped consistently around the stock/action over the full length.
Relatively equal/even pressure to displace the epoxy, no point loads to potentially warp the receiver.
From my previous life of building engines, this was my thought as well.Ever heard of a torque plate or "concreting" an engine block with block filler to stiffen the cylinder walls?
You do all of this with the fastener preload applied to the cylinder case as it moves the cylinder wall around. That way you hone the walls "straight" while in the distorted condition. Been like this for decades now.
That "stress" you mention is actually distortion. Its caused by the fastener pulling on the receiver body via the threaded holes.
If were going to split hairs on this stuff, then you want your bedding job to mirror the exact shape of your reciever as it sits in the rifle ready to fire. Same for where the barrel goes because that has a thinner wall a d even higher level of distortion. Get it on the action and torqued up prior to bedding.
Just like an engine block sees.
Now how much of a difference does this really make on a bolt gun? It would be an interesting battery of tests to find out. A tremendous amount of expensive as well
Awesome!!! This makes so much since to me and that's exactly what I wanted to hear from a guy like yourself. I will continue to snug it up like it will be when fired. Thanks for your reply.Ever heard of a torque plate or "concreting" an engine block with block filler to stiffen the cylinder walls?
You do all of this with the fastener preload applied to the cylinder case as it moves the cylinder wall around. That way you hone the walls "straight" while in the distorted condition. Been like this for decades now.
That "stress" you mention is actually distortion. Its caused by the fastener pulling on the receiver body via the threaded holes.
If were going to split hairs on this stuff, then you want your bedding job to mirror the exact shape of your reciever as it sits in the rifle ready to fire. Same for where the barrel goes because that has a thinner wall a d even higher level of distortion. Get it on the action and torqued up prior to bedding.
Just like an engine block sees.
Now how much of a difference does this really make on a bolt gun? It would be an interesting battery of tests to find out. A tremendous amount of expensive as well
Awesome!!! This makes so much since to me and that's exactly what I wanted to hear from a guy like yourself. I will continue to snug it up like it will be when fired. Thanks for your reply.
Agreed. Thank you!
By this, do you mean torque to spec, as though you were reassembling the rifle?
Awesome!!! This makes so much since to me and that's exactly what I wanted to hear from a guy like yourself. I will continue to snug it up like it will be when fired. Thanks for your reply.
There's one thing here I neglected to mention earlier. Stock bedding 101 tends to dictate that the pillars are glued into the stock prior to the action being installed. I've personally never done it this way. Instead, I attach the pillars to the receiver first with studs/nuts, then bed the thing as an assembly. It's more work I guess because I have to make additional effort to ensure bedding material doesn't run out of the bottom of the pillar bore holes, but thats a pretty easy problem to solve with some masking tape.
The pillars I make are a bit different. The pillar has a square head to ensure clocking and its registered at a determined height in the stock to ensure the action sits on the radius horizontal center line.
The idea being that the pillars are installed and positioned exactly how they need to be in a manner than can be verified. The other thing is I don't have the risk of stuffing a pillar bore full of resin that I later have to try and figure out how to remove.
Once the whole thing gets squashed, I just use a couple zip ties to hold it together till the stuff sets up.
A couple vids here narrate the process. I get its out of the reach of most as cnc mills typically don't live in people's garages at home. Maybe it'll help someone out though.
No screws for me, at all.
Headless studs to position the receiver correctly, then surgical tubing wrapped consistently around the stock/action over the full length.
Relatively equal/even pressure to displace the epoxy, no point loads to potentially warp the receiver.
I bed my stocks the same way Wannashootit does.
Nathan Foster of www.ballsiticstudies.com (with several YouTube videos on his methodology and compound) uses a similar method (bike innertube in one video, e.g.). He's a proponent of zero stress bedding. However, he also beds over top of the pillars intentionally and preps them the same as the rest of the stock. He tends to focus primarily on accurizing factory setups. Food for thought?
If bedding on top of the pillars is a consistently challenge, why? Is it because when the action fits into the receiver it isn't in contact with the pillars? Is it a low viscosity bedding compound flowing into a gap as the compound cures if the parts aren't "forced" together? Is the amount of bedding compound used causing it to flow over the pillars as the action as seated and remaining there if not forced out/away?
I'd speculate that if you're that last one - bedding compound flowing over the pillars as you seat the action - you just need the action snug enough to force the compound out from the "gap" between the action and the pillars. You could probably do some testing with clay/putty/Elmers at low cost, I'd guess.
I'm not good enough to do "one step" bedding. I have to install the pillars first then bed the action. After the pillars have been glued in and the bottoms trimmed to length, I pour the epoxy in the stock, lay the barreled action on top if it and torque the action screws to 40 inch pounds.
Last edited:
Longrifles inc.
What is the OD on those pillars if you don't mind me asking? Also, what software do you use?
End hijack..
Pillars are .625"x.625 on the head. Corner radius's are .375". Support ribs are 1.350" dia. Body cylinder is .5" and the hole through the center is .3125".
I model in SW 2020 and program machines with MasterCam 2020 intergrated into Solid Works. The Live 5 axis package.
Nathan Foster of www.ballsiticstudies.com (with several YouTube videos on his methodology and compound) uses a similar method (bike innertube in one video, e.g.). He's a proponent of zero stress bedding. However, he also beds over top of the pillars intentionally and preps them the same as the rest of the stock. He tends to focus primarily on accurizing factory setups. Food for thought?
If bedding on top of the pillars is a consistently challenge, why? Is it because when the action fits into the receiver it isn't in contact with the pillars? Is it a low viscosity bedding compound flowing into a gap as the compound cures if the parts aren't "forced" together? Is the amount of bedding compound used causing it to flow over the pillars as the action as seated and remaining there if not forced out/away?
I'd speculate that if you're that last one - bedding compound flowing over the pillars as you seat the action - you just need the action snug enough to force the compound out from the "gap" between the action and the pillars. You could probably do some testing with clay/putty/Elmers at low cost, I'd guess.
I would offer a few things for explaining some of this and it more or less explains the path that I take.
1. First, were assuming that a given action is exactly the advertised diameter. They often are not as anything made has a "window" (tolerance) that is made to. Now compound this with a 3rd party manufacturing a bedding pillar. Most pillars are not even contoured to the radius of the action they are going to be supporting. They are machined flat as they are parted off the lathe. So, you end up with tangent/line contact. In this instance resin would/should be encouraged to flow into the void but a problem is created with that. (described in #2 below)
Next, say you do have contoured pillars. Who's to say they are machined correctly? If were trying to "seal" the contact ring between the receiver and the pillar head, those two surfaces really need to be completely coincident to one another. I can assure you that they are not. When I bedded guns with these things years ago a std practice was to "lap" the pillar head to the receiver body with a sheet of 220 grit wet/dry paper stuck in between the two. -wrapped around the action with the pillar being swiped over it on a little fixture I made. (basically, lapping a scope ring, but "backwards")
2. Aluminum and epoxy are not the best of bed fellows. Machine AL once with a nice sharp tool and its bright enough to throw a rainbow glare in the correct light. Now let it sit for awhile and see what happens. It turns a dull grey color because its oxidized on the surface. That oxide is great for preventing further corrosion however epoxy does not adhere to it all that well. This is a big deal over the long haul. How many bedding jobs a year or two later show signs of erosion where the epoxy is super thin? -A lot of them. The stuff just starts lifting and chipping away.
The other problem to solve here the choice of resin. 99.9% of the stuff used for bedding a rifle is an adhesive. Its designed to be a glue to bond two pieces of whatever together. Its not really meant to be a mold material. (Why I strongly advocate using a material with a very high percentage of solids that are non ferrous)
-That's all a bedding job really is, a casting of the receiver. My point is when you have interruptions with this casting on a material known to be problematic with adhesion (aluminum) it creates a situation where the potential for erosion/failure is elevated. An easy example would be the stocks that have come through my shop over the years where the pillars have "unglued" themselves and either fall out or push out of the stock with ease. Temperature, shock, compression, and torsion. All of these only serve to aggravate this.
"Zero stress bedding". I understand the intent, but in practice its a bit of an oxymoron. I'll explain.
-The only way you really get to where a casting is "stress free" is by accurately defining the "tool" used to make the mold. By that I mean the receiver needs to be in the condition its going to be in when the thing is all done and ready to shoot. Torquing a barrel on at 80-100lbs/ft distorts the action. A 60* thread form works by being a wedge. Its no different than a log splitter however here the force applies an outward, radial load on the receiver ring causing it to grow in size slightly. It will also encourage the front ring of the action to bellmouth.
Long story short, make sure your barrel is attached at the correct preload prior to bedding.
Next, guard screws. As I mentioned earlier, good automotive machinists have known for 30-40 years that the fasteners used for things like main caps/cylinder heads, encourages the cylinder bores to distort when they are torqued up. To combat this, they hone the bores with the block preloaded into this condition. Mains are torqued up and torque plates are installed. A typical gasoline V8 engine block made of cast iron weighs around 200lbs and has considerable strength. Performance specific blocks weigh even more. The mass helps to increase the rigidity, yet this still happens and ignoring it costs the engine power that can be clearly measured/compared on an engine dyno.
Now, take a long hard look at your typical 1.350" dia receiver. The front ring is where the 1st guard screw gets installed. That cross section is approximately .170" thick. On a 28 pitch thread (typically used) that's around 4-3/4 revs of thread engagement. Now, move rearward to the 2nd screw. There we have a little more, right around .220" or so equating to around 6 rotations worth of engagement.
Again, the material surrounding the screw is put into a "wedge" condition where if enough force is applied, the material surrounding it will distort. This can be seen all the time on things where bolts get screwed into stuff with the force of God. The surface immediately surrounding the hole is plasticized into a raised ring. So, go back to the children's book called "The Princess and the Pea." Your action is the Princess. The "pea" is all this distortion being introduced to the receiver body in the assembled state.
If you truly want "zero stress" in your casting, then it works to your advantage to emulate these loads as much as possible during the casting process because that is how the thing will be when it goes together with you behind it at the rifle range.
Sorry if this got too long. Saturday am's and I'm up at 430 most mornings... [/QUOTE]
Last edited:
Sounds like a solid pillar. Fast forward to your next post, I've had good success/luck with running a grooving tool at .050 deep at 4tpi around pillar body to help with a mechanical lock as well given I use aluminum.Pillars are .625"x.625 on the head. Corner radius's are .375". Support ribs are 1.350" dia. Body cylinder is .5" and the hole through the center is .3125".
I model in SW 2020 and program machines with MasterCam 2020 intergrated into Solid Works. The Live 5 axis package.
I'm an infant in the world of software, sw being my biggest enemy. We mostly use Auto Desk, but it seems to be a bit quirkey on 5 axis, no as bad on 3+2 though.
Thank you for the information, and beautiful work on the biatholon rifle.
Waiting for your thoughts Mr. Gradous, curious minds would like to know what you are thinking... this topic is very interesting...
Interesting. I’m not in a position to speak for the zero stress crowd, but I think the key difference in philosophy lies right here. I suppose they’re looking for predictable pre-load across the bedding (if recoil is the load) when the action is torqued into the stock. Basically, they seem to want a 1:1 cast of the action unstressed for “wider” distribution of the compressive stress around the action screws - sort of the action getting pulled into versus resting on the bedding.
[/QUOTE]I would offer a few things for explaining some of this and it more or less explains the path that I take.
The other problem to solve here the choice of resin. 99.9% of the stuff used for bedding a rifle is an adhesive. Its designed to be a glue to bond two pieces of whatever together. Its not really meant to be a mold material. (Why I strongly advocate using a material with a very high percentage of solids that are non ferrous)
-That's all a bedding job really is, a casting of the receiver. My point is when you have interruptions with this casting on a material known to be problematic with adhesion (aluminum) it creates a situation where the potential for erosion/failure is elevated. An easy example would be the stocks that have come through my shop over the years where the pillars have "unglued" themselves and either fall out or push out of the stock with ease. Temperature, shock, compression, and torsion. All of these only serve to aggravate this.
"Zero stress bedding". I understand the intent, but in practice its a bit of an oxymoron. I'll explain.
-The only way you really get to where a casting is "stress free" is by accurately defining the "tool" used to make the mold. By that I mean the receiver needs to be in the condition its going to be in when the thing is all done and ready to shoot. Long story short, make sure your barrel is attached at the correct preload prior to bedding.
Next, guard screws. As I mentioned earlier, good automotive machinists have known for 30-40 years that the fasteners used for things like main caps/cylinder heads, encourages the cylinder bores to distort when they are torqued up. To combat this, they hone the bores with the block preloaded into this condition. Mains are torqued up and torque plates are installed.
Now, take a long hard look at your typical 1.350" dia receiver. The front ring is where the 1st guard screw gets installed. That cross section is approximately .170" thick. On a 28 pitch thread (typically used) that's around 4-3/4 revs of thread engagement. Now, move rearward to the 2nd screw. There we have a little more, right around .220" or so equating to around 6 rotations worth of engagement.
Again, the material surrounding the screw is put into a "wedge" condition where if enough force is applied, the material surrounding it will distort. This can be seen all the time on things where bolts get screwed into stuff with the force of God. The surface immediately surrounding the hole is plasticized into a raised ring. So, go back to the children's book called "The Princess and the Pea." Your action is the Princess. The "pea" is all this distortion being introduced to the receiver body in the assembled state.
If you truly want "zero stress" in your casting, then it works to your advantage to emulate these loads as much as possible during the casting process because that is how the thing will be when it goes together with you behind it at the rifle range.
Sorry if this got too long. Saturday am's and I'm up at 430 most mornings...
The brass and paper tell all,,,,,, it's that simple.Waiting for your thoughts Mr. Gradous, curious minds would like to know what you are thinking... this topic is very interesting...
Thanks!The brass and paper tell all,,,,,, it's that simple.
T
That’s my feeling on it. You know when you’ve attained it when the screw head bottoms out in its pocket, and 1/4 turn later you’re at torque. Versus having to pull the action down into some other “stressed” shape, and the spongy feeling of the screw getting there.Interesting. I’m not in a position to speak for the zero stress crowd, but I think the key difference in philosophy lies right here. I suppose they’re looking for predictable pre-load across the bedding (if recoil is the load) when the action is torqued into the stock. Basically, they seem to want a 1:1 cast of the action unstressed for “wider” distribution of the compressive stress around the action screws - sort of the action getting pulled into versus resting on the bedding.
I look at it like this. The bedding compound, when cured is the height goal you need to get. So you need to have some fill of soft bedding material before the material cures. So, no you don't want to torque down the action screws. Torquing down the action's screws is going to push the bedding material out of where you want it.
What I like to do is "make a bed" that the barrelled action is going to sit on. That is usually tape under the barrel to hold it up, and I usually shim under the rear action screw, then bed it later. The rest of the action gets fully bedded, or skim bedded. Once that bedding is cured, remove the tape and shim and bed the rear of the action. Same with the bottom metal. Do it in separate parts rather than do too much and end up with a glue-in. Bedding along the magazine box and various points in the bottom metal stiffens the action, but also leaves a good chance for a hang-up somewhere.
Note that when doing this one could have the tendency to torque down the action into the temporary bed (tape in front, shim in rear) that would possibly flex the action. Just bring it down until it stops. Let the bedding cure and remove each piece you bed.
There are some excellent pics and direction on this thread doing this. I love the pics on here that show clean and fully filled bedding jobs. I get fully filled bedding jobs, but usually some clean up afterward. No worries, it can all be cut back out again if you have to, and trimming out some inner overflow isn't bad if it isn't in a place that's holding the action in,
i wonder if it would help to bed the rifle with a loaded dummy round and engaged bolt....albeit with care to protect the bolt from adhering to the bedding material?
Similar threads
- Replies
- 8
- Views
- 863
