• Watch Out for Scammers!

    We've now added a color code for all accounts. Orange accounts are new members, Blue are full members, and Green are Supporters. If you get a message about a sale from an orange account, make sure you pay attention before sending any money!

Gunsmithing Need help from those who make their own pillars.

JelloStorm

Gunny Sergeant
Full Member
Minuteman
Feb 23, 2010
1,404
1
42
Northeast Pennsylvania
Hey all,

I'm trying to bed my Savage 93 into a Boyds stock and I'm running into an issue with the pillars.

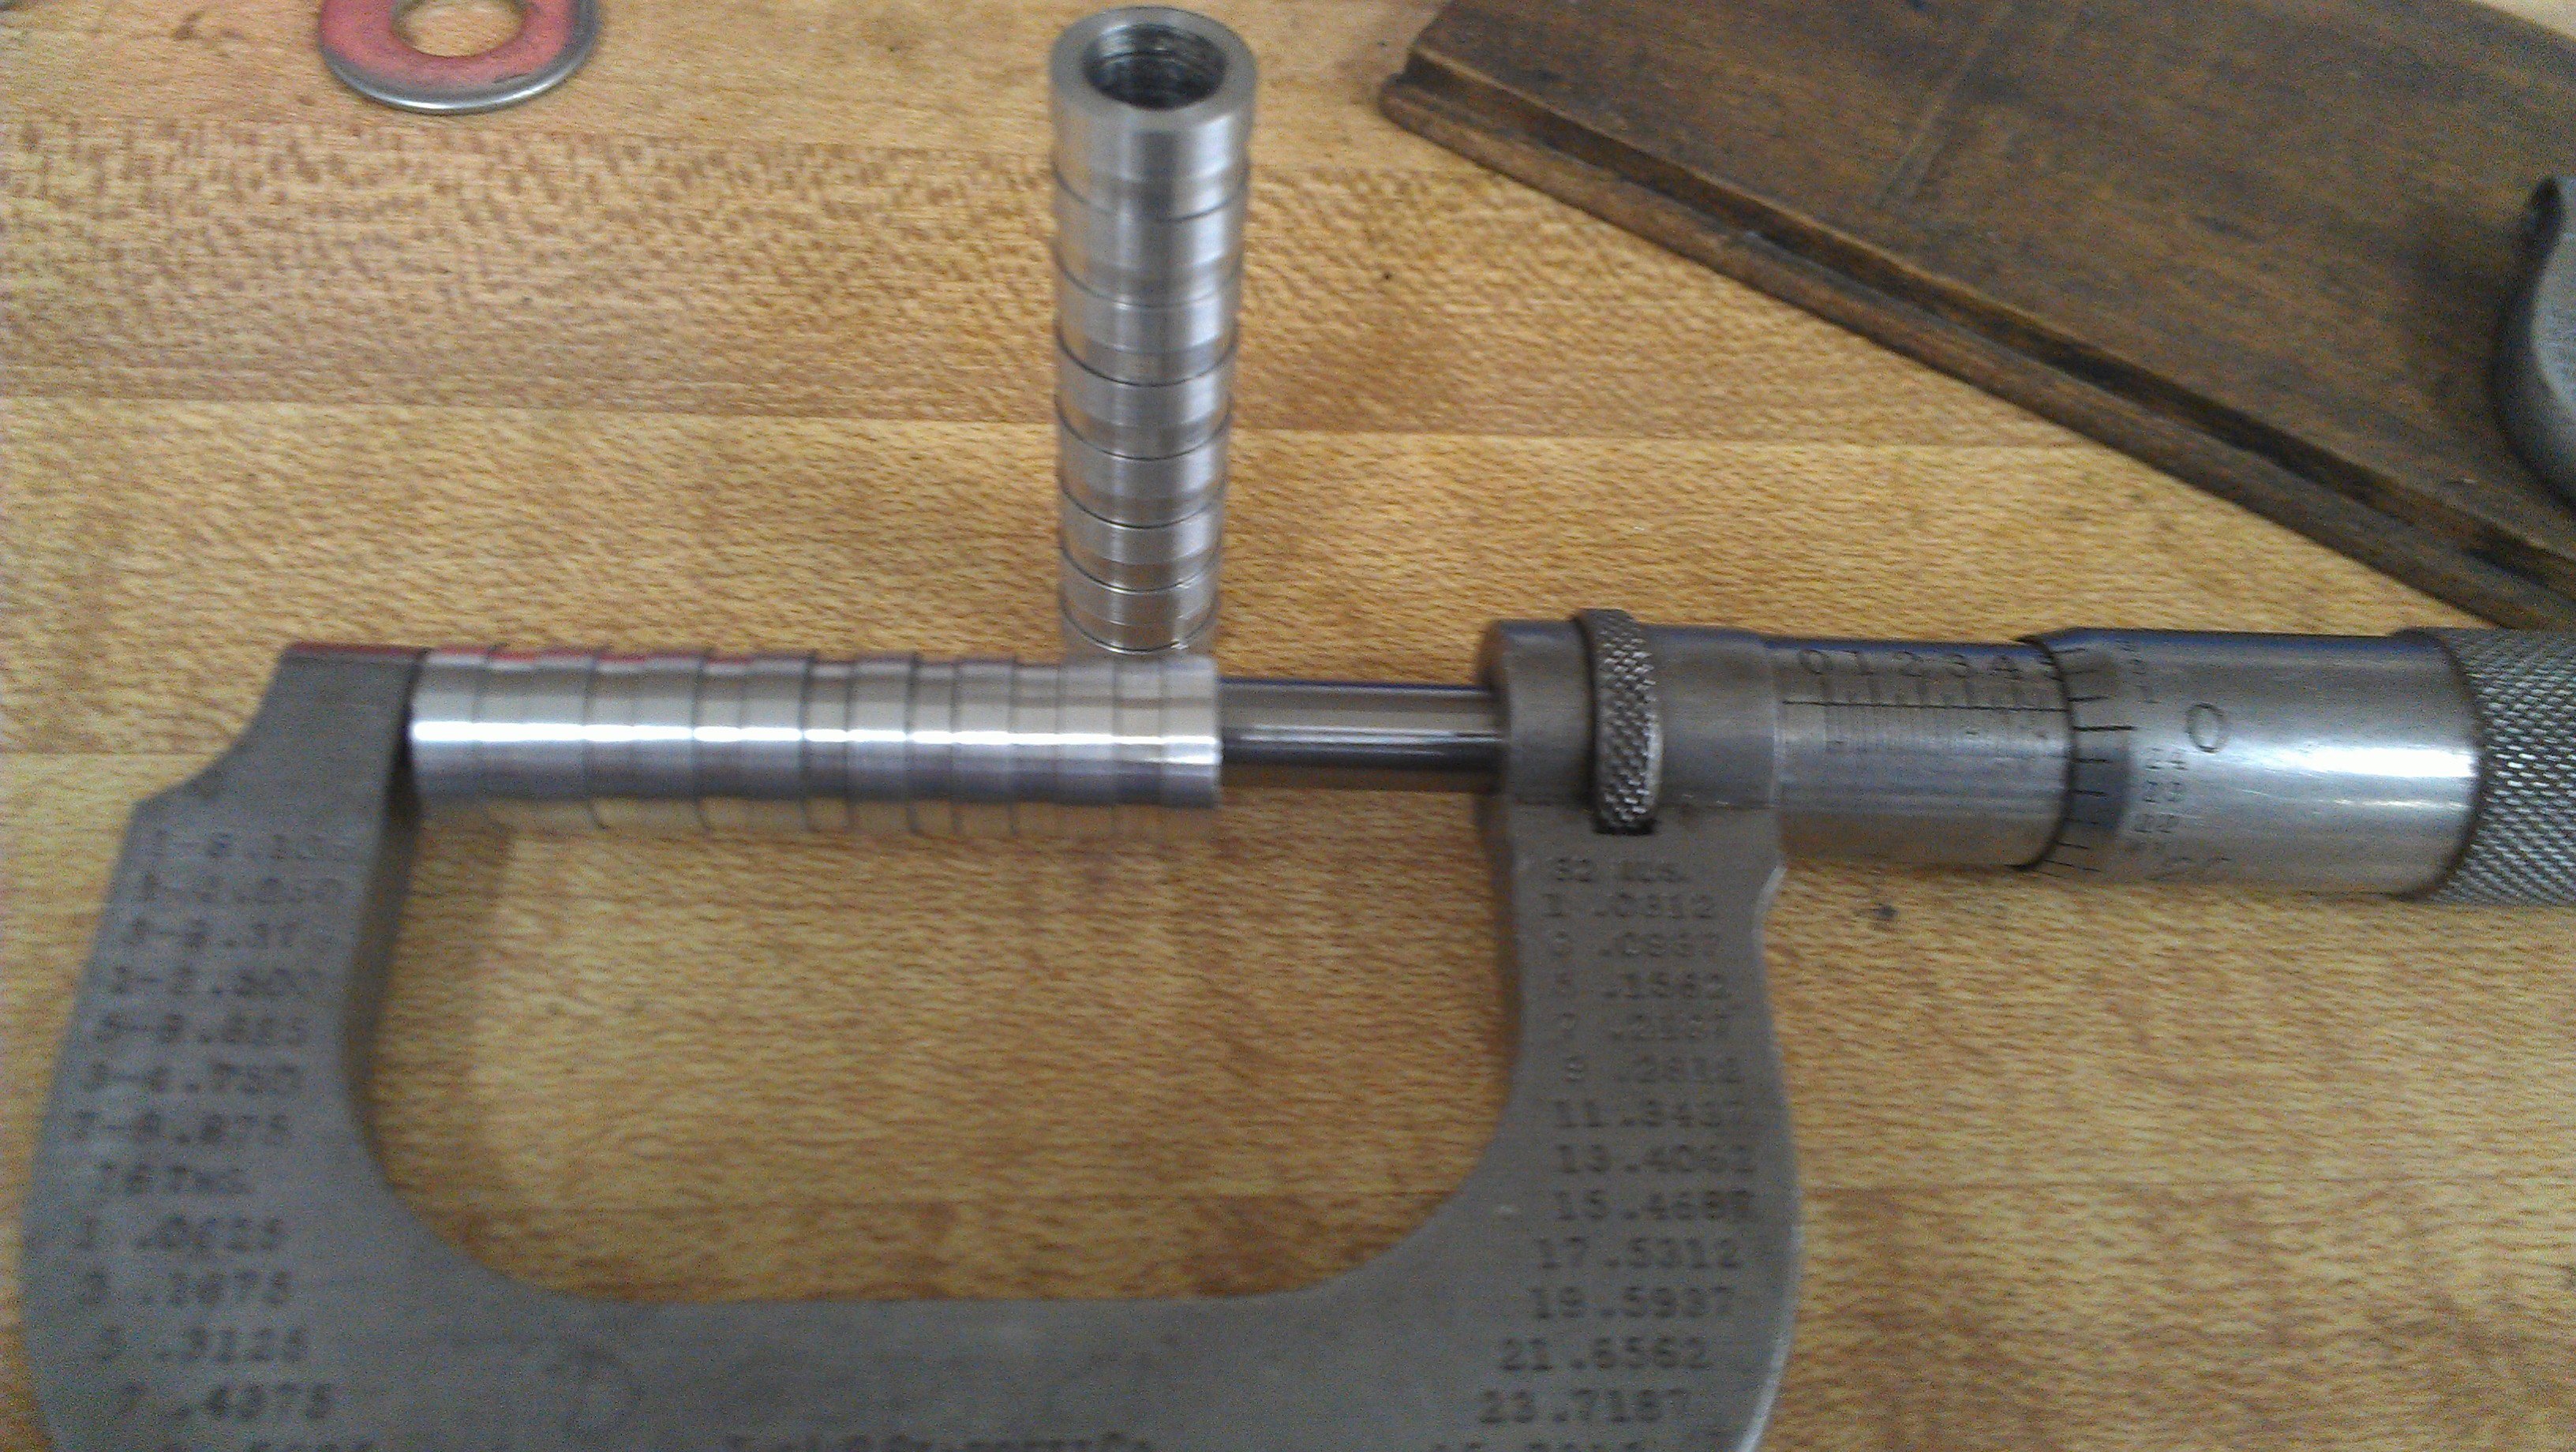
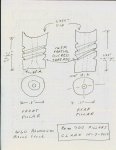
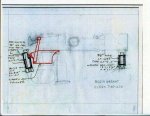
I can't use .5"+ pillars due to it being a Rimfire, there just isn't enough real estate in the stock for the rear pillar so I'm going to be using 3/8" pillars instead. The problem is, I can't seem to find 3/8 / .375 pillars anywhere. I did find these Mauser 98 stock ferrules that will work but it's not grooved to hold the bedding and I dont have a lathe.

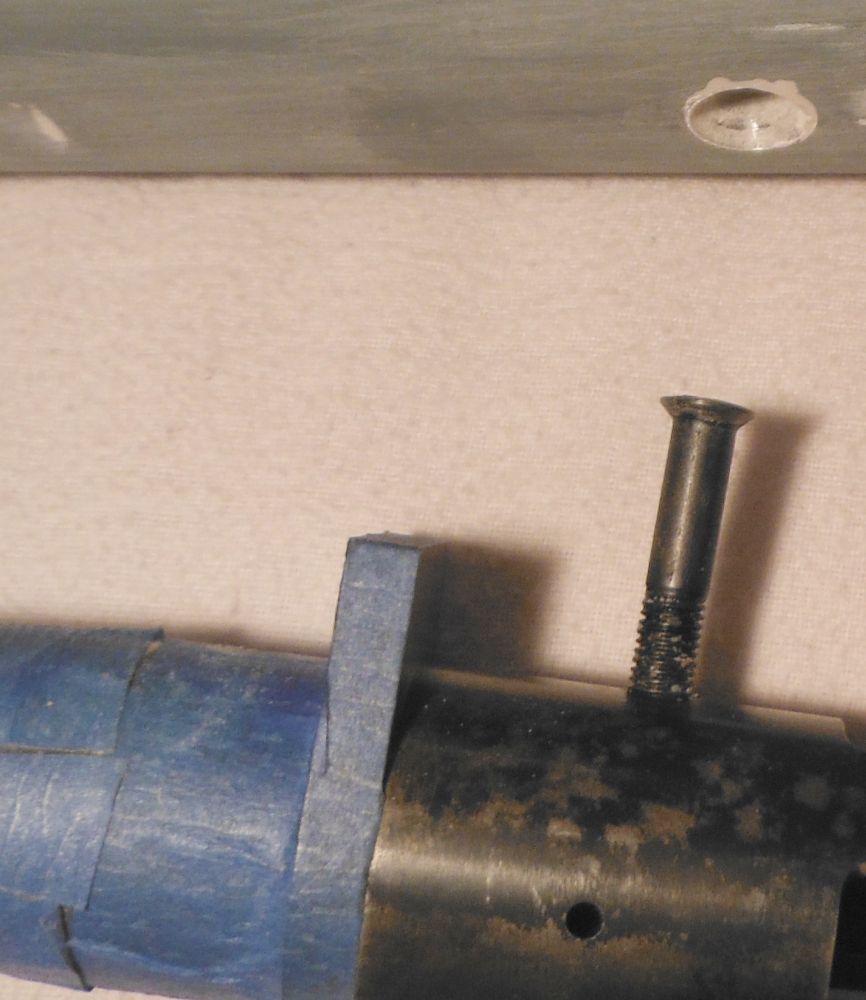
It may be worth noting that I'll be using Remington 700 action screws cut down to length for the Savage action. I believe they are .250 1/4x28 threaded so the pillars must accept them.

http://www.brownells.com/gunsmith-t...ixtures/mauser-98-stock-ferrules-prod983.aspx

If any of you guys make your own pillars and can make me a set (I'll pay of course) or get me pointed in the right direction it would be a great help.
 
I could give it a shot. I'm still learning to use my lathe so it would be a good project and I wouldn't charge you. So you want 3/8 OD and 1/4 ID, grooved I assume, for bedding. What length and do you want them curved/v-block on the top to fit the curve of your receiver? What is the OD of a Savage 93 receiver?

My R700 grade 8 bolts show just shy of 0.246 diameter so should fit a 0.250 hole just fine.

IMAG1596.jpg


That would be extremely awesome if I could get an actual pillar. PM me any costs and stuff.

Actually the way these Savage 93 receivers are, two flat pillars would work the best since both contact surfaces on the receiver where pillars would meet is flat.

As far as the length... That's yet to be determined until i can get a rough estimate. I could always use a dremel and trim them down as needed right?

3/8" OD and .250 inside would be perfect.

Give me a ballpark on the length. I'm pretty much done:

IMAG1597.jpg

IMAG1598.jpg

IMAG1599.jpg

IMAG1600.jpg

IMAG1601.jpg

IMAG1602.jpg

IMAG1603.jpg

IMAG1604.jpg

IMAG1605.jpg
 
1.5 looks a little long, but that's your problem now.

I wanted to cut the grooves a bit deeper,but the wall thickness was pretty thin and I didn't want to weaken them. They are good and sharp though and should hold bedding compound pretty well.

IMAG1611.jpg
 
Yeah 1.5" is a bit long, but measuring to where I need them they come out to just under 1 1/4" and 1 3/8" so I figured 1.5" should give me enough wiggle room to trim them down to fit.

This being my first pillar job on a rifle I'm learning a lot. Like how I wished I would've paid attention in machine shop more in school instead of cheerleaders. :D
 
I cant picture a 93 right now, but I know with the Savage 10/110 I end up using a full 1/2 pillar and notching it out for the trigger, you can kind of see it in this picture.. I really do hate bedding Savages, much more of a pita and not near as much bedding area.

savage.jpg
 
For Rem700 or other round bottom receivers, I make the pillar from 6061 aluminium alloy 1/2" round stock.
I cut a concave radius on the top of the pillar to fit the convex receiver radius. For the epoxy to get traction, I cut threads on the pillar while it is in the lathe.

For flat bottom receivers, like Mausers, Mosin Nagants, Howa, Winchester, etc. I use a 3/8" OD .306" ID 1010 steel tubing. I have tried brass tube, but it has dissimilar metal problems with the rest of the gun. I have tried stainless, but it does not machine as well. For the epoxy to get traction, I make marks with a hack saw, a la Wagner:
http://www272.pair.com/stevewag/mmrifle/mmrifle3.html
http://www272.pair.com/stevewag/turk/turkbed1.html
http://www272.pair.com/stevewag/turk/turkbed2.html
http://www272.pair.com/stevewag/turk/turkbed3.html
 

Attachments

  • pillars Rem700 gamma 10-7-2012.jpg
    pillars Rem700 gamma 10-7-2012.jpg
    90.3 KB · Views: 36
  • Mosin Nagant drawing relieve stock for pillars and Timney trigger and relieve pillar for trigger.jpg
    Mosin Nagant drawing relieve stock for pillars and Timney trigger and relieve pillar for trigger.jpg
    95.3 KB · Views: 47
I was referring to the first picture where there is a 90 degree angle on the ID of the bottom of the front pillar. I see the notch in the second picture for trigger clearance; or am I missing something?
 
OK, I get it. ADL style stock. I was thinking of only bottom metal and didn't see the need for the countersink cut.
 
I made two from brass 1/4" plumbing pipe. Cut to length, then put them on a phillips screwdriver, and let them run freewheel against a coarse grinding wheel for 10 seconds. Puts LOTS of digs on the outside, to bond the epoxy to. Hardware store items--look up pipe nipples. BTW, if you wrap the stock screws with two or three layers of teflon thread sealing tape when you do the epoxy, the tubes automatically will have side clearance to the screws after the epoxy cures, and will not bond the screws into the stock. Geezer wisdom....
PS: Remove tape after bedding cures.
 
I've started modifying the pillars to work with my screw setup. This allows me to contour the pillars to action, clamp them down, bed the action, then at the same time bed the bottom metal.

Normally you can't get a good clean fit between pillar and action with no compound in between if you want to bed the bm at same time.

bedscrews1.jpg

bedscrews2.jpg

bedscrews3.jpg

bedscrews4.jpg


Like this
bedding.jpg


Galaxy S3 on tapatalk
 
Given the little material that's in the Boyds Rimfire Hunter stock I had to add wood using wood filler and old Subway rewards card I cut up to dam up the filler.

I think I'm going to have to bed the bottom metal just to add strength to that rather thin wood. It's been a fun learning experience but if I had the money I'd just throw it at McMillan to make me an HTG but a $500 stock on a $300 gun is kinda overkill...