• Watch Out for Scammers!

    We've now added a color code for all accounts. Orange accounts are new members, Blue are full members, and Green are Supporters. If you get a message about a sale from an orange account, make sure you pay attention before sending any money!

Nucleus Light Primer Strikes

I guess one way to look at this is that we are essentially beta testing this action. I know I've gotten frustrated with how much information was sent with this action and even my extra bolt head. There wasn't a user manual so to speak or instructions sent with either. I get that the expectation is that a "competent gunsmith" should be doing all installations but I think the reality is that most are probably doing most of the work themselves. Hopefully ARC puts out some information on this, that would really send this action over the top for me.
 
  • Like
Reactions: Darkhorse1
I guess one way to look at this is that we are essentially beta testing this action.

Having done lots of beta testing, I’m not sure I agree with that statement. Beta testing is indicative of using an product that is not at final development for the purpose of discovering flaws. This is a polished product and is just lacking operational documentation to address those nuisanced conditions presented by home builders like me.
 
They are aware of this need and have plans in motion.
That's good to hear. I would agree that I shouldn't have to take it to a smith for something I would think should be regular maintenance to keep clean, if I had just a little bit of info on it. Looking forward to it.
 
Having done lots of beta testing, I’m not sure I agree with that statement. Beta testing is indicative of using an product that is not at final development for the purpose of discovering flaws. This is a polished product and is just lacking operational documentation to address those nuisanced conditions presented by home builders like me.
I don't know that I would call the nucleus a polished product. There has been at least a couple of mods done to the thing since it's initial release. My buddy was one of the first to get his and his bolt release is hard as hell to rotate. Apparently that was addressed and fixed by the time I got mine a couple of months later. His action also had the old bolt head which was causing issues. Mine does not. Then there is the whole light primer strike issue which seems to be common. There are 3 springs available to address that. As with most production, there tends to be issues found during initial fielding. The nucleus is no exception.
 
And I do think its important for me to clarify that I'm not trying to bash ARC. They delivered a good product at an amazing value. I'm glad they released the action the way they did rather than hold up production and delivery for months working the minor issues out.
 
  • Like
Reactions: EchoDeltaSierra
Then there is the whole light primer strike issue which seems to be common. There are 3 springs available to address that.

This is issue I experienced, based on conversations and testing three difference springs all with similar failure, I suspect there is not the spring problem as perceived, but a re-assembly problem. This could potentially be chalked up to a lack of knowledge/information versus an actual design flaw. Considering my first match isn't until the end of April, I had no reservations about sending my rifle to ARC for diagnosis to benefit us all.
 
@bohem

I was playing with my bolt today, and I think the Nucleus may be different from other actions where you adjust firing pin protrusion but essentially unscrewing the cocking piece. The cocking piece and firing pin on the Nuclus are fixed, and you adjust the front end of the FP to change protrusion. Unless I'm missing something, I believe you gain in both FP protrusion and cocked spring compression by adjusting the hex washer/nut further down.

Here's a lovely MS Paint depiction. The only thing I can think of that would change this is if there is a relationship between the FP and bolt shroud that I'm missing. At any rate, maxed out I have ~0.045" protrusion, which I believe should work out. I had it set for about 0.025" last outing, and combined with some cold grease was giving me several duds. I'll see how this new arrangement works.

FPprotrusion.jpg
 
I don't know that I would call the nucleus a polished product. There has been at least a couple of mods done to the thing since it's initial release. My buddy was one of the first to get his and his bolt release is hard as hell to rotate. Apparently that was addressed and fixed by the time I got mine a couple of months later. His action also had the old bolt head which was causing issues. Mine does not. Then there is the whole light primer strike issue which seems to be common. There are 3 springs available to address that. As with most production, there tends to be issues found during initial fielding. The nucleus is no exception.

Tomcatfan, do you know what your buddy did to fix the bolt release? I’m having the same problem with mine. Not every time I release it, just occasionally. I have to use a hex wrench to get it to turn. Or do I need to go ahead and call Josh?
 
Tomcatfan, do you know what your buddy did to fix the bolt release? I’m having the same problem with mine. Not every time I release it, just occasionally. I have to use a hex wrench to get it to turn. Or do I need to go ahead and call Josh?
Honestly I don't know if he did do anything about it. He could turn the bolt release with his thumbs, I couldn't. So by default, I have pussy thumbs. I got my action in and there was a very noticeable difference in how easy the bolt release was to turn on my action compared to his. Even my pussy thumbs could turn mine with no problem.
 
Mine actually jams up to where it won't turn. I have to work it loose using an allen wrench. After I get it loose, it works fine. It's done it twice since I've had it.
 
  • Like
Reactions: fat7hogs
Are you pulling the bolt the very rear most position prior to trying to turn the bolt stop pin? Mines super stiff unless I flick the bolt back all the way so the ejector fully deploys.
 
Are you pulling the bolt the very rear most position prior to trying to turn the bolt stop pin? Mines super stiff unless I flick the bolt back all the way so the ejector fully deploys.

When it sticks, It sticks no matter what position the bolt is in. It just won't turn. I just have to work with it to get it to turn again. Once I get it to turn, it's good to go...until the next time. Like I said earlier, it's only done it twice, once back in December, and once yesterday.
I'm going to contact PVA this week and see if they've seen this on any other rifle, and what they recommend.
 
After finally putting my rifle together and going out to test. I also have issues with light strikes from my Nucleus action. My first batch of test loads (using cci 450 primers) I had 50% not fire. I did some looking on the internet and I found this thread. So I cleaned my bolt of all grease that came in it from ARC and I also bought and replaced the FP spring with a 19lb one.
Yesterday I went back out and it did get better, but still not anywhere near acceptable. I’m now 30% fail rate. I checked how the firing pin came out and put it back together as close as what it looked like when I took it apart. Meaning how far down to screw the castle nut to keep same protrusion. Only thing I can think of , is it my triggger. I noticed other with the issue also had the same trigger I have(Huber 2 stage). Would going to a triggertech solve the issue?
Before buying a new trigger I would take some calipers and double check your spring protrusion. I definitely did not reassembly mine correctly when I replaced my spring. I don't think there has been anyone who has not had the issue fixed with the 19 lb spring.
 
Also try some different primers. 450s have been giving me a damn fit.
 
After finally putting my rifle together and going out to test. I also have issues with light strikes from my Nucleus action. My first batch of test loads (using cci 450 primers) I had 50% not fire. I did some looking on the internet and I found this thread. So I cleaned my bolt of all grease that came in it from ARC and I also bought and replaced the FP spring with a 19lb one.
Yesterday I went back out and it did get better, but still not anywhere near acceptable. I’m now 30% fail rate. I checked how the firing pin came out and put it back together as close as what it looked like when I took it apart. Meaning how far down to screw the castle nut to keep same protrusion. Only thing I can think of , is it my triggger. I noticed other with the issue also had the same trigger I have(Huber 2 stage). Would going to a triggertech solve the issue?

Tighten the castle nut more to ensure full firing pin protrusion. If you still think it's the trigger, I'd be happy to rid you of the Huber.
 
Been using them with no issue, can you elaborate on that.

I've had a ton of light strikes. It honestly may be the lot of primers were bad but they even wouldnt go off in my buddy's big horn too. once my fed 205m primers come in, i'll see what the deal is more
 
But a lot of people, I've read, have been having some issues with them. I know a ton of people that dont have issues. seems like a hit or miss thing. no pun intended
 
Before buying a new trigger I would take some calipers and double check your spring protrusion. I definitely did not reassembly mine correctly when I replaced my spring. I don't think there has been anyone who has not had the issue fixed with the 19 lb spring.

Excuse the ignorance, How do I measure the protrusion? Ive searched and the only way I can see how to measure is with a gauge.
I took a picture of the FP before I took it apart and when I put it back it together it looked exactly the same.
I double checked it tonight and its pretty much as far down as it will go. I can't get the castle nut to turn any more and it's right where i had it set.
image1(1).jpeg
 
Also try some different primers. 450s have been giving me a damn fit.
I've tried regular small rifle primers and all have fired off. There should be no reason I shouldn't be able to use any primers I want.
 
Excuse the ignorance, How do I measure the protrusion? Ive searched and the only way I can see how to measure is with a gauge.
I took a picture of the FP before I took it apart and when I put it back it together it looked exactly the same.
I double checked it tonight and its pretty much as far down as it will go. I can't get the castle nut to turn any more and it's right where i had it set.
View attachment 7010084
Assemble your bolt and drop the firing pin by twisting the rear portion of the bolt body while holding the handle firm. You'll see the firing pin sticking out, and you can then measure how far out it protrudes by using calipers.

If your Nucleus' bolt is similar to mine, you'll have barely 0.020" of firing pin protrusion with the castle nut set up like that. I adjusted mine to be be right around 0.040" and that resulted in the nut being slightly below the shoulder on the firing pin where it necks down, whereas yours is just about level with it. You've really got to lean into the spring on top of that washer (pressing it against the floor worked best for me) to get it compressed enough to adjust further.

Before you adjust though, do measure how far your pin actually protrudes to see if it's necessary. @bohem made a great post on the first page here discussing firing pin protrusion and why you see problems if you're above 0.050" or below 0.030". Here's a link: https://www.snipershide.com/shooting/threads/nucleus-light-primer-strikes.6896558/post-7161913
 
Excuse the ignorance, How do I measure the protrusion? Ive searched and the only way I can see how to measure is with a gauge.
I took a picture of the FP before I took it apart and when I put it back it together it looked exactly the same.
I double checked it tonight and its pretty much as far down as it will go. I can't get the castle nut to turn any more and it's right where i had it set.
View attachment 7010084
I measured protrusion by using the back end of a set of calipers and measuring the bolt face to the front of the bolt. Then I dropped the firing pin and made that measurement again and the delta between the two is the firing pin protrusion. Depending on your calipers you may even be able to stick them in on the bottom of the bolt and just measure from the bolt face up to the tip of the firing pin.
 
I measured protrusion by using the back end of a set of calipers and measuring the bolt face to the front of the bolt. Then I dropped the firing pin and made that measurement again and the delta between the two is the firing pin protrusion. Depending on your calipers you may even be able to stick them in on the bottom of the bolt and just measure from the bolt face up to the tip of the firing pin.
You can make both measurements using your system with the pin protruding. The bolt face and the front of the bolt are both machined by ARC to be flatter than you could ever measure with calipers (you'd likely need a specially setup micrometer and even then might not find differences without a lot of trouble) so a measurement from the front of the bolt to the bolt face will be the same regardless of which point on the bolt face you measure to.

The way I measured was by placing the base of my calipers across the front of two of the action lugs to ensure it was parallel with the bolt face. Measured to the bolt face, then adjusted the angle of the calipers slightly so that the protrusion from the base of the calipers touched the tip of the firing pin instead of the bolt face.
 
Assemble your bolt and drop the firing pin by twisting the rear portion of the bolt body while holding the handle firm. You'll see the firing pin sticking out, and you can then measure how far out it protrudes by using calipers.

If your Nucleus' bolt is similar to mine, you'll have barely 0.020" of firing pin protrusion with the castle nut set up like that. I adjusted mine to be be right around 0.040" and that resulted in the nut being slightly below the shoulder on the firing pin where it necks down, whereas yours is just about level with it. You've really got to lean into the spring on top of that washer (pressing it against the floor worked best for me) to get it compressed enough to adjust further.

Before you adjust though, do measure how far your pin actually protrudes to see if it's necessary. @bohem made a great post on the first page here discussing firing pin protrusion and why you see problems if you're above 0.050" or below 0.030". Here's a link: https://www.snipershide.com/shooting/threads/nucleus-light-primer-strikes.6896558/post-7161913
So just measured it and I’m at .042” protrusion. I measured 3 times and got same every time so I’m confident in the measurement. Should I move it back closer to .040”-.035” or am I good there?
I haven’t changed anything since my last outing with 30% misfires. Primers up are all misfires.
E2343E0E-3658-46EC-82D0-E4B551839D1F.jpeg
 
If you're at 0.040" of pin protrusion I'd stick with the advice from PVA's HMFIC and not mess with it. If you wanted to do something, though, you could set it to 0.030-0.035" since that seemed to be the preferred pin protrusion mentioned in the post he made.

The issues could be one of a few options, really:

  • Residual grease in firing pin area (I know you said you cleaned it, so it's unlikely, but if you have access to an ultrasonic for a very thorough cleaning it wouldn't hurt to try)
  • Improperly seated primers that are just being pushed further into the brass when the firing pin hits them. Are any of your primers proud before attempting to fire them?
  • Improperly headspaced brass, especially using CCI 450's, will cause the whole cartridge to just move forwards and absorb firing pin energy when struck. Do you resize your brass further than only a few thousandths shorter than your chamber?
  • Bad lot of primers, some people have had lots of 450's that have caused light strikes while other lots cause none.
  • Could be poor interaction between the trigger and the action, I know one person who had their issues solved by switching from a Huber to a TT, but I also have heard rumors that the Nucleus was tested with a Huber (don't quote me, just a rumor I heard).
Sorry, but not being there to inspect everything in person (and, admittedly, not knowing the ins and outs of all the variables involved like the back of my hand) I can't give you any definitive cause for the light strikes, just a list of potential causes since the pin protrusion doesn't seem to be the most likely cause.

All the help is much appreciated!!

- I'll set it back to .030-.035" as suggested. See if that helps any.
- After reading the thread through the first time, I double checked primers when I made the last batch. All primers were set correctly and no "high" primers were in the batch at least by my account.
-All brass i've loaded 450's with has been brand new LC. I ran through the FL bushing die to make neck tension uniform. I checked maybe 20% in a case gauge to verify parameters. Length has been trimmed to +/- .002" sammi spec. Rifle is chambered in .223
- Bad lot may be a possibility.
- I'm tempted to borrow the trigger out of my other rifle to see if its any better, but I've also read Timney CE's have had issues.
- The only primers that I'm having issues has been the 450's. Everything else I've put through it has lit off just fine. Including some factory Wolf brass and Federal match ammo that I had and wanted to just try to see if any issues with those. None

Again, Thank You for all the feedback and suggestions. It's much appreciated .
 
  • Like
Reactions: proff49
Update: Since installing my 19# firing pin springs, I thought I had fixed the problem.

Fast forward to two weeks ago. Went out shooting and it was cold, say 25 degrees and very windy.

Had three rounds with "light strikes," even though the primers were thoroughly dented.

Last weekend, went out again to fire a few practice rounds before the NE BWRS match. This time about 10 degrees. Same thing, four rounds that failed to fire.

I stopped at a gas station and picked up a can of chlorinated carb cleaner on the way to the match.
I then sprayed down damn near everything inside the bolt, and reassembled it.

I then ran the action dry for the whole match, except the cocking cams.

For the rest of the day, I had no issues. 89 rounds fired as they should.

What I noticed was this:
While the rifle was still warm from the truck ride to the range, it fired fine. As soon as it started getting cold, I started having issues.

I did not have any grease on the firing pin, FP spring, or inside of the bolt. Just a very thin layer of oil.

I am thinking that the cold weather may have caused the oil to thicken and thus slow down the firing pin spring.

I thought I read that there is a 22# spring offered. I'm going to contact ARC to find out.
Regardless, I'm not impressed.
 
Possible causes for failure to fire (light strikes) and solutions.

1. Striker assembly has not been properly assembled
Solution: Reassemble the striker assembly ensuring that the castle nut has been screwed down onto the striker so that the distance between the firing pin tip and the face of the castle nut is at least 1.335 inches. See attached drawing.

2. Short sear bar is reducing striker fall distance.
Solution: Get a new trigger that has a longer sear bar. Ideally, a tiny bit of cock-on-close ensures that the striker spring is adequately compressed.

3. Grease or sticky (high viscosity) oil between striker (firing pin) shaft and the bolt shroud bore through which the shaft passes is robbing energy for the striker as it moves through the shroud.
Solution: Disassemble the striker assembly and de-grease with a solvent such as acetone or brake cleaner. Re-assemble the striker assembly without oil. Before inserting the striker assembly back into the bolt, apply grease to only the interface between the bolt shroud and the bolt body. Additionally, apply grease to the cocking cams of the bolt shroud. See attached drawing. Insert the striker assembly back into the bolt body to complete this procedure.

4. Bolt handle has not been fully rotated to the closed position due to interference with stock.
Solution: Check to ensure the bolt handle in the closed position is not contacting the stock or the chassis. If contact is detected, modify the stock or chassis as required to ensure that the rotation of the bolt handle is arrested by contact with the receiver rather than with the stock.

5. Primers have not been fully seated.
Solution: Fully seat the primers. Typically, the face of a fully seated primer will be 0.008–0.012 inches below flush.

6. Insufficient work done by the striker spring due to plastic deformation or modification.
Solution: Replace the striker spring.

7. Modification to cocking piece has reduced striker fall.
Solution: Replace coking piece.

8. Excessive head space
Solution: Reset head space using the correct go and no-go for the chamber.

9. Improperly cut chamber allows for forward movement of cartridge upon being struck by the striker.
Solution: Replace or re-cut the barrel so that the chamber.

Ted
 

Attachments

  • DOC - M9 bolt and striker assy.PDF
    292.9 KB · Views: 182
All,

I have posted a list (above) of possible causes of failure to fire and light strikes and the solution for each.

In general, we have found that most of the light strike issues have been caused by improper assembly of the striker mechanism. See the attached drawing.

When re-assembling the striker mechanism, it is imperative that the castle nut be screwed down onto the firing pin (striker) so that the MINIMUM distance between the tip of the firing pin and the forward face of the castle nut is 1.335 inches. Measure this carefully.

When reassembling the striker mechanism, make sure to push the lock washer down against the firing pin until it comes to a stop. This can be difficult because you must push against the striker spring to do it. Two sets of hands makes this much easier so get someone to help you with this and make sure that you are both wearing eye protection. Working with springs can be dangerous.

After your bolt has been fully assembled, the tip of the firing pin should protrude from the face of the bolt by 0.035 - 0.045 inches.

If your problems persist, please send us an email with NUCLEUS LIGHT STRIKES in the subject line and your contact information. We will call you. If we think we cannot resolve the issue over the phone, we will ask you to send your action and trigger to us.

Thus far, in every instance of a customer sending a "light striking" Nucleus action to back to us, we have found that the the light strikes were the result of something that the customer had done improperly. Nevertheless, we give the customer the benefit of the doubt because we understand that exactly replicating the condition within which he experienced the problem is impossible. So if we encounter an instance where we cannot get reliable ignition, there are measures we can take to correct the problem. Among these are the installation of the firing pin having a smaller tip radius than that of our standard pin and the installation of a 25 pound spring, due to arrive at our facility in about two weeks.

The Nucleus was tested using 16 pound springs and CCI number 34 and number 41 primers. The tests were conducted in January of 2018 at a temperature in the low 40s. Since most customers who have replaced their 16 pound spring with a 19 pound spring indicate that they could notice a difference in the effort required to cock the action, I think that sending making a free 25 pound spring available to everyone who has either a Nucleus or a John Hancock may help resolve any lingering issues.

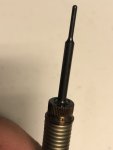
Also, I realize that disassembling the striker mechanism using the large washer that we provide with the action is difficult so are offering a striker assembly tool that will make the job much easier. This can be ordered from our website very soon. See pic below.

I this helps.

Ted

1548254668521.png
 
Last edited:
If your problems persist, please send us an email with NUCLEUS LIGHT STRIKES in the subject line and your contact information. We will call you. If we think we can resolve the issue over the phone, we will ask you to send your action and trigger to us.
Good info and posts, but I'm assuming you meant cannot in lieu of can above.
 
I can tell the difference in bolt lift between a 16lb and 19lb spring. My rifle is just heavy enough to where I can lift the bolt without rotating the rifle with the 16lb spring. Not so much with the 19.

What are your thoughts about putting components into an ultrasonic cleaner to get all the lubricant as possible out of it?
 
As soon as I get back from Shot Show, I will make and post a video instructing viewers on how to disassemble and re-assemble the Nucleus bolt and striker assemble. This is something that I should have done long ago.

Ted
In the meantime, here are two of your existing videos that are helpful to show and/or describe proper striker disassembly and reassembly:


It's interesting to note that the firing pin protrusion question (how much is enough?) is mentioned here in the second video talking about how increasing the firing pin protrusion will reduce the energy imparted onto the primer once you get beyond the point of "enough".
 
Last edited:
  • Like
Reactions: character0
To question about Huber trigger vs. Triggertech. I have a Huber and Triggertech with no cleaning of the bolt and no light strikes. I have a third action with a Triggertech, and I have been getting light strikes after cleaning the bolt. I haven't run down through everything, but will go down Ted's list. I may need to disassemble the striker assembly to clean, but I was hoping an agitated bath in acetone would take care of it.
 
I wish I would have seen this message earlier. Almost the exact same thing happened to me. I had experienced light primer strikes and failures to fire with factory ammo, in 65F weather, so I took the firing spring mechanism out and cleaned it of grease. I thought I had it fairly clean. Tested it Friday with 27rds with 1 issue. Tried to clean it a bit more, then packed up for the 6hr drive to a match. Temps were in the low 20’s to start the day. I had 7 consecutive failures to fire with light primer strikes! After 2 stages I had dealt with enough frustration and just decided to help coach my girlfriend for the rest of the day.

While it’s likely an easy fix, it has certainly left a bad first impression. Driving 12hrs round trip without firing a single round will do that.


Update: Since installing my 19# firing pin springs, I thought I had fixed the problem.

Fast forward to two weeks ago. Went out shooting and it was cold, say 25 degrees and very windy.

Had three rounds with "light strikes," even though the primers were thoroughly dented.

Last weekend, went out again to fire a few practice rounds before the NE BWRS match. This time about 10 degrees. Same thing, four rounds that failed to fire.

I stopped at a gas station and picked up a can of chlorinated carb cleaner on the way to the match.
I then sprayed down damn near everything inside the bolt, and reassembled it.

I then ran the action dry for the whole match, except the cocking cams.

For the rest of the day, I had no issues. 89 rounds fired as they should.

What I noticed was this:
While the rifle was still warm from the truck ride to the range, it fired fine. As soon as it started getting cold, I started having issues.

I did not have any grease on the firing pin, FP spring, or inside of the bolt. Just a very thin layer of oil.

I am thinking that the cold weather may have caused the oil to thicken and thus slow down the firing pin spring.

I thought I read that there is a 22# spring offered. I'm going to contact ARC to find out.
Regardless, I'm not impressed.
 
If you are running a Bix n Andy tac trigger, make sure you are running the low top sear instead of the default medium
 
Determined from my measurements and corroborated with another user. I talked to a guy from Bullet Central at Shot and he mentioned that if you send in your measurements for the Nuke, they will include it in their charts for top sear selection. I haven't noticed any issues and my light primer strikes went away after switching.
 
Determined from my measurements and corroborated with another user. I talked to a guy from Bullet Central at Shot and he mentioned that if you send in your measurements for the Nuke, they will include it in their charts for top sear selection. I haven't noticed any issues and my light primer strikes went away after switching.

This is good to hear. I switched to the low sear before installing my BnA but haven't had a chance to shoot it yet.
 
ok, i have a BixnA tacsport with the STANDARD SEAR and after watching their video i measured my nucleus action......i believe it’s borderline after measuring and remeasuring. this made me curious so i tore down my mausingfield With the same trigger which runs perfect. the mausingfield measurement coincided with the data on the bullets.com site as well so at least I know I’m measuring correctly

with that, im shooting a mildly altered wildcat cartridge with peterson brass so there can be something with that as well. its a 260 30* improved so there is no real case modification other than hinging the shoulder at the neck/shoulder junction .

but for now i can get cci450's to go bang with a good jam into the lands and the heavier 19lb spring( after forming the case i have no problem setting off the 450's but had issue with the lighter spring and cci 41's in the same formed cases.)
still not completely convinced that something else isnt at play so ill continue to investigate.
I’m goint to order the low sear just to see....at least I’ll know either way.

Edited
 
Last edited:
I have been using a BnA standard sear in my nuke with the 16# spring. I have had zero problems. There is also noticeably less cocking on close with it versus the Huber it replaced.
 
Determined from my measurements and corroborated with another user. I talked to a guy from Bullet Central at Shot and he mentioned that if you send in your measurements for the Nuke, they will include it in their charts for top sear selection. I haven't noticed any issues and my light primer strikes went away after switching.

Were your measurements in the 3.9mm range?