• Watch Out for Scammers!

    We've now added a color code for all accounts. Orange accounts are new members, Blue are full members, and Green are Supporters. If you get a message about a sale from an orange account, make sure you pay attention before sending any money!

Poor man's annealing setup

Re: Poor man's annealing setup

Cool, but I don't see the point of the rifle rest and the vice. I just hold the power screwdriver in my right hand with the propane torch standing on the table. Put a brass in my socket, spin it in the flame, and drop it when done. No need to ever move the torch or remove the socket.
 
Re: Poor man's annealing setup

Looks like a good way to keep an consistent area of heat being applied onto the neck.
 
Re: Poor man's annealing setup

This is what I do, too. I'd love a Geraud?, but i'd rather buy bullets, with the money. Doing the "McGiver" stuff, is fun, besides.<div class="ubbcode-block"><div class="ubbcode-header">Originally Posted By: Gene Poole</div><div class="ubbcode-body">I find it fastest to mount the drill so it swivels and leave the torch stationary: pop a case in while it is upright, swivel into the flame, then all the way down so gravity drops it out. A picture is worth a thousand words:

http://www.snipershide.com/forum/ubbthre...095#Post3362095 </div></div>
 
Re: Poor man's annealing setup

Same method for me only simplified. Socket is chucked in cordless drill, torch sits on table. Drill in Right hand, left hand feeds case into socket, dip into flame until "done" (about 4 seconds for my torch) then drop in old ss steel mixing bowl. Repeat. I can do 7-10 cases per minute, working at a slow pace. Less than 30 minutes and I'm done with all my brass.
 
Re: Poor man's annealing setup

<div class="ubbcode-block"><div class="ubbcode-header">Originally Posted By: Temp9</div><div class="ubbcode-body">Cool, but I don't see the point of the rifle rest and the vice. I just hold the power screwdriver in my right hand with the propane torch standing on the table. Put a brass in my socket, spin it in the flame, and drop it when done. No need to ever move the torch or remove the socket. </div></div>

You make a good point, and i just tried that. Only problem is when i dump the brass into the water the socket wants to come off too. I thought about using JB weld to bind the socket and extension bar anyway.

I just started doing this about a month ago and am still refining/simplifying my technique. This is exactly why I made this thread. Thanks for sharing your methods guys!
 
Re: Poor man's annealing setup

<div class="ubbcode-block"><div class="ubbcode-header">Originally Posted By: Creature</div><div class="ubbcode-body"><div class="ubbcode-block"><div class="ubbcode-header">Originally Posted By: Temp9</div><div class="ubbcode-body">Cool, but I don't see the point of the rifle rest and the vice. I just hold the power screwdriver in my right hand with the propane torch standing on the table. Put a brass in my socket, spin it in the flame, and drop it when done. No need to ever move the torch or remove the socket. </div></div>

You make a good point, and i just tried that. Only problem is when i dump the brass into the water the socket wants to come off too. I thought about using JB weld to bind the socket and extension bar anyway.

I just started doing this about a month ago and am still refining/simplifying my technique. This is exactly why I made this thread. Thanks for sharing your methods guys!</div></div>

Odd that your screwdriver doesn't hold onto the socket adapter. Is it the type that holds the bits using a small magnet? Mine is a Milwaukee screwdriver where the bits snap in and stay very well. Either way, good job for taking up annealing in the first place! Many people are afraid to anneal their brass and make up excuses like "It's easier to just buy new brass." and "Annealing is dangerous." Happy reloading!

Edit: After rereading my first post, I realize I sounded kind of rude. That wasn't my intention, and I apologize.
 
Re: Poor man's annealing setup

Really like your set-up. I have been using the handheld drill/stationary flame method, but yours looks like a useful variation that will increase consistency in applying the flame. I'll be trying it out shortly, and thanks for sharing!
 
Re: Poor man's annealing setup

Nice cheap setup. I might need to start doing that to my 338 lapua brass.
 
Re: Poor man's annealing setup

TrimMateAnnealer1.jpg


Close to $100, but it's 'dual use' and Alton Brown just loves 'dual use' tools.

Chris
 
Re: Poor man's annealing setup

<div class="ubbcode-block"><div class="ubbcode-header">Originally Posted By: Temp9</div><div class="ubbcode-body"><div class="ubbcode-block"><div class="ubbcode-header">Originally Posted By: Creature</div><div class="ubbcode-body"><div class="ubbcode-block"><div class="ubbcode-header">Originally Posted By: Temp9</div><div class="ubbcode-body">Cool, but I don't see the point of the rifle rest and the vice. I just hold the power screwdriver in my right hand with the propane torch standing on the table. Put a brass in my socket, spin it in the flame, and drop it when done. No need to ever move the torch or remove the socket. </div></div>

You make a good point, and i just tried that. Only problem is when i dump the brass into the water the socket wants to come off too. I thought about using JB weld to bind the socket and extension bar anyway.

I just started doing this about a month ago and am still refining/simplifying my technique. This is exactly why I made this thread. Thanks for sharing your methods guys!</div></div>

Odd that your screwdriver doesn't hold onto the socket adapter. Is it the type that holds the bits using a small magnet? Mine is a Milwaukee screwdriver where the bits snap in and stay very well. Either way, good job for taking up annealing in the first place! Many people are afraid to anneal their brass and make up excuses like "It's easier to just buy new brass." and "Annealing is dangerous." Happy reloading!

Edit: After rereading my first post, I realize I sounded kind of rude. That wasn't my intention, and I apologize. </div></div>

I ended up doing it your way and it worked a lot faster. I did probably 600 cases of .308, .223, .338LM. I was able to keep the socket from coming off by holding the base of it with my gloved left hand. This also serves to steady, with side pressure, the wobbling. I keep the torch on it's side and steady arms by resting elbows on knees. No vise or rest need and can dump cases without detaching bit(as stated above).

It's all good, I didn't take it that way. Happy reloading to you too.
 
Re: Poor man's annealing setup

<div class="ubbcode-block"><div class="ubbcode-header">Originally Posted By: mdavlee</div><div class="ubbcode-body">Nice cheap setup. I might need to start doing that to my 338 lapua brass. </div></div>

That's the main reason I decided to start. At $2.60 per piece you gotta try and stretch that out. Although IIRC there was a guy who set a long range(1000yd) record using a .338-30. The brass he used was fired 50+ times. He annealed after each firing.
 
Re: Poor man's annealing setup

<div class="ubbcode-block"><div class="ubbcode-header">Originally Posted By: Creature</div><div class="ubbcode-body"><div class="ubbcode-block"><div class="ubbcode-header">Originally Posted By: Temp9</div><div class="ubbcode-body">Cool, but I don't see the point of the rifle rest and the vice. I just hold the power screwdriver in my right hand with the propane torch standing on the table. Put a brass in my socket, spin it in the flame, and drop it when done. No need to ever move the torch or remove the socket. </div></div>

You make a good point, and i just tried that. Only problem is when i dump the brass into the water the socket wants to come off too. </div></div>

Think simple. A piece of Duck Tape will do the trick in holding things together.

Also, dumping the case in water just gives you a wet case. Not necessary for proper annealing. I just drop mine in an old stainless steel mixing bowl. Went to it after I made the mistake of dropping some hot cases on just paper towel on the counter. The burn marks were a clue that I needed something to handle the heat for the few moments it takes to cool off
cool.gif
 
Re: Poor man's annealing setup

I swear I thought that if I posted this I would be crucified. I do almost the same thing. Impact driver with a socket adapter and a torch. Nice to know I'm not crazy
 
Re: Poor man's annealing setup

<div class="ubbcode-block"><div class="ubbcode-header">Originally Posted By: Deadshot2</div><div class="ubbcode-body"><div class="ubbcode-block"><div class="ubbcode-header">Originally Posted By: Creature</div><div class="ubbcode-body"><div class="ubbcode-block"><div class="ubbcode-header">Originally Posted By: Temp9</div><div class="ubbcode-body">Cool, but I don't see the point of the rifle rest and the vice. I just hold the power screwdriver in my right hand with the propane torch standing on the table. Put a brass in my socket, spin it in the flame, and drop it when done. No need to ever move the torch or remove the socket. </div></div>

You make a good point, and i just tried that. Only problem is when i dump the brass into the water the socket wants to come off too. </div></div>

Think simple. A piece of Duck Tape will do the trick in holding things together.

Also, dumping the case in water just gives you a wet case. Not necessary for proper annealing. I just drop mine in an old stainless steel mixing bowl. Went to it after I made the mistake of dropping some hot cases on just paper towel on the counter. The burn marks were a clue that I needed something to handle the heat for the few moments it takes to cool off
cool.gif


</div></div>
I got the problem with the socket coming off fixed. The reason I put cases in water is probably more mental than anything. Once you get a case to the point were it's turning red heat is radiating to the body. The reason I quench is to stop that radiation. Who knows, it probably doesn't matter. I'm far from being a metallurgist.

Been rotating wet brass to sit on top of my AC outside. Neighbors prob think I'm crazy. lol
 
Re: Poor man's annealing setup

<div class="ubbcode-block"><div class="ubbcode-header">Originally Posted By: Creature</div><div class="ubbcode-body"><div class="ubbcode-block"><div class="ubbcode-header">Originally Posted By: Deadshot2</div><div class="ubbcode-body"><div class="ubbcode-block"><div class="ubbcode-header">Originally Posted By: Creature</div><div class="ubbcode-body"><div class="ubbcode-block"><div class="ubbcode-header">Originally Posted By: Temp9</div><div class="ubbcode-body">Cool, but I don't see the point of the rifle rest and the vice. I just hold the power screwdriver in my right hand with the propane torch standing on the table. Put a brass in my socket, spin it in the flame, and drop it when done. No need to ever move the torch or remove the socket. </div></div>

You make a good point, and i just tried that. Only problem is when i dump the brass into the water the socket wants to come off too. </div></div>

Think simple. A piece of Duck Tape will do the trick in holding things together.

Also, dumping the case in water just gives you a wet case. Not necessary for proper annealing. I just drop mine in an old stainless steel mixing bowl. Went to it after I made the mistake of dropping some hot cases on just paper towel on the counter. The burn marks were a clue that I needed something to handle the heat for the few moments it takes to cool off
cool.gif


</div></div>
I got the problem with the socket coming off fixed. The reason I put cases in water is probably more mental than anything. Once you get a case to the point were it's turning red heat is radiating to the body. The reason I quench is to stop that radiation. Who knows, it probably doesn't matter. I'm far from being a metallurgist.

Been rotating wet brass to sit on top of my AC outside. Neighbors prob think I'm crazy. lol</div></div>

Hah, I leave my brass to dry on my deck outside after cleaning (stainless media) and get weird looks from my neighbors occasionally. I no longer drop my brass in water. Quenching won't affect the outcome of the annealing process, but I get enough of drying brass from using stainless media. I just drop my brass onto a damp towel. The cases cool pretty quickly and I can resize right after annealing.
 
Re: Poor man's annealing setup

<div class="ubbcode-block"><div class="ubbcode-header">Originally Posted By: Temp9</div><div class="ubbcode-body">
Creature said:
Deadshot2 said:
Creature said:
Temp9 said:
Hah, I leave my brass to dry on my deck outside after cleaning (stainless media) and get weird looks from my neighbors occasionally. I no longer drop my brass in water. Quenching won't affect the outcome of the annealing process, but I get enough of drying brass from using stainless media. I just drop my brass onto a damp towel. The cases cool pretty quickly and I can resize right after annealing. </div></div>

So I guess the case would heat up to a certain temp(with the neck being hotter) and then start to cool once it was removed from the flame. If you don't quench the case right away will the heat have more time to radiate downward to the body(bad)?

I would much rather not have to dry the brass but am paranoid about heat reaching the body of the case...
 
Re: Poor man's annealing setup

cstmwrks,

What kind of motor and power supply are you using?
 
Re: Poor man's annealing setup

<div class="ubbcode-block"><div class="ubbcode-header">Originally Posted By: cstmwrks</div><div class="ubbcode-body">
Mind you when I say never, that assumes your only heating the neck / shoulder for the proper time and removing it from your tool. If you just leave the flame on it of course you can cook the shit out of your brass.

</div></div>

In that case the neck would be so badly burned nobody would even consider using the brass. When using heat sinks like all the individuals have shown or described, there's no way that even then there'd be enough heat transferred to base of the case to render it unusable. But what good would it be with a neck that's "fried"?
 
Re: Poor man's annealing setup

<div class="ubbcode-block"><div class="ubbcode-header">Originally Posted By: cstmwrks</div><div class="ubbcode-body"><div class="ubbcode-block"><div class="ubbcode-header">Originally Posted By: 725franky</div><div class="ubbcode-body">cstmwrks,

What kind of motor and power supply are you using? </div></div>

It's an AC timing motor. I bought it from Allelectronics.com for $4.50.
It runs at 50 RPM. Any low RPM timing motor ( 50 to 100 ) will do the job.
They do not always have these motors in AC so some times you have to go DC and get a power supply to run it. </div></div>

Cool, Thanks!
 
Re: Poor man's annealing setup

So what are the signs of a over annealed neck? I have a few that are a little more "done" than others. I can't really describe the color but it isn't that silver-ish Lapua color. I'm pretty sure it's fine as i don't let it glow bright.

I know you don't know how hot my torch is but on average I've been running:

.223 7 seconds
.308 9 seconds
.338lm 11 seconds

All are probably +/- 1 second. I wait until I see it glow a little and then dump.

Well if you guys haven't been quenching your brass and haven't been blown up then I might as well try it.
laugh.gif
I wonder what kind of container would be best. I would think a metal bowl would transmit heat. Maybe a wooden bowl?

Also thanks for the heads up about that motor(I can't find it on that site BTW). I've had the idea in my head to build my own. There was some guy who had used a motor like that in conjunction with a circular saw blade and could do a bunch at once. I think he had two torches and could adjust speed.
 
Re: Poor man's annealing setup

<div class="ubbcode-block"><div class="ubbcode-header">Originally Posted By: cstmwrks</div><div class="ubbcode-body">
Creature said:
The 9 seconds sounds close on the .308.

If the brass looks grayish and is no longer smooth to the touch I would say you have killed it. If you can squeeze the end a little and it does not spring back, you killed it.
</div></div>

I snagged a couple quotes from an article on 6mmbr(linked at bottom) I wanted to get your opinion on. I've kind of been going by it and wanna make sure I'm not using incorrect info.

"There is no particular danger to over-annealing the case necks, which is the usual result of standing the brass in water and heating the necks with a torch. All that will happen is that your accuracy will not improve, or it may become worse, and the cases may seem to be a little more sticky during extraction. Case life will be improved because the necks are soft--too soft."

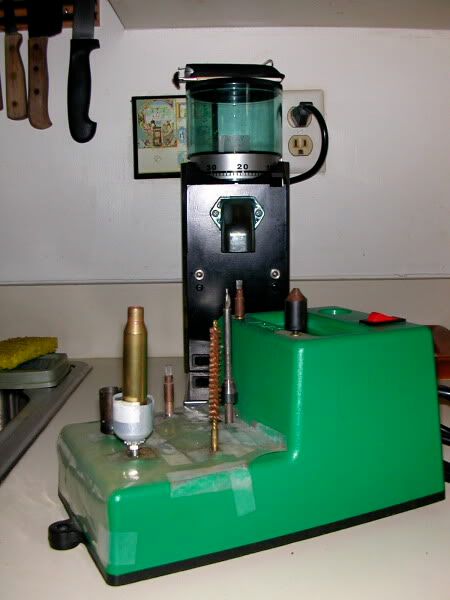
"Testing Cartridge Brass for Hardness and Softness
This is not a definitive test of case hardness; it is more of an illustration than anything else. It requires a pair of small Vise-Grips and a few bottle neck rifle cases in various conditions of use: a factory fresh empty case, two cases that have not split but have been fired many times, and a couple of extra cases to set the jaws of the Vice Grips.

Place one of the used cases base down in a shallow tray containing water up to the lower third of the case, and deliberately over-heat the case neck--bring it to a red heat.

Adjust the Vise-Grips until the jaws barely touch the case neck when they are fully closed. Then, Carefully adjust them to go a few thousands of an inch beyond that point. the jaws should close until you can just barely visibly detect that the case mouth is deformed when the Vise-Grips are closed.

Ordinary pliers are not good for this demonstration because it is too easy to go too far. Vise-Grips, on the other hand, have an adjustable limit to which they can be closed.

Squeeze the neck of the used, but un-annealed case. Note the pressure required. Also note that when the pressure is released, the case neck springs back to its original shape.

Squeeze the neck of the factory fresh case. Once again note that the case neck springs back to its original shape, and that it takes slightly less pressure to deform it than the un-annealed case.

Now, squeeze the annealed case. The pressure to deform it is markedly less and when it is released, the case mouth remains deformed--no spring."

http://www.6mmbr.com/annealing.html
 
Re: Poor man's annealing setup

<div class="ubbcode-block"><div class="ubbcode-header">Originally Posted By: cstmwrks</div><div class="ubbcode-body">Creature,
Looks like you have read much of what I did before I built my little gizmo and tried annealing myself. I'm sure in all that you read a quote some thing like this: annealing is both an art and a science.

I took that to mean there is an art to using what ever method you have to achieve the science of annealing.

So I think the guys at 6mmbr know what they are talking about. But I would suggest you do not need to stress that you are screwing up a bunch of brass and will be eating a bolt any time soon from over cooked brass.

I did let some brass cook for around 20 seconds just to see what would happen. It had a nasty scorched look to it but even then it did not have that look all the way down to the base.

I don't know how you have your flame tip set up ( distance wise ) but at the 9 second time frame it sounds reasonable if not a bit low ( AKA not really annealed at all ). How thick are your case necks? What brand? For me I noticed a longer time for both LC and CBC and less time on Remington and WW.

</div></div>

Thanks for the reassurance. I had figured as much as I've done over a 1000 with this setup the past few days.

.308 is commercial Win, .223 is LC, and .338 is lapua. Yeah I know mil-surp nato cases have thicker walls by the neck.

I'm pretty sure i got things down. The brass is heating up to at least 650F as the Tempilstik melts when applied to hot case. From what I'm reading that means it is in the range of softening the metal(annealing).
 
Re: Poor man's annealing setup

I'd like to build something like this:
http://www.bench-source.com/id81.html

When you mentioned that motor above i started think about if you could control the speed... Then you could probably fashion a shell holder out of a circular saw blade and connect it to middle spindle on motor. Then you'd only need two mounts for the torches. Hmmm....
 
Re: Poor man's annealing setup

<div class="ubbcode-block"><div class="ubbcode-header">Originally Posted By: cstmwrks</div><div class="ubbcode-body"><div class="ubbcode-block"><div class="ubbcode-header">Originally Posted By: Creature</div><div class="ubbcode-body">I'd like to build something like this:
http://www.bench-source.com/id81.html

Hmmm.... </div></div>
I hope your happy with yourself. . . . I've been pretty content with my little machineso far. Now you dangle that in front of me? I do have an Excitron stand alone stepper motor setting idle that would make building a table like that a pretty simple project.

We will see how it goes, winter is coming. </div></div>

This is what got me thinking about using a circular saw blade.
http://bulletin.accurateshooter.com/2007/11/new-versatile-brass-o-matic-annealing-machine/

I saw a design that used a large ring, made out of small round metal, to come into contact with the base of the case. It only made contact with the base of the case on one side. This functioned to spin(via friction on one side) the case slowly as the motor spun the larger care holder. Pretty slick.