• Watch Out for Scammers!

    We've now added a color code for all accounts. Orange accounts are new members, Blue are full members, and Green are Supporters. If you get a message about a sale from an orange account, make sure you pay attention before sending any money!

Fieldcraft Rifle Painting Tutorial

Re: Rifle Painting Tutorial

KnoxCop that looks sick.

Who cares if it isn't camo, it looks awesome.

What'd you use for the pattern? Looks to be some type of mesh?

Parker
 
Re: Rifle Painting Tutorial

<div class="ubbcode-block"><div class="ubbcode-header">Originally Posted By: TexasClassIII</div><div class="ubbcode-body">KnoxCop that looks sick.

Who cares if it isn't camo, it looks awesome.

What'd you use for the pattern? Looks to be some type of mesh?

Parker </div></div>
I actually used a mesh laundry bag and used thin wire to hold it down. I just finished doing my big rifle sort of the same way just using more earth tones.
IMAG0055.jpg

IMAG0049.jpg

IMAG0045.jpg
 
Re: Rifle Painting Tutorial

<div class="ubbcode-block"><div class="ubbcode-header">Originally Posted By: LongArm</div><div class="ubbcode-body">Before
After
DSCN0965.jpg

</div></div>

Looks great, and it's a lot better than digital. I was going to go digital until I saw yours. Like you said, a sponge is a lot simpler than doing stenciled camo, and it's inherently a more random pattern. How many colors did you use (it looks like two).

I'm going to be using duracoat on my guns. I still have to do an environment match with CamoPicker to get the right colors, but as soon as i do, I'll be ordering the paint.
 
Re: Rifle Painting Tutorial

I decided to paint my blue-gun first, after a few attempts i came up with this. Im not sure if its good enough to go forward with or should i try again or should i just send it to a professional, what do you guys think.
IMG_5774.jpg

IMG_5775.jpg
 
Re: Rifle Painting Tutorial

<div class="ubbcode-block"><div class="ubbcode-header">Originally Posted By: Nemisis7.62</div><div class="ubbcode-body">I decided to paint my blue-gun first, after a few attempts i came up with this. Im not sure if its good enough to go forward with or should i try again or should i just send it to a professional, what do you guys think.
IMG_5774.jpg

IMG_5775.jpg
</div></div>

I like it, it's different sure looks pretty damn neat.
 
Re: Rifle Painting Tutorial

My 10 year old son and I tried out the tutorial and this is what we did:

8207DF51-orig.jpg


18DE8792-orig.jpg


Re: Rifle Painting Tutorial

AR Corey: Loving the Snakeskin paintjob.

QUESTION: Has anyone ever done such a good job on their paint they've lost their rifle? (Even temporarily?)
 
Re: Rifle Painting Tutorial

<div class="ubbcode-block"><div class="ubbcode-header">Originally Posted By: Greg Langelius *</div><div class="ubbcode-body">Over the years, I've done a lot of camo painting. Painting directly onto firearms has become less and less desirable for me as the years accumulate. Things wear and become otherwise unsatisfactory, and removal has always been somewhat of a hassle.

These days any rifles/shotguns I own that don't have factory camo are camo'd by first covering <span style="font-style: italic">everything</span> with 3M Blue wide masking tape, then applying either the paint finish or camo duct tape (digital camo duct tape can be used for this) over the masking tape. Naked parts get the tape removed, using an Exacto knife to trim neatly. The rest stays.

Using camo duct tape, I have found that there is no need to match edges and patterns; from beyond 20ft, it just doesn't matter.

Originally, I had qualms about whether this was effective, durable enough, or good for the firearm; but those worries were unfounded.

I have camo jobs that are on the firearm for years now. I have test-peeled back corners and the masking's adhesive is sill easily removed, and will also stick right back down where it was before. The bluing underneath appears to have been protected very well.

If the tape gets damaged or the finish could use replacement with something else (or nothing), the tape can be removed and replaced as needed. The tape itself provides some modest protection from trail rash.

Some fairly interesting projects can be completed, like my Win 94AE .44mag Trapper Carbine with all camo (duct taped) furniture and matching sling.

I just don't like the idea of having anything on the firearm that's either irrevocable, or a pain to remove/replace.

Some may go "Eeeewww" at the idea, and that's fine by me. The resulting camo job trends more (for me) towards the practical than the aesthetic. IMHO; as a concept, camo is more utilitarian than artistic in its intent.

Greg </div></div>

Greg, check out "Frog Tape." You can find it at Walmart, Lowes, etc. It is just as removable as the blue tape, but it's green. I use it for labeling just about everything gun related. I used the camo duct tape on a rifle as a kid, only I taped it directly to the rifle. Never again! Putting removable painters tape down first is the way to go.
 
Re: Rifle Painting Tutorial

I have a few days off work coming up with no plans until I skimmed through all 9 pages of this thread. Awesome work out there! Do you guys remove the scope, rings, base, barrel and action and do each piece seperatly or is this not neccessary? Also does anyone have any photos showing the application process while using a fishnet or some type of netting. I can't play it out in my head as to which step or layer it is to be applied.
 
Re: Rifle Painting Tutorial

<div class="ubbcode-block"><div class="ubbcode-header">Originally Posted By: khall540</div><div class="ubbcode-body"> Also does anyone have any photos showing the application process while using a fishnet or some type of netting. I can't play it out in my head as to which step or layer it is to be applied.
</div></div>
Pick what color you want your fishnet to be and spray you entire gun that color. Then apply your netting, use small wire to secure it to your gun, take your time get the netting even and make sure it is touching the gun, any gap between the netting and the gun will cause the netting pattern not to show up. Then spray your remaining colors, remove netting and enjoy.
 
Re: Rifle Painting Tutorial

Thanks for the quick response Knox. I can begin to see it now. I think I will be sure to practice on 2x4 or pipe first just to be sure I get my colors correct.
 
Re: Rifle Painting Tutorial

I tried my hand with a sponge on my first rifle I have painted. I'm liking how it turned out. Just waiting to see how long it will last before I need to touch it up. Still need to try out the snakeskin or webbing on one...(sorry for the shitty photo with the flash and desk lamp, I'll try to get one outside in the sun)
2012-03-09212216.jpg


2012-03-09212201.jpg
 
Re: Rifle Painting Tutorial

Did you make that sling? how many feet of cord did that take you
 
Re: Rifle Painting Tutorial

let me ask this. i want an urban camo, greys and such. but how do you find enough colors to make up the palette? i can use some blues possibly but commercial rattle can selections suck, there is grey, and there is primer.... any thoughts other than buying a pint of black and a pint of white and mixing your own?
 
Re: Rifle Painting Tutorial

<div class="ubbcode-block"><div class="ubbcode-header">Originally Posted By: Johny B</div><div class="ubbcode-body"> Did you make that sling? how many feet of cord did that take you </div></div>
If you are talking about my sling here are 2 better pics of it. I think it was close to 150 feet to make a 42in sling. It is called a double solomon bar or wide solomon bar. Be forewarned it took me close to 2 hours to tie it I got the sling parts at walmart .
http://www.youtube.com/watch?v=8lZss5Tzp54
IMAG0018-1.jpg

IMAG0003-1.jpg
 
Re: Rifle Painting Tutorial

Just finished painting my first rifle. I wanted to try it out on something I wouldnt be upset about if it looked bad. About 2 hours later I am happy with the way it turned out. Thanks for all the tips from everyone. Im going to try one of the ARs next weekend.
[url="http://i1249.photobucket.com/albums/hh504/izot1616/DSCN1594.jpg"]http://i1249.photobucket.com/albums/hh504/izot1616/DSCN1594.jpg[/url][IMG]
hope the photo posts alright
 
Re: Rifle Painting Tutorial

Just did my first camo job today using the sponge. I was really happy with it for my first one! Used khaki for the base and brown and OD green for the sponging.

 
Re: Rifle Painting Tutorial

<div class="ubbcode-block"><div class="ubbcode-header">Originally Posted By: 2down1UP2down</div><div class="ubbcode-body">
DSCN1594.jpg
</div></div>

great looking camo there.. just wondering how you done it??
 
Re: Rifle Painting Tutorial

How exactly did you do this? Great job!

<div class="ubbcode-block"><div class="ubbcode-header">Originally Posted By: Awesymoto</div><div class="ubbcode-body">Well I got bored today, and went to wal-mart. I bought two colors tan and green... tapped off the turrets, mag well, and muzzle and went' to town.

First try and I'm pretty happy with it.
Before:

IMG_0306.jpg


After

IMG_0493.jpg


IMG_0495.jpg


IMG_0498.jpg


a bit lighter than i wished, but actually isn't bad. </div></div>
 
Re: Rifle Painting Tutorial

First attempt at painting this weekend. Used Rustoleum Camouflage Khaki as a base coat, followed by Deep Forest Green with some Earth Brown on top of the Forest Green. Pretty happy with the results overall; just a few spots to touch-up to break up the outline a bit better. It'll look better as the veg comes in a bit this summer...

s4nd6d.jpg


epnnr6.jpg
 
Re: Rifle Painting Tutorial

Well, i couldn't find any krylon camo colors, but rustoleum has camo paint as well. Here is my first attempt. I decided to start out on a simple savage 64 22lr.

2012-05-08155837.jpg


P1040095.jpg


It doesn't look to bad in the deader areas, but unfortunately im in oklahoma and everything is most green... doesn't match as well as I would like.
 
Re: Rifle Painting Tutorial

<div class="ubbcode-block"><div class="ubbcode-header">Originally Posted By: 2down1UP2down</div><div class="ubbcode-body">
DSCN1594.jpg
</div></div>

this one is my favorite. please explain how you did it
 
Re: Rifle Painting Tutorial

ok here is the thing. i bought the multi-spec camo from bulldog and i think i want an urban camo. no oter reason than i like blue. dont care what it matches or blends with. here are the colors so far

7159309014_4d368a1a6a_b.jpg


i just dont know what order or how to really lay it out. i need to make some dummy shapes and justtry the layout i guess and figure out what i want a the main color. i wish i could find darker blues or more grays, but there is only so much selection in cans

any tips or thoughts?
 
Re: Rifle Painting Tutorial

Start with light colors and work your way darker, is my bet.
 
Re: Rifle Painting Tutorial

Awesome paint jobs and tutorial. I might try a krylon camo on my 22lr and see how that turns out.
 
Re: Rifle Painting Tutorial

We need more progress and walk through pictures than just before and afters. I am currently in the process of painting my SPS Tactical and will be posting the whole process once done...
 
Re: Rifle Painting Tutorial

well yeah i did actually , i had my nagant custom painted then wrapped the contact areas/barrel with real tree burlap, and set it outside and went a got the mail and lost it for about an hour. but i have a savage axis that me and my friend painted it urban/woodland digital , works well!
 
Re: Rifle Painting Tutorial

<div class="ubbcode-block"><div class="ubbcode-header">Originally Posted By: 2down1UP2down</div><div class="ubbcode-body">
DSCN1594.jpg
</div></div>

nice paint job
what did you do to make that pattern?
 
Re: Rifle Painting Tutorial

Does anybody else have a sort of OCD while painting that everything needs to be balanced in color? I end up always defeating the whole purpose of a random scheme by thinking "there isn't enough dark brown here, oh, there needs to be green here" and it ends up looking like crap.
 
Re: Rifle Painting Tutorial

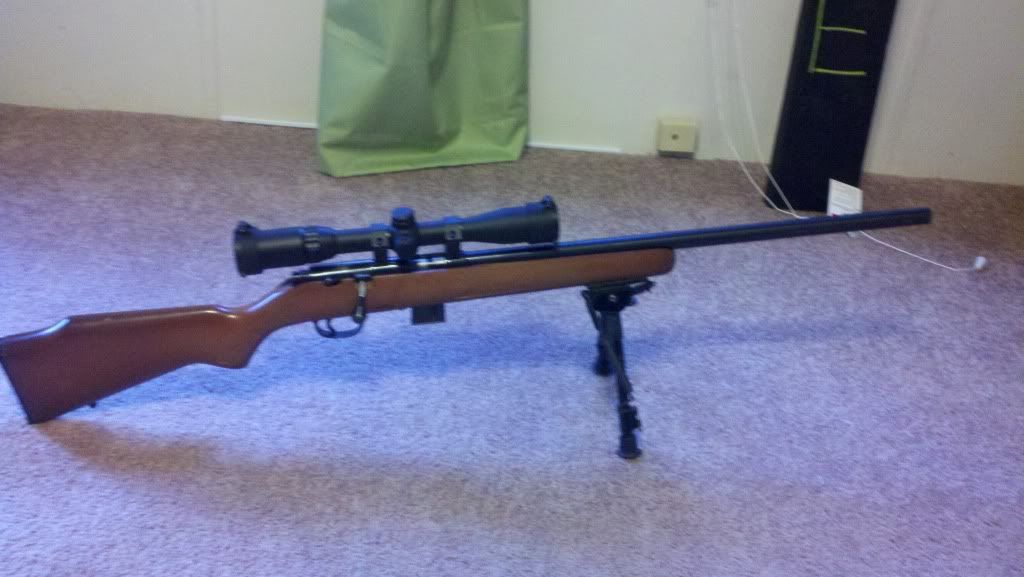
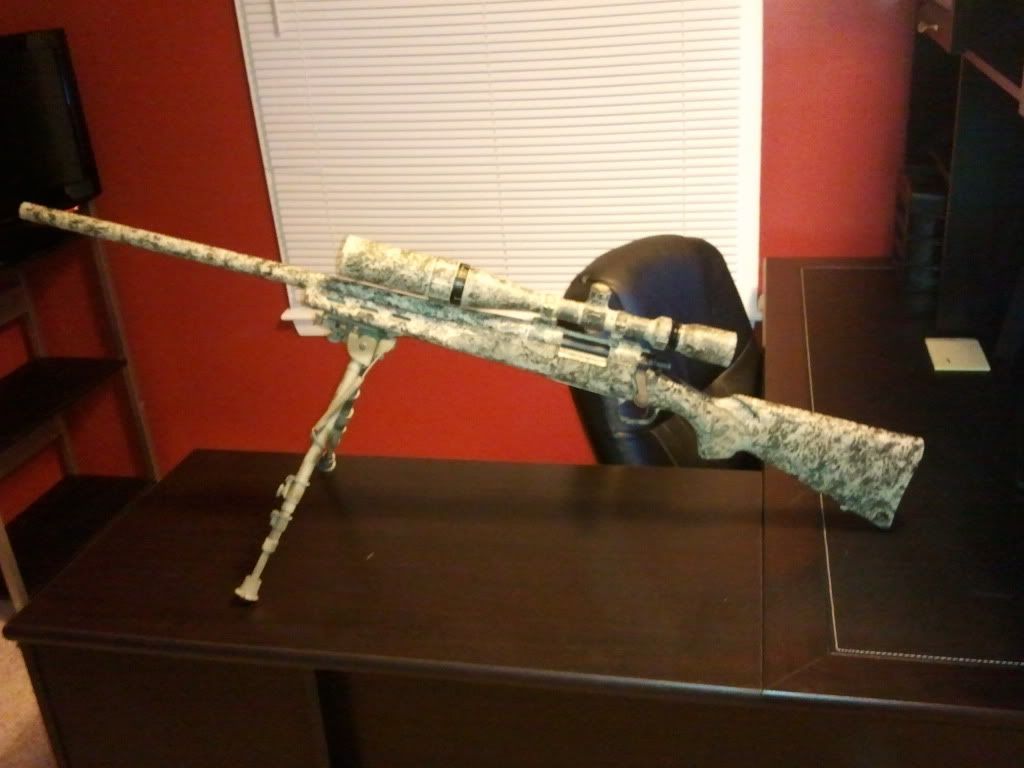
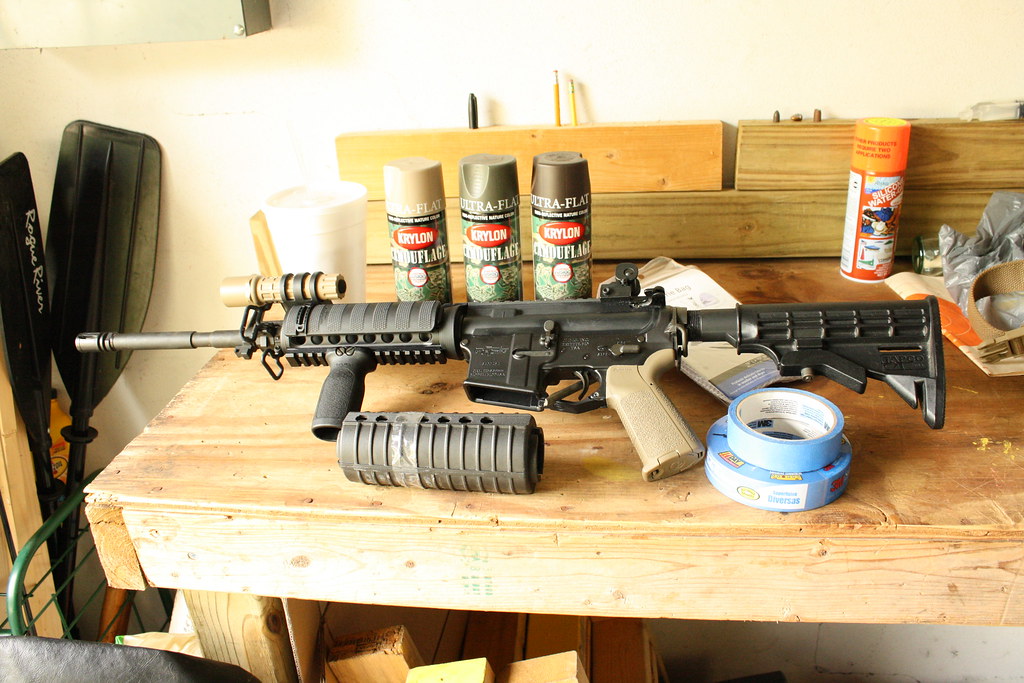
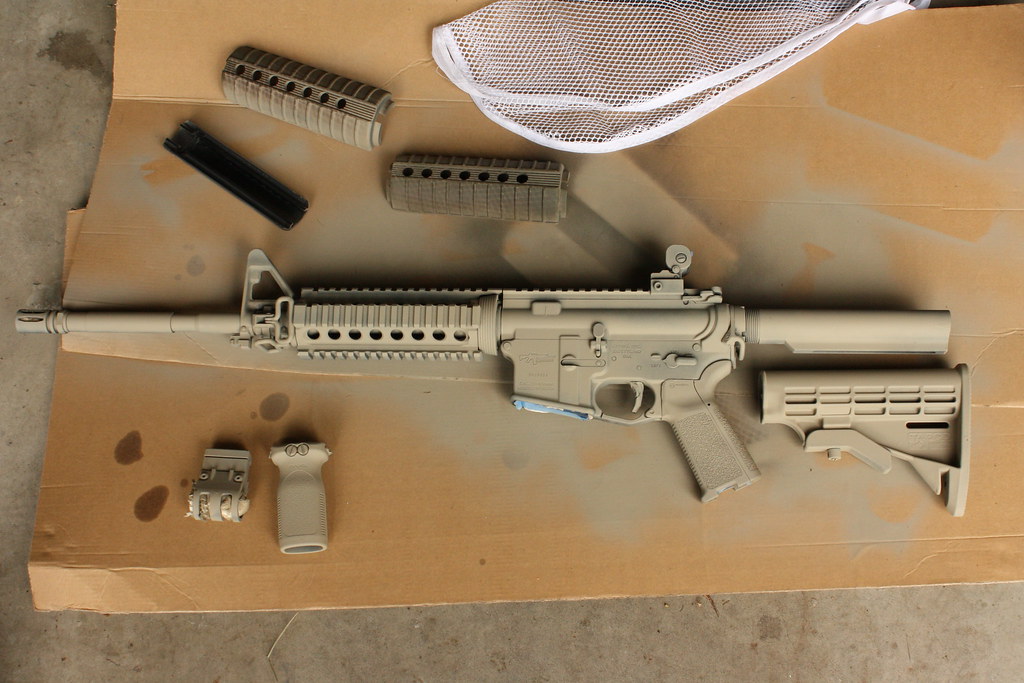
<span style="font-weight: bold">This is what my rifle started out looking like:</span>

5613964587_4f15ee471e_b.jpg


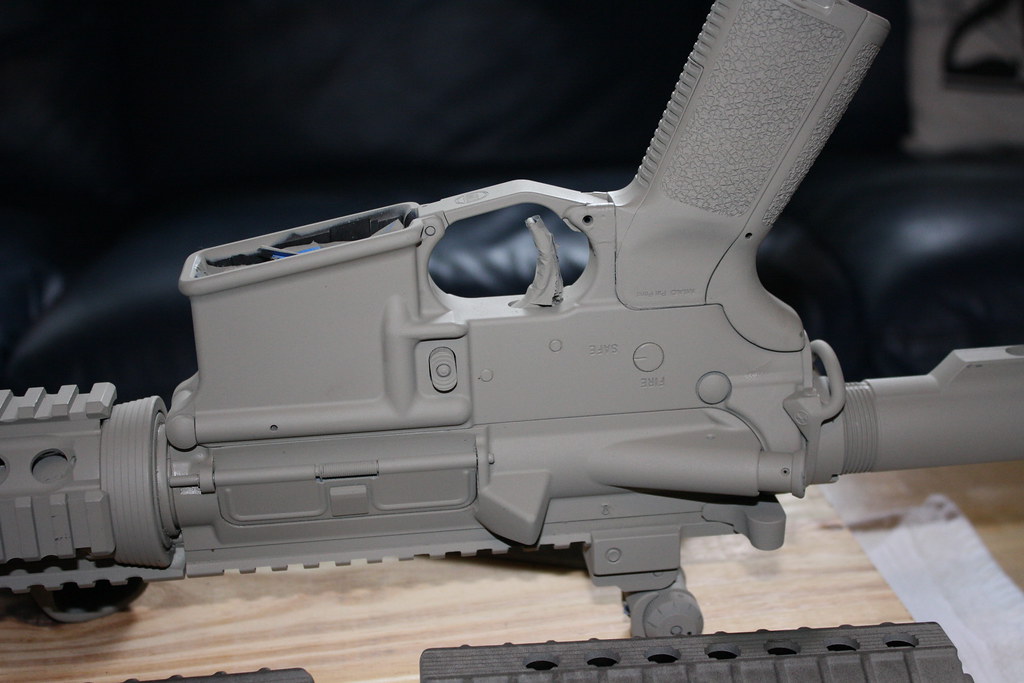
<span style="font-weight: bold">I sprayed it with brake cleaner and hung it in front of a couple fans for about two hours to dry out. Wiped it down, made sure it was clean.

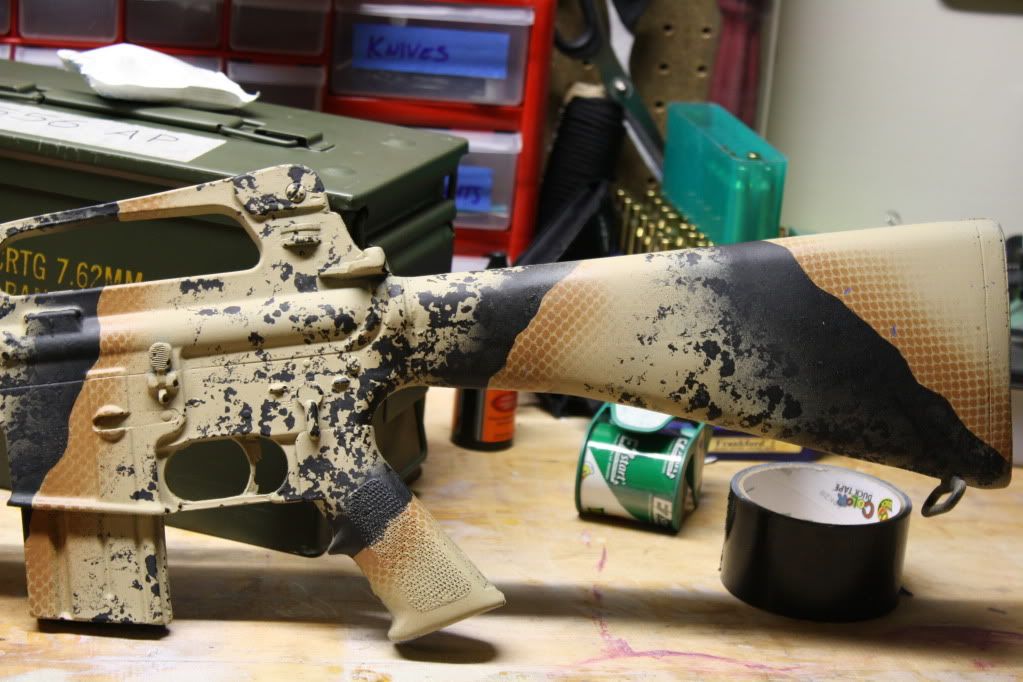
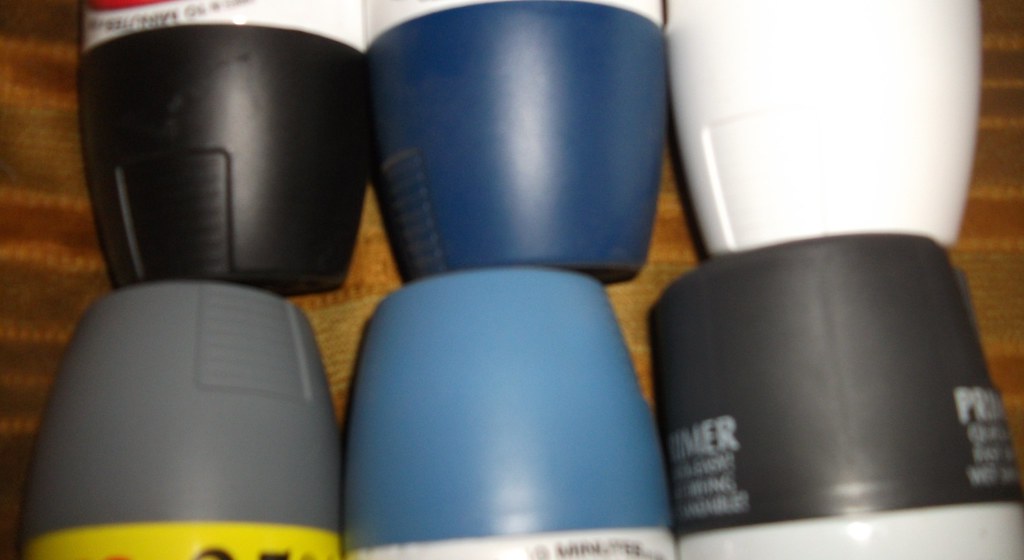
I taped off the front sight post, rear sight, trigger, and stuffed some paper towels in the flash hider, mag well, and lower/upper receivers just in case the paint seeped through somehow. First coat was base khaki:</span>

5614545906_db69d470ed_b.jpg


<span style="font-weight: bold">Let it dry overnight:</span>

5614548614_618489d5ee_b.jpg


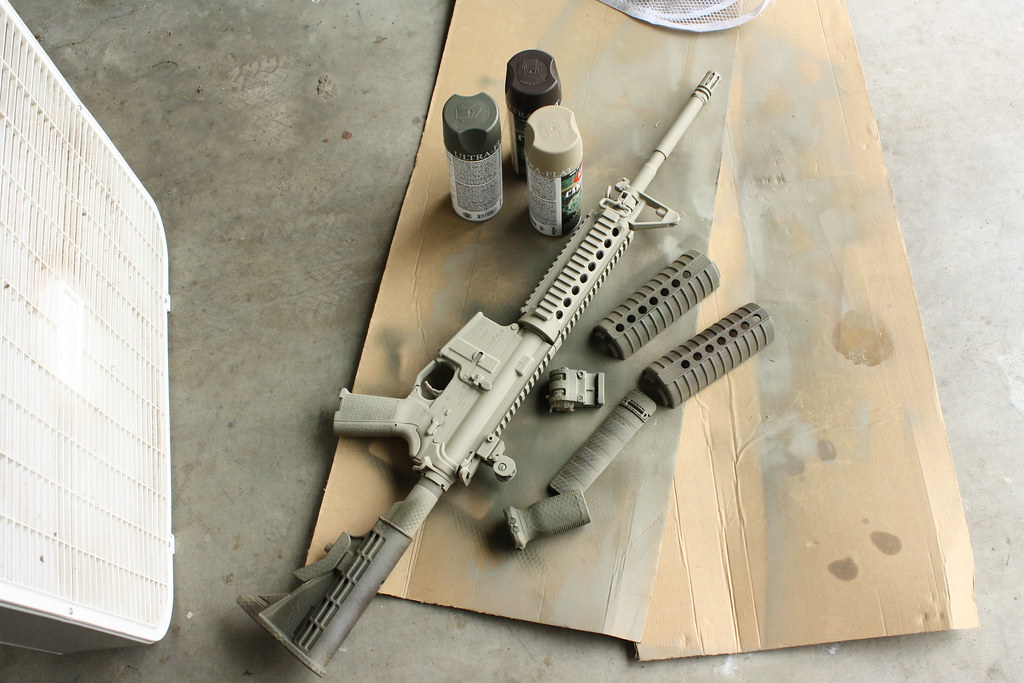
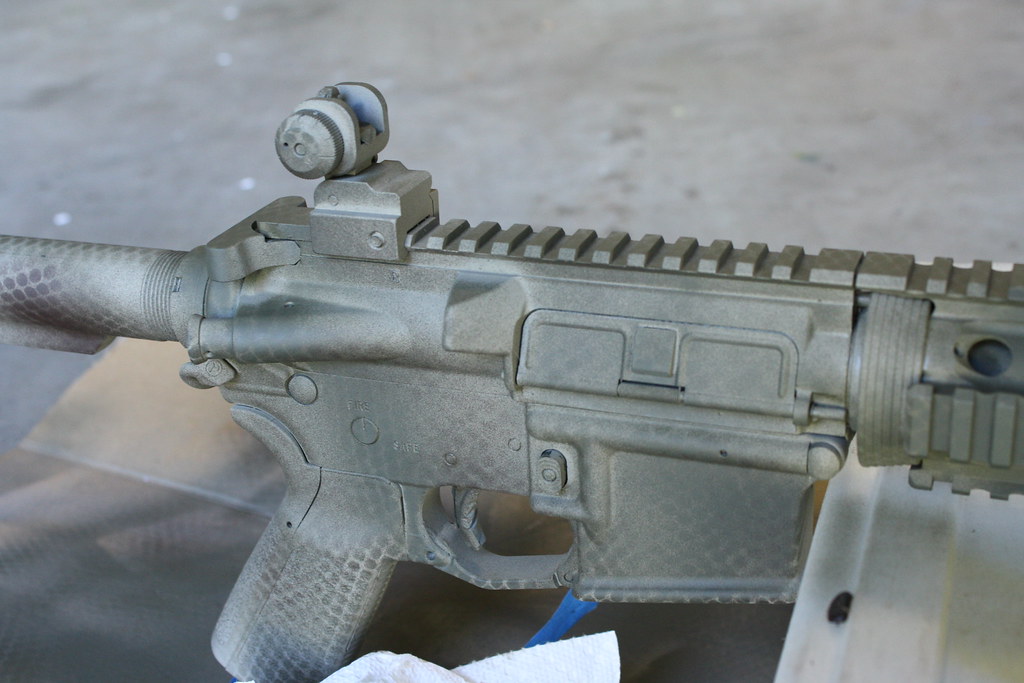
<span style="font-weight: bold">Next morning, came out and did the green and a light coat of brown over the entire rifle using the laundry bag netting seen in the last picture:</span>

5613967555_a472b536c0_b.jpg


5616326345_64650aae0e_b.jpg


5616292615_ac317f4455_b.jpg


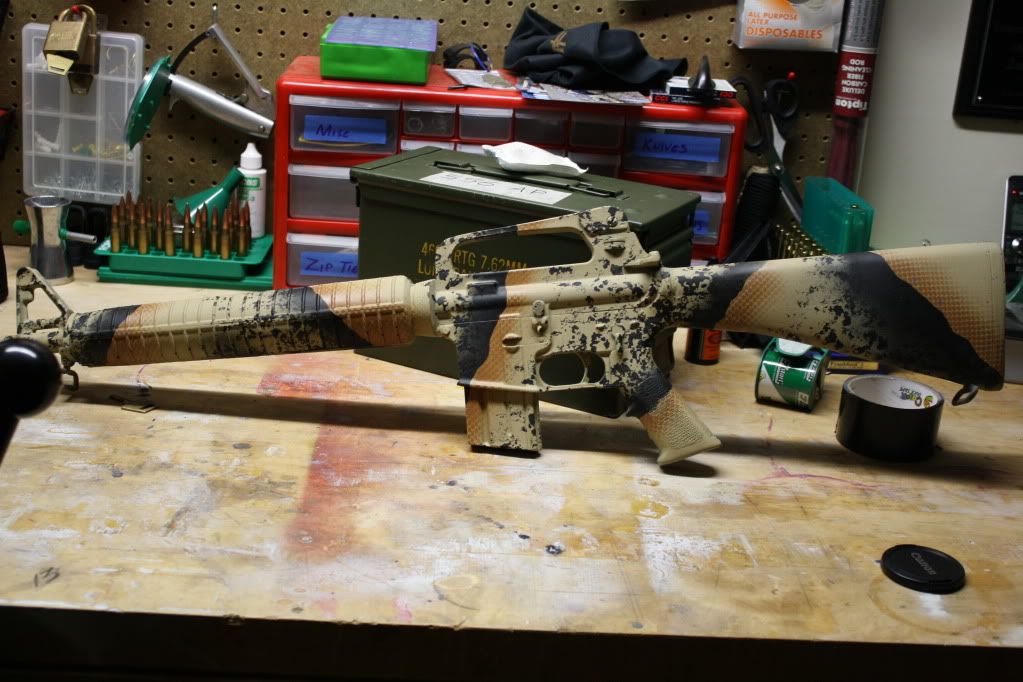
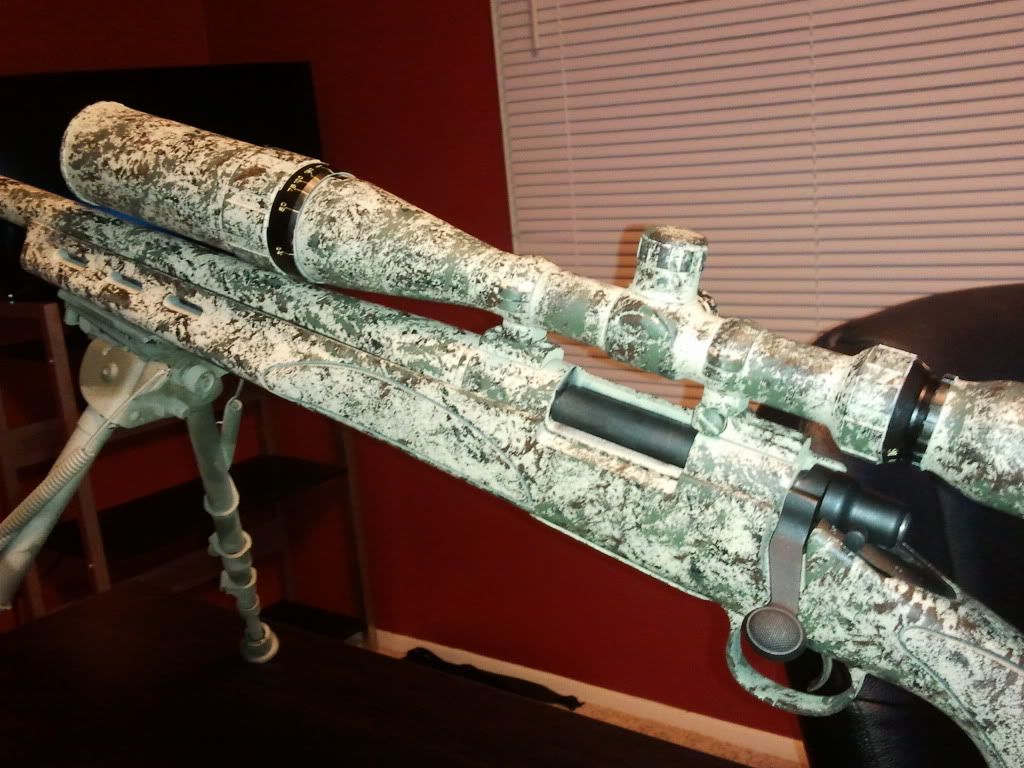
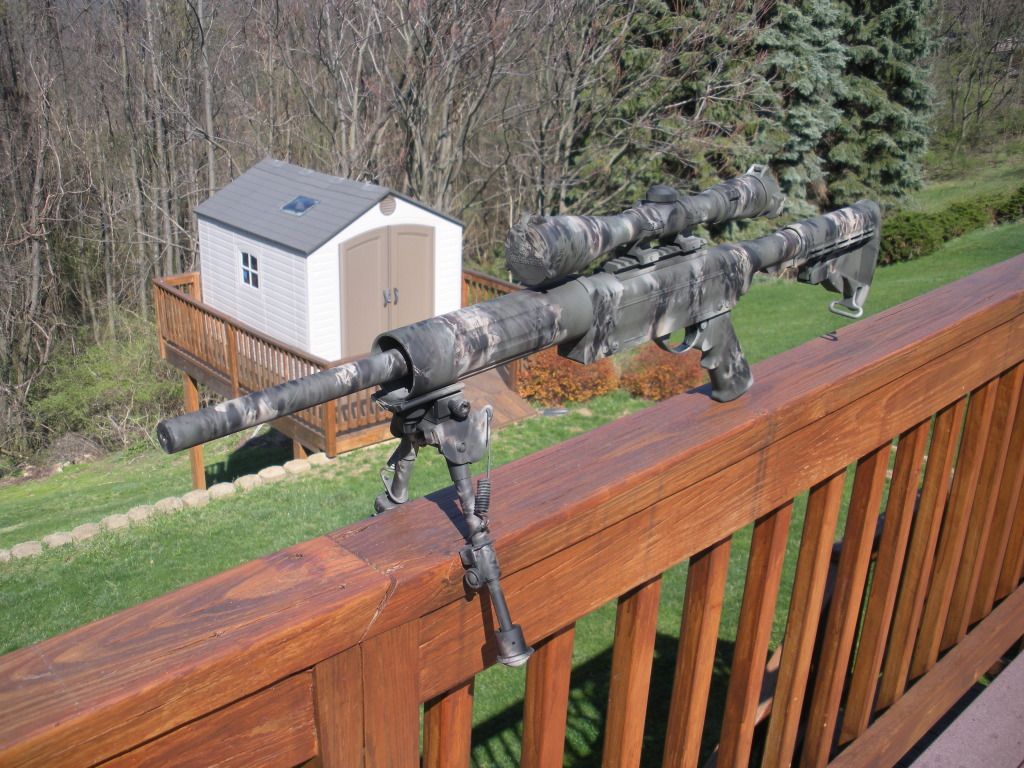
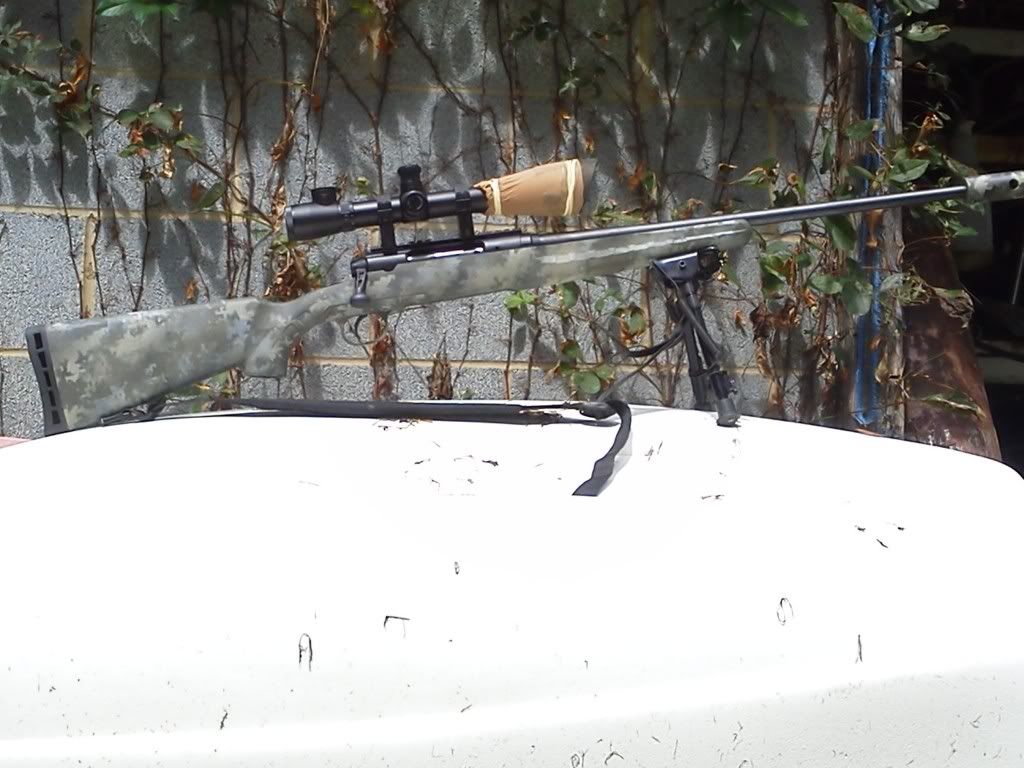
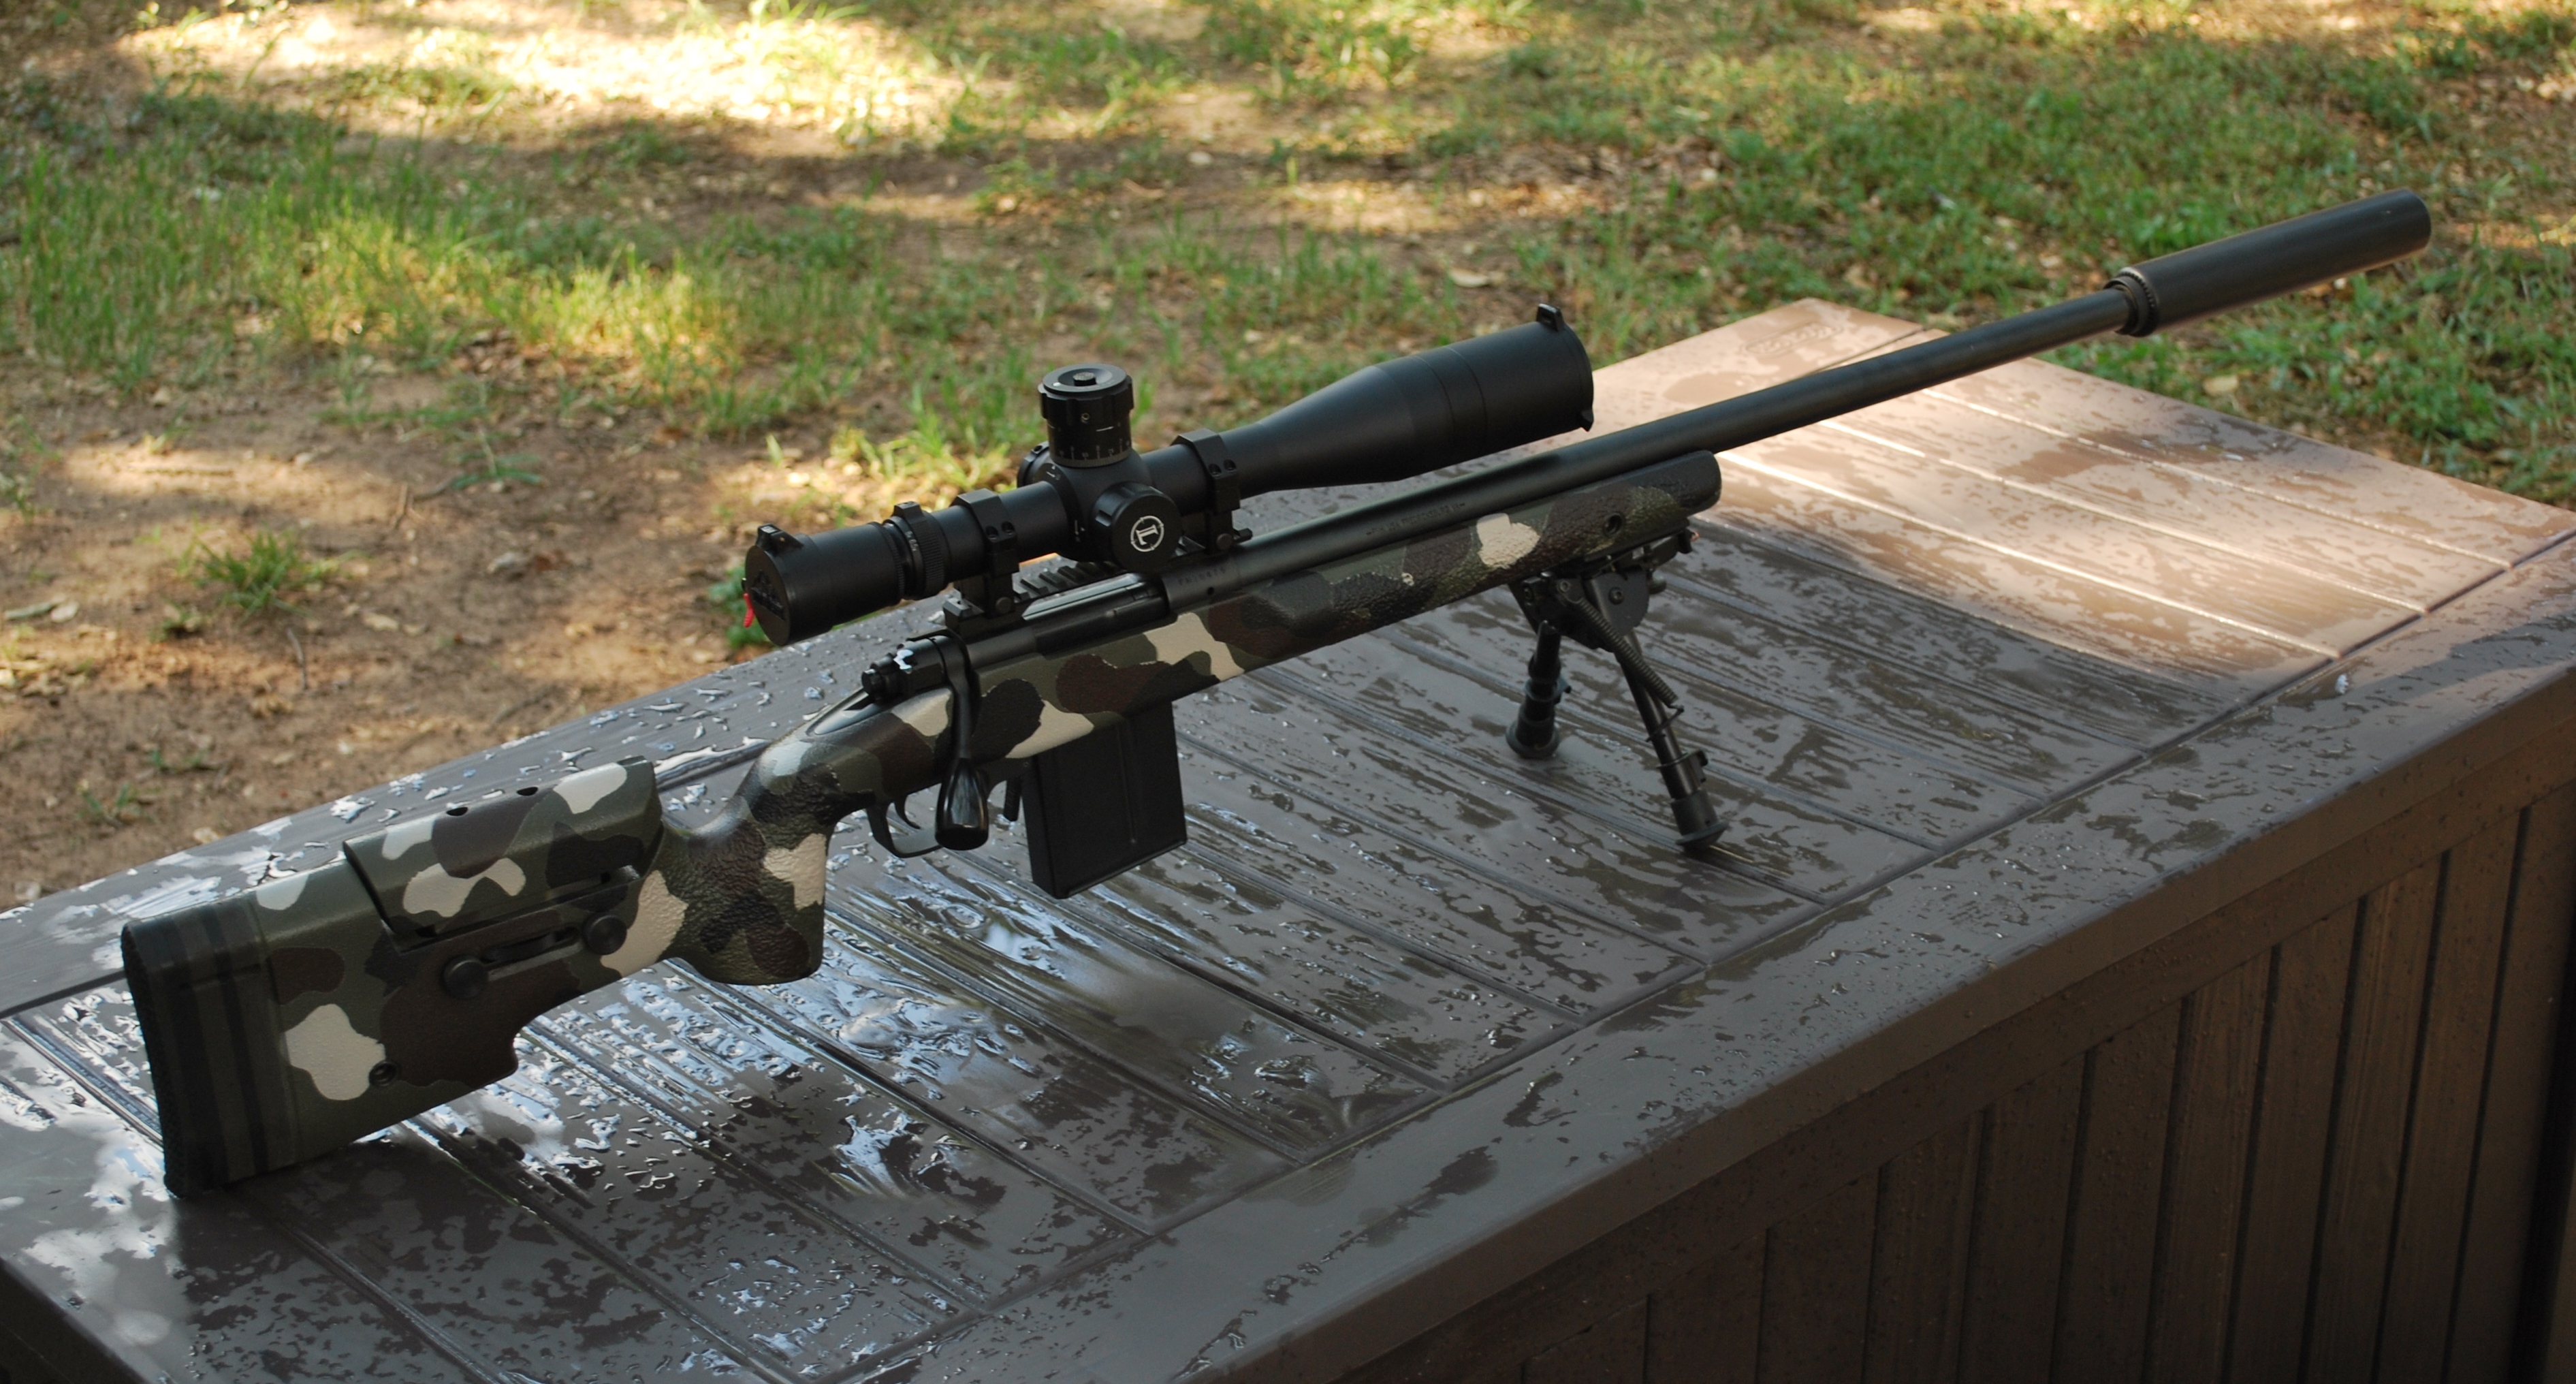
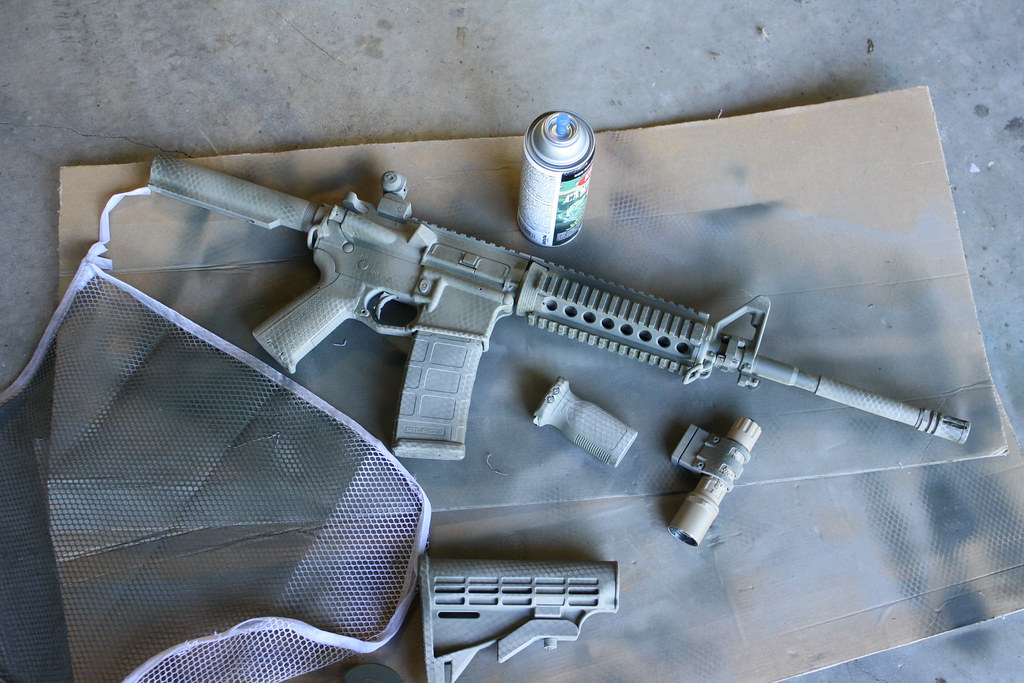
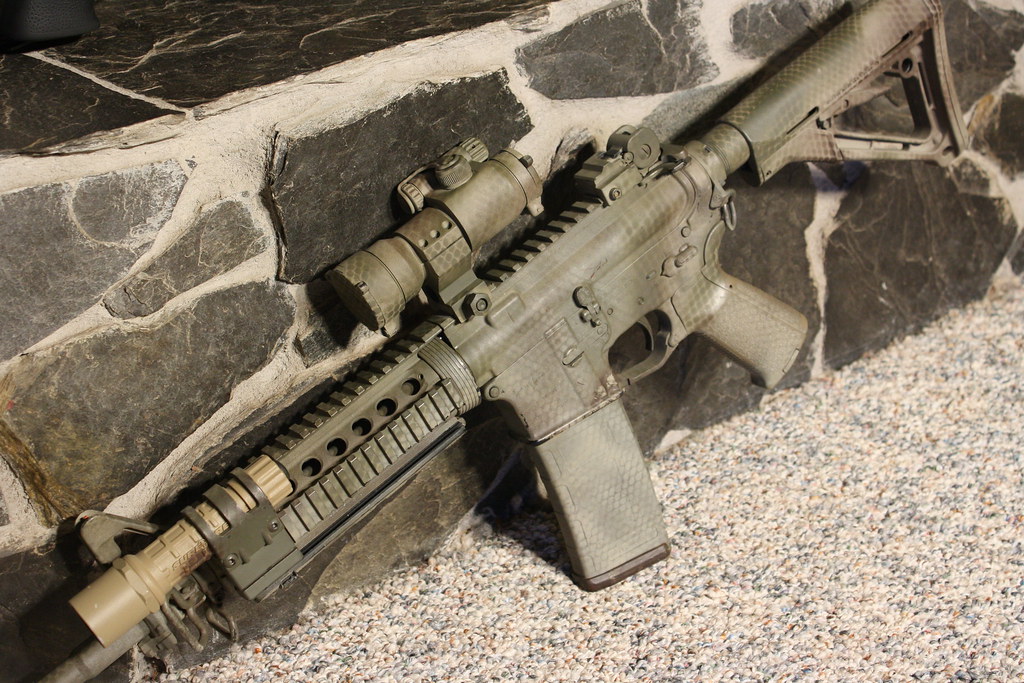
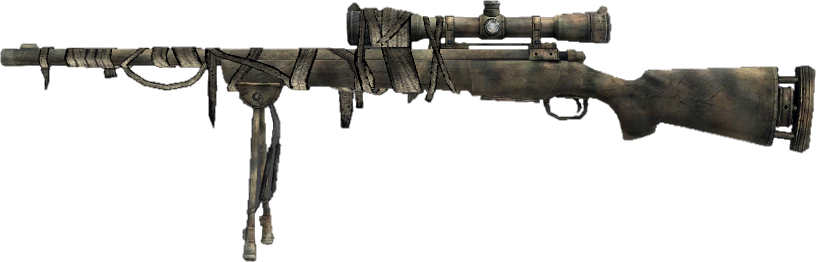
<span style="font-weight: bold">Added some more brown, got a new stock and Aimpoint so I painted them up as well. Finished product:</span>

7544473390_3082d76df2_b.jpg


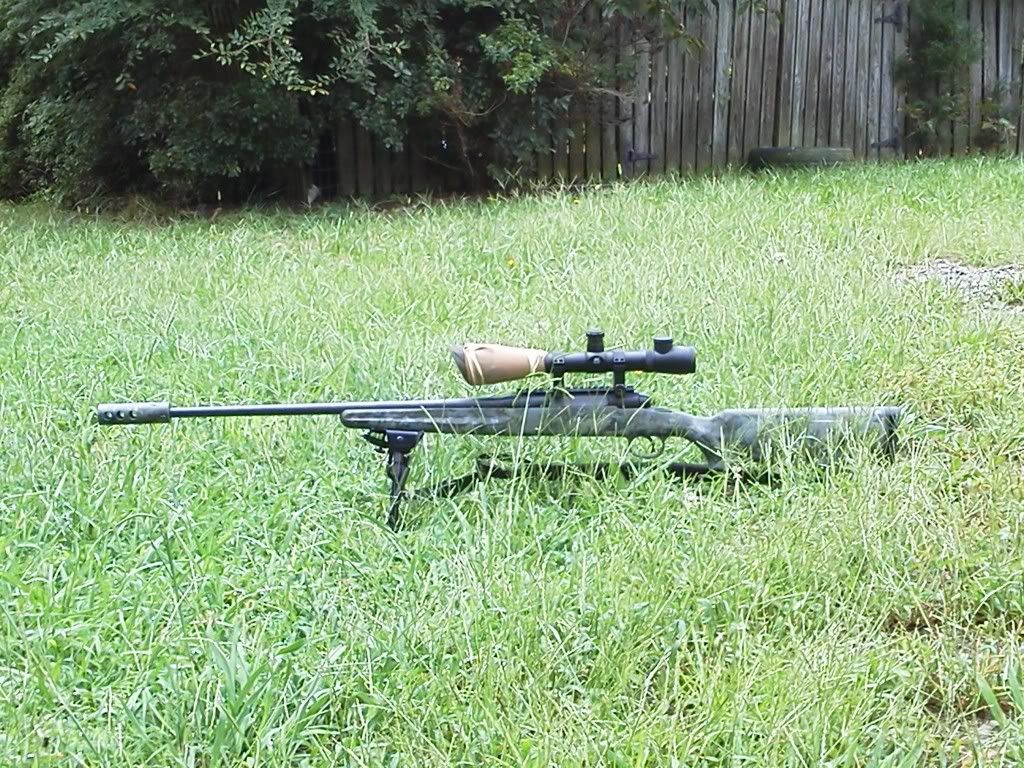
<span style="font-weight: bold">Now with less flash:</span>

7544515924_622bff1283_b.jpg


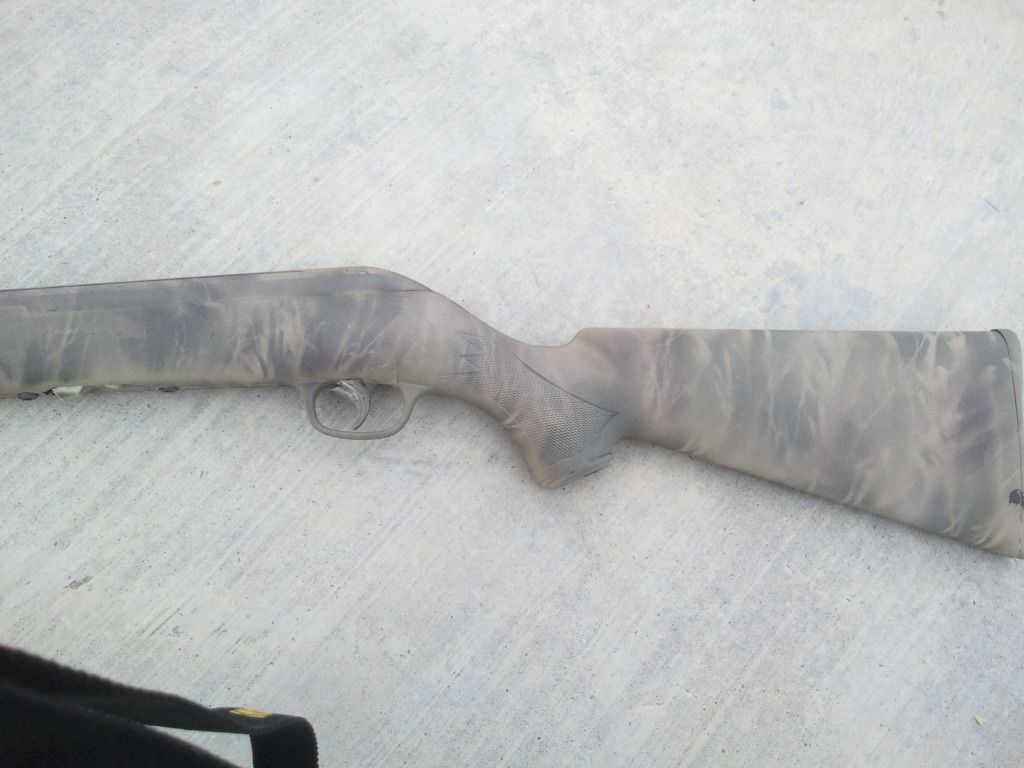
Depending on the lighting, the brightness of the paint job either increases or decreases. It didn't take very long (three days total, with drying time) because I left it in front of multiple fans after every coat of paint to help it dry faster and more evenly. The edges are starting to get worn and chipped a little as you can tell in the second to last picture, but it has held up great so far.


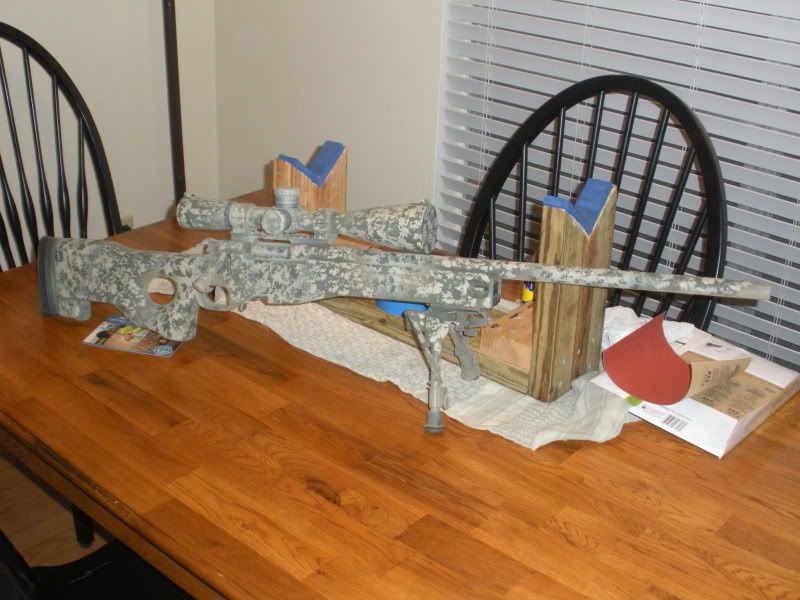
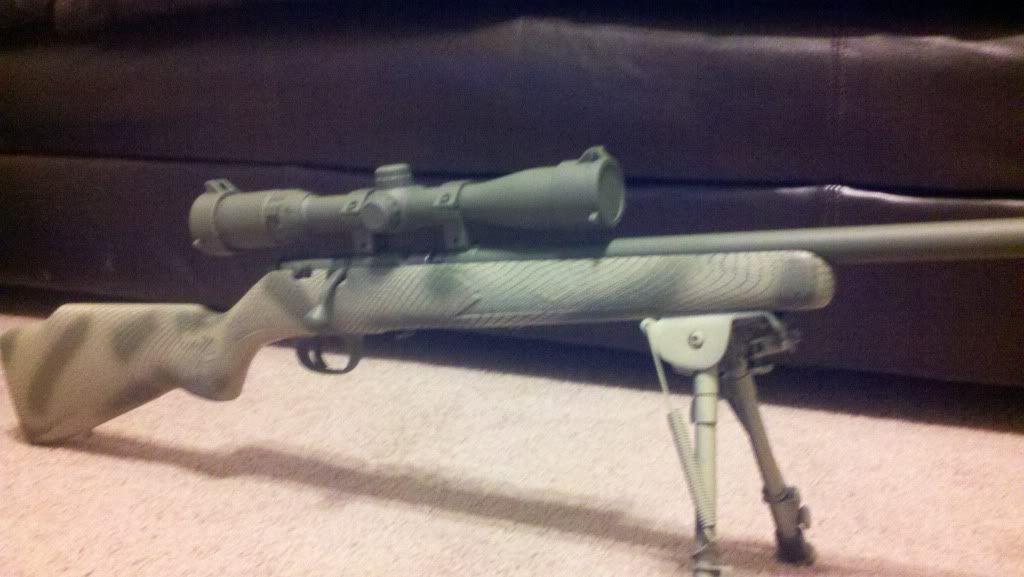
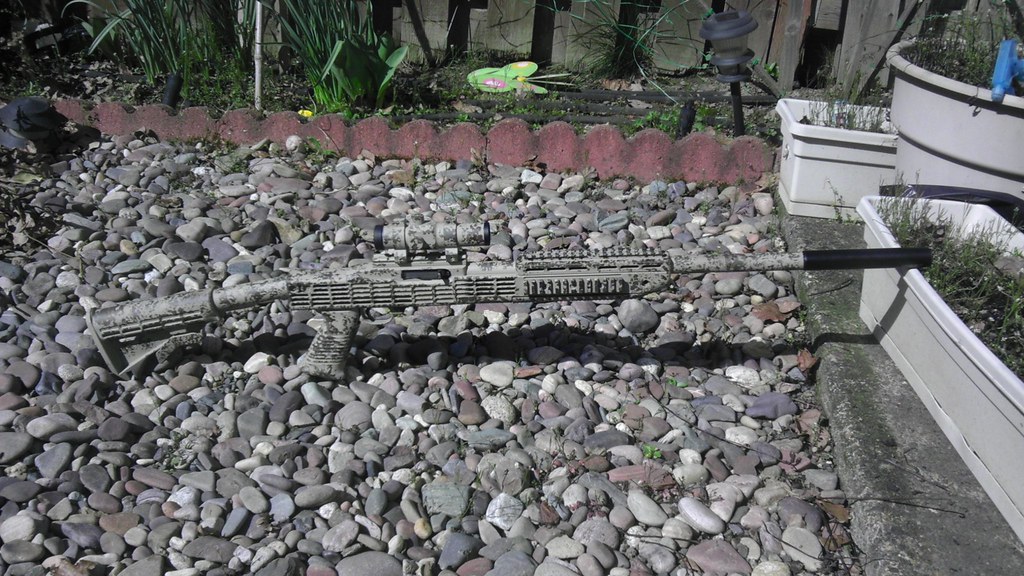
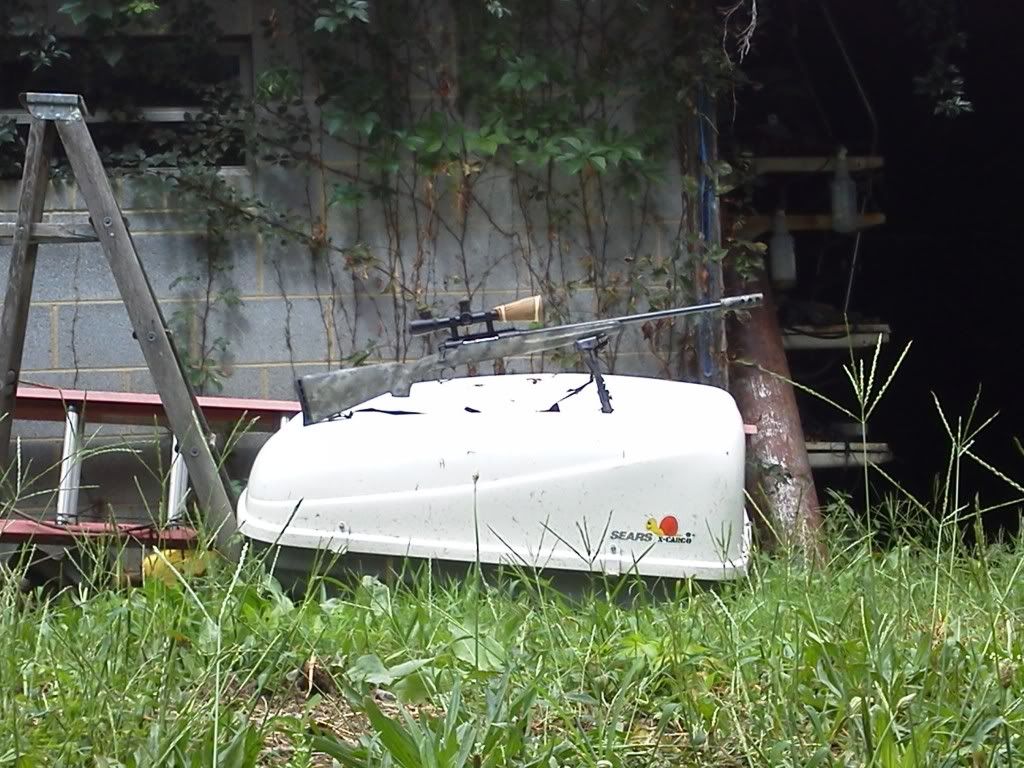
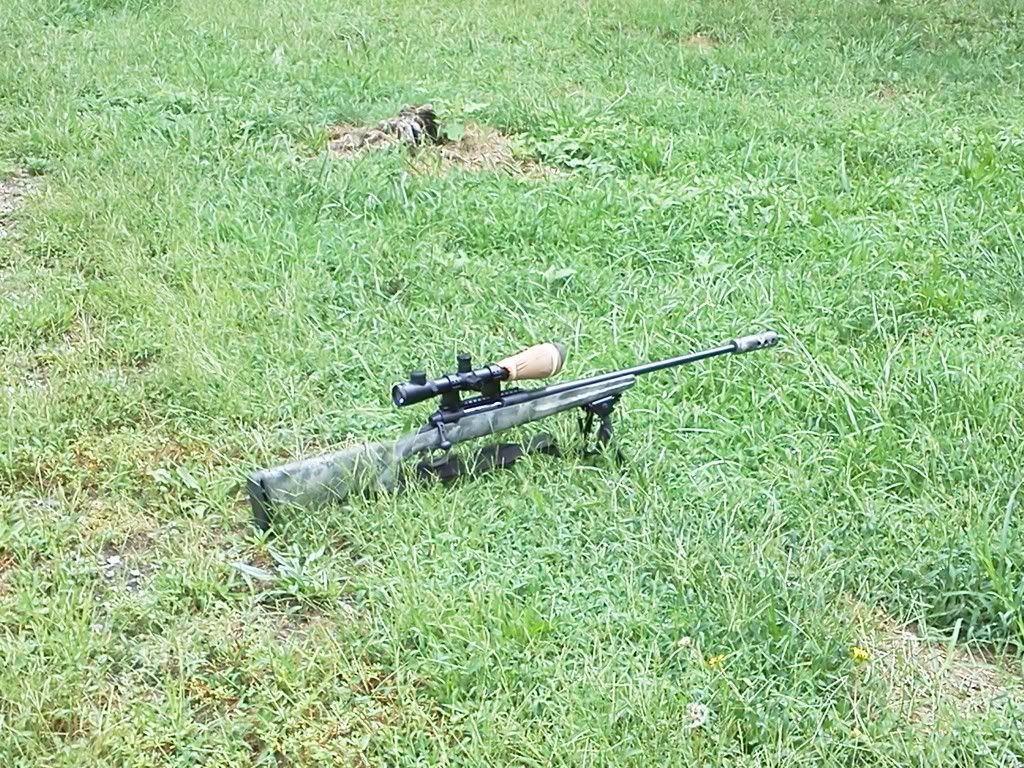
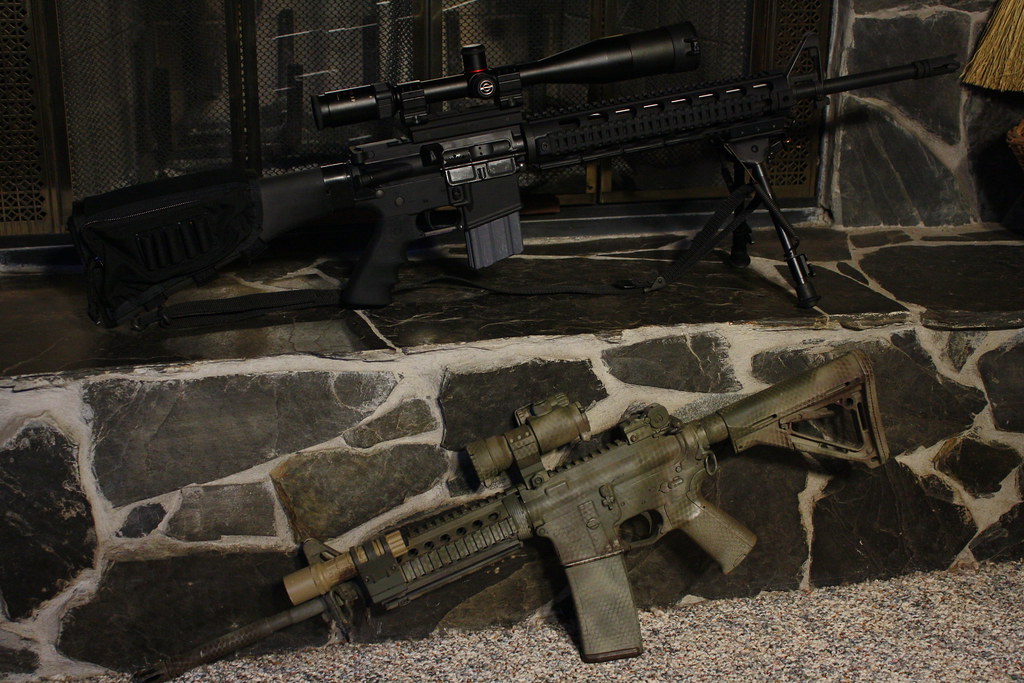
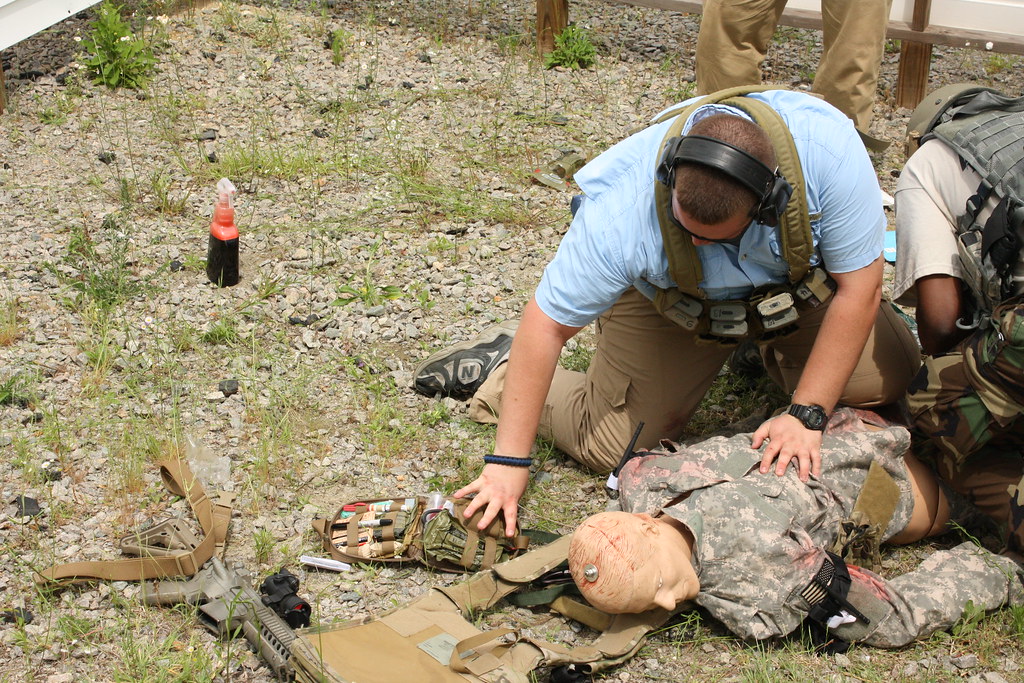
<span style="font-weight: bold">Before I painted the Aimpoint and the stock, this is how it looked compared to gravel on a range I took North American Rescue's 2-day medical class at (great class by the way):</span>

7165856786_1ddf174d3e_b.jpg
 
Re: Rifle Painting Tutorial

This thread has been great. So much info and ideas. It will definitely help when o go to spraying my gun. Thanks all!!
 
Re: Rifle Painting Tutorial

What method of prep is good for painting a Rem 5R stainless barrel and action? I know that paint doesn't like to stick to stainless steel. Has anyone used self-etching primer? What brand is a good choice?
 
Re: Rifle Painting Tutorial

I didn't take any pictures during the process but I used this tutorial as a guild and I would have to say it turned out quiet well. Let me get your feedback, please.


rifleandspotscope.jpg
 
Re: Rifle Painting Tutorial

You guys are inspirational on your paint jobs you've posted. I recently traded for a rifle and the more I look at it the less I scared of trying to paint it I'm getting. I'm starting to see where the bluing is rubbed thin and some of the already applied paint is coming off. I'll be posting pics soon I hope. I think I'm going to attempt a snake scale of some kind but am not certain yet. I live in South Texas so the Diamondback pattern keeps pulling me towards it. Hope to actually contribute something other than props on y'alls mad skills on my next post in here.
 
Re: Rifle Painting Tutorial

I have an M24 SWS and I wanted to paint the rifle like this:

m24_sniper.jpg

BF2_M24_Model.png


What base colors would I need? Im going to use krylon. And Im watching this thread for excellent advise.
 
Re: Rifle Painting Tutorial

Thx i will. However, i just wonder what color to use for the base and the rest of the camo.
 
Re: Rifle Painting Tutorial

Has anyone tried the Krylon Matting paint? Its a pray on clear that mattes down the color so its not as glossy?
 
Re: Rifle Painting Tutorial

<div class="ubbcode-block"><div class="ubbcode-header">Originally Posted By: n2rockets</div><div class="ubbcode-body">Has anyone tried the Krylon Matting paint? Its a pray on clear that mattes down the color so its not as glossy?</div></div> <div class="ubbcode-block"><div class="ubbcode-header">Originally Posted By: n2rockets</div><div class="ubbcode-body">Has anyone tried the Krylon Matting paint? Its a pray on clear that mattes down the color so its not as glossy?</div></div>
I have only used the Krylon matte clear, but it was ovr the flt camo colors.