I realize this is a sniper type forum....but I thought with the expertise here individuals here could help with my question on Zeroing. I am NEW at this so please bear with me if my question's seem ignorant.
I have been reading over the past two months about zeroing and proper zeroing. It seems that most pieces I read discuss a couple things. First, the purpose of the rifle...how it is expected to be used or might be used. Second, that each zeroing scheme has its place and purpose. Third, there is NO perfect zero, each is specific to the needs of the shooter. Fourth, regardless of the zero use, the number one factor will be the skill of the shooter. And...well...tons of other good pieces.
At any rate, I am looking to figure out what zero might be best for the following.
AR15 w/16" barrel....223Wylde
Eotec HWS EXPS GRN Optic
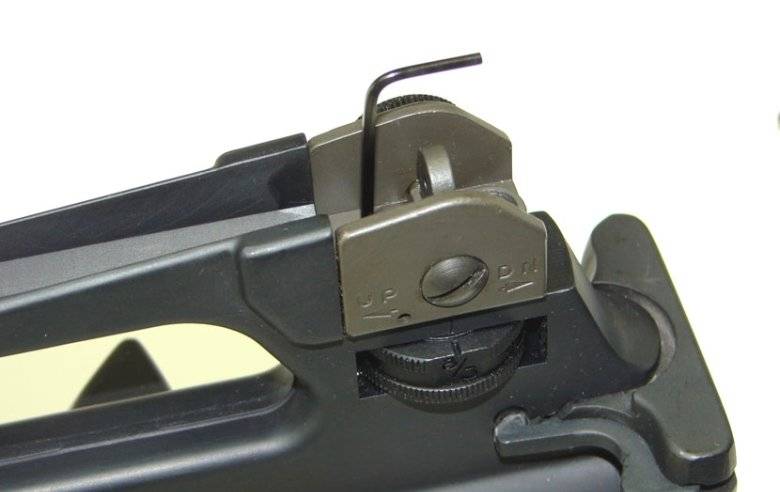
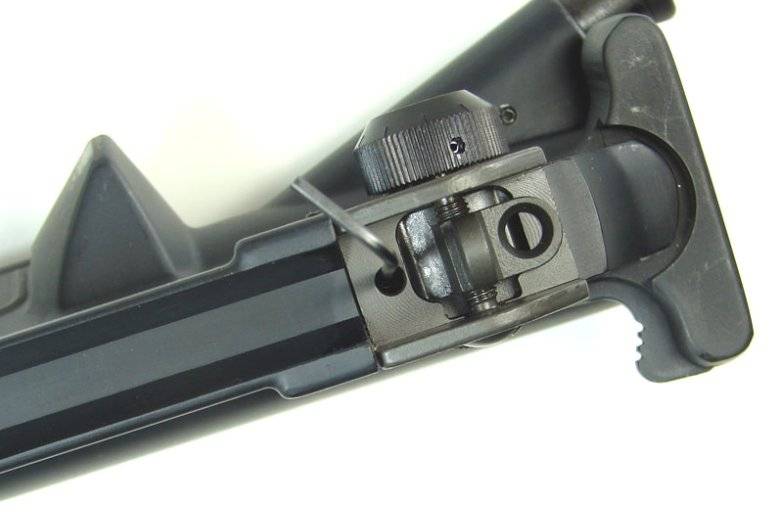
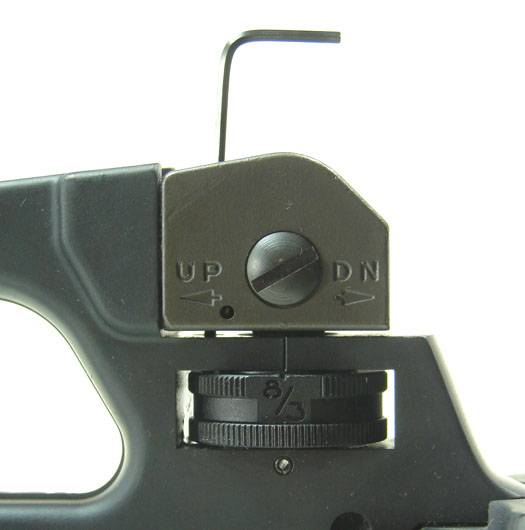
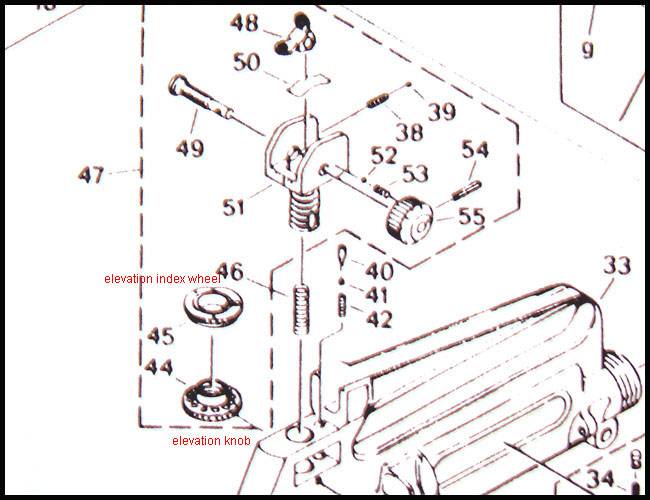
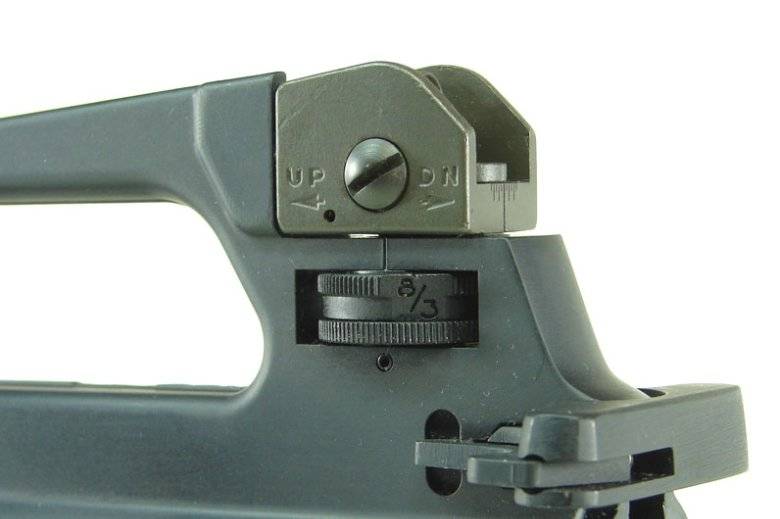
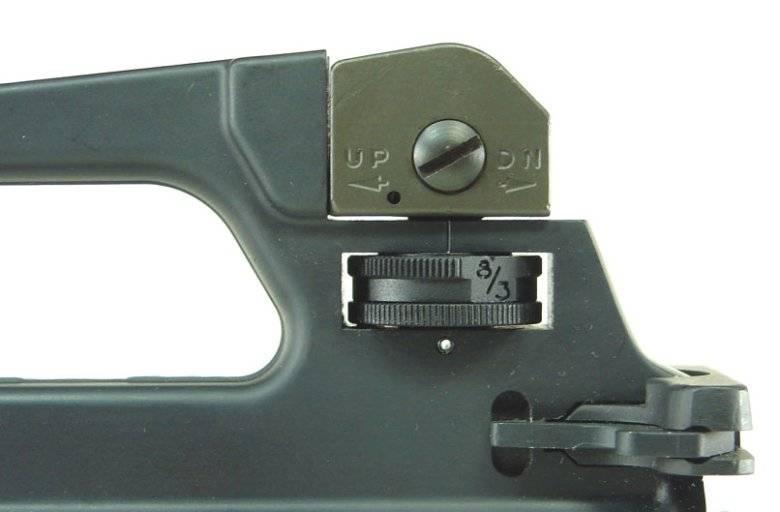
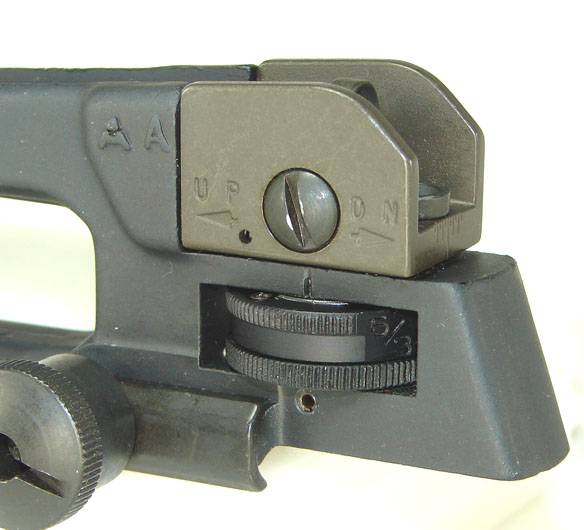
Troy Industries Iron Flip Up back up sights for co-witness (through 1/3 bottom of Eotech)
Green Laser - mounted under barrel
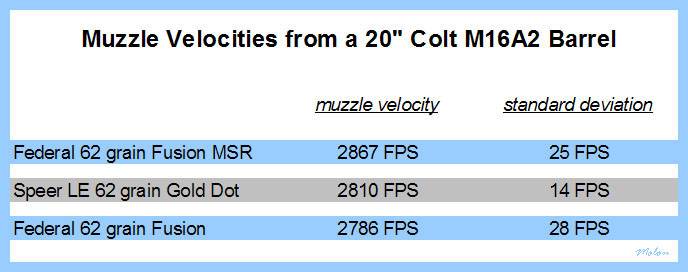
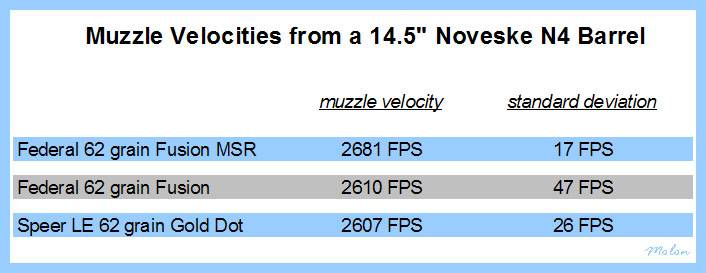
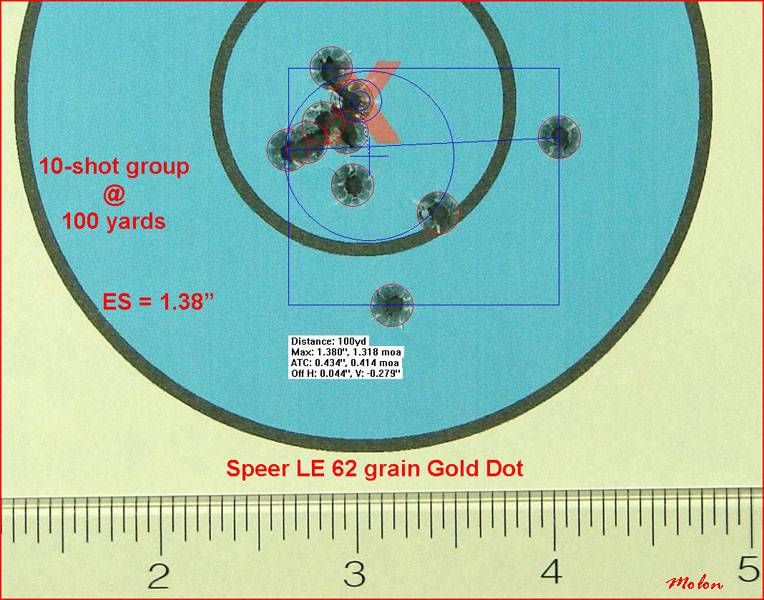
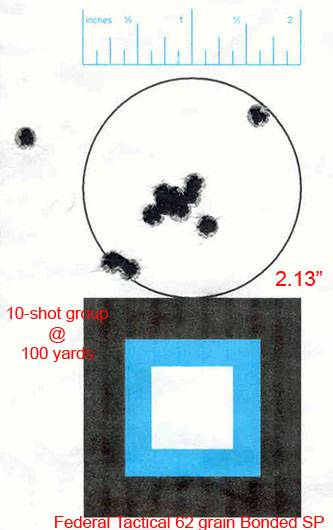
Ammo: Likely Speer Gold Dot LE Duty .223 Rem 62grn SP (or the like, for self defense with accuracy, suggestions welcome)
Purpose of the rifle: Mainly Self Defense, but also target shooting out to, say, 100+ yards. Would love to target shoot farther, but without a magnifier, or a scope, and the increase in deviations outside of the main purpose of the rifle forcing more holdover/holdunder I don't think that is likely.
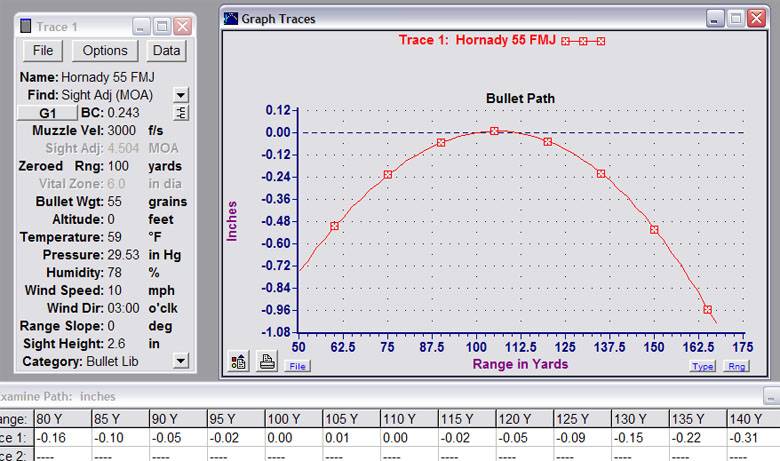
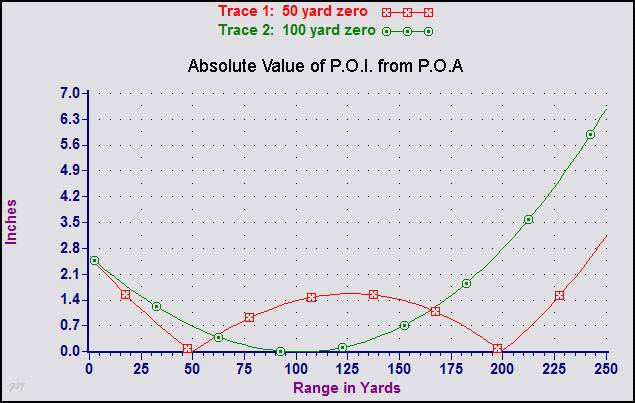
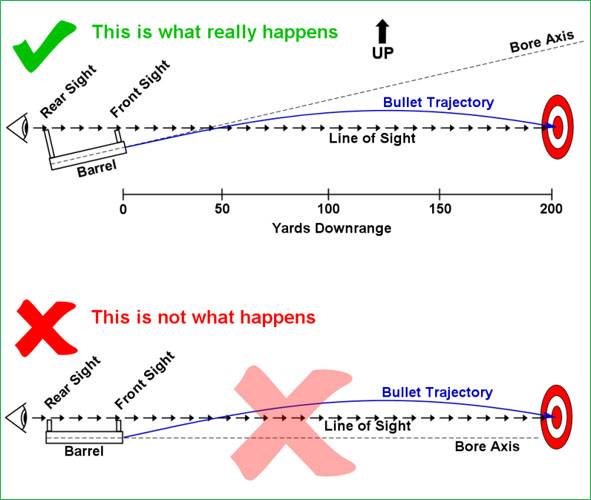
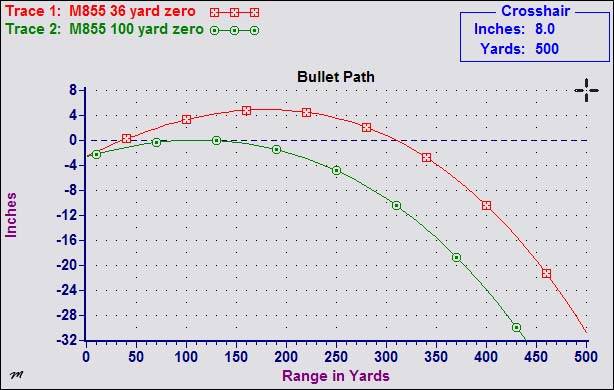
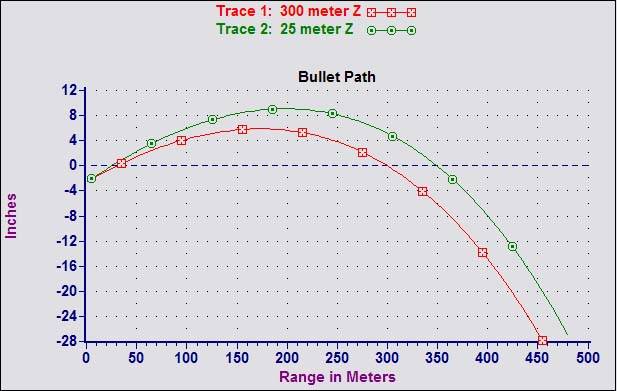
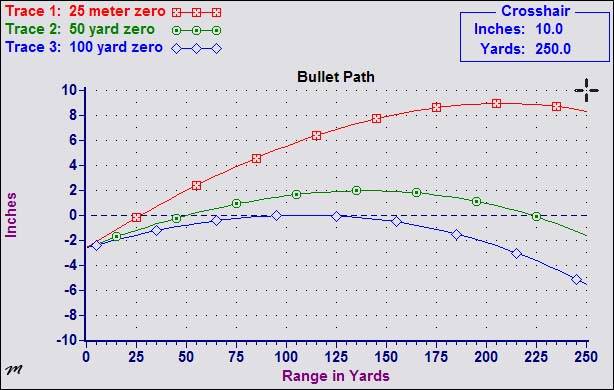
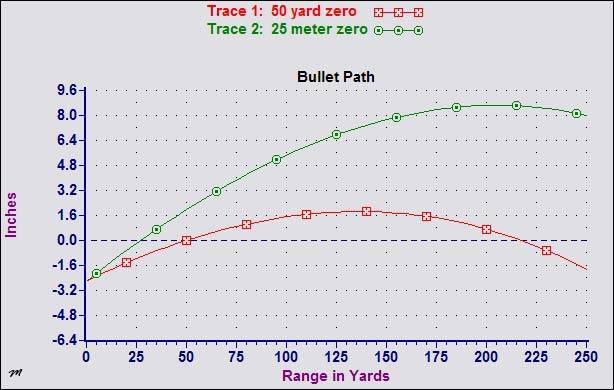
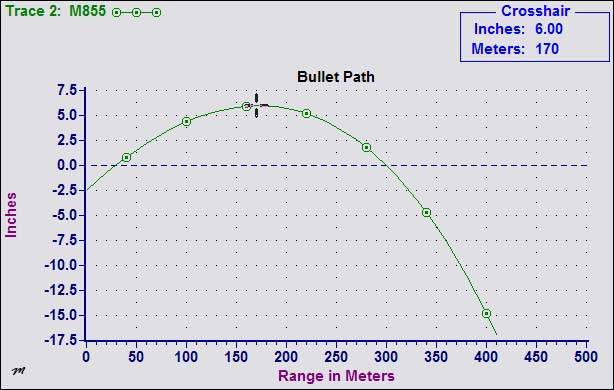
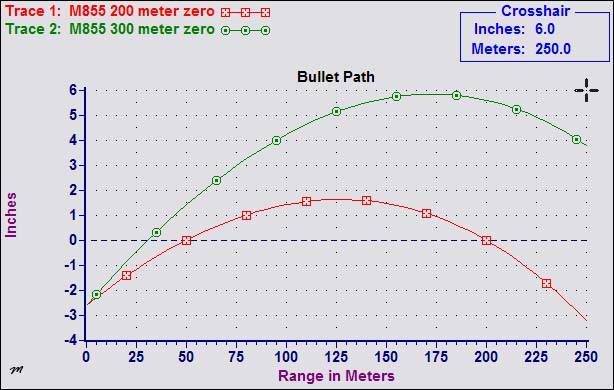
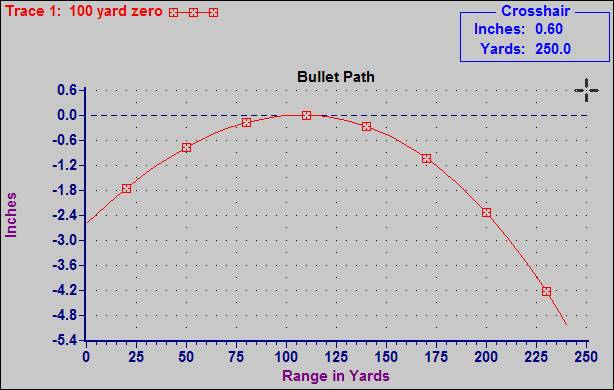
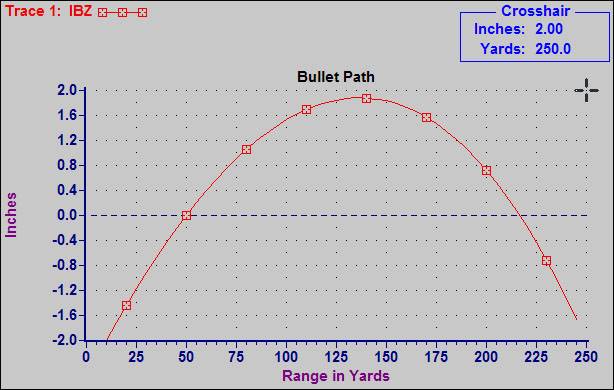
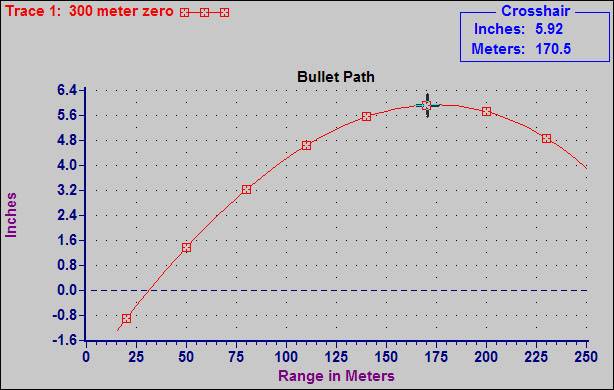
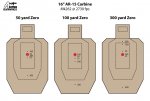
I am looking to use a 50 yard zero or the 100 yard zero. My goal is to have the narrowest ribbon of bullet rise and drop from....25yds out to approx. 100 or 120yds or so. I am hoping to use the bottom line of the Eotech reticle for targets from 0 to, say 10yds or so....from there I would like to simply point and shoot (putting the 1moa dot in the center of the reticle on target and pull the trigger, no hold over or under).
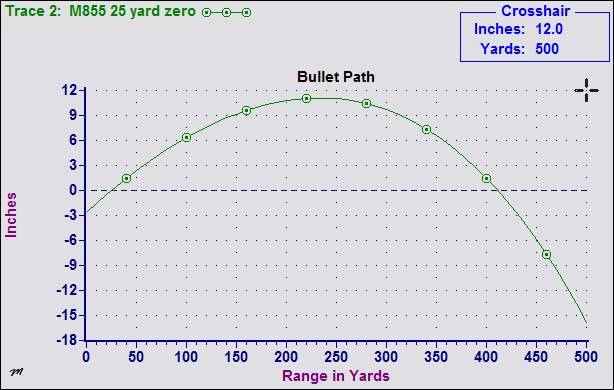
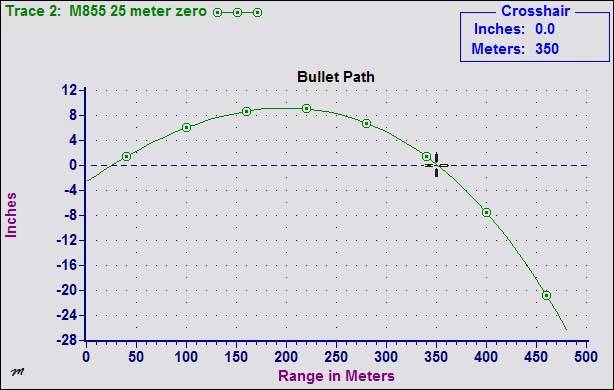
Is it even possible to have a zero which gives you only a 2" deviation, 1" up or down from center, to 100 yards? Could anyone give me approximations of the 50 yard Zero bullet path deviation at 25yds, 75yds, 100yds, and 150yds...and where that second Zero MIGHT be (about 200+yds???)?
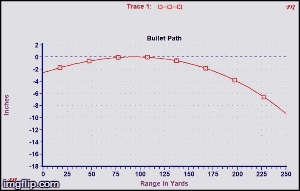
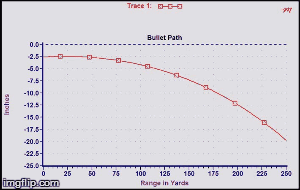
And the approximations of the 100 yard Zero bullet path deviation at 25yds, 50yds, 75yds, and 150yds? I believe, from what I've read that the 100yd zero would simply drop after about 110yds, requiring only a hold over beyond that point.
Ok...I know enough, I think, to write what I wrote above, based on reading only. BUT not enough to use the readily available calculators to find all of this. My expertise is with handguns...not rifles.
Thanks for any helpful info!!!
Best,
KM1
I have been reading over the past two months about zeroing and proper zeroing. It seems that most pieces I read discuss a couple things. First, the purpose of the rifle...how it is expected to be used or might be used. Second, that each zeroing scheme has its place and purpose. Third, there is NO perfect zero, each is specific to the needs of the shooter. Fourth, regardless of the zero use, the number one factor will be the skill of the shooter. And...well...tons of other good pieces.
At any rate, I am looking to figure out what zero might be best for the following.
AR15 w/16" barrel....223Wylde
Eotec HWS EXPS GRN Optic
Troy Industries Iron Flip Up back up sights for co-witness (through 1/3 bottom of Eotech)
Green Laser - mounted under barrel
Ammo: Likely Speer Gold Dot LE Duty .223 Rem 62grn SP (or the like, for self defense with accuracy, suggestions welcome)
Purpose of the rifle: Mainly Self Defense, but also target shooting out to, say, 100+ yards. Would love to target shoot farther, but without a magnifier, or a scope, and the increase in deviations outside of the main purpose of the rifle forcing more holdover/holdunder I don't think that is likely.
I am looking to use a 50 yard zero or the 100 yard zero. My goal is to have the narrowest ribbon of bullet rise and drop from....25yds out to approx. 100 or 120yds or so. I am hoping to use the bottom line of the Eotech reticle for targets from 0 to, say 10yds or so....from there I would like to simply point and shoot (putting the 1moa dot in the center of the reticle on target and pull the trigger, no hold over or under).
Is it even possible to have a zero which gives you only a 2" deviation, 1" up or down from center, to 100 yards? Could anyone give me approximations of the 50 yard Zero bullet path deviation at 25yds, 75yds, 100yds, and 150yds...and where that second Zero MIGHT be (about 200+yds???)?
And the approximations of the 100 yard Zero bullet path deviation at 25yds, 50yds, 75yds, and 150yds? I believe, from what I've read that the 100yd zero would simply drop after about 110yds, requiring only a hold over beyond that point.
Ok...I know enough, I think, to write what I wrote above, based on reading only. BUT not enough to use the readily available calculators to find all of this. My expertise is with handguns...not rifles.
Thanks for any helpful info!!!
Best,
KM1
Last edited: