• Frank's Lesson's Contest

    We want to see your skills! Post a video between now and November 1st showing what you've learned from Frank's lessons and 3 people will be selected to win a free shirt. Good luck everyone!

    Create a channel Learn more
  • Having trouble using the site?

    Contact support

Night Vision New Armasight Units (Sidekick and Jockey 640s)

The big reality about thermal images that people (especially new thermal users) have to truly understand are this.

1. Emissivity conditions are always changing. Sometimes slowly, sometimes fast.
2. You need a device that allows you to change a large range of settings to get the best image.
3. You need to spend a good bit of time learning your adjustment features and how they affect your particular unit in given emissivity conditions.
4. You will typically get great images when emissivity conditions are good. When thermal conditions are poor, even the best devices struggle to produce a decent image.
5. There are no one and done (plug & play) settings that will "always" produce the best image.
6. Good content creators on Youtube and other platforms whom understand thermal devices very well, will typically cherry pick thermal conditions that are great for producing great thermal images. This shows what the particular unit is capable of.
7. For me personally, I do not judge a thermal device on how good it produces an overall scene image during good thermal conditions. I judge a thermal device on how good it is at detecting a live critter in poor thermal conditions. Then I analyse the different Palette algorithms under varying conditions to see what "special" image features they bring to the table for quick contrast and detection by the human eye of live critters. Then I analyse what algorithm features it possesses for a sharper encapsulation of a live critters body for shooting purposes if the device is to be used as an aiming solution.
8. A good thermal will possess a Palette choice that has an algorithm written such as to devote most processing power to the live critter and somewhat ignore the "scenery" out there.

Takes a good bit of time, effort and "want to" to become knowledgeable and proficient with thermal devices and you never quit learning.
Makes total sense. I think along the same lines here.

I have 4 bonfires to burn on the property and may do it tomorrow night. I am looking forward to seeing how the new units perform to detect heat signatures like people and dogs while around the fires, i.e. can the unit still pick them out....
 
  • Like
Reactions: WhereNow&How
The big reality about thermal images that people (especially new thermal users) have to truly understand are this.

1. Emissivity conditions are always changing. Sometimes slowly, sometimes fast.
2. You need a device that allows you to change a large range of settings to get the best image.
3. You need to spend a good bit of time learning your adjustment features and how they affect your particular unit in given emissivity conditions.
4. You will typically get great images when emissivity conditions are good. When thermal conditions are poor, even the best devices struggle to produce a decent image.
5. There are no one and done (plug & play) settings that will "always" produce the best image.
6. Good content creators on Youtube and other platforms whom understand thermal devices very well, will typically cherry pick thermal conditions that are great for producing great thermal images. This shows what the particular unit is capable of.
7. For me personally, I do not judge a thermal device on how good it produces an overall scene image during good thermal conditions. I judge a thermal device on how good it is at detecting a live critter in poor thermal conditions. Then I analyse the different Palette algorithms under varying conditions to see what "special" image features they bring to the table for quick contrast and detection by the human eye of live critters. Then I analyse what algorithm features it possesses for a sharper encapsulation of a live critters body for shooting purposes if the device is to be used as an aiming solution.
8. A good thermal will possess a Palette choice that has an algorithm written such as to devote most processing power to the live critter and somewhat ignore the "scenery" out there.

Takes a good bit of time, effort and "want to" to become knowledgeable and proficient with thermal devices and you never quit learning.

As a new person, after watching lots of videos and such before I got into thermal and reading people's comments online, I think a lot of people are looking for something that looks as good as good night vision, or something else. I've seen some stuff that starts to blur the line for upwards of 15k but I think they forget what thermal is actually doing. You aren't seeing the actual thing, you are seeing a computer representation of different levels of heat from the thing. If you are using it to pick out living things, it doesn't really matter if it looks as good as your mark I eyeball, it matters that it is able to allow you to pick out something alive and possible what that thing is, person, dog, cat, bird. I've seen some video of SWIR and it gets even closer but I don't expect that for 3 grand and I mostly care that it does a good job of picking out things that are alive to the point where I can tell that it is in fact alive and at least vaguely what the thing is. I tried to do a lot of research to manage my expectations before hand. People want 15k thermal for 3k, there's no free lunch. If you want 15k thermal images, ya better start saving your pennies haha.
 
The big reality about thermal images that people (especially new thermal users) have to truly understand are this.

1. Emissivity conditions are always changing. Sometimes slowly, sometimes fast.
2. You need a device that allows you to change a large range of settings to get the best image.
3. You need to spend a good bit of time learning your adjustment features and how they affect your particular unit in given emissivity conditions.
4. You will typically get great images when emissivity conditions are good. When thermal conditions are poor, even the best devices struggle to produce a decent image.
5. There are no one and done (plug & play) settings that will "always" produce the best image.
6. Good content creators on Youtube and other platforms whom understand thermal devices very well, will typically cherry pick thermal conditions that are great for producing great thermal images. This shows what the particular unit is capable of.
7. For me personally, I do not judge a thermal device on how good it produces an overall scene image during good thermal conditions. I judge a thermal device on how good it is at detecting a live critter in poor thermal conditions. Then I analyse the different Palette algorithms under varying conditions to see what "special" image features they bring to the table for quick contrast and detection by the human eye of live critters. Then I analyse what algorithm features it possesses for a sharper encapsulation of a live critters body for shooting purposes if the device is to be used as an aiming solution.
8. A good thermal will possess a Palette choice that has an algorithm written such as to devote most processing power to the live critter and somewhat ignore the "scenery" out there.

Takes a good bit of time, effort and "want to" to become knowledgeable and proficient with thermal devices and you never quit learning.
Wow - I should've written this ! Great wording !! :)


I would put this into a context. There are 3 components to the thermal image you see thru a given device on a given night when looking at a given scene (yes, every device is different, every night is different and every scene is different)

01 - Operator experience with thermal
02 - Operator experience with THIS thermal (model that is - hopefully each instance of a model is the same !)
03 - The unit itself

In that priority order !


Unfortunately thermal image is not (yet) plug and play - it might be some day, but not yet. I have a fair amount of experience outside with thermal, since April 2014 and average 10 hours a week out there, usually minimum 1-2 hours per night. I tried to count all the thermals I've had/used, I can't even remember them all, I wrote them down last week and then later remembered 2 more. But its 60 ish ...

When I get a new thermal, I'm not starting from total scratch. I have a process to learn the new thermal. Run each of the "knobs" thru its full range - while leaving the others at the middle of their range. And get an idea what each one does. I do NOT assume that the names of the knobs are related to what they do. Like "contrast" and "gain" seem to be different for some thermals and one and the same on others. I just mentally consider it to be "Knob #x"
After running thru each knob, I then have an idea about where I want to start. My goal is "to make it look like a UTC" :D
So I keep adjusting until I think it does.
In truth - it takes me 1-2 years to get 10000% comfortable with the settings on a given thermal. That gives me time to cycle through the seasons and the settings and all manner of "exceptional" nights ... like heavy ice storms ... or high winds ... etc ... even "frozen mist" !!! All of which matter.
With the UTC-x that I spent 2000+ hours outside with, making adjustments had become automatic. It was like driving a car. Once you really learn, you don't think about what you are doing, you just think about where you want to go and it happens.
And like WWWHNBC says, continuous adjustment is usually required to optimize the image. You can "leave it where it is" sometimes and let the image be "good enough" ... but like one time I saw a critter thru 3 tree lines at ~700yds and I had to do quite a bit of fiddling to finally be able to PID that critter as a deer. Including moving laterally so I would bring different aspects of the critter into view. Moving from side to side is also a good idea when you aren't sure how far back in the woods a critter is. Its using parallax to your advantage ! I do that in the day time with binoculars also !

In summary, in my experience, the unit, the hardware and the software, does matter in terms of ultimate image, but the humanware is actually a much larger factor in optimizing the image that you see. So don't seek the perfect settings and leave it. Seek to "learn the knobs" ... just like with a car, no perfect setting for steering wheel or gas pedal, you gotta move em to optimize your journey !
 
Last edited:
... think a lot of people are looking for something that looks as good as good night vision ...

People may want that - but they need to move on from that idea. I'll give you an example.

When I got my first thermal, I already had a pvs-14. I took both out to my alfalfa patch an 18ish acre patch with trees on E and S. With the 14 I saw an empty pasture, with the thermal I saw 3 deer, in the moon shadows of the East edge of the pasture.

Would you rather have NV and be blind to those critters or be able to see those critters ? That's the choice you have !! We really are blind to the critters without thermal. If I could only have 1 device, it would be a thermal scanner, cause then at least I can detect a threat and run ! Even a breach can detect a primate sized critter at 600yds in the open ...

In truth, depending on what you are doing, you need both. But if I could just have one, it would be thermal.

ID is not usually an instantaneous thing, like in the day time. When people ask me "how far out can you PID with thermal" ? I answer "How long do I have?" Because watching the critter move (once you have experience knowing how critters move) and seeing various hints like ears and tails and such, you can PID most critters in fractions of a second to a few seconds. At least to the extent of "Is that critter within my ROE for this outing". Yup, with experience, that's usually real fast. But best to take your time and watch the critter longer if you're not sure. Like me, I don't want to shoot one of my calves, that's $1000. And I'm out there to protect them. And some calves will do a "bounce run" that some yotes also do. So head/tail on they can look really similar. But broadside they are different, especially the tails, yote tails usually 45 degree down angle and thicker. Not at all like a calf tail. And proportions are different also. With experience you don't think about those details, you just go "ah ha - its a yote - and take the shot".
 
You nailed a ton of important facts and points in those 2 posts Wig.

The thermal I adjust most during a night is a PAS 29 COTI. Main reason is to keep it "tooned" to where it is only hitting in my NV on something alive instead of a bunch of clutter in the NV scene.

Most all the "regular" thermals I have learned to set for that night and pretty much "leave it where it is" sometimes and let the image be "good enough"

Funny, you said if you had to take just one device it would be a thermal scanner and mentioned a Breach. I have told many people if I could have one, and one only, it would be a Breach. Well now that will change to a Sidekick.

I have spotted relatively close deer in not much cover with a thermal and then stared as hard as I could trying to see it with just NV and could not see it even knowing it was there.
 
Another example - this time a predator I'd seen glimpses of was out in the woods behind the chicken area. With mk1 eyeballs or binos I could not find it, there was a huge area to search. So I got the thermal. The thermal quickly located the critter and I could take appropriate action. This was in the day time BTW.
 
All points bulletin out for JW. Have you run a frame test with the Auto NUC turned off and go to manual nuc.

If you haven't, would really appreciate it if you could and let us know what your findings are.

So tonight is the first time I have tried that. Mine does not have the updates yet. But turning the unit to Manual NUC has made a very noticeable improvement in overall performance. Running like a sewing machine now.

Extremely excited about learning this tonight.
 
Last edited:
All points bulletin out for JW. Have you run a frame test with the Auto NUC turned off and go to manual nuc.

If you haven't, would really appreciate it if you could and let us know what your findings are.

So tonight is the first time I have tried that. Mine does not have the updates yet. But turning the unit to Manual NUC has made a very noticeable improvement in overall performance. Running like a sewing machine now.

Extremely excited about learning this tonight.
Well wouldja look at that. I just tested it and averaged over 10 display frames and got exactly 50fps now, instead of 43fps like I was showing with the NUC set to Auto. As a reminder, simultaneously pressing up and down buttons NUCs the unit, so maybe a decent workaround to get a little closer to advertised performance. So it's acting more like my Pulsars at 50Hz.
 
So the one I have in hand does not have the updates and I have another one ordered that will have the updates.

I will be able to compare them side by side and make a pretty decent evaluation of the difference and share my findings with the Hide.

Once I do that I will send the non updated one in to be updated.
 
  • Like
Reactions: Bakwa and chase723
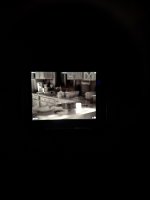
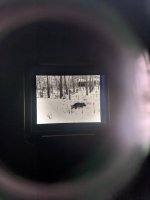
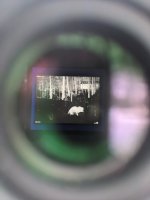
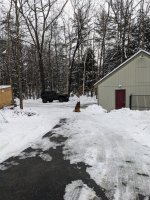
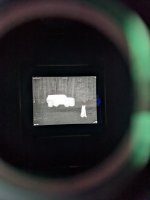
Got my updated one in last Tuesday and was initially very disappointed. Conditions however were pretty bad for thermal. It was 34'F and 90% humidity. The 6" of snow was baking off everywhere. So when I went outside to see anything, sure, I could pick up the dog in the yard, but I could see anything behind him. All the trees and landscape inside of 50yds blended into a gray blob. The first two photos show what I saw with the naked eye vs the Sidekick. The 3rd photo was just inside where the unit performed totally different (hint hint....would stove and no humidity). I'm taking all photos with a shaky hand and the Sidekick doesn't focus up close well.

I popped my head back outside around 10pm as the temp fell below freezing and humidity dropped. The picture noticeably started to improve.

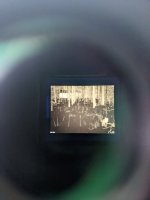
I snapped a few more photos yesterday as humidity changed. Pictures 4-6 below. Again, I'm holding the sidekick in one hand and a phone in the other. I also forgot to adjust the focus on the Sidekick from an up close indoor focus to outside. Oops.

Totally improved image last night without horribly humidity. I should have grabbed the Kestrel to confirm the actual environmental so will try to do that next time. Went out last night to hunt for critters while running an L3 PVS14 unfilmed white tube on my dominant right eye. No issues fory brain and was able to spot the dog in the woods as he wandered around. The image overall was pretty good. I have a few settings saved under the different defaults now for night time, day time, more humid, and use with the "patrol" mode.

Overall I am happy so far. I need to figure out how to not get a massive bloom of red on "patrol" mode when I look up into trees for porcupines. My guess is the sensor just picks up the sky and contrast needs to get dialed down so will tweak settings more.
 

Attachments

  • PXL_20240201_212129672.jpg
    PXL_20240201_212129672.jpg
    1,011.3 KB · Views: 176
  • PXL_20240201_212154174.jpg
    PXL_20240201_212154174.jpg
    389.2 KB · Views: 174
  • PXL_20240202_002625943.jpg
    PXL_20240202_002625943.jpg
    117.4 KB · Views: 184
  • PXL_20240202_165430828.MP.jpg
    PXL_20240202_165430828.MP.jpg
    323.2 KB · Views: 188
  • PXL_20240202_165409570.MP.jpg
    PXL_20240202_165409570.MP.jpg
    221.1 KB · Views: 197
  • PXL_20240202_165528289.MP.jpg
    PXL_20240202_165528289.MP.jpg
    280.5 KB · Views: 181
Well, it took 8 days, UPS said my thermal was out for delivery, then suddenly it was in alabama, then it was back in my city and actually got delivered. The image quality is noticeably better than before. Very happy with it, I of course have a lot to learn tweaking the settings. They removed video streaming from the menu, I spose we will get that in a firmware update.
 
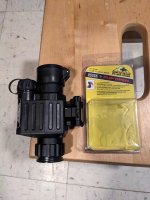
Butler Creek flip cap #1 works well for any of the guys who have already busted the rubber tether for the objective cover.
How the heck did you do that? On the other hand, I did try a butler creek cap that I have for the eyepiece and it fit, will have to go dig up which one it is, I didn't think about trying one on the front, that is certainly faster and easier than the current cap but I'll probably keep using it unless the tether breaks. Reason I tried one on the eyepiece was because I'm OCD and was/am thinking about putting it on there when I transport it so that lens can't get scratched, but that's probably over the top unnecessary, I'm working through my issues lol.
 
How the heck did you do that? On the other hand, I did try a butler creek cap that I have for the eyepiece and it fit, will have to go dig up which one it is, I didn't think about trying one on the front, that is certainly faster and easier than the current cap but I'll probably keep using it unless the tether breaks. Reason I tried one on the eyepiece was because I'm OCD and was/am thinking about putting it on there when I transport it so that lens can't get scratched, but that's probably over the top unnecessary, I'm working through my issues lol.
I just measured the front objective lens with a caliper and ordered the closest size.
 
SUPER GLUE and Baking Soda is your friend. Bonds those rubber straps back very well. Then hit is with a black magic marker and presto you back in business. Hecque, they even fix some plane propellers with that method.

I have fixed many rubber straps using this method.

 
  • Love
Reactions: wigwamitus
Been interested in getting a pair of these curious. Does anyone have insight to how these perform compared to some of the obvious comparisons people have been using Nox-18 and RH-25 in high humidity situations, rain, or snow or even on sunny day? There seemed to be mixed impressions but haven't really seen anyone say or show video comparing these tougher conditions other than thermalboi had urban setting in sunlight where I'd be much more interested in fields/farms/woods;
 
Last edited:
  • Like
Reactions: mikefraz
Been interested in getting a pair of these curious. Does anyone have insight to how these perform compared to some of the obvious comparisons people have been using Nox-18 and RH-25 in high humidity situations, rain, or snow or even on sunny day? There seemed to be mixed impressions but haven't really seen anyone say or show video comparing these tougher conditions other than thermalboi had urban setting in sunlight where I'd be much more interested in fields/farms/woods;
You're certainly not going to get $6,000 performance for $3,000, there's no free lunch. I think most people would say though that you aren't getting double the performance for double the money so it's up to you, if you have 6k to burn. I believe most people are saying you get probably 75% give or take the performance of the nox18? Something like that.
 
  • Like
Reactions: WTFDUDE
Been interested in getting a pair of these curious. Does anyone have insight to how these perform compared to some of the obvious comparisons people have been using Nox-18 and RH-25 in high humidity situations, rain, or snow or even on sunny day? There seemed to be mixed impressions but haven't really seen anyone say or show video comparing these tougher conditions other than thermalboi had urban setting in sunlight where I'd be much more interested in fields/farms/woods;
Hold my beer and listen up. :)

So I have never owned nor looked through a Nox 18 or RH-25. But have some time on friends BAE units and a lot of time on Flir Boson units that I own. Some limited time on other various flavors.

I received my 2nd updated Sidekick 640 a couple of days ago and have been running it through its paces. I also have the luxury of putting a 3x 62mm Torrey Pines Logic Magnifier on the Sidekick 640. Here are my thoughts and findings.

So this morning it started out at 90% humidity and 100 percent cloudy. Poor emissivity conditions. The Sidekick performed very well and gave very good detail on both buildings, vehicles, people etc and also did the same on rural terrain where most items (trees, bushes, grass etc) are typically at about the same emissivity. This was with and without the 3x Magnifier attached. Around 11.00 am it started raining and has rained all day and is still raining heavily tonight.

So tonight in heavy rain I have been viewing all of the same scenery as I did this morning. All of this scenery has had hours and hours of rain on it. During my viewing just a little while ago during heavy rain it was stunning to me on how good of an image the Sidekick was producing. Additionally when you put a big lens 3x Magnifier on any (1x native mag) unit it enables you to evaluate the FPA and core ability to form images at much longer distance. You are better able to assess the sharpness, contrast, etc and overall image produced at longer ranges. The Sidekick surpassed all of my expectations. I was very impressed in what this little unit can do.

Like any thermal device you have to spend time in different emissivity conditions to learn how to adjust the settings of any particular device to get the maximum performance it is capable of achieving. A quality device has plenty of individual settings one can adjust to optimize its best performance under the present conditions you are working in.

In pouring down rain the following settings worked excellent for me.

First I turn off the Compass and Inclinometer that show on the Ocular Screen. This will give the CPU more HOSS-POWA because it offloads work the CPU would otherwise have to devote power too.

Contrast - 22
Sharpness - 9
Brightness - 5
Gamma - 10
Gain - 0
NUC Auto - ON
Picture in Picture Off

Now usually I will let the unit warm up with NUC on Auto and then once warmed up, switch over to manual so its not NUC' ing as frequently as it does. This lets me decide when to NUC to improve any image degradation.

I am not noticing any perceived lag or jerkiness in the unit. To me the two single most important adjustments with this unit that have a really big impact on performance and image quality are Gamma and Gain. This unit is very sensitive to increases in Gain and the image will get grainy fast if you have the Gain jacked up too high. In poor conditions I have found that increasing the Gamma and decreasing the Gain results in a much better image and detection of critters still remains good.

The Sidekick may not exactly be a NOX 18, Skeet or Voodoo, but it is one hell of a very compact good performer for its price point and really not far behind what they bring to the table due to the inherent limitations of a 1x wide FOV spotter. A 1x spotter can only do so much no matter who makes it and their range is limited, unless you can easily attach a big ass 62 mm 3x Magnifier lens on it.

I have tried to take some photos and video with my Cell Phone through the lens, but that is not working out to be anywhere representative of what I am actually seeing so I would not want to slander what the Sidekick is capable of producing. Stokes and JW are the ones that have the ability to capture through the lens images most representative of devices.
 
Last edited:
  • Like
Reactions: WTFDUDE
Hold my beer and listen up. :)

So I have never owned nor looked through a Nox 18 or RH-25. But have some time on friends BAE units and a lot of time on Flir Boson units that I own. Some limited time on other various flavors.

I received my 2nd updated Sidekick 640 a couple of days ago and have been running it through its paces. I also have the luxury of putting a 3x 62mm Torrey Pines Logic Magnifier on the Sidekick 640. Here are my thoughts and findings.

So this morning it started out at 90% humidity and 100 percent cloudy. Poor emissivity conditions. The Sidekick performed very well and gave very good detail on both buildings, vehicles, people etc and also did the same on rural terrain where most items (trees, bushes, grass etc) are typically at about the same emissivity. This was with and without the 3x Magnifier attached. Around 11.00 am it started raining and has rained all day and is still raining heavily tonight.

So tonight in heavy rain I have been viewing all of the same scenery as I did this morning. All of this scenery has had hours and hours of rain on it. During my viewing just a little while ago during heavy rain it was stunning to me on how good of an image the Sidekick was producing. Additionally when you put a big lens 3x Magnifier on any (1x native mag) unit it enables you to evaluate the FPA and core ability to form images at much longer distance. You are better able to assess the sharpness, contrast, etc and overall image produced at longer ranges. The Sidekick surpassed all of my expectations. I was very impressed in what this little unit can do.

Like any thermal device you have to spend time in different emissivity conditions to learn how to adjust the settings of any particular device to get the maximum performance it is capable of achieving. A quality device has plenty of individual settings one can adjust to optimize its best performance under the present conditions you are working in.

In pouring down rain the following settings worked excellent for me.

First I turn off the Compass and Inclinometer that show on the Ocular Screen. This will give the CPU more HOSS-POWA because it offloads work the CPU would otherwise have to devote power too.

Contrast - 22
Sharpness - 9
Brightness - 5
Gamma - 10
Gain - 0
NUC Auto - ON
Picture in Picture Off

Now usually I will let the unit warm up with NUC on Auto and then once warmed up, switch over to manual so its not NUC' ing as frequently as it does. This lets me decide when to NUC to improve any image degradation.

I am not noticing any perceived lag or jerkiness in the unit. To me the two single most important adjustments with this unit that have a really big impact on performance and image quality are Gamma and Gain. This unit is very sensitive to increases in Gain and the image will get grainy fast if you have the Gain jacked up too high. In poor conditions I have found that increasing the Gamma and decreasing the Gain results in a much better image and detection of critters still remains good.

The Sidekick may not exactly be a NOX 18, Skeet or Voodoo, but it is one hell of a very compact good performer for its price point and really not far behind what they bring to the table due to the inherent limitations of a 1x wide FOV spotter. A 1x spotter can only do so much no matter who makes it and their range is limited, unless you can easily attach a big ass 62 mm 3x Magnifier lens on it.

I have tried to take some photos and video with my Cell Phone through the lens, but that is not working out to be anywhere representative of what I am actually seeing so I would not want to slander what the Sidekick is capable of producing. Stokes and JW are the ones that have the ability to capture through the lens images most representative of devices.
*Double fisting *
Going to have to look into a magnifier for thermal you don’t get the fisheye or I guess it would be reverse fisheye effect using one. So had read the auto nuking was slowing things down and I’ve had some cheaper Leopold thermals that have a nuke button but found myself needing it quite a bit on them. I assume you are not needing to nuke often if your setting it to manual aside from the frame rate decrease.

*hands back the beverage which is slightly warmer but still should quench thirst*
 
  • Haha
Reactions: WhereNow&How
Hey all. I've been running dual 14's on an Arc Panning Bridge for a little over a year now, and recently replaced one of the 14's for a Sidekick on a Rayvn rail. I'm brand new to thermal and I'm blown away by how cool this tech is. Question if I may...If I disable Auto-NUC to improve performance, how often might I find myself having to do it manually? The Sidekick is great so far but it does NUC itself pretty regularly especially when first turned on. What exactly am I looking for when deciding to NUC the unit?
 
Hey all. I've been running dual 14's on an Arc Panning Bridge for a little over a year now, and recently replaced one of the 14's for a Sidekick on a Rayvn rail. I'm brand new to thermal and I'm blown away by how cool this tech is. Question if I may...If I disable Auto-NUC to improve performance, how often might I find myself having to do it manually? The Sidekick is great so far but it does NUC itself pretty regularly especially when first turned on. What exactly am I looking for when deciding to NUC the unit?
So when the image starts to degrade and lines start to appear in the Ocular Screen it is time to NUC any thermal device.

In a helmet mounted situation with a PVS 14 right beside it you will probably be better off leaving it in Auto NUC. Point being that the two buttons you have to press simultaneously to do a manual NUC are small and somewhat tedious to deal with (especially helmet mounted) and will likely be a pain in the ass to you having to fiddle with it and a PVS 14 to keep them all lined up correctly.

You can try it that way, but my previous experience with head mounted thermal (Breach & 14) indicates to me that you would likely be better to leave it on Auto.
 
Flir did make a really cool 5 button remote. I was able to fashion a watch band and wear that on my wrist and it makes controlling the Flir Breach controls a breeze and easy peasy. I also use those 5 Button Remotes on my rifles to control the Flir Thermosight Line of Scopes as well.

Maybe the NEW Armasight guys might bring back a 5 Button Remote to control their devices as well.
 
So when the image starts to degrade and lines start to appear in the Ocular Screen it is time to NUC any thermal device.

In a helmet mounted situation with a PVS 14 right beside it you will probably be better off leaving it in Auto NUC. Point being that the two buttons you have to press simultaneously to do a manual NUC are small and somewhat tedious to deal with (especially helmet mounted) and will likely be a pain in the ass to you having to fiddle with it and a PVS 14 to keep them all lined up correctly.

You can try it that way, but my previous experience with head mounted thermal (Breach & 14) indicates to me that you would likely be better to leave it on Auto.
That’s a great point about operating the buttons while helmet mounted. Auto-NUC it is. So far I’ve been pleasantly surprised at the dual-band system. Not as bad to use as I thought. The Armasight blows my buddies Jerry CE5 out of the water.
 
Man don't even get me started on that. The rest of the world knows we going down the drain with that puppet and his puppet masters pulling the strings running the show. Total insanity.

So just checked out the wildlife tonight with the SK. Temps are currently 53 F, Humidity 96%, wind at 9mph and it rained all afternoon. Excellent conditions to see what a unit can really do. :)

Most of trees, brush etc are all at the same temps so the "sea of fog"is upon me. Nothing can make an image of same emissivity terrain in those conditions that us mere mortals can get our hands on. Maybe some liquid cooled units can. But critters are popping like crazy. Looking at Dillas at 200 yards clear as a bell, albeit with a 3x magnifier on for PID. LOL

Take it off and they are still popping. One thing about the Sidekick is that in poor thermal conditions running the Gain down to zero and jacking the Gamma up to 10 produces the best and a really nice image.
 
Last edited:
  • Like
Reactions: WTFDUDE and jwramp
Hold my beer and listen up. :)

So I have never owned nor looked through a Nox 18 or RH-25. But have some time on friends BAE units and a lot of time on Flir Boson units that I own. Some limited time on other various flavors.

I received my 2nd updated Sidekick 640 a couple of days ago and have been running it through its paces. I also have the luxury of putting a 3x 62mm Torrey Pines Logic Magnifier on the Sidekick 640. Here are my thoughts and findings.

So this morning it started out at 90% humidity and 100 percent cloudy. Poor emissivity conditions. The Sidekick performed very well and gave very good detail on both buildings, vehicles, people etc and also did the same on rural terrain where most items (trees, bushes, grass etc) are typically at about the same emissivity. This was with and without the 3x Magnifier attached. Around 11.00 am it started raining and has rained all day and is still raining heavily tonight.

So tonight in heavy rain I have been viewing all of the same scenery as I did this morning. All of this scenery has had hours and hours of rain on it. During my viewing just a little while ago during heavy rain it was stunning to me on how good of an image the Sidekick was producing. Additionally when you put a big lens 3x Magnifier on any (1x native mag) unit it enables you to evaluate the FPA and core ability to form images at much longer distance. You are better able to assess the sharpness, contrast, etc and overall image produced at longer ranges. The Sidekick surpassed all of my expectations. I was very impressed in what this little unit can do.

Like any thermal device you have to spend time in different emissivity conditions to learn how to adjust the settings of any particular device to get the maximum performance it is capable of achieving. A quality device has plenty of individual settings one can adjust to optimize its best performance under the present conditions you are working in.

In pouring down rain the following settings worked excellent for me.

First I turn off the Compass and Inclinometer that show on the Ocular Screen. This will give the CPU more HOSS-POWA because it offloads work the CPU would otherwise have to devote power too.

Contrast - 22
Sharpness - 9
Brightness - 5
Gamma - 10
Gain - 0
NUC Auto - ON
Picture in Picture Off

Now usually I will let the unit warm up with NUC on Auto and then once warmed up, switch over to manual so its not NUC' ing as frequently as it does. This lets me decide when to NUC to improve any image degradation.

I am not noticing any perceived lag or jerkiness in the unit. To me the two single most important adjustments with this unit that have a really big impact on performance and image quality are Gamma and Gain. This unit is very sensitive to increases in Gain and the image will get grainy fast if you have the Gain jacked up too high. In poor conditions I have found that increasing the Gamma and decreasing the Gain results in a much better image and detection of critters still remains good.

The Sidekick may not exactly be a NOX 18, Skeet or Voodoo, but it is one hell of a very compact good performer for its price point and really not far behind what they bring to the table due to the inherent limitations of a 1x wide FOV spotter. A 1x spotter can only do so much no matter who makes it and their range is limited, unless you can easily attach a big ass 62 mm 3x Magnifier lens on it.

I have tried to take some photos and video with my Cell Phone through the lens, but that is not working out to be anywhere representative of what I am actually seeing so I would not want to slander what the Sidekick is capable of producing. Stokes and JW are the ones that have the ability to capture through the lens images most representative of devices.
How long does it take to warm up? Also, I will try that turning off the compass and such, it didn't even occur to me that doing that would free up enough cpu to matter, ha.
 
  • Like
Reactions: mikefraz
How long does it take to warm up?
Well I don't have the exact science to that down pat yet. But I'd say a good 5 to 10 minutes should be at least a decent warm up.
Also, I will try that turning off the compass and such, it didn't even occur to me that doing that would free up enough cpu to matter, ha.
A CPU ain't much different than a Pack Mule. The lighter the load the faster they can go. :)
 
  • Like
Reactions: mikefraz
With the limited quality from the onboard recordings (512px@21fps) I tried upscaling to 60fps and 720p... it definitely looks smoother, so maybe something to try for folks that are wanting to use the recording feature on a regular basis. I do wish the focus range would let you get a sharp image closer than about 10-15ft. Would make for some way better video of this sort of up close stuff.


And just a brief point of comparison for similar content taken from the onboard recordings on an RH25 (starting at 1:23) -

I need to meet people who can get me into literally anything that will let me shoot at night, hahahaha. The guy with quads, wonder what he does for a living LOL. Awesome video.
 
  • Like
Reactions: jwramp
So I got an email that there is a firmware update for the sidekick. Has anyone else done it yet? I created an account and it made me fill out the warranty form, even though i've done that before. I still don't see a firmware option at the top of the page. I sent them an email.
 
  • Like
Reactions: stefan73