• Watch Out for Scammers!

    We've now added a color code for all accounts. Orange accounts are new members, Blue are full members, and Green are Supporters. If you get a message about a sale from an orange account, make sure you pay attention before sending any money!

  • The site has been updated!

    If you notice any issues, please let us know below!

    VIEW THREAD

Care And Feeding Of A GAP 6.5 SAUM.....

I have been getting small dents on the shoulder portion of the casing when I resize. Its not an issue of excessive lube as I have cleaned my die repeatedly and tried one shot lube as well as imperial.

My dies may be slightly different as I bought them in 2009. They are Redding FL 6.5/300 SAUM. Part # 80758 It seems like its trapped air causing the dents. Anyone else having this problem thats FL sizing? Any suggestions? The rifle still shoots fine, the loaded rounds are not that pretty tho..
 
Pat,
I see that you recommend using the .291" bushing after the first firing, not on unfired brass. The way I calculate it, .295" minus .030"(.015" neck x2) = .265" inside neck diameter. That won't hold a .264" bullet. What am I not getting?
Thanks,
Bill
 
Pat,
I see that you recommend using the .291" bushing after the first firing, not on unfired brass. The way I calculate it, .295" minus .030"(.015" neck x2) = .265" inside neck diameter. That won't hold a .264" bullet. What am I not getting?
Thanks,
Bill

Where did you get .295 the bushing is .291
-.030 = .261
 
Where did you get .295 the bushing is .291
-.030 = .261

In Pat's 1st post, he says to neck down with a .295 but doesn't mention the .291 until this line: "After the initial firing I use the .291 bushing in the sizing process." Maybe he means that you neck down in 2 steps: .295 & .291. That's how I would do it.
 
That's because the necks aren't turned yet, so if you use a 0.291 bushing you would have way too much neck tension. he uses the .295 to set the proper neck tension on the ID and then turns the OD to the proper spec for thickness. So after the first firing you now have to use a smaller bushing to get the same neck tension as before b/c the neck walls are thinner.
 
That's because the necks aren't turned yet, so if you use a 0.291 bushing you would have way too much neck tension. he uses the .295 to set the proper neck tension on the ID and then turns the OD to the proper spec for thickness. So after the first firing you now have to use a smaller bushing to get the same neck tension as before b/c the neck walls are thinner.

I don't have all of my reloading supplies for the 6.5 SAUM yet so I haven't been able to experiment. If I'm following you, would you get 2 different neck tensions if you followed the 2 below procedures?

Neck down w/ .295 & .291
Expand w/ .264
Turn to .015"

vs

Neck down w/ .295
Expand w/ .264
Turn to .015"
Shoot
Neck down w/ .291
 
Last edited:
I don't have all of my reloading supplies for the 6.5 SAUM yet so I haven't been able to experiment. If I'm following you, would you get 2 different neck tensions if you followed the 2 below procedures?

Neck down w/ .295 & .291
Expand w/ .264
Turn to .015"

vs

Neck down w/ .295
Expand w/ .264
Turn to .015"
Shoot
Neck down w/ .291

you are oversizing it down just to open it back up, so you are overworking the necks unnecessarily. you could have more tension because it was oversized down then you open it back up and there will be spring back.
 
you are oversizing it down just to open it back up, so you are overworking the necks unnecessarily. you could have more tension because it was oversized down then you open it back up and there will be spring back.

I see your point but am not clear how Pat chose .295 as the bushing. Can you calculate it or is it trial & error?

By calculating I get the following:
The .312” od of a 7mm saum case gets necked down to .295”
The neck thickness of a 7mm saum case is about .0155"
.295” - .031”= .264” giving 0 neck tension.
I assume that after sizing down from .312” to .295” there is more neck thickness than .0155” but I can’t imagine how you would calculate how much.

So in coming up with the proper bushing for the first time, would you just start with a larger bushing, neck down, measure id and repeat until you had the desired neck tension?
 
You measure the thickness with a ball micrometer. 7 saum brass necked down with a .295 bushing becomes thicker in the neck in the process.. If I remember correctly something on the order of .017" or maybe a bit more neck thickness after the initial necking down prior to turning. .295 - .017x2= .261 ID

after turning the ID remains the same or close to .261" unless you expand it again. Which even if you did, most expanders will still give you about .001-.0015" neck tension after running them through anyway.

SPAK-Thanks for the reply.
 
Necking down to .295.

Just started necking down my 7mm SAUM brass with a .295 bushing and the mouth of neck is flared (see photo).
Flared end of neck has an OD of .294"
Rest of neck has an OD of .289"
Also, the reduced part stops short of the neck-shoulder junction. I'm using a Co-Ax press, the die is set with a slight cam-over and the bushing is screwed down tight.

What am I doing wrong?
 

Attachments

  • 6.5 brass.jpg
    6.5 brass.jpg
    966.8 KB · Views: 39
Last edited:
You need to start with larger bushings and gradually work down. I had the same thing with the 300 SAUM. I use .320 or so, .315,.310,.305,.298 then .295.
 
You need to start with larger bushings and gradually work down. I had the same thing with the 300 SAUM. I use .320 or so, .315,.310,.305,.298 then .295.

I had wondered about that, always reading that resizing by more than .005" should be done in more than 1 step.
Just curious what bushings others are using to go from 7mm to 6.5. It looks like it needs 4 bushings but I'm wondering if the heavier steps should occur in the beginning or the end of the process?
 
Last edited:
I had wondered about that, always reading that resizing by more than .005" should be done in more than 1 step.
Just curious what bushings others are using to go from 7mm to 6.5. It looks like it needs 4 bushings but I'm wondering if the heavier steps should occur in the beginning or the end of the process?

I've always sized 7 saum straight down with a .295", never had issues so I don't think more than one bushing is necessary with 7 saum. However, 300 saum is a three step process for me.
 
I've always sized 7 saum straight down with a .295", never had issues so I don't think more than one bushing is necessary with 7 saum. However, 300 saum is a three step process for me.

Do you neck down with the expander button installed in the FL sizing die or removed? I did it w/o the button. Maybe that's the problem?
 
I just tried sizing in one step with the .295 bushing and the button in. There is only a slight wrinkle at the mouth now. How close to the shoulder/neck junction should the bushing size? It looks like my bushing stops about 1/32" away. Sizing .308 with bushings, I recall that the bushing gets closer to the shoulder.
 
I just tried sizing in one step with the .295 bushing and the button in. There is only a slight wrinkle at the mouth now. How close to the shoulder/neck junction should the bushing size? It looks like my bushing stops about 1/32" away. Sizing .308 with bushings, I recall that the bushing gets closer to the shoulder.
I would try a larger bushing. Not worth the risk... or send me some of the brass you want to try , I could use it. Lol. So it in steps, it's a lot of work but you won't ruin your unicorn brass you have
 
I would try a larger bushing. Not worth the risk... or send me some of the brass you want to try , I could use it. Lol. So it in steps, it's a lot of work but you won't ruin your unicorn brass you have

I think that 1 extra step (maybe .303) should do it. I don't mind the extra effort. My rifle won't be here for 10 months. I just hate experimenting with such expensive brass. Any thoughts on the distance from the end of the sizing to the neck/shoulder junction?
 
There's a pic somewhere on here and it shows it perfectly. Try Googling it. I would but I'm on the road to work
 
Thanks. I found the thread. I'll have to do done more research. I'm concerned that if I don't size closer to the shoulder, I'll either weaken the neck when I neck turn or create a donut when the neck expands during firing.
 
Thanks. I found the thread. I'll have to do done more research. I'm concerned that if I don't size closer to the shoulder, I'll either weaken the neck when I neck turn or create a donut when the neck expands during firing.
You will create a donut. Get the K&M neck turning mandrel it has a cutter to cut the donut on the inside. You will have to cut the donut on the outside. Turn necks to 15 thousandths. I use the 21st century neck lathe. It works great
 
I didn't size down in steps and all those pieces of brass had broken necks by the time I was neck turning them
 
I reread the section on bushings in Zediker's Handloading for Competition. Turns out what looked like a section of untouched neck at the shoulder is actually tapered because of the bevel on the inside of the bushing edge. According to what I read, as long as I turn down slightly onto the shoulder, I won't get doughnuts. As I understand it, the shoulder is a bit thicker than the neck so turning that area shouldn't weaken it.

My last question for now:
Pat's process is to trim the cases after turning. I've always trimmed before turning to get a more consistent amount (case to case) of turning onto each shoulder. Also, you don't have to deburr the outside of the necks because the burr gets removed during turning.
Any thoughts?
 
It doesn't matter really.. If you trim before turning you will get more consistent results.. However if your necking down from 300 saum brass if I remember correctly it will finish shorter than the trim length anyway.

my experience with Norma brass is that the shoulders are so inconsistent before firing that you will have high and low spots when you turn so even if you trimmed to the same lengths you'll still have variation until you fire the cases.
 
my experience with Norma brass is that the shoulders are so inconsistent before firing that you will have high and low spots when you turn so even if you trimmed to the same lengths you'll still have variation until you fire the cases.

Thanks. I was hoping that FL sizing then trimming would fix any variation But that may be optimistic.
 
Just got the Redding Die set fro GAP. Why does it come with a .290 bushing instead of a .291 bushing?
 
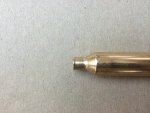
Update! Finally got some more brass to play around with.
I ended up with some virgin Norma .300 and 7mm RSAUM brass.
Specs on the brass were:
7mm
COAL: .225-.227
Inside Neck Diameter: .290
Outside Neck Diameter: .312
Neck Thickness: .016-.017

300
COAL: .210-.212
Inside Neck Diameter: .304
Outside Neck Diameter: .336
Neck Thickness: .015-.016

The Neck Thickness in the brass varied from piece to piece, but a pretty constant average would be around .016

To work the .300 brass:
- Ran it through a Whidden Full Length 6.5 SAUM Bushing Die
- Used a .331 / .317 / .303 / .291 Bushing
After that process I ended up with a .257 Inside Neck Diameter, which is obviously smaller than what you need. Per the original post a .295 Bushing would probably be optimal for this. I used the .291 because I already had it, and didn't figure the .004 difference would make a big deal. I then ran it through a Sinclair 6.5 expander, which took the Inside Neck Diameter up to .261-.262. Based on those numbers, the Neck Thickness increased by .001-.002 to .017-.018

With that much brass getting pushed around, as per my earlier work, I was pretty sure that there was going to be a "Donut" (thicker area) somewhere. I used some Pin Gages to check the inside neck for any variation in thickness. I ran a .261 and it made it through all of the necks with no problem. I then ran a .262 through, and it would make it about 3/4s of the way down the neck before stopping. That puts a thicker area of brass on the inside of the neck just above the shoulder junction.

Per my earlier post, I am taking care of that by neck turning both the inside and outside, and adjusted it so that it gives me a finished uniform neck thickness of .015. I am then finishing that with the .291 bushing which gives me a final Internal Neck Diameter of .261, that takes care of the .300 brass.

To work the 7mm brass:
- Ran it through a Whidden Full Length 6.5 SAUM Bushing Die
- Used a .303 / .291 Bushing

As I was checking it out, I realized that about the last .030-.050 of the neck closest to the shoulder was not getting sized!

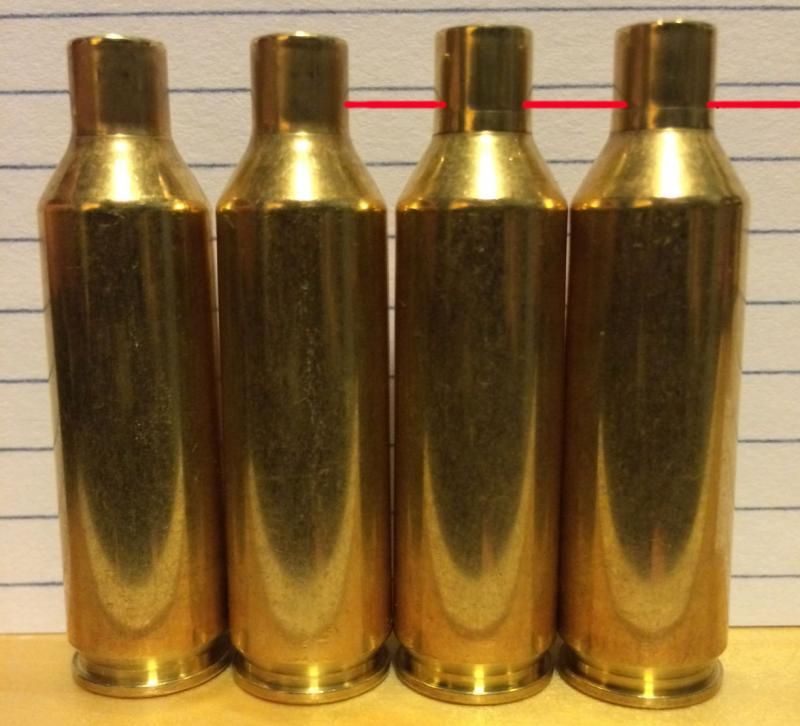
Long story short, I tried everything that I could to get that part of the neck sized, but the only thing that worked was to take about .030 off of the top of the shell holder and then reset the die lower in the press. That did finally get it right to the neck/shoulder junction.

As per above, after that process I ended up with a .257 Inside Neck Diameter.

I then ran it through a Sinclair 6.5 expander, which took the Inside Neck Diameter up to .261-.262. Based on those numbers, the Neck Thickness increased very slightly, but not as much as with the .300, it was no more than .001.

I then checked the inside neck dimensions with the Pin Gages to double check for a Donut, the .261 made it through with no problem, and the .262 also made it through, in some cases it was pretty snug, but it never made a hard stop like with the .300 brass.

I am also going to finish this with the inside & outside neck turning to produce a .015 Neck Thickness, and then run it through the .291 bushing, for consistency purposes to produce a finished Inside Neck Diameter of .261

ADDITONAL NOTES!
- the necks on the brass were really bad out of the box (concentricity and thickness). I would seriously recommend cleaning them up with passes through FL dies with expanders, then checking them with every tool that you have, prior to doing any neck turning. Simply using a bushing die, without the expander, my brass was all over the place when I checked it with a Sinclair Neck Gauge.

- the necks on the virgin 7mm & 300 brass are not the same. The 7mm is longer, so make sure you account for that as needed (issue below)

- make sure your necks are sized completely, per above, I had about a .030-.050 area just above the shoulder junction that was not getting sized down. If you didn't catch this and correct it before you started turning, that area would have more material removed making it thinner and inconsistent.


Hopefully this may clarify some things, if not please let me know.
 
Just started necking down my 7mm SAUM brass with a .295 bushing and the mouth of neck is flared (see photo).
Flared end of neck has an OD of .294"
Rest of neck has an OD of .289"
Also, the reduced part stops short of the neck-shoulder junction. I'm using a Co-Ax press, the die is set with a slight cam-over and the bushing is screwed down tight.

What am I doing wrong?

See my post above, also had the same thing going on with my 7mm brass.

The flaring at the top of the neck can happen when the neck tops out in the die, and the top of the neck is then pushed out into the bevel of the bushing. Check your COAL before you size, in my situation I am trimming them before sizing to prevent this. Check the length of your bushing and the length of your case neck, and make sure that your neck is not significantly longer, this can help with both issues.

The lack of sizing at the bottom of the neck will depend on your setup, with mine I had the same problem and had to shave about .030 off of the shell holder to get it to size the neck all of the way down.

If you don't get the neck sized all the way down, and you turn them, you are going to have a problem!

Per the diagram above (pardon my crappy art skills), the cutter will be set for the top part of the neck which has been sized down, however when it reaches the bottom part of the neck which has not been sized it is going to remove more material, how much will depend on the size difference between the 2 areas.

I read somewhere that someone had necks that were failing/falling off, this could be a potential cause for this, because they did not get the neck sized all the way down, then during the turning process they took away too much material thinning/weakening the neck/shoulder junction.

IMHO, you REALLY need to check the condition of your necks BEFORE you turn them. While the turning process will fix inconsistent neck wall thickness, it relies on the brass being true/straight/consistent. Per above, using a Sinclair Case Neck Sorting Tool, Caliper, Micrometer, Pin Gages I found a lot of issues with the concentricity of the case necks straight out of the box/bag. You need concentric/consistent necks in order to get a good result when you turn them. If you turn a crooked or inconsistently sized neck, as the old saying goes "$#!@ In = $#!@ Out.

If you don't have all of the tools to check for this, you will probably never have a "visual cue" to realize that a lot of this stuff is going on because you are talking about differences that are thousands of an inch.

Also doubt that a lot of people will realize the difference when loading or shooting, unless it goes to the extreme of something like the neck shoulder junction failing or case necks splitting after 1-2 firings.

Per my earlier post, IMHO "The Devil is in the details" here!
 
See my post above, also had the same thing going on with my 7mm brass.

Thanks for the reply. Pat suggested that maybe my bushing was undersized. I measured it and it was .0015" small. That may be the cause of the flared mouth. It may also be that I need to neck down in steps. I have bushings on order to experiment with both scenarios and I'll post my results.

As for the neck not getting sized completely down to the shoulder, the neck down part on my shoulders stops about .03" before the shoulder (although it's nowhere near as dramatic as in your photos). Part of the problem is that Redding bushings have a chamfer at their mouths. I measured it at about .025" long so you are never going to get the neck sized all the way to the shoulder unless you remove the chamfer on the bushing. I believe that only LE Wilson bushings come w/o the chamfer (on one end only). I'm just going to keep an eye on the brass as I fire it and see what happens.
 
I just called Redding to get some more information about the 2 problems. Their answer runs contrary to the information that has been posted here. I'm not trying to stir up a hornets nest and I realize that there is more than one way of doing things. I just want to pass on what they suggest. They told me that in order to fully reduce a neck, you should use a FL sizing die. This avoids the unaltered .03" or so that we have been getting and eliminates the risk of thinning down the neck/shoulder area when turning. They also say that using this die will likely not give you the flared mouth that I have been getting on the case necks. If anyone is interested, the die that they sell is #91758. Its called something like 6.5/300 SAUM. Clearly many thousands of rounds have been successfully formed w/ the bushing die so take this advice with a grain of salt.
 
The standard full length die will still cause a flaring at the case mouth. During the neck down process.

The full length die was made to spec for the .298" neck so it can't be used with the new reamer for adequate sizing.

When necking down using bushing dies there is always a portion of the neck that is not sized at the neck shoulder junction.

Necking down using a .295" bushing, turning to .014" neck thickness down .050-.075" onto the shoulder I have not had any neck seperations with now 6 firings on Norma brass.

If you use improper technique turning into the shoulder I can see how a neck could get too thin at the junction.. That being said I haven't had any problems yet.

in an ideal world I would fill length size with a standard sizing die before turning.

Neck down, trim to 2.015" then turn brass, resize with bushing of your choice and you will be fine .
 
Thanks for the info on the die and the new reamer. I suspected I was ok with turning down onto the unsized portion.
 
I use redding comp 3 die sets, the neck die has a micrometer head as well and this allows you to size the neck down to the shoulder. I'm with SPAK, I size down my necks run them through my body die, trim to 2.025" use a 40 degree cutter with my Sinclair turning tool and trim to .01465" and down onto the shoulder about .050" then I anneal. I have 6 cycles on my Norma 7 SAUM brass. I just sacrificed on case last week and section cut it 4 ways, measured with my ball mic the shoulder/case walls .0165", the shoulder/neck junction measured .0165" and my necks still are .01465". No issues and I think I can get 10-12 at the rate they are holding up.
 
I use redding comp 3 die sets, the neck die has a micrometer head as well and this allows you to size the neck down to the shoulder. I'm with SPAK, I size down my necks run them through my body die, trim to 2.025" use a 40 degree cutter with my Sinclair turning tool and trim to .01465" and down onto the shoulder about .050" then I anneal. I have 6 cycles on my Norma 7 SAUM brass. I just sacrificed on case last week and section cut it 4 ways, measured with my ball mic the shoulder/case walls .0165", the shoulder/neck junction measured .0165" and my necks still are .01465". No issues and I think I can get 10-12 at the rate they are holding up.

Thanks. Did you have to special order the Comp. neck sizer. It sounds like the 6.5 saum dies that Redding has won't work with the new reamer. SPAK said, "The full length die was made to spec for the .298" neck so it can't be used with the new reamer for adequate sizing."

Also, the 7mm RSAUM has a 30 deg shoulder but you are using a 40 deg cutter. Does the angle change during sizing?
 
Last edited:
No special order on the dies (redding # 58280) but they are costly. The 40 degree cutter allows me to turn the neck and onto the shoulder without taking to much shoulder mtl, but I have used the 30 degree as well without any issues. I turn necks on all my calibers except the ones I use Lapua brass but this is my first Wildcat so to speak so it's been T&E for me to find what works for me and my rig. You are correct in there are many ways to skin the cat just pay attention and you will be fine.
 
Neck tension question:
.264 bullet diam.) + .030" (.015" x 2 neck thickness) = .294 (finish cartridge neck). I confirmed this by measuring a loaded round as well.
Using a .295 bushing that only gives me .001" neck tension. Isn't that too light?
BTW, I solved the problem of the flared case mouth but I had to neck down in 3 steps.

the. .295. Bushing is for necking down the brass. I would use a .292 or .291 bushing for final sizing.
 
I thought so. I'm probably following Pat's initial instructions too literally.
 
After the initial necking down with the .295 bushing, expanding the neck for turning, turning the brass, you should still have enough neck tension for the first loading. After they are fired use a .292 or .291 bushing.
 
After the initial necking down with the .295 bushing, expanding the neck for turning, turning the brass, you should still have enough neck tension for the first loading.

After doing the above, get .001" neck constriction. That's less than I'm used to having but the bullet does seem to be seating with adequate pressure.
 
Or just run it through the sizer with the 291 bushing if you prefer.
 
I'm using the Redding die set George listed out. My first set of 50 cases is done (Norma 300 SAUM) and look good, they run .294" at the neck loaded. I'm not using the expander button, my finish bushing is a .292". For turning I used the PMA tool with the 30deg cutter and ran it down to where it was just starting to kiss the shoulder. Now I just have to wait for my barrel to be finished.

Edit: I forgot to mention that I only had to scrap one case, I didn't set my expander up right initially (last use for BR cases) and collapsed the shoulder on the first one.
 
Last edited:
Are most of you guys using a short or long action, how do the 140's feed in a short action?