• Watch Out for Scammers!

    We've now added a color code for all accounts. Orange accounts are new members, Blue are full members, and Green are Supporters. If you get a message about a sale from an orange account, make sure you pay attention before sending any money!

Fieldcraft Rifle Painting Tutorial

Re: Rifle Painting Tutorial

just one question R"1/5": Are you running bare cloth on your rifle's cheekpiece? If so doesn't it get wet or dirty at all?

Thanks

-Glen
 
Re: Rifle Painting Tutorial

Terrific post.

Take time to thoughtfully choose your colors and pattern. I know a LEO sniper who has painted his duty rifle four times. Looks great.

 
Re: Rifle Painting Tutorial

gleng,

Yes, it is bare cloth. If it gets wet or dirty it's just fine because it is easy to change out! I chose bare cloth because it's most comfortable for me! When I shoot, I like to feel as comfortable as possible. We all know it's not always perfect shooting conditions either! It (cheekpiece) will do its job though! Are you planning on doing something similar?

R"1/5"

 
Re: Rifle Painting Tutorial

sorry i re-open this topic maybe

but what kind of other spray paint can i use for this (wooden stock)

in my country is no krylon

what are the requirements for the paint
 
Re: Rifle Painting Tutorial

A flat enamel would work.

Model airplane paints work good.
 
Re: Rifle Painting Tutorial

This is all some really great stuff. All I would add is that a rifle makes a pretty complex and expensive beginners' practice/training workpiece.

I suggest you can get pretty much the same experience working with something gunlike from the toy aisle at Wallyworld and such.

Acrylics make good materials to work with while working out color schemes, color mixing, and masking/spraying techniques, and can be easily removed for another go at it with simple spray-on oven cleaner and a quick stiff brush scrub in the bathtub. The plastic toy gun isn't going to complain or reveal costly errors in your techniques through ruined real and costly components.

Greg
 
Re: Rifle Painting Tutorial

+1 Greg. I did a practice painting on a wooden gun I cut fron a 2x8 first to make sure I could get the right results first. If you mess up with krylon it will come off pretty easy with carb or break cleaner, or denatured alcohol. But it is a lot of extra work so I do suggest a prctice piece first. Also find something you can do a practice tape off job on too. Even if you have a pellet gun and scope for it, it is a good practice piece. Better than screwing up your $3000.00 (or more in many cases) worth of rifle and scope. Also, something not mentioned here, if you paint your scope caps, especially the insides, make sure the paint has completly cured before you start putting them back on and opening and closing them. If not fully cured, paint chips can come loose from opening and closing the caps, and I can bet you it will find its way to your scope lens and then you will have wet paint chips that will be a real pita to get off, or could damage your lens.
 
Re: Rifle Painting Tutorial

Thanks for the tips guys, I have a 22 that is dire need of a practice job. I'm going to try a desert digipat on it.
 
Re: Rifle Painting Tutorial

<div class="ubbcode-block"><div class="ubbcode-header">Originally Posted By: Sgt. Badger</div><div class="ubbcode-body">Followed Trigger Monkey's tips and repainted my SPR the other day.

100_2326.jpg


100_2324.jpg


</div></div>

Very nice!

 
Re: Rifle Painting Tutorial

<div class="ubbcode-block"><div class="ubbcode-header">Originally Posted By: wjwill</div><div class="ubbcode-body">
Solid OD green base coat.
IMG_1215.jpg

Here is the finished rifle after I added some kahki to it.
IMG_1587.jpg

</div></div>

That came out really well. I don't see too many people using OD green as a base coat.
 
Re: Rifle Painting Tutorial

I prefer to use OD Green as a base coat. It's simply a matter of creating a graph and determining what is the base color for your environment for the longest periods in a year. As you head West, say Kansas, khaki and lighter coats.
 
Re: Rifle Painting Tutorial

My .223 AR15 with Krylon from walmart. Was going to add more colors but it matches my AO so it will stay like this for a bit.

morestuff060ph2.jpg


morestuff062le0.jpg

 
Re: Rifle Painting Tutorial

what do you use to take the paint off rifle stocks? I used acetone and it turned it white.
 
Re: Rifle Painting Tutorial

Here is my try at using grass. I was actually impressed, this is a very simple way to paint a rifle, and I was able to complete the entire project(prep. time included) within 25 minutes. Most of the time was dedicated to taping, and finding the right size cuts for the turrets, it only like around 5 minutes to paint the rifle.

img0453xd7.jpg

By zortmo01, shot with Canon PowerShot SD1100 IS at 2008-08-11
img0456gd0.jpg

By zortmo01, shot with Canon PowerShot SD1100 IS at 2008-08-11
 
Re: Rifle Painting Tutorial

Great tutorial! I followed it, but I changed some things to my likings.

EDIT: I'll post up my paint job soon. I need to take the pics.
 
Re: Rifle Painting Tutorial

<div class="ubbcode-block"><div class="ubbcode-header">Originally Posted By: pickpick</div><div class="ubbcode-body"> what do you use to take the paint off rifle stocks? I used acetone and it turned it white. </div></div>

Try lacquer thinner?
 
Re: Rifle Painting Tutorial

Acetone works for me. What type of material is it (rifle stock) made of (wood w/finish to it?) It works great on fiberglass (www.mcmfamily.com!) Sand down the stock, then when your stock turns into a toothpick; buy a fiberglass stock! Just trying to help out!
 
Re: Rifle Painting Tutorial

Followed the tutorial and painted up my new Savage FP10 with Choate stock.

Taped up
DSC01277.jpg


Khaki Base
DSC01285.jpg


A little OD
DSC01287.jpg


A little Brown
DSC01288.jpg


And Voila!
DSC01289.jpg


Here are some outside shots
DSC01290.jpg

DSC01293.jpg

DSC01294.jpg

 
Re: Rifle Painting Tutorial

I think I read where someone used a "minnow net". I assume its fishing net for really small fish.

Hope that helps.
 
Re: Rifle Painting Tutorial

hey , well i tried this , i think it worked well for my first time, im in AZ with alot of desert so i only used the tan, and brown no green, but might add some cause it looks killer on the others, and it might make it more adaptable in the long run. here are the before, durring and afters... i have a Stag Model 3 with an EOTech 512.
DSC08633.jpg

DSC08638.jpg

DSC08662.jpg

DSC08663.jpg

DSC08665.jpg

 
Re: Rifle Painting Tutorial

<div class="ubbcode-block"><div class="ubbcode-header">Originally Posted By: Camo_Toe</div><div class="ubbcode-body">1st attempt, following directions laidforth herein.
Tday.jpg
</div></div>

You might want to go to Wal-mart, get some Krylon OD khaki and brown and re-spray that thing.

Just curious, where are you that your camo choices were khaki and red...?
 
Re: Rifle Painting Tutorial

You might want to go to Wal-mart, get some Krylon OD khaki and brown and re-spray that thing.

Just curious, where are you that your camo choices were khaki and red...? [/quote]

It is brown, ha ha the camera looks brighter and redder. . .ha ha
 
Re: Rifle Painting Tutorial

Thanks a bunch for posting this thread/tutorial, jumped in with both feet and gave it a try:

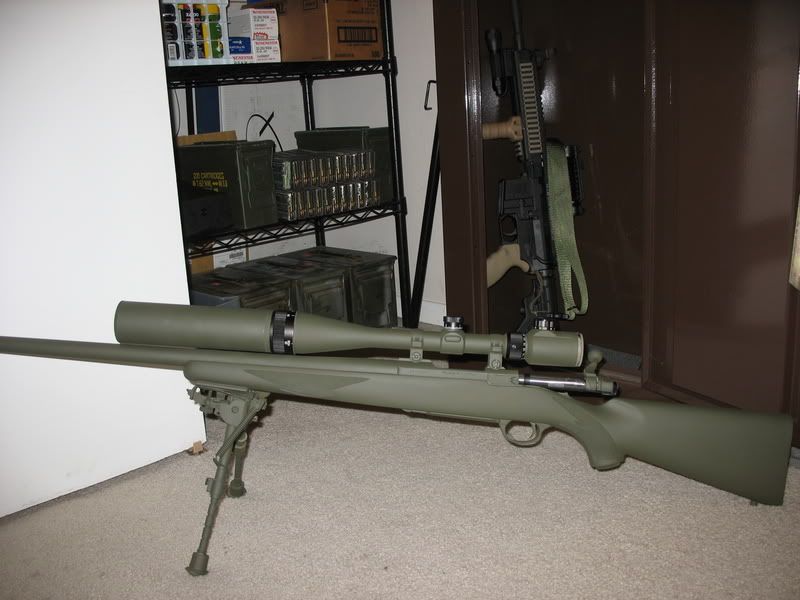
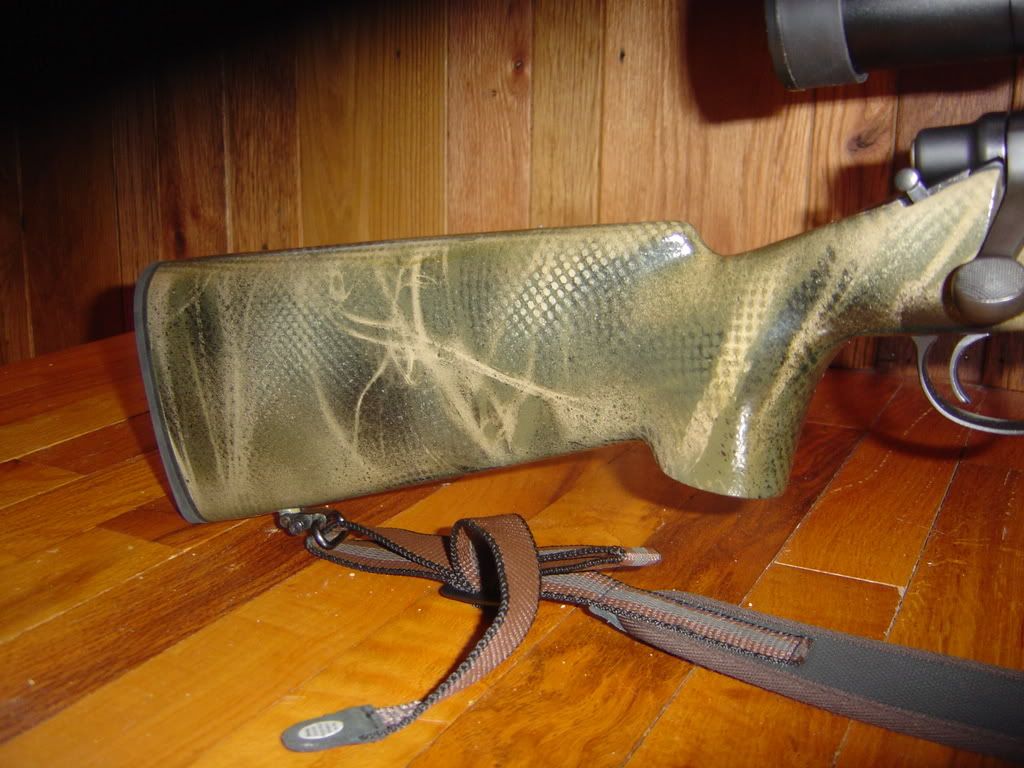
First stripped as much as I could access with acetone, took a long time. Hard to see last camo job, a thick coat of paint that ended up a dark blob best described it:
begin%201.jpg


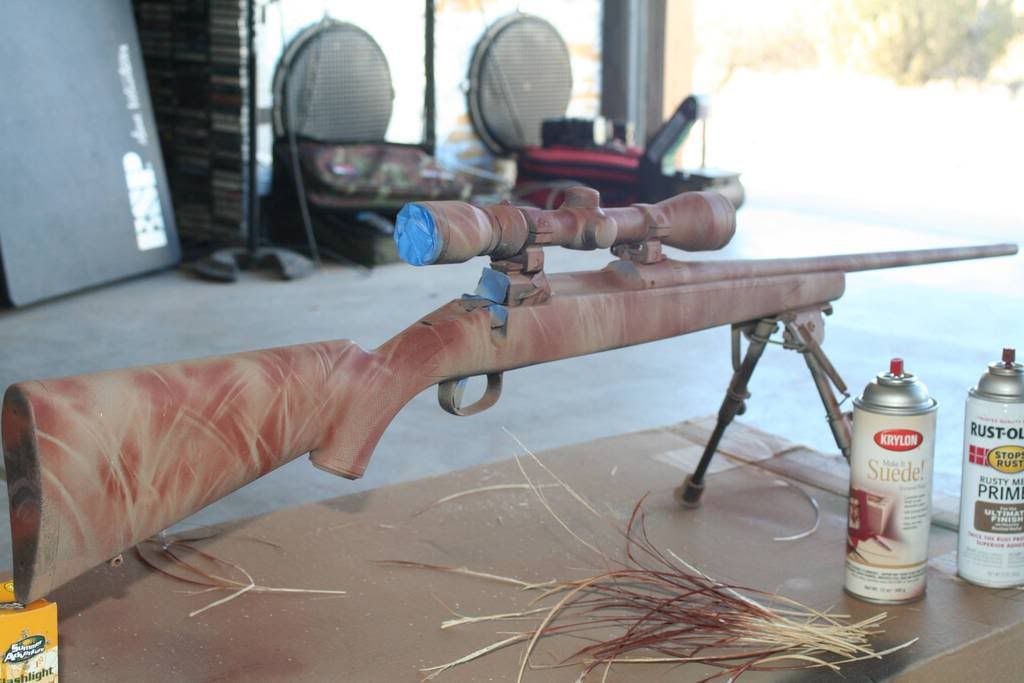
Once I stripped it down and masked all the necessary things I put a base coat of tan that had a slight texture to it. The grass, leaves, etc. on the table are fakes I bought at a local craft store, really only ended up using the thick bunch of grass on the left:
base%20coat%20and%20tools%201.jpg


Midway point, wished I could have left it there, it looked good, but I needed it darker...
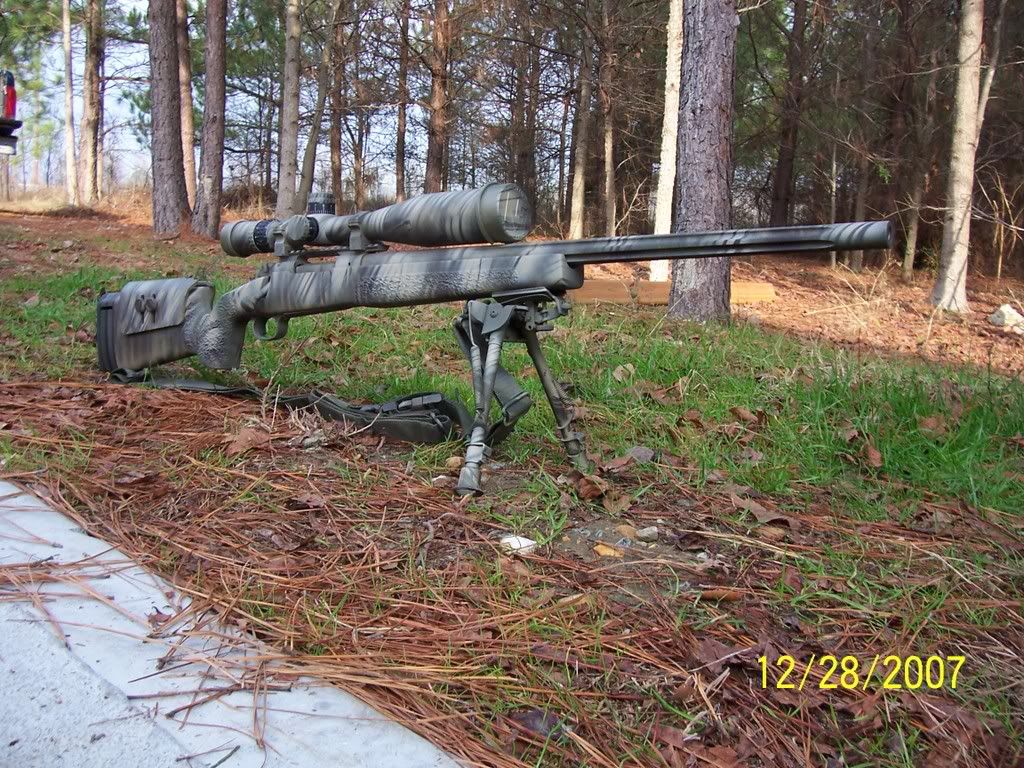
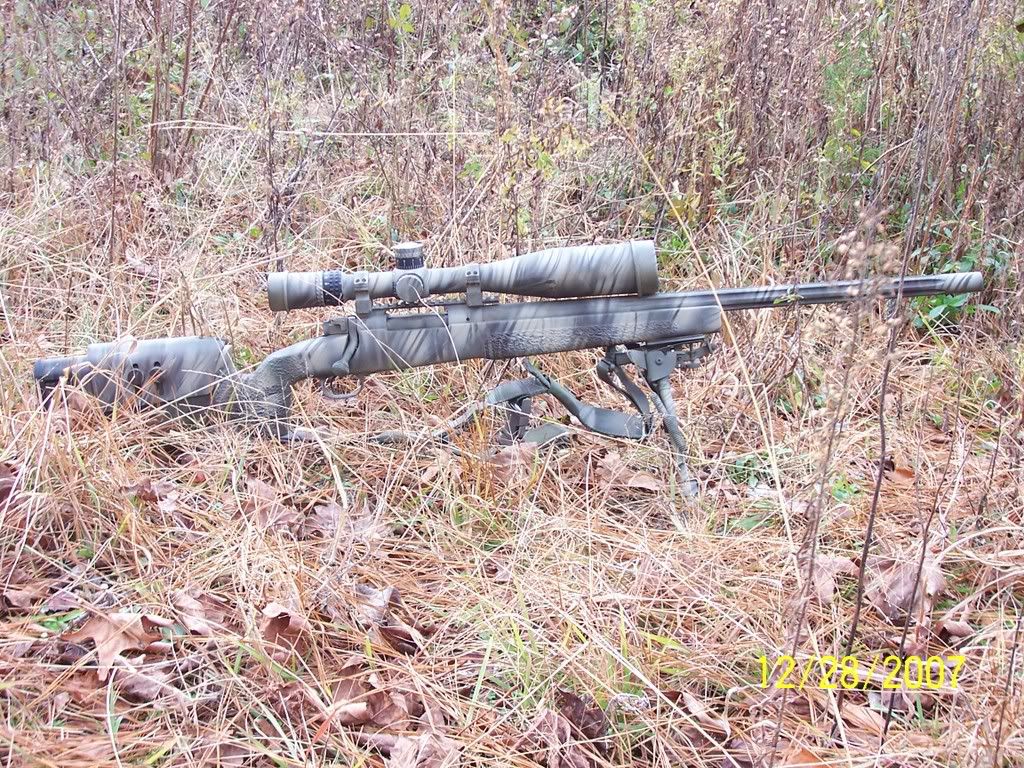
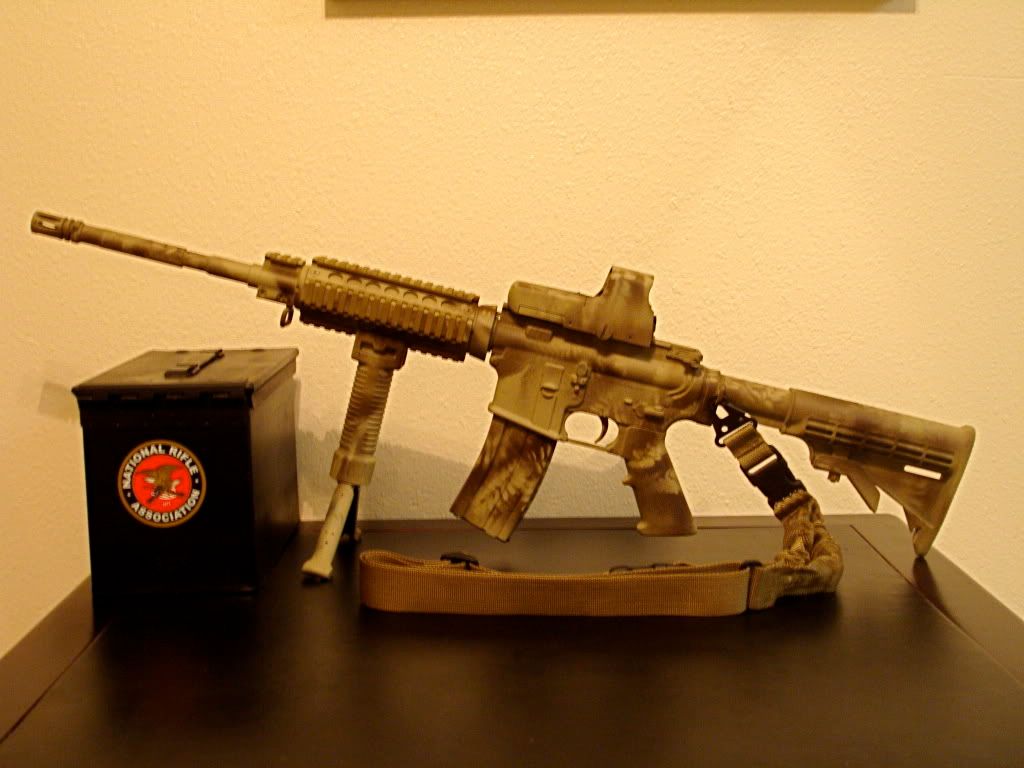
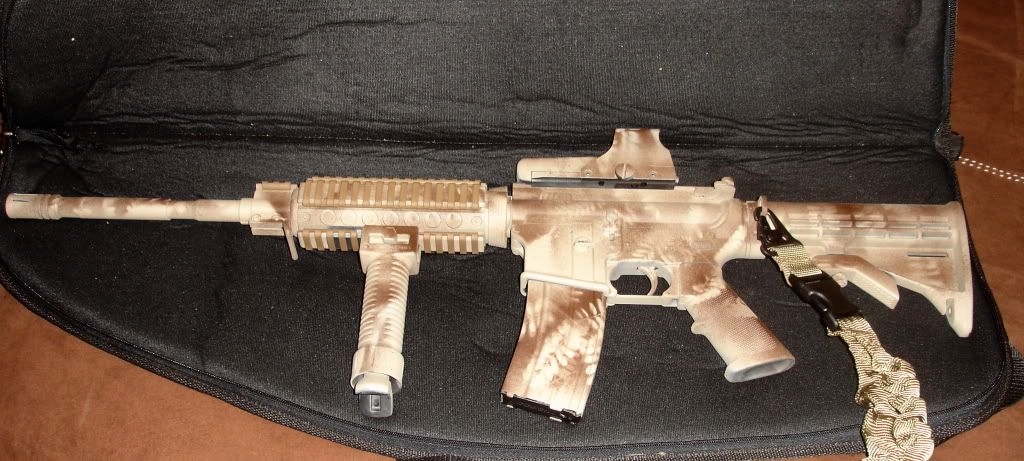
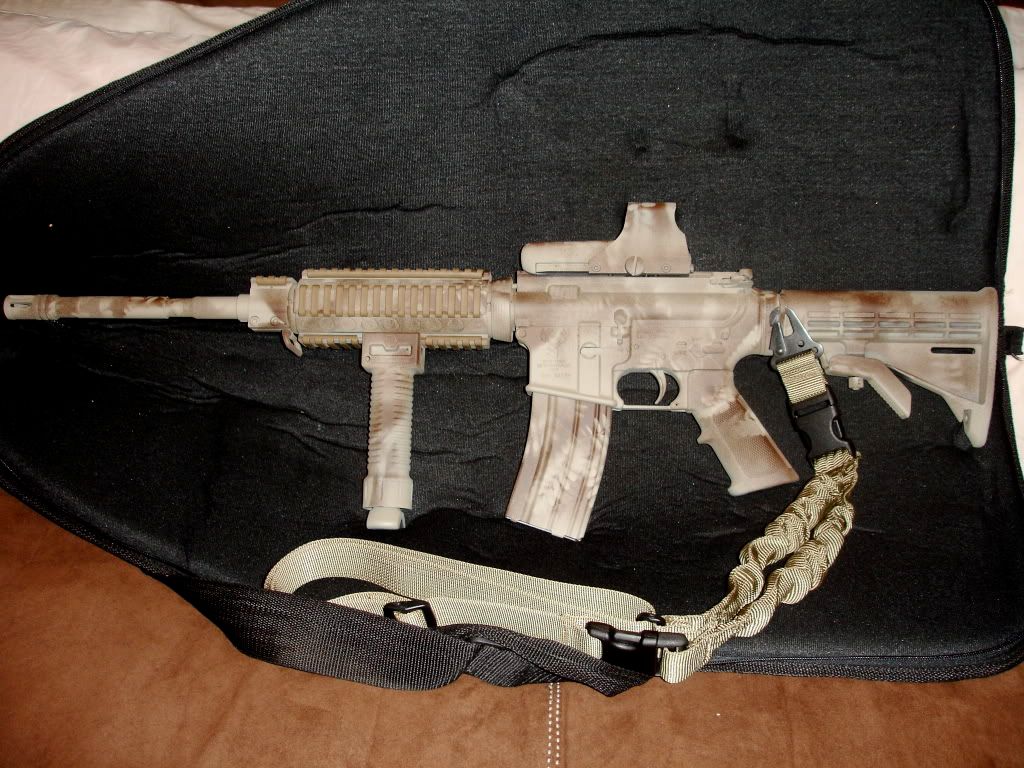
midway.jpg


Finished.

308%20camo%20final%201.jpg


308%20camo%20final%202.jpg


Maybe too dark, maybe too much paint, but I am positive that I can do a better job next time as I learned a lot while doing it. And it works good for now, way better than it was. Thanks for the tips!
 
Re: Rifle Painting Tutorial

Looks good to me. How dark/light should depends on where you are hunting etc.

Lw
 
Re: Rifle Painting Tutorial

Hello all,
I wanted to add some info to this tutorial. I recently spoke with two chemists at Krylon for specific information on the Krylon Camo paints. With the new Krylon "Fusion" Camouflage paints they recommend NOT using an Adhesion Promoter or any primer on metal (including blasted barrel, receiver, etc.) synthetic or wood surfaces of a rifle. They say the new formula of the Fusion Camouflage paints eliminates the need of an adhesion or primer coat. And when I questioned them if using a primer anyway would be better for longevity or resilience they emphatically said no.

Hope this helps anyone with an upcoming paint project.
 
Re: Rifle Painting Tutorial

Hey just got done painting my .22LR Rifle, and I want to say one thing.....

YOU ARE THE MAN!

DANG MY GUN LOOKS GOOD! It's a lot better than the plain shiny black too!

If I remember, I will take some pictures and put them up on here. It took me quite a while to do, but I am a perfectionist and I took about an hour to just tape everything off...

I'm glad that I saw this thread cause you made my rifle look sexy sexy!

riflesmalluy7.jpg