• Watch Out for Scammers!

    We've now added a color code for all accounts. Orange accounts are new members, Blue are full members, and Green are Supporters. If you get a message about a sale from an orange account, make sure you pay attention before sending any money!

Maggie’s The Welding and Metalworking Thread

This was done by one of our members that lives in Jacksonville, FL.
It was made for his then fiancee, now wife.
It was still unfinished at this point. For some reason I don't have the completed pics.
temp.jpg


John,
I hope you don't mind me reposting your handiwork.
 
  • Like
Reactions: Barneybdb
Found the text with the completed table. John trimmed the back edge and made a window table.
The cutoff piece became a wine bottle rack for his inlaws.
IMG_20170220_150826319.jpg

IMG_20170210_170654877.jpg
 
  • Like
Reactions: Barneybdb
More info, please. That is amazing? How's it done?

Cheers,

Sirhr


Thanks guys! been getting a lot of PM's on the specifics, so I will post some links here.

These are a variation of Live edge river tables, a concept started ( I think) by Greg Klassen. His tables use an intricately cut piece of glass. You take a live edge slab, cut it in half, and orient the two live edges facing each other so it mimics a river. Now people are using epoxy to fill the void with various pigmented epoxy pours.

My process is a little different than others because I am using melamine to make the molds, then silicone caulk as needed to prevent leaks (no weird time consuming tape, or mold release spray). This leaves a funky edge so this becomes cut offs generally. So far I have not had any issues with product sticking so bad I cant get it out. Patience with a small pry bar does the trick.

http://www.gregklassen.com/products

The epoxy I use (its cheap)

https://www.amazon.com/Crystal-Clea...?ie=UTF8&qid=1539029664&sr=8-5&keywords=epoxy

The pigments

https://www.amazon.com/VARIETY-vari..._rd_t=40701&psc=1&refRID=398H97RS3SMFQ4Q5F8SR

Here are some video links


more to come shortly as I am finishing 2 now.
 
We ended up not liking the final dimensions, so my wife sketched up a frame design, and now it is a wall hanging.

20181010_153736.jpg


Getting closer with the gun room work bench. Needs a shelf, paint, and the top secured.

20181007_142337.jpg


And started on my winter project. Got this old trailer from the inlaws. Needs some love, but has plenty of life left... i hope. My buddies and i will use it to tow dirt bikes and the likes.

100534.jpeg

100830.jpeg
20181008_075720.jpg
 
Sorry to the Georgia fans:

IMG_2883.JPG


National Welding Supply had a competition booth at the Gumbo Cookoff in SW La this last weekend. Giving this baby away on a drawing. I didn't even bother to enter because I'm in AL and would get my leads cut every day, bit man it was slick.
 
On my recent battlefields adventure, I went to a really cool museum called the "Sea War" museum in Jutland. They cover the battle of Jutland, but also Naval battles in the North Sea dating back... a long way.

In the museum was this beautiful little brass model of a WW1 German Sea Mine that had been a presentation gift to some German Admiral who commanded mine-laying ships in the war. It was a beautiful little bit of craftsmanship. And I wanted to own it in the worst way! Apparently, however, the Danes, as socialist as they are, do not let one open up the case and help one's-self to souvenirs. Especially not Navy ones.

So, I took a couple of photos and decided when I got back to the workshops at Schloss Nitrocellulose, I would make my own! I ordered a pair of brass spheres from India (eBay, of course) and this weekend, made not one but two little models of sea mines.

The British one was incredibly difficult, as it involved splitting the sphere and putting in a copper band, then soldering the whole thing back together. The rest of the little bits were just lathe work and drilling and tapping for 10ba and 14ba nuts, studs and bolts. The studs and nuts are real...
L1070755.JPG


This is the original from the museum in Jutland

44430237_1573005196179455_9104904529454825472_n.jpg


Here is my pair. The British one with the copper belt is on the left. The German Spherical mine on the right. Watch is there for scale.

44508747_1573223252824316_2324297031985659904_n.jpg


Both complete with all their parts, but one is ready for final polishing (the German one) and the British one on the left still needs to have the excess solder filed off and all the joints cleaned up.

These are all copper, brass, bronze and German Silver. No plastic. All soldered. No adhesive at all.

No reason for making them except that I loved the little one in the museum and thought I would see if I could match the workmanship of whoever made the original. I actually learned some new soldering and fluxing and fixturing techniques on these. Once polished and put on wood bases, they will be lovely little trinkets.

Cheers,

Sirhr
 
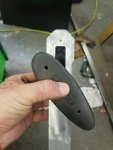
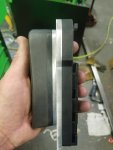
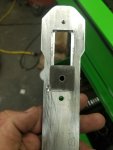
Decided to practice using a mill and made an adjustable pad for my desert tech. Went pretty good, had a few mistakes along the way but I'm pretty happy with it. Forgot to subtract half the tool diameter so I have a little screw up on my final piece.
 

Attachments

  • 20181017_193848.jpg
    20181017_193848.jpg
    270.7 KB · Views: 114
  • 20181017_193916.jpg
    20181017_193916.jpg
    312.9 KB · Views: 109
  • 20181017_193436.jpg
    20181017_193436.jpg
    402.5 KB · Views: 95
On my recent battlefields adventure, I went to a really cool museum called the "Sea War" museum in Jutland. They cover the battle of Jutland, but also Naval battles in the North Sea dating back... a long way.

In the museum was this beautiful little brass model of a WW1 German Sea Mine that had been a presentation gift to some German Admiral who commanded mine-laying ships in the war. It was a beautiful little bit of craftsmanship. And I wanted to own it in the worst way! Apparently, however, the Danes, as socialist as they are, do not let one open up the case and help one's-self to souvenirs. Especially not Navy ones.

So, I took a couple of photos and decided when I got back to the workshops at Schloss Nitrocellulose, I would make my own! I ordered a pair of brass spheres from India (eBay, of course) and this weekend, made not one but two little models of sea mines.

The British one was incredibly difficult, as it involved splitting the sphere and putting in a copper band, then soldering the whole thing back together. The rest of the little bits were just lathe work and drilling and tapping for 10ba and 14ba nuts, studs and bolts. The studs and nuts are real... View attachment 6959210

This is the original from the museum in Jutland

44430237_1573005196179455_9104904529454825472_n.jpg


Here is my pair. The British one with the copper belt is on the left. The German Spherical mine on the right. Watch is there for scale.

44508747_1573223252824316_2324297031985659904_n.jpg


Both complete with all their parts, but one is ready for final polishing (the German one) and the British one on the left still needs to have the excess solder filed off and all the joints cleaned up.

These are all copper, brass, bronze and German Silver. No plastic. All soldered. No adhesive at all.

No reason for making them except that I loved the little one in the museum and thought I would see if I could match the workmanship of whoever made the original. I actually learned some new soldering and fluxing and fixturing techniques on these. Once polished and put on wood bases, they will be lovely little trinkets.

Cheers,

Sirhr


good job, way to be a go getter
 
Every once in a while you can find good deals on craig's list. But be careful. I bought a Miller Maxstar 150 for $400. Have been using it for 1.5years now flawlessly to TIG Weld. I also have the Lincoln 210MP and has been great too for what it is. I got the Lincoln when it first came out before there was much out there. I have definitely made my money back off of them. Next thing I want is a Plasma Table.
 
  • Like
Reactions: Barneybdb
BTW, if anyone is interested, I have a spare welder... Miller EconoTig. I bought a better one, but right after having this completely rebuilt by Miller. It was my first TiG and is a super machine. Comes on a cart with torch, pedal, etc. Ready to add a tank and start welding. It is a perfect machine for the small shop, hobbyist or student welder.

PM me if interested. Looking for $900 or will trade for/towards interesting guns/scopes/militaria/artillery, etc. Pick up in VT or might be able to bring somewhere down the East Coast or out to Ohio on one of my upcoming trips.

Cheers,

Sirhr
 
Sadly I gave up on a wood burner in my basement. Can’t get a contractor to build the chimney. Ins company won’t let me build it either so I’ll have to settle for a pellet stove?
 
I wish there was a section for sale of welders. I have a Miller welder and Hypertherm plasma cutter to sell.

I have a Hypertherm plasma cutter (made not far from here) and that thing is the 'nads! Great investment and if anyone wants a cutter, then this American company is the one to support.

Just a plug for a great machine and company.

Cheers,

Sirhr
 
I have a Hypertherm plasma cutter (made not far from here) and that thing is the 'nads! Great investment and if anyone wants a cutter, then this American company is the one to support.

Just a plug for a great machine and company.

Cheers,

Sirhr
They are great. I actually have 2. That she why I am selling one. I love using it. It's cutting metal like a knife through butter.
 
I wish I bought a bigger plasma cutter. I started with a Miller 375 cut mate but would like to have one rated for 3/4".
 
We ended up not liking the final dimensions, so my wife sketched up a frame design, and now it is a wall hanging.

View attachment 6954582

Getting closer with the gun room work bench. Needs a shelf, paint, and the top secured.

View attachment 6954583

And started on my winter project. Got this old trailer from the inlaws. Needs some love, but has plenty of life left... i hope. My buddies and i will use it to tow dirt bikes and the likes.

View attachment 6954585
View attachment 6954587View attachment 6954586
Looks good as wall art. After i finish the river table i am working on i am gonna do a lamp with led back lighting.
 
This was done by one of our members that lives in Jacksonville, FL.
It was made for his then fiancee, now wife.
It was still unfinished at this point. For some reason I don't have the completed pics. View attachment 6953492

John,
I hope you don't mind me reposting your handiwork.
No mike i dont mind at all. Hope all has been goin well for you
 
Other than my jacked up back, things are great as usual.
How about you?
Did you have to leave town to play with any electricity after these two hurricanes?
Thanks i appreciate it. Make sure to post up pics of this lamp, you have me intrigued.
Didnt have to leave town. I make the power dont care where or what it does after that. Lol. Been fishin quite a bit waiting in the flounder to stack up to get some in the freezer. Got plenty of reds and trout already.

Mz gonna do the lamp basically like your table just real light on the tint and a small led strip in a routed groove in the backside. Did i just say geeove in the backside. Yup sure did
 
  • Like
Reactions: Sean the Nailer
I'm a machinist for a major US airline. I get to make some neat bits from time to time. I also like tinkering with motorcycles and cars.

Exhaust port caps for a Wright R-1820 display engine in our museum

20140209_231629-L.jpg


20140209_231647-L.jpg


Pressure test fixture for a fire suppression system

FB_IMG_1533596763378-M.jpg


A 5-3/4" wrench

FB_IMG_1533596236510.jpg


A couple of random fittings

10400456_1155928331113_7310744_n-M.jpg


0204000446-M.jpg


Clutch cover for my TL1000S

FB_IMG_1533596265948.jpg


Brake reservoir mount for the TL1000S

clamp-M.jpg


A piece I made for my son's bedroom door

IMAG0196-M.jpg


Bar riser for an Aprilia Falco I made for a friend

IMG956718-L.jpg


Cake topper for our wedding

FB_IMG_1533596204978-M.jpg


Christmas trees that I give out to family and friends

FB_IMG_1533596242560-M.jpg


Salt and pepper shaker set I made for my mother-in-law

0906091940-M.jpg


Cake topper for a friends wedding

20170506_022323-L.jpg
 
Not sure if this fits in here with your guys amazing skills. Some really good looking work in this thread.

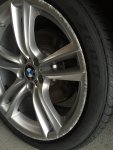
I re-weld and bond copper to Aluminum for a German Auto company.

Started out as a wheel program only, but it’s grown to so much more, especially with how many aluminum parts on are vehicles these days.
 

Attachments

  • 3D0DF4F7-D8B3-429B-829E-F082E8E80092.jpeg
    3D0DF4F7-D8B3-429B-829E-F082E8E80092.jpeg
    401.3 KB · Views: 143
  • 30A03D92-48BB-4C66-968D-3AFAF4C33741.jpeg
    30A03D92-48BB-4C66-968D-3AFAF4C33741.jpeg
    454.7 KB · Views: 126
02456270-DE71-48AA-B778-22C0D1A1BE73.jpeg
So my ‘57 ford needs a rear bumper. Had a little break in the action so I cut out some brackets today out of 3/8 plate. Used the little plasma cutter that replaced our old miller. I don’t really like it compared to the old monster that we had.
10F1E5F3-5443-4591-8272-9D65C2FA867D.jpeg
Cleaned up the plasma cut on the mill. I took the last .007” as fast as I could, a bit of chatter made an interesting finish that I’ll leave there.
 
Been busting my ass (and knees, and back) on this little project for most of the week. It's my first paid solo welding job:

IMG_2956.JPG


18' trailer deck that can be sucked onto the chassis of a roll-off dump trailer so the owner can shrug off the dump body and load a bobcat or mini excavator. Finally got it welded out to the point that it's now up on jack stands, but man it was a lot of time on my knees and laying on the ground to get it there. If the weather cooperates (unlikely) and some parts arrive (also questionable) it should be put to the test by next weekend.

If this design works as he's hoping the client wants me to build some square (versus hoppered) dump bodies to go along with it.
 
Been busting my ass (and knees, and back) on this little project for most of the week. It's my first paid solo welding job:

View attachment 6965155

18' trailer deck that can be sucked onto the chassis of a roll-off dump trailer so the owner can shrug off the dump body and load a bobcat or mini excavator. Finally got it welded out to the point that it's now up on jack stands, but man it was a lot of time on my knees and laying on the ground to get it there. If the weather cooperates (unlikely) and some parts arrive (also questionable) it should be put to the test by next weekend.

If this design works as he's hoping the client wants me to build some square (versus hoppered) dump bodies to go along with it.


update, stud.
how you getting along w it
 
  • Like
Reactions: Barneybdb
update, stud.
how you getting along w it

Weather has been slowing me down a bit but I can see the end. He keeps adding more stuff he wants but I was able to lay in about 60 welds on Monday. I'm a little bogged down doing some final fit-up things which takes a bit longer without an extra set of hands.

I replied to your text the other night but didn't hear back from you. Maybe my phone is cutting up again?

I'll try to grab an updated pic this afternoon.
 
Last edited:
  • Like
Reactions: Barneybdb
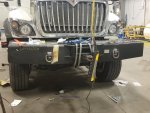
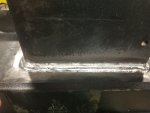
A little out of practice since I've only welded a handful of times this year after I was moved to another part of the company. This is a winch bumper that I am installing, have another one just like it to do once this is done. I really enjoy fabricating and doing this type of work.
 

Attachments

  • 20181108_133818.jpg
    20181108_133818.jpg
    520 KB · Views: 134
  • 20181108_082436.jpg
    20181108_082436.jpg
    320.1 KB · Views: 136
I welded shut a package of Retirement gifts, for one of the guys in the shop. We all called him "Mr. Makita" because he was almost of the opinion that if the job couldn't be tackled with an angle-grinder, then the job simply couldn't be done.

We used to joke that if the boss gave him a sheet of 1" plate, and a 7" angle grinder, and told him that he wanted 1/8 checkerplate, that Mr. Makita would then be in his glory.

So yeah, when it came retirement time, a number of his gifts were placed (protectedly) inside a large disconnect box, and I welded that shut. So he had to get into it, by grinding it open. It took him a while to do it, as he was tearing up so badly that he couldn't see well, looking down.

Good times.....