Join the Hide community
Get access to live stream, lessons, the post exchange, and chat with other snipers.
Register
Download Gravity Ballistics
Get help to accurately calculate and scope your sniper rifle using real shooting data.

Install the app
How to install the app on iOS
Follow along with the video below to see how to install our site as a web app on your home screen.
Note: This feature may not be available in some browsers.
You are using an out of date browser. It may not display this or other websites correctly.
You should upgrade or use an alternative browser.
You should upgrade or use an alternative browser.
Fieldcraft Rifle Painting Tutorial
- Thread starter Trigger Monkey
- Start date
Re: Rifle Painting Tutorial
Thanks punkpigpen. I see plenty of room for improvement on this one. I'll save some money back and get my airbrush replaced and get some more Duracoat and see if I can do better next time. I want this down perfect before I do my brothers rifle for him. the Krylon wasn't very user friendly for detail work.
Thanks punkpigpen. I see plenty of room for improvement on this one. I'll save some money back and get my airbrush replaced and get some more Duracoat and see if I can do better next time. I want this down perfect before I do my brothers rifle for him. the Krylon wasn't very user friendly for detail work.

Re: Rifle Painting Tutorial
Amazing job, and very much appreciated... I want to do a woodlands pattern on my Model 700, with a PPD sztock any ideas?
my best regards Maddawg (another Chris)
Amazing job, and very much appreciated... I want to do a woodlands pattern on my Model 700, with a PPD sztock any ideas?
my best regards Maddawg (another Chris)
Re: Rifle Painting Tutorial
ok well now my son says Pa make it black lol, well I have searched these posts looking for an answer to finishing the metal parts? Any ideas?
maddawg
ok well now my son says Pa make it black lol, well I have searched these posts looking for an answer to finishing the metal parts? Any ideas?
maddawg
Re: Rifle Painting Tutorial
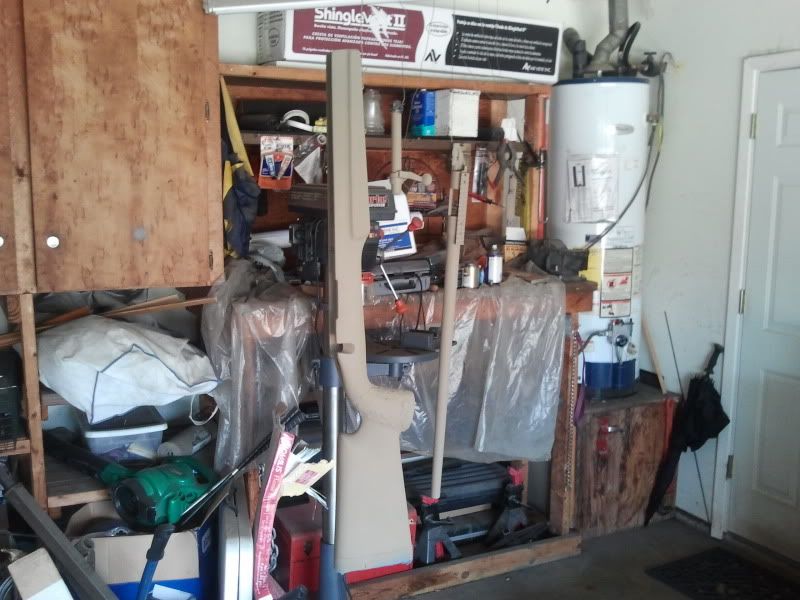
I see some good looking rifles in here. I just painted my .308 today and I'll take some photo's when she back together.
I see some good looking rifles in here. I just painted my .308 today and I'll take some photo's when she back together.


Re: Rifle Painting Tutorial
el gordo2 that is one sweet paint job, on your savage , any how to tips-details other than allready posted ?
el gordo2 that is one sweet paint job, on your savage , any how to tips-details other than allready posted ?
Re: Rifle Painting Tutorial
Great write up. It definitely give s me the piece of mind to spray my own rifle.
Great write up. It definitely give s me the piece of mind to spray my own rifle.


Re: Rifle Painting Tutorial
Hey guys, Ive been following this particular thread for a while and finally decided to register now that I have my rifle painted!
My project gun: Marlin 60SB
It was stainless with walnut stock... didn't like that much.
So, I bought a Boyd's Tacticool stock and gave her a custom paint job for the area.
My steps were:
1) Took everything apart (painted everything separately)
2) Painted everything olive drab green
3) placed my fern leaves and grass on top of the green
4) Painted over everything (with varying thickness for effect) with Krylon Sand Camo and then removed my foliage!
Sorry I didn't take pictures of the process, but here are the final pictures. Tomorrow Im going to go re-sight it in and I will take some pictures outside with some natural sunlight. Should turn out better.
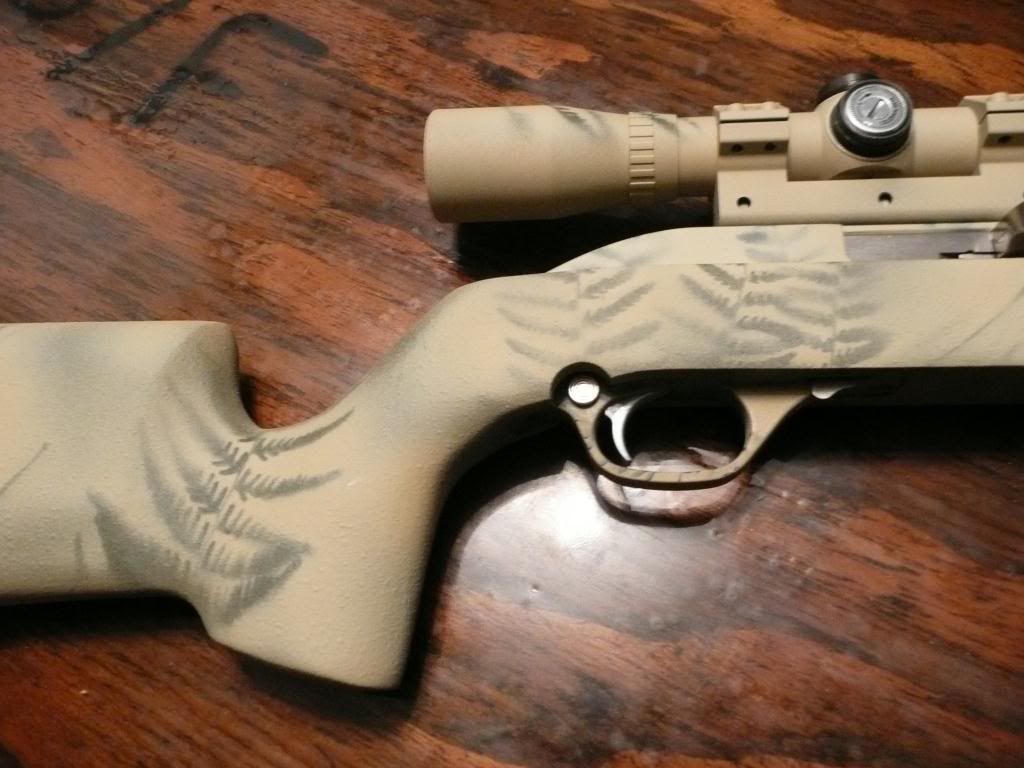
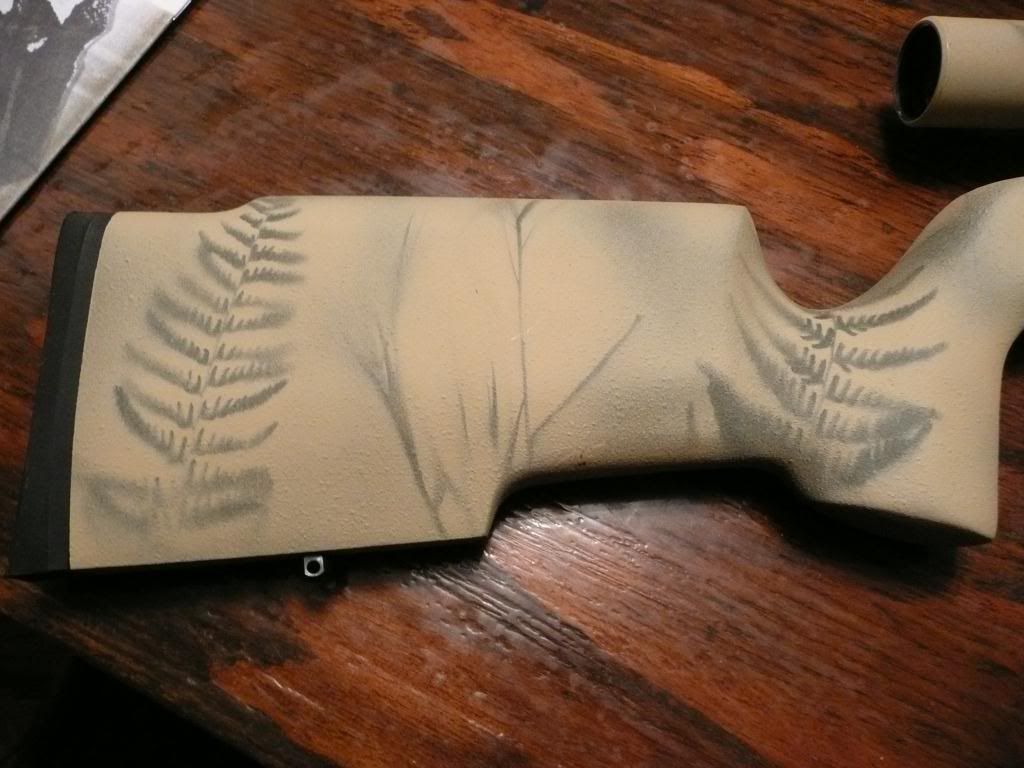
And I absolutely love that tacticool stock... realllly close to the Macmillan A5 and cost under a hundred bucks... can't go wrong with that
Hey guys, Ive been following this particular thread for a while and finally decided to register now that I have my rifle painted!
My project gun: Marlin 60SB
It was stainless with walnut stock... didn't like that much.
So, I bought a Boyd's Tacticool stock and gave her a custom paint job for the area.
My steps were:
1) Took everything apart (painted everything separately)
2) Painted everything olive drab green
3) placed my fern leaves and grass on top of the green
4) Painted over everything (with varying thickness for effect) with Krylon Sand Camo and then removed my foliage!
Sorry I didn't take pictures of the process, but here are the final pictures. Tomorrow Im going to go re-sight it in and I will take some pictures outside with some natural sunlight. Should turn out better.
And I absolutely love that tacticool stock... realllly close to the Macmillan A5 and cost under a hundred bucks... can't go wrong with that
Re: Rifle Painting Tutorial
Great tutorial! I do it a very similer way myself. hoping to paint my 700 sps tac this week sometime!
Great tutorial! I do it a very similer way myself. hoping to paint my 700 sps tac this week sometime!

Re: Rifle Painting Tutorial
<div class="ubbcode-block"><div class="ubbcode-header">Originally Posted By: pickpick</div><div class="ubbcode-body"> what do you use to take the paint off rifle stocks? I used acetone and it turned it white. </div></div>
I use graffiety remover. We had it at work to remove paint from road signs. When they were defaced. Works really well on scopes. Didn't harm wood stocks either.
Re: Rifle Painting Tutorial
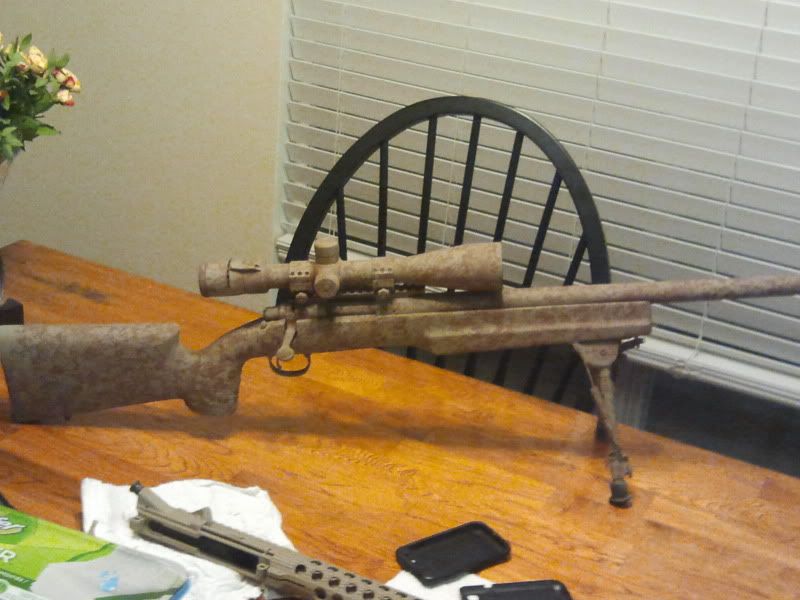
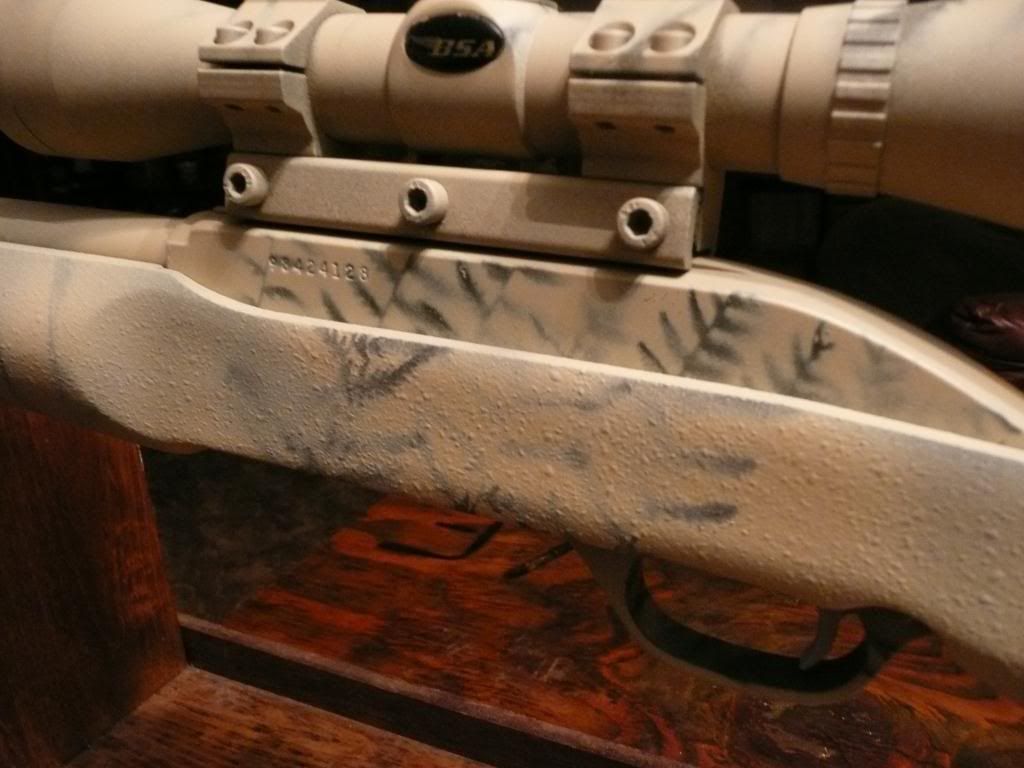
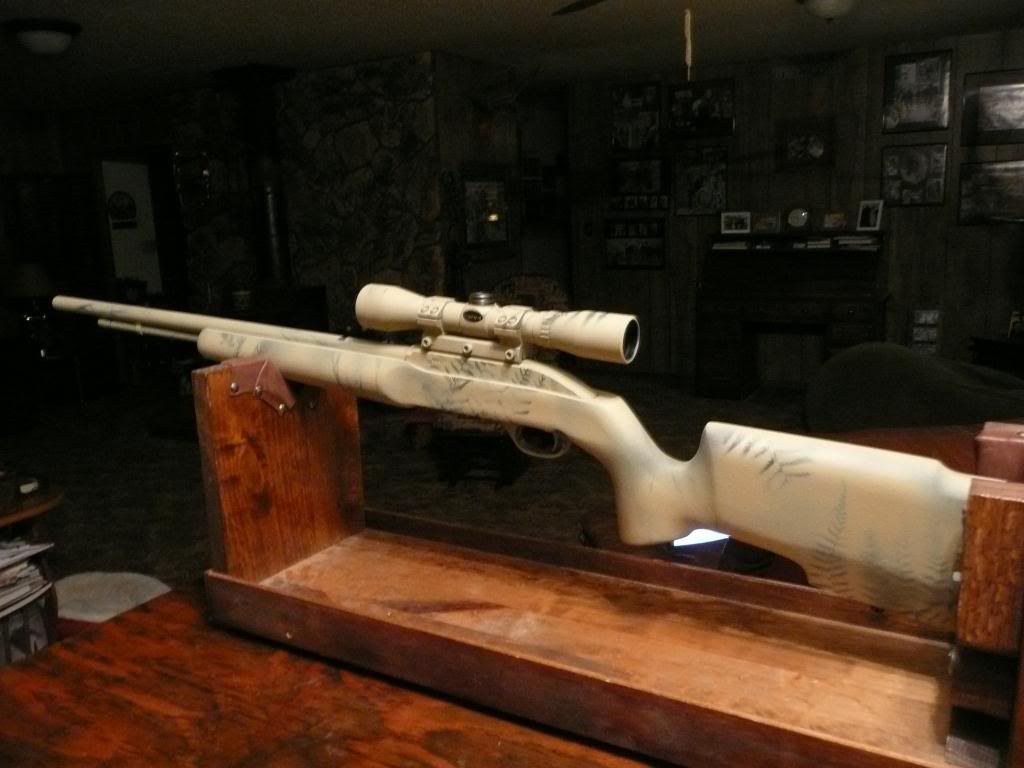
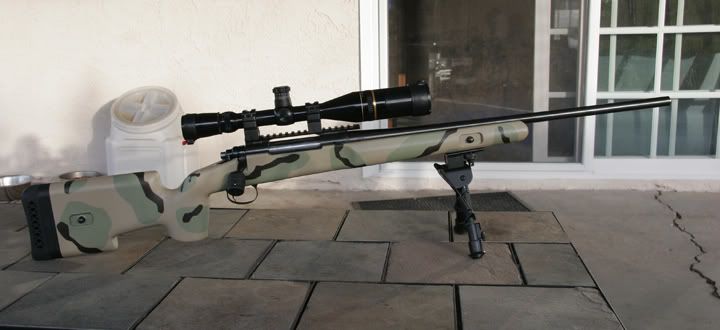
My first painting attempt, trying to replicate the Manners molded-in Desert Sage camo:
www.snipershide.com/forum/ubbthreads.php?ubb=showflat&Main=254987&Number=2887097
My first painting attempt, trying to replicate the Manners molded-in Desert Sage camo:
www.snipershide.com/forum/ubbthreads.php?ubb=showflat&Main=254987&Number=2887097
Re: Rifle Painting Tutorial
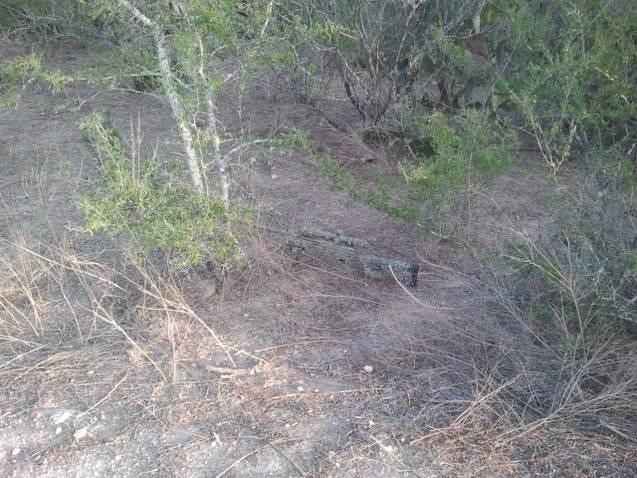
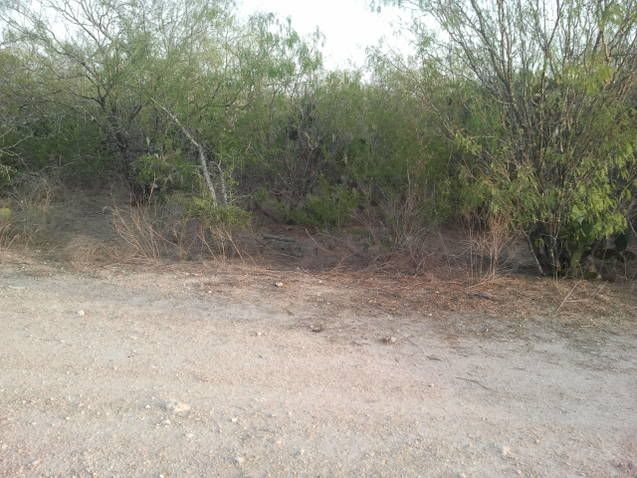

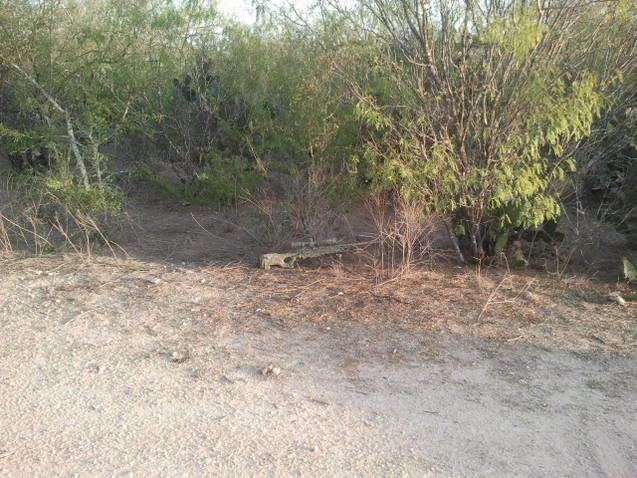
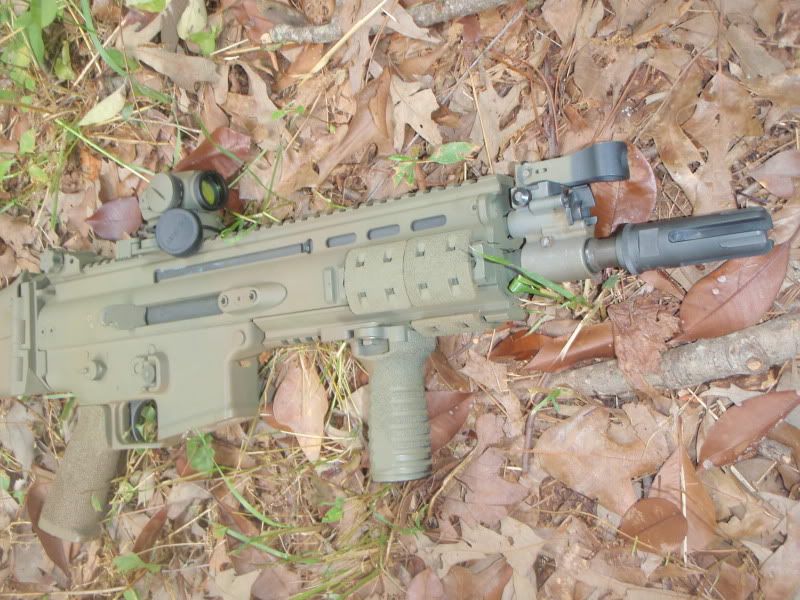
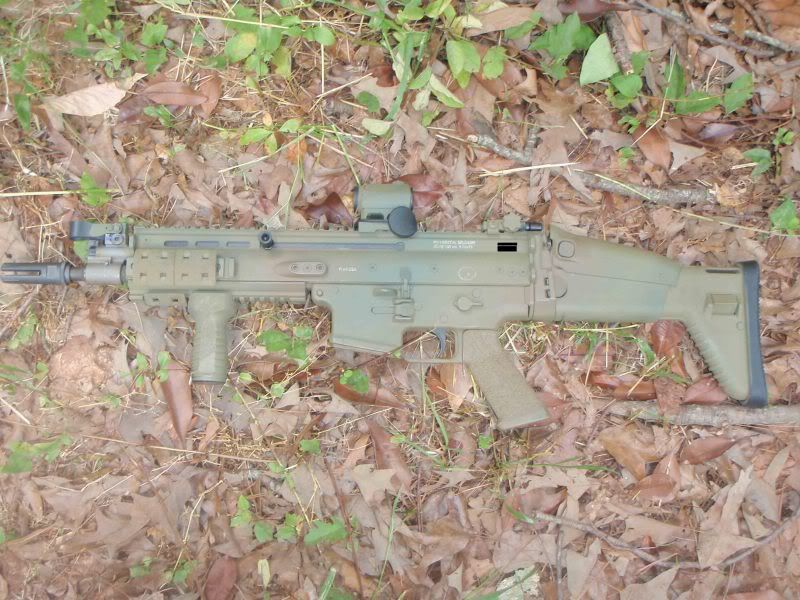
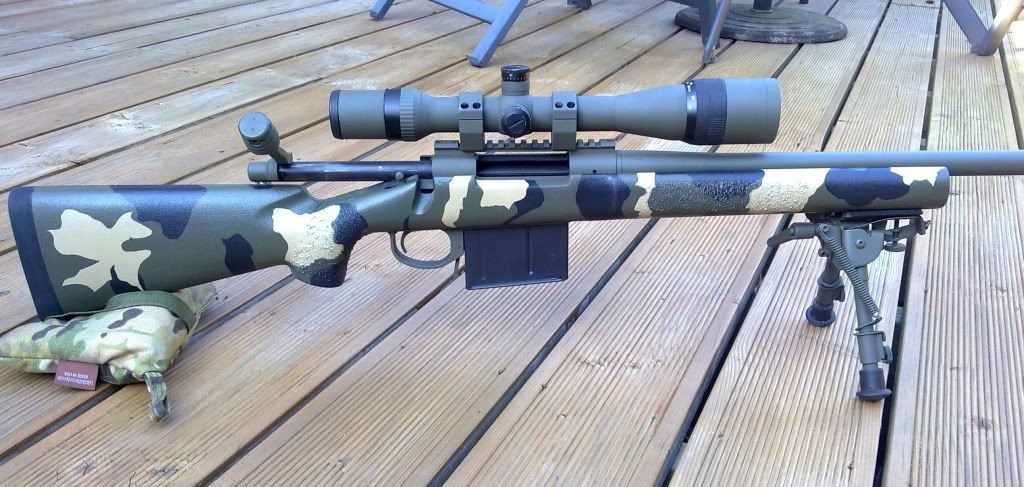
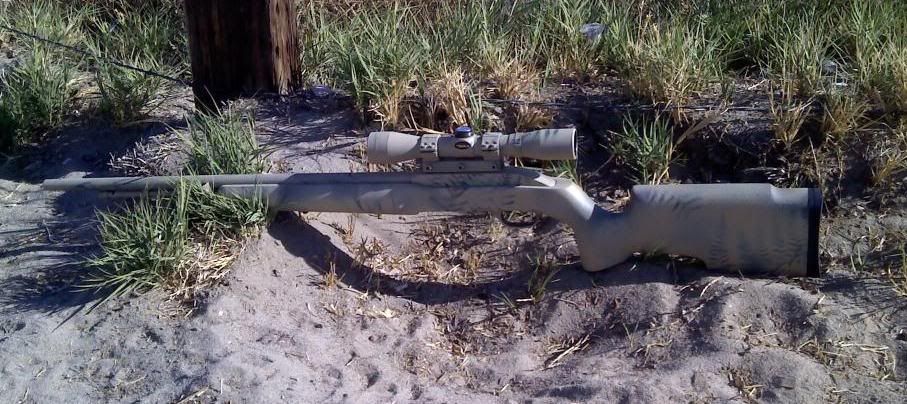
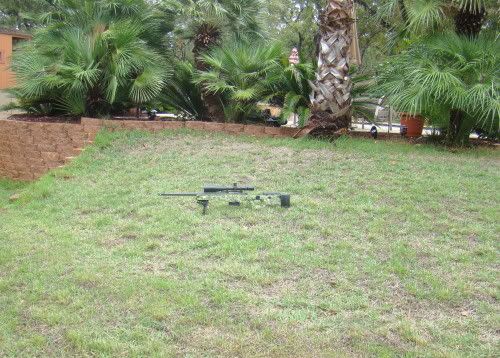
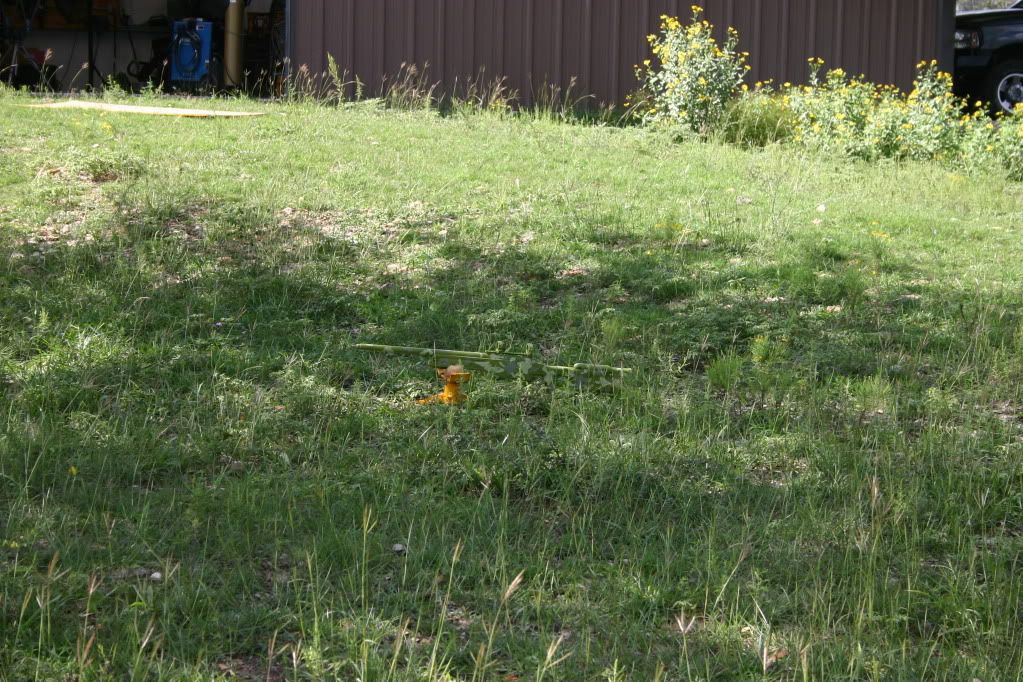
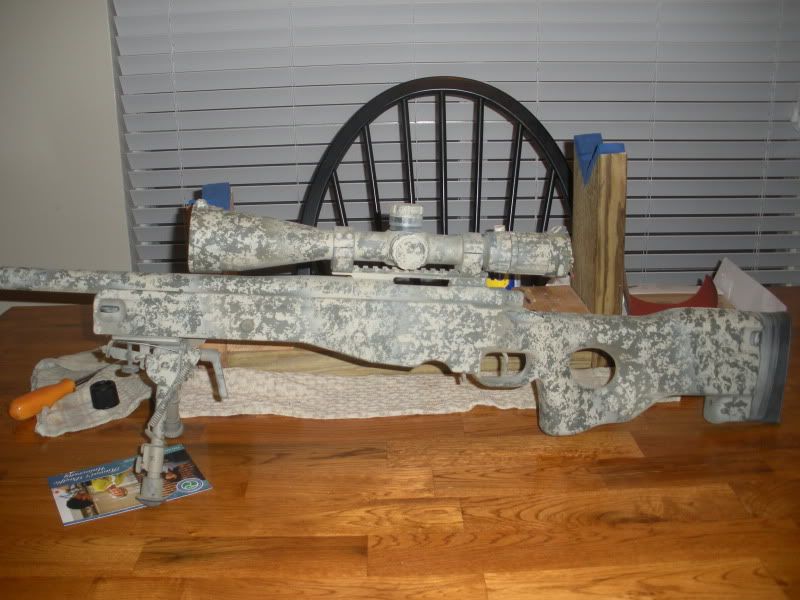
These are pictures from no more that 20-30 feet away any more that that and it is hard to see on the camera.
These are pictures from no more that 20-30 feet away any more that that and it is hard to see on the camera.


Re: Rifle Painting Tutorial
Over the years, I've done a lot of camo painting. Painting directly onto firearms has become less and less desirable for me as the years accumulate. Things wear and become otherwise unsatisfactory, and removal has always been somewhat of a hassle.
These days any rifles/shotguns I own that don't have factory camo are camo'd by first covering <span style="font-style: italic">everything</span> with 3M Blue wide masking tape, then applying either the paint finish or camo duct tape (digital camo duct tape can be used for this) over the masking tape. Naked parts get the tape removed, using an Exacto knife to trim neatly. The rest stays.
Using camo duct tape, I have found that there is no need to match edges and patterns; from beyond 20ft, it just doesn't matter.
Originally, I had qualms about whether this was effective, durable enough, or good for the firearm; but those worries were unfounded.
I have camo jobs that are on the firearm for years now. I have test-peeled back corners and the masking's adhesive is sill easily removed, and will also stick right back down where it was before. The bluing underneath appears to have been protected very well.
If the tape gets damaged or the finish could use replacement with something else (or nothing), the tape can be removed and replaced as needed. The tape itself provides some modest protection from trail rash.
Some fairly interesting projects can be completed, like my Win 94AE .44mag Trapper Carbine with all camo (duct taped) furniture and matching sling.
I just don't like the idea of having anything on the firearm that's either irrevocable, or a pain to remove/replace.
Some may go "Eeeewww" at the idea, and that's fine by me. The resulting camo job trends more (for me) towards the practical than the aesthetic. IMHO; as a concept, camo is more utilitarian than artistic in its intent.
Greg
Re: Rifle Painting Tutorial
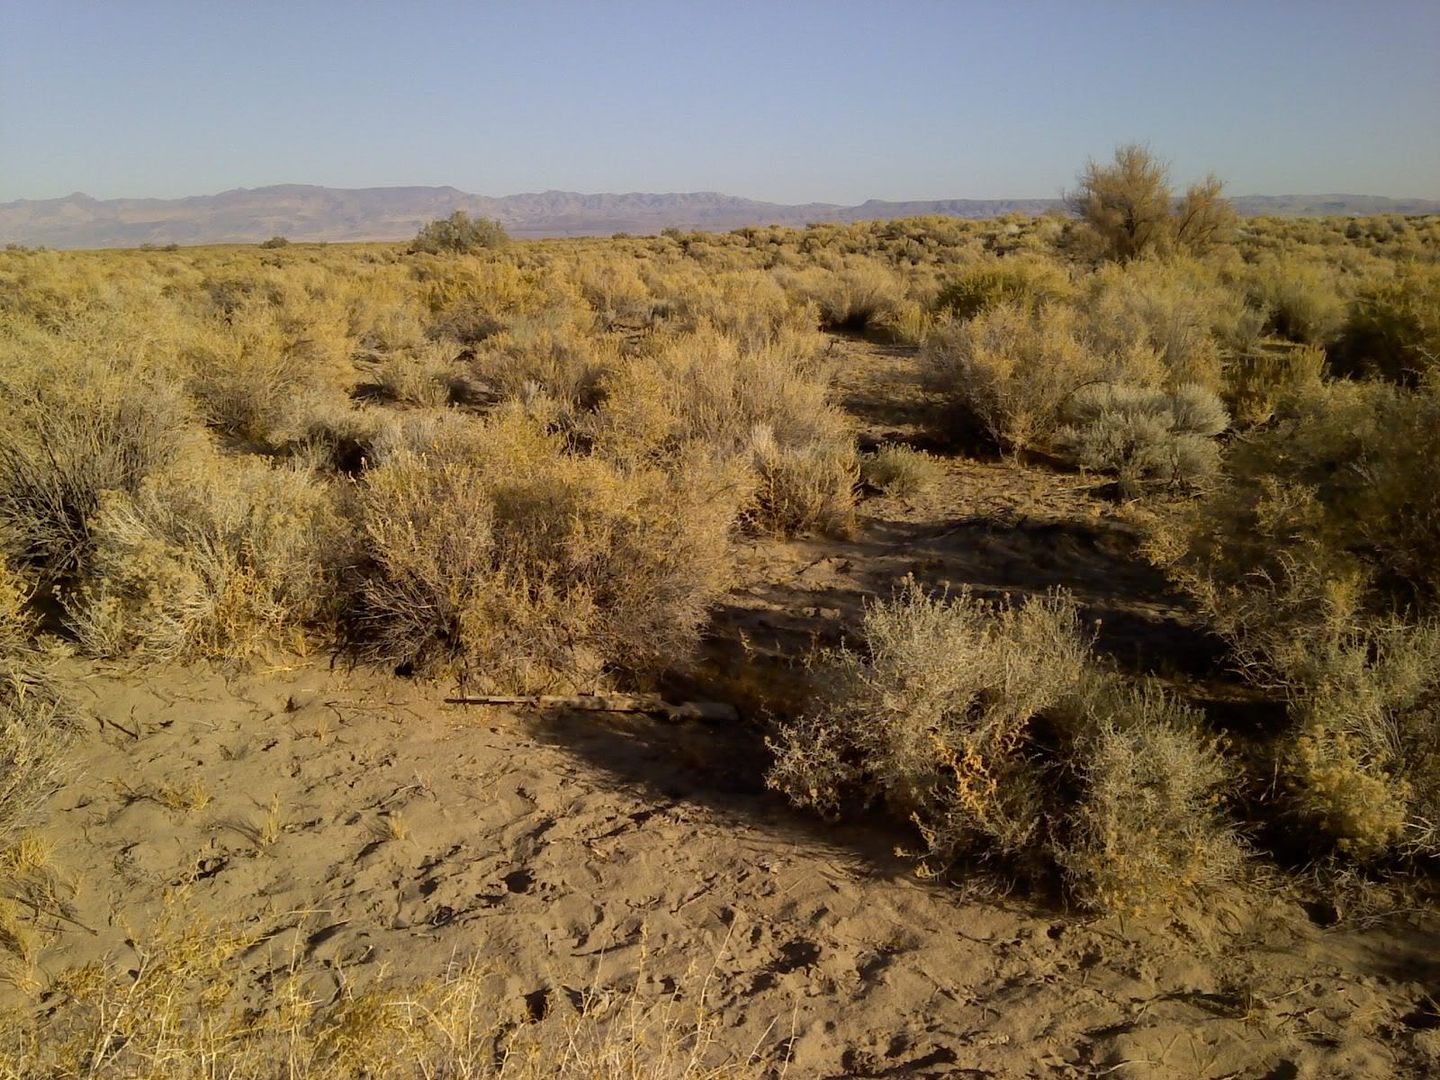
Does anyone have some additional pictures of how to hold the grass clump and the spray can in relation to the grass? Ive been practicing on 2 x 4's and I still dont have the pattern looking good enough to try it for real.
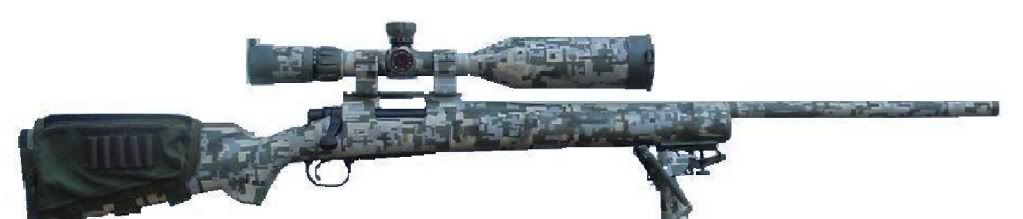
Here's what Im trying to make it look like:

Does anyone have some additional pictures of how to hold the grass clump and the spray can in relation to the grass? Ive been practicing on 2 x 4's and I still dont have the pattern looking good enough to try it for real.
Here's what Im trying to make it look like:
Re: Rifle Painting Tutorial
<div class="ubbcode-block"><div class="ubbcode-header">Originally Posted By: bluedsteel</div><div class="ubbcode-body">Trigger Monkey et al;
How has your rifle held its paint? Has any worn off or just washed away?
I just painted an old Crosman pellet rifle today, mostly using your technique. I wanted to try a cheap gun before I tackle my Rem 700 with Leupold.
The Krylon camo paint dries (so far) with a very flat finish. Looks like my flat interior latex in my house, which will stain if you touch it with a sweaty hand...does this happen with your rifle?
I was thinking about going with a gloss paint, if that is more "print proof"(?).
Thanks.
bluedsteel </div></div>
It holds up fine on my rifles but I use duracoat as a base.
Re: Rifle Painting Tutorial
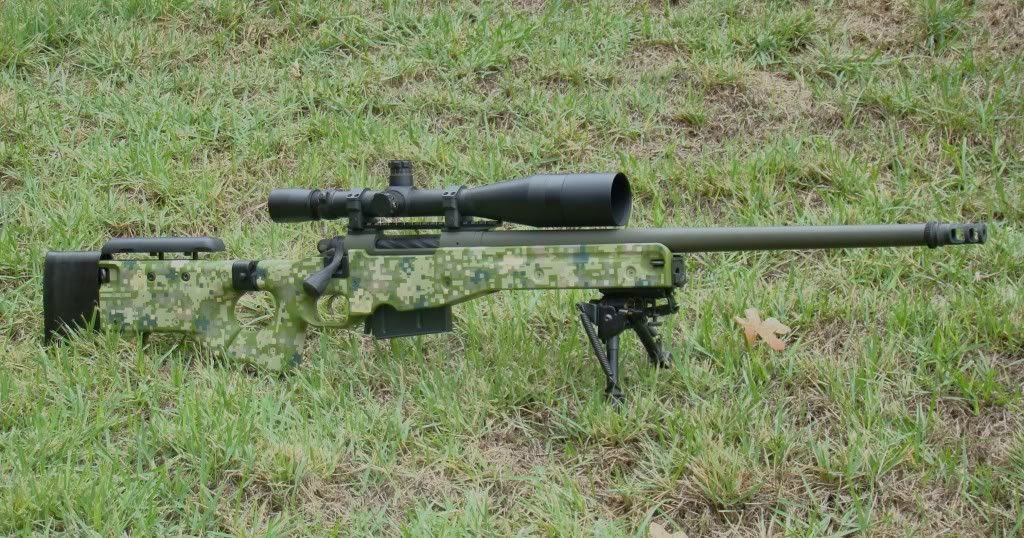
<div class="ubbcode-block"><div class="ubbcode-header">Originally Posted By: LongArm</div><div class="ubbcode-body">Before
After
 </div></div>
That thing really screws with my eyes. Good camo.
<div class="ubbcode-block"><div class="ubbcode-header">Originally Posted By: LongArm</div><div class="ubbcode-body">Before
After
That thing really screws with my eyes. Good camo.
Re: Rifle Painting Tutorial
<div class="ubbcode-block"><div class="ubbcode-header">Originally Posted By: Greg Langelius *</div><div class="ubbcode-body">Over the years, I've done a lot of camo painting. Painting directly onto firearms has become less and less desirable for me as the years accumulate. Things wear and become otherwise unsatisfactory, and removal has always been somewhat of a hassle.
These days any rifles/shotguns I own that don't have factory camo are camo'd by first covering <span style="font-style: italic">everything</span> with 3M Blue wide masking tape, then applying either the paint finish or camo duct tape (digital camo duct tape can be used for this) over the masking tape. Naked parts get the tape removed, using an Exacto knife to trim neatly. The rest stays.
Using camo duct tape, I have found that there is no need to match edges and patterns; from beyond 20ft, it just doesn't matter.
Originally, I had qualms about whether this was effective, durable enough, or good for the firearm; but those worries were unfounded.
I have camo jobs that are on the firearm for years now. I have test-peeled back corners and the masking's adhesive is sill easily removed, and will also stick right back down where it was before. The bluing underneath appears to have been protected very well.
If the tape gets damaged or the finish could use replacement with something else (or nothing), the tape can be removed and replaced as needed. The tape itself provides some modest protection from trail rash.
Some fairly interesting projects can be completed, like my Win 94AE .44mag Trapper Carbine with all camo (duct taped) furniture and matching sling.
I just don't like the idea of having anything on the firearm that's either irrevocable, or a pain to remove/replace.
Some may go "Eeeewww" at the idea, and that's fine by me. The resulting camo job trends more (for me) towards the practical than the aesthetic. IMHO; as a concept, camo is more utilitarian than artistic in its intent.
Greg </div></div>
Post some pics of your duct tape jobs.
Re: Rifle Painting Tutorial
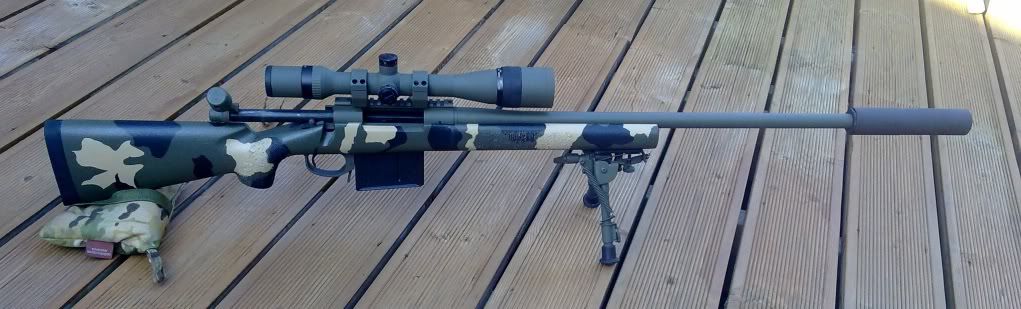
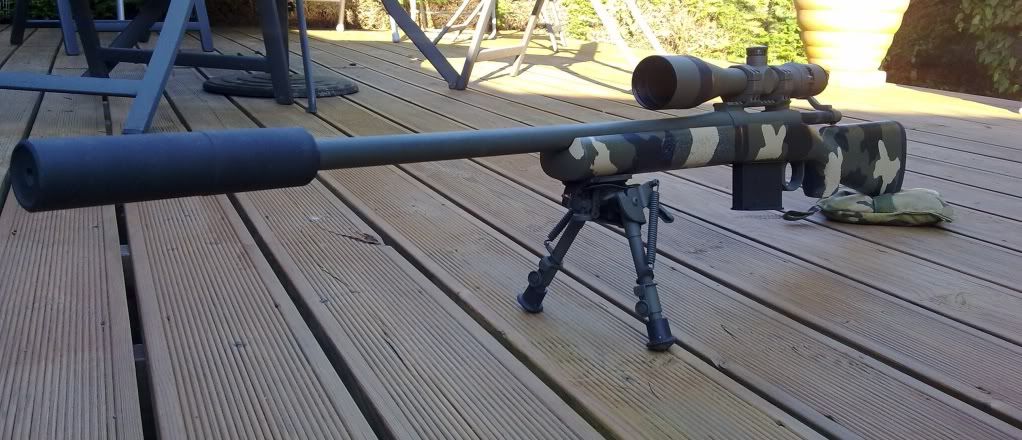
Thanks for the compliment, that sponge camo was the easiest camo job I have done. To me it is the way easier than doing regular camo.
Thanks for the compliment, that sponge camo was the easiest camo job I have done. To me it is the way easier than doing regular camo.
Re: Rifle Painting Tutorial
<div class="ubbcode-block"><div class="ubbcode-header">Originally Posted By: LongArm</div><div class="ubbcode-body">Thanks for the compliment, that sponge camo was the easiest camo job I have done. To me it is the way easier than doing regular camo. </div></div>
I agree. I have done a few paint jobs with a sponge too. I think if you really want it to blend in that method works really good. And most digital paint jobs done with the stencils, just dont look right. Not saying they look bad. I just think the the sponge gets you closer to the effect.
Re: Rifle Painting Tutorial
New user here. I stumbled onto this site looking for rifle coating options. WOW! Outstanding work on painting your weapons! I never knew you could use regular spraypaint on rifles. Any certain manufacturer/type recommended?
Inspired by the results seen here, I have to do this soon!
New user here. I stumbled onto this site looking for rifle coating options. WOW! Outstanding work on painting your weapons! I never knew you could use regular spraypaint on rifles. Any certain manufacturer/type recommended?
Inspired by the results seen here, I have to do this soon!
Re: Rifle Painting Tutorial
I like krylon ultra flat but any flat spray paint will do. Just know that no matter how well the manufacturer claims it resists scratches and such that it will eventually rub off and it will be necessary to repaint every so often.
I like krylon ultra flat but any flat spray paint will do. Just know that no matter how well the manufacturer claims it resists scratches and such that it will eventually rub off and it will be necessary to repaint every so often.
Re: Rifle Painting Tutorial
Just came back to this one to see how it's going, and saw the question. I'm sorry, I don't do pictures. In the time I've been here there was (I think) one picture that had originated with me and ended up here, and I had mailed it to LL.
My camo jobs can't compete as works of art with many of the outstandingly effective schemes posted here. But they are effective in the sense that they fade into a background effectively enough. They work because the eye can't resolve anything as amall as the discontinuities between the tape strip overlay lines once that eye gets beyond the trip-over distance.
In large part, as long as the shades involved exist at or nearby where the camo'd object resides, there is an opportunity for the background and object's images to merge. Guck tapes can be obtained in woodland green/brown/black, ar/marpat, and desert camo-like patterns and colors, which is close enough for me, and more effective than my feeble attempts to duplicate such designs..
The part about camo that struck me as even more important was the need for it to be changeable and replaceable with minimum fuss and minimum need for any behavior that might scar up the underlying firearm. This method accomodates those needs very effectively.
More importantly, it's quick, economical, and easy; and it minimizes the distraction from issues I consider more important, like load development and marksmanship practice.
Greg
Re: Rifle Painting Tutorial
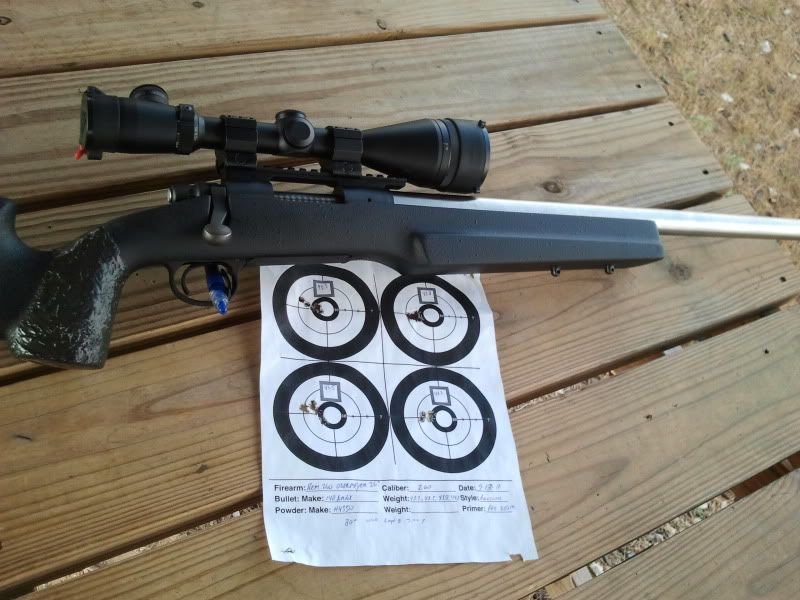
Following this info I painted a Remington 597 that I had laying around. I haven't decided what colors to paint my big gun yet, this paint job was just for fun as it has no camouflage purpose.


Following this info I painted a Remington 597 that I had laying around. I haven't decided what colors to paint my big gun yet, this paint job was just for fun as it has no camouflage purpose.
Re: Rifle Painting Tutorial
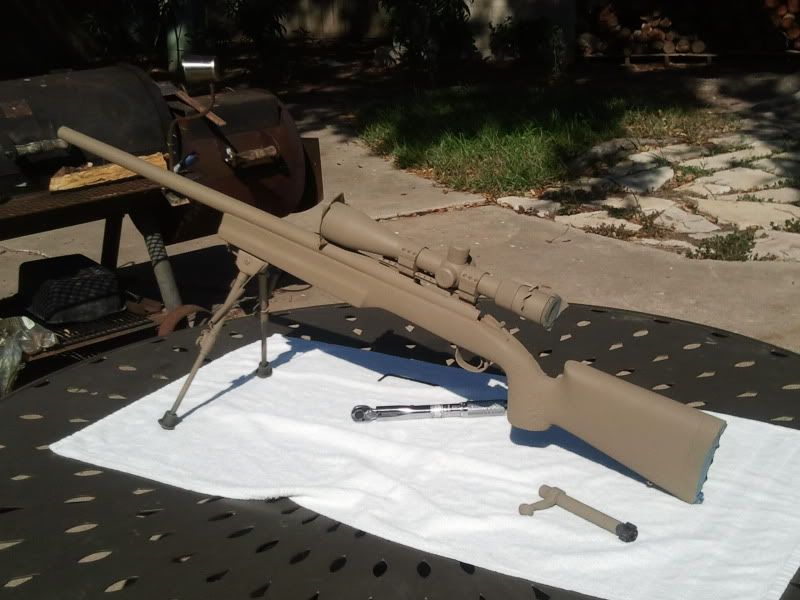
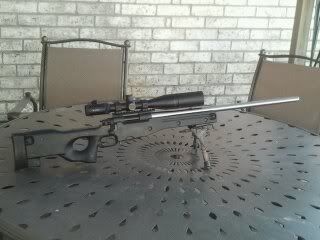
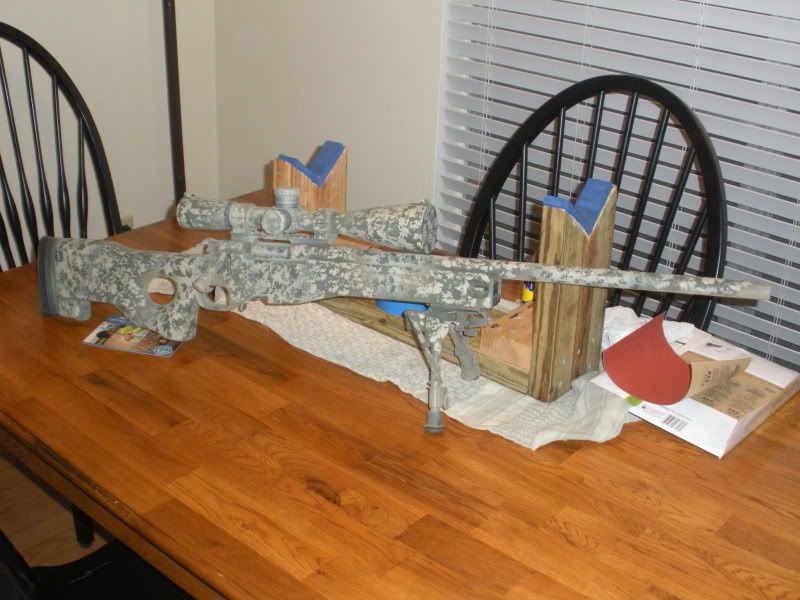
Well I got bored today, and went to wal-mart. I bought two colors tan and green... tapped off the turrets, mag well, and muzzle and went' to town.
First try and I'm pretty happy with it.
Before:

After


a bit lighter than i wished, but actually isn't bad.
Well I got bored today, and went to wal-mart. I bought two colors tan and green... tapped off the turrets, mag well, and muzzle and went' to town.
First try and I'm pretty happy with it.
Before:
After
a bit lighter than i wished, but actually isn't bad.
Re: Rifle Painting Tutorial
<div class="ubbcode-block"><div class="ubbcode-header">Originally Posted By: LongArm</div><div class="ubbcode-body">
These are pictures from no more that 20-30 feet away any more that that and it is hard to see on the camera. </div></div>
You did an amazing job. I am impressed with how well it blends. If it weren't for the shadow underneath your scope, there are several pictures that I would claim it wasn't actually there. I wonder if you could lighten the underside or break up the shadow in some way, so that its not a straight line. I would be interested to see exactly how did such a great job with your rifle.
Re: Rifle Painting Tutorial
<div class="ubbcode-block"><div class="ubbcode-header">Originally Posted By: Driftwood</div><div class="ubbcode-body"><div class="ubbcode-block"><div class="ubbcode-header">Originally Posted By: LongArm</div><div class="ubbcode-body">
These are pictures from no more that 20-30 feet away any more that that and it is hard to see on the camera. </div></div>
You did an amazing job. I am impressed with how well it blends. If it weren't for the shadow underneath your scope, there are several pictures that I would claim it wasn't actually there. I wonder if you could lighten the underside or break up the shadow in some way, so that its not a straight line. I would be interested to see exactly how did such a great job with your rifle. </div></div>
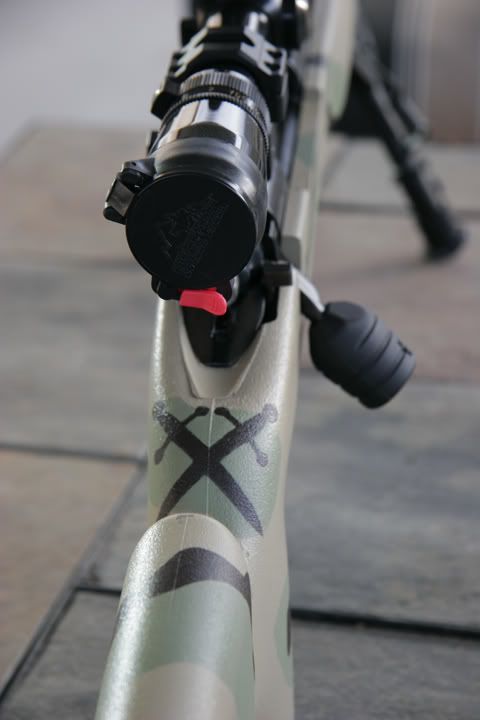
Thanks. I think the only way to do that would be to paint it white our cream under the scope but in sunlight it would stick out . It looks like the new army camo up close, not the look I was going for, being a Marine amd all. I'd add a brown to it but it's working good now. Thanks for the compliment!
<div class="ubbcode-block"><div class="ubbcode-header">Originally Posted By: Driftwood</div><div class="ubbcode-body"><div class="ubbcode-block"><div class="ubbcode-header">Originally Posted By: LongArm</div><div class="ubbcode-body">
These are pictures from no more that 20-30 feet away any more that that and it is hard to see on the camera. </div></div>
You did an amazing job. I am impressed with how well it blends. If it weren't for the shadow underneath your scope, there are several pictures that I would claim it wasn't actually there. I wonder if you could lighten the underside or break up the shadow in some way, so that its not a straight line. I would be interested to see exactly how did such a great job with your rifle. </div></div>
Thanks. I think the only way to do that would be to paint it white our cream under the scope but in sunlight it would stick out . It looks like the new army camo up close, not the look I was going for, being a Marine amd all. I'd add a brown to it but it's working good now. Thanks for the compliment!
Re: Rifle Painting Tutorial
you may try a technique called dusting. Take the spray paint and lightly run it over your scope cap and blend the look alittle. i did it on mine. You will still se your marks on your scope and the name but it will look blended.
<div class="ubbcode-block"><div class="ubbcode-header">Originally Posted By: Awesymoto</div><div class="ubbcode-body">Well I got bored today, and went to wal-mart. I bought two colors tan and green... tapped off the turrets, mag well, and muzzle and went' to town.
..
First try and I'm pretty happy with it.
Before:
After
You
a bit lighter than i wished, but actually isn't bad. </div></div>
Re: Rifle Painting Tutorial
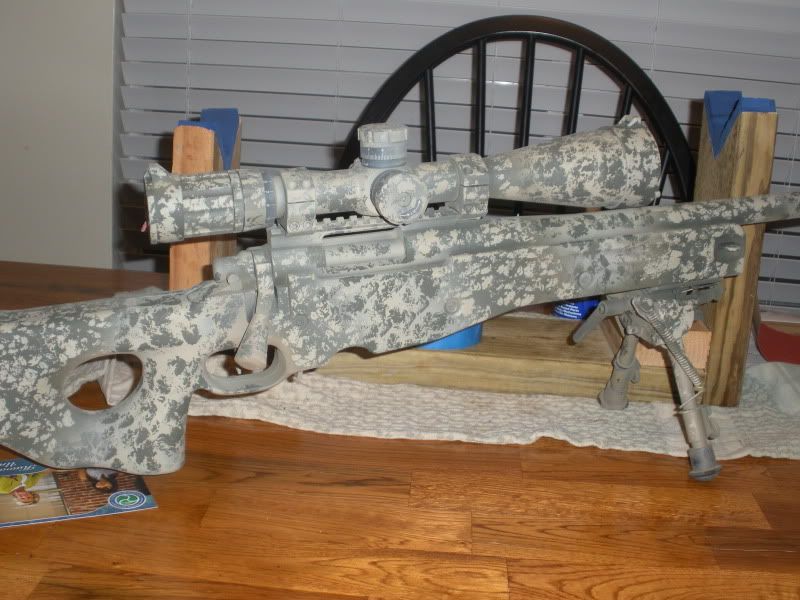
long arm. check did it today, also hit it with a bit more dark green, really leveled the light tone to a neutral dry environment look.
long arm. check did it today, also hit it with a bit more dark green, really leveled the light tone to a neutral dry environment look.
Re: Rifle Painting Tutorial
<div class="ubbcode-block"><div class="ubbcode-header">Originally Posted By: Awesymoto</div><div class="ubbcode-body">long arm. check did it today, also hit it with a bit more dark green, really leveled the light tone to a neutral dry environment look. </div></div>
Did you like the way it turned out? I like the camo on your rifle.
Re: Rifle Painting Tutorial
<div class="ubbcode-block"><div class="ubbcode-header">Originally Posted By: LongArm</div><div class="ubbcode-body">
Did you like the way it turned out? I like the camo on your rifle. </div></div>
Yes, had to be careful not to be too zealous on the application though. pretty easy, though before I put it in the safe, I was holding an AP brush and some CLP scratching my head.
Re: Rifle Painting Tutorial
I wish I had a better pic of this pss. Painted it for a buddy and NEVER AGAIN!
I wish I had a better pic of this pss. Painted it for a buddy and NEVER AGAIN!
Re: Rifle Painting Tutorial
There is some great info in here, has anyone had good luck with the Cerakote air dry ceramic coatings that Brownells sells? They claim to be scratch and solvent resistant, at least more so than off the shelf spraypaint.
There is some great info in here, has anyone had good luck with the Cerakote air dry ceramic coatings that Brownells sells? They claim to be scratch and solvent resistant, at least more so than off the shelf spraypaint.
Re: Rifle Painting Tutorial
<div class="ubbcode-block"><div class="ubbcode-header">Originally Posted By: Greg Langelius *</div><div class="ubbcode-body">My camo jobs can't compete as works of art with many of the outstandingly effective schemes posted here. But they are effective in the sense that they fade into a background effectively enough. They work because the eye can't resolve anything as amall as the discontinuities between the tape strip overlay lines once that eye gets beyond the trip-over distance.
In large part, as long as the shades involved exist at or nearby where the camo'd object resides, there is an opportunity for the background and object's images to merge.</div></div>
Check out this application:
CamoPicker
It lets you use a picture of your local landscape to match paint colors to the dominant colors in the photo for various paint manufacturers. It doesn't actually print any patterns, but it allows you to try various patterns with the matched colors.
Similar threads
- Replies
- 18
- Views
- 5K
- Replies
- 6
- Views
- 4K
