Join the Hide community
Get access to live stream, lessons, the post exchange, and chat with other snipers.
Register
Download Gravity Ballistics
Get help to accurately calculate and scope your sniper rifle using real shooting data.

Install the app
How to install the app on iOS
Follow along with the video below to see how to install our site as a web app on your home screen.
Note: This feature may not be available in some browsers.
You are using an out of date browser. It may not display this or other websites correctly.
You should upgrade or use an alternative browser.
You should upgrade or use an alternative browser.
Spray Painting Rifles
- Thread starter Deltagunner00
- Start date
How does that clear hold up to abuse? Realistic use not using it as a hammer of course.
Chip and scratch resistant?
I've done a few like this. My 22lr seen thousands and thousands of rounds training off barricades ect. Held up great. I took quite a bit more time scuffing it and cleaning before I painted mine though. My others have held up great too, haven't seen as much abuse as my 22lr. My 223ai coyote rifle got banged around quite a bit in the truck
How does that clear hold up to abuse? Realistic use not using it as a hammer of course.
Chip and scratch resistant?
Here's a slide show on one I did about 6 years ago and got well used to show how it holds up.
Sponged my ruger Hawkeye to resemble a manners

Here's a slide show on one I did about 6 years ago and got well used to show how it holds up.
Looks like it just has some "character marks".
These all look brilliant. Seriously great effects.
My question is has anyone experienced paint running off due to contact with sweat and other moisture? I would consider doing this for my PSR rifle (using my original Tikka stack as a practice).
Do you use an under coat of some kind first?
Excellent video! Thanks for the contribution.
My question is has anyone experienced paint running off due to contact with sweat and other moisture? I would consider doing this for my PSR rifle (using my original Tikka stack as a practice).
Do you use an under coat of some kind first?
Excellent video! Thanks for the contribution.
These all look brilliant. Seriously great effects.
My question is has anyone experienced paint running off due to contact with sweat and other moisture? I would consider doing this for my PSR rifle (using my original Tikka stack as a practice).
Do you use an under coat of some kind first?
Excellent video! Thanks for the contribution.
Never had a issue with it running off because of sweat. I rub the stock down with alcohol, painted and clear coat
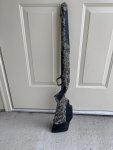
Just got done with practicing on an ald Savage Axis stock. Quick, easy, and it turned out pretty good.

Just saw this thread. I happened to have done one last Friday. I like how it turned out.

Last edited:
Looks great but I would recommend taping off the recoil pad so paint doesn't get on there. IMO it gives it a more professional, finished look and the paint will wear fast on the rubber. Just my two cents-you can take it or leave it....Just got done with practicing on an ald Savage Axis stock. Quick, easy, and it turned out pretty good.
View attachment 7155635
Did you paint 3 or 4 different layers to make it look like that? Love the colors/shades.Just got done with practicing on an ald Savage Axis stock. Quick, easy, and it turned out pretty good.
View attachment 7155635
Looks great but I would recommend taping off the recoil pad so paint doesn't get on there. IMO it gives it a more professional, finished look and the paint will wear fast on the rubber. Just my two cents-you can take it or leave it....
Good call and a point I learned. This was a practice piece to get down the pattern for the colors and I will absolutely tape some areas on future stocks: butt pad, safety areas, barrel and receiver areas to keep out the matte clear final coats, as well as remove sling studs.
Did you paint 3 or 4 different layers to make it look like that? Love the colors/shades.
I leveraged the original black color of the stock. Started with tan, then brown, then olive.
Attachments
I quit painting rifles many years ago because I felt that the paint did not stand up sufficiently to the punishment. Paints have improved, but nowadays, I still think that Black is the New Black; and my rifles already come that way.
However, I saw a mention about difficulty removing paint.
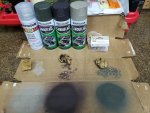
For rattle can paints. I use Super Clean Degreaser, in the purple gallon jug from Wal-Mart's Automotive Department. I then wander over to the gardening department and buy an inexpensive long and narrow plastic planter (be sure you get the one without the holes in the bottom, and get it long enough to hold your longest part).
Put the parts in the planter, and add enough Super Clean to cover them, a second gallon may be a wise investment. Come back a day later with nitrile gloves. Drain the parts over the planter. The paint will slide right off with finger pressure. Do this away from the planter, possibly onto some paper towel. It will also tend to etch aluminum parts.
Line a large funnel with a single layer of paper towel, stick the end into the jug, and slowly filter the degreaser back into the jug(s), it's reusable. It's also fairly benign to man, beast and the rest of the ecology; relatively speaking.
Greg
However, I saw a mention about difficulty removing paint.
For rattle can paints. I use Super Clean Degreaser, in the purple gallon jug from Wal-Mart's Automotive Department. I then wander over to the gardening department and buy an inexpensive long and narrow plastic planter (be sure you get the one without the holes in the bottom, and get it long enough to hold your longest part).
Put the parts in the planter, and add enough Super Clean to cover them, a second gallon may be a wise investment. Come back a day later with nitrile gloves. Drain the parts over the planter. The paint will slide right off with finger pressure. Do this away from the planter, possibly onto some paper towel. It will also tend to etch aluminum parts.
Line a large funnel with a single layer of paper towel, stick the end into the jug, and slowly filter the degreaser back into the jug(s), it's reusable. It's also fairly benign to man, beast and the rest of the ecology; relatively speaking.
Greg
I got to messing around with a good thing on that practice stock today after work. Shot it with another coat of clear, but it must have been too humid (NE WI upper 80's today with high dew points) and that last coat got some significant haze to it. So I went at it with some fine steel wool after it dried. That got rid of the haze, AND smoothed out some of the texture that came with the sponge application. I'm a little torn: the bit of texture that was there was kind of nice that it was definitely custom and gave it the tiniest amount of grip... but the smoothed over effect from the wool gave it a very professional look, like it was almost printed on. Plus some of the sponge daubs got kind of thick as the paint dried and it was not uniform across the stock and the wool made it all uniform. Yup, it is picking nits, but I think we share some of the same DNA from being precision shooters that carries over to other endeavors... So which would you prefer: the slight texture, or the smoothed over 'printed' look? Tried to get pics but it did not image well to show the story.
I'd probably go with the printed look, saw too many "textured" rattle can do's where the texture portion flaked off later on in the service.
I like the look when the paint is wore down from use. Heck I like when an unpainted rifle is wore down from use.I quit painting rifles many years ago because I felt that the paint did not stand up sufficiently to the punishment. Paints have improved, but nowadays, I still think that Black is the New Black; and my rifles already come that way.
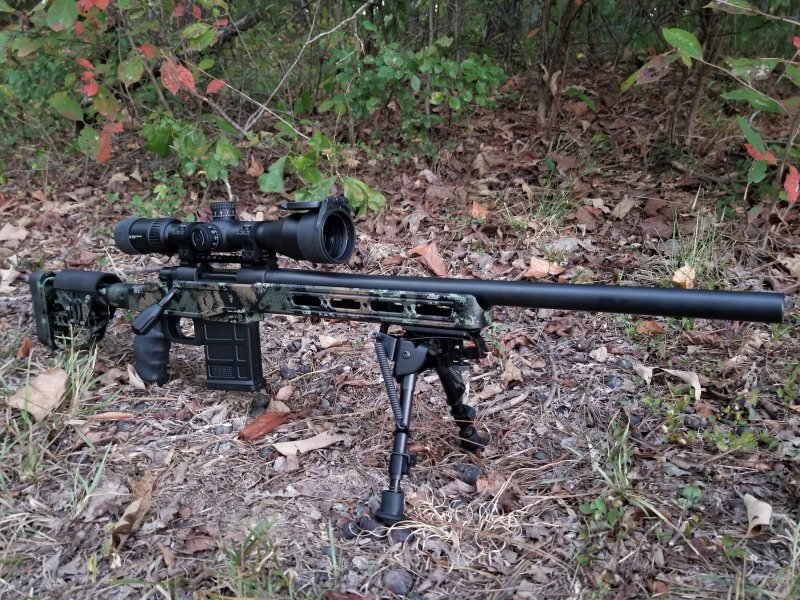
I'm a camo master. Here's my AI/AX in the backyard

Wow, that is good. Can't even smell the gun oil!I'm a camo master. Here's my AI/AX in the backyardView attachment 7157880te
Yeah but the green is so bright it won't match any other terrain so your score is only 3/10I'm a camo master. Here's my AI/AX in the backyardView attachment 7157880
Wow, great minds think and work alike I did my Barrett, and the PSG-1s with the Schmidt & Benders the same way! Only trouble is no one can find them anymore, not even me. LOLI'm a camo master. Here's my AI/AX in the backyardView attachment 7157880
If you have a left over stock or something practice on that! If you don’t like it, you can always repaint itThanks for the video. I've always liked the look of painted rifles but intimidated to rattle can any of mine.
If you don't have a left over stock you can always lay a stock on some heavy cardboard, draw the outline, cut it out, hang it, put down a white base coat and then go to town practicing. It's only two dimensional but at least you get the feel for how far away you have to hold the cans, how tight you have to hold netting if you use it, what shape your sponges need to be, or how much pressure to apply, how to position stencils if you use them, what the colors actually look like, ...you get the picture.
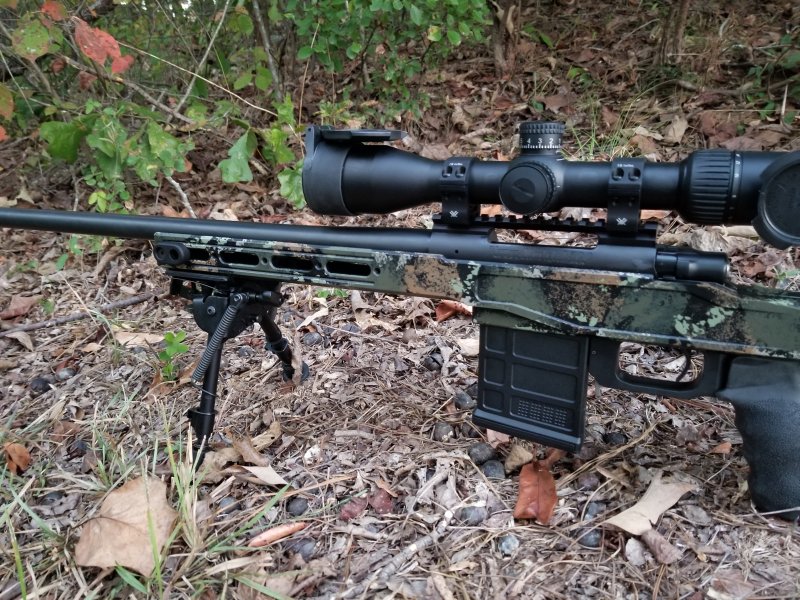
First rifle I’ve ever painted. It turned out okish. Figured I’d sacrifice this stock before I bombed a chassis as I’m not a super artsy person.
Looks good to me. Just.... I don't think your choice of colors would be good for hiding anything in my neck of the woods....View attachment 7159023View attachment 7159024
First rifle I’ve ever painted. It turned out okish. Figured I’d sacrifice this stock before I bombed a chassis as I’m not a super artsy person.

Doesn’t do me any good here in Colorado either. I’m gonna try some different colors when I get my krg bravo lolLooks good to me. Just.... I don't think your choice of colors would be good for hiding anything in my neck of the woods....
Did you do the buttpad too? I usually tape it off and leave it black because the soft rubber usually flakes off fairly quickly even if one applies clear coat.View attachment 7159210
I did my tikka up as such. Some spruce trees around where i hunt, but majority of vegetation is sage and dry prairie grass.
I’ve used krylon on several rifles, pistols, motorcycle plastics, etc. Nail the prep work, finish with a clear coat, and you’re golden. Sweat should be a non issue. Using a ‘can in can’ catalysed clear coat is a great way to go.These all look brilliant. Seriously great effects.
My question is has anyone experienced paint running off due to contact with sweat and other moisture? I would consider doing this for my PSR rifle (using my original Tikka stack as a practice).
Do you use an under coat of some kind first?
Excellent video! Thanks for the contribution.
That’s a sharp looking rifle, well done.Just got done sponge painting my T1X and Howa/XLR Element...


got all excited this thinking this was a potato gun /launcher post , or pumpkin chunkin air cannon deal , cool look for the firearms any way
I painted my AXMC a while back. I did use a sponge technique, but I didn't want to replicate the Manners look. Here's a video that my son made of the project. It's not really a how-to, more of a chronological documentation of the process, and an illustration of the level of disassembly necessary to get a professional quality finish.
I love this thing. Took 120 rounds or so to smooth the bolt out, it’s not like my bergara but not bad. Outside of that, this thing is a shooter. Can’t beat it for the money with what you’re getting.How do you like your Ruger? Looks great! I'm about 90% there on my decision to get the LRT.
This is her now with the Tract and a smaller bolt handle


Only problem is you'll never find it again from here on out. ROFLI will try this on a plastic stock I have lying around.
Similar threads
- Replies
- 6
- Views
- 384
