Yes, If you would please.ThanksIt's a collection of parts I put together. Not something you can buy as a kit. If you're interested I can post the parts list.
Join the Hide community
Get access to live stream, lessons, the post exchange, and chat with other snipers.
Register
Download Gravity Ballistics
Get help to accurately calculate and scope your sniper rifle using real shooting data.

Install the app
How to install the app on iOS
Follow along with the video below to see how to install our site as a web app on your home screen.
Note: This feature may not be available in some browsers.
You are using an out of date browser. It may not display this or other websites correctly.
You should upgrade or use an alternative browser.
You should upgrade or use an alternative browser.
What did you do in the reloading room today?
- Thread starter Kisssofdeath
- Start date
Parts list.Also any pictures of the parts you may have.
Wheel: http://www.fixtureworks.com/store/pc/bearing-covers-stud-mount-radial-inch-s2569.htm
Part number: TRC-160604-SSR4Z-C
Hinge: http://www.amazon.com/dp/B01JRI8VGK?psc=1&ref=ppx_yo2_dt_b_product_details
¼ - 20 nylock nut
One - 3/8" long 4-40 flathead machine screw
Two - 1/2" long 4-40 button head machine screws
from Home Depot, Lowes, etc...
You'll need the tools to drill and tap 3 4-40 holes to mount the hinge and the nylock nut.
Note: The hinge is not spring loaded. I use my left hand to hold the nylock nut / wheel down on the cartridge case while turning the base of the case with my right thumb and index finger. It sounds a bit awkward, but works very well. With the wheel it's much easier to hold the case in place and get an accurate reading.
I'll add some pictures showing how it's assembled tomorrow.
Assembly pix:
Note: The higher surface hardness of this particular wheel does not grip the cartridge case enough to spin it by turning the wheel. I couldn't find a wheel in this configuration with a softer urethane surface.
Two button head machine screws fastening the hinge to the concentricity gauge slider.
Shows the chopped down upper hinge arm and the nylock nut attached to it using a 4-40 machine screw. Note the bottom of the lower hinge arm needs to be thinned down to fit the uneven surface of the backside of the slider.
Shows the underside of the upper hinge arm with the flathead 4-40 machine screw that fastens the nylock nut to the upper hinge arm. Note the wheel comes with a 1/4 - 20 threaded stud which screws into the nut. I tried JB Welding the nut to the hinge arm, but it didn't hold so drilled and threaded the nut to accept the machine screw.
Last edited:
Never seen a flame annealer like that. One's a pre-heat? Odd....
Prepped and primed a couple hundred 6cm cases.

Also loaded up 150 300wm rounds

Also loaded up 150 300wm rounds
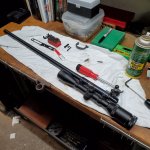
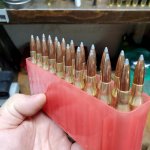
While waiting for my SBR stamp, I learned how to make 300 Blackout rounds for it.
Already had bins of new LC 5.56 brass, and CCI #41 / Federal GMM 205 primers.
Bought the suggested Harbor Freight mini cut off saw.
ebay provided the case holder for the saw.
Midway had dies and case gauge, IMR 4227 and some 220 grain SMK’s.


Already had bins of new LC 5.56 brass, and CCI #41 / Federal GMM 205 primers.
Bought the suggested Harbor Freight mini cut off saw.
ebay provided the case holder for the saw.
Midway had dies and case gauge, IMR 4227 and some 220 grain SMK’s.
 memtb
memtbWhile waiting for my SBR stamp, I learned how to make 300 Blackout rounds for it.
Already had bins of new LC 5.56 brass, and CCI #41 / Federal GMM 205 primers.
Bought the suggested Harbor Freight mini cut off saw.
ebay provided the case holder for the saw.
Midway had dies and case gauge, IMR 4227 and some 220 grain SMK’s.
View attachment 7685076
View attachment 7685077
You might find it's less work to size them down before cutting.


Loaded up my last 37 rounds of prepped 30-06 brass than converted the S1050 to 9mm.
Never loaded 9 before. Got the tool head and dies out of the PX here.
Looks like I bought Precision Delta 124 ball for this production. Only got 1000...gonna have to see if I can order a couple thou more to make it worthwhile.
Powder is going to be W231/HP38 looks like I'll be in the 3.5 plus/minus range. Likely use a Smith 952 as my test gun.
Any pet loads please Pm.
Edit/Add - PD has projectiles, 2000 on the way. Gonna need SPP after this loadout.
Last edited:
Loaded 125 6.5 Manbuns.
100 with 135 JLK
25 with 130 TMK
H-4350, WLR and range pickup Kinetic brass.
Damn, that shit is heavy, but it sized and trimmed nicely.
I'll probably load another 100 tomorrow along with some 6-BR using VarGet, CCI and 105 Match Burners.
100 with 135 JLK
25 with 130 TMK
H-4350, WLR and range pickup Kinetic brass.
Damn, that shit is heavy, but it sized and trimmed nicely.
I'll probably load another 100 tomorrow along with some 6-BR using VarGet, CCI and 105 Match Burners.
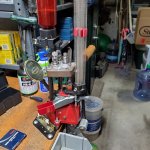
This was the setup I started with. Committed to loading .338 so had to go the single stage route. Now that I have both, I understand the pros and cons of each.
Last edited:
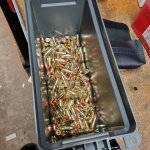
Knocked out the last of some Ten mike-mike odds and ends. 4 different types of projos, ~100-200 of each.
And since I guess the garage is my "reloading room" I built one of these contraptions from salvaged scrap pressure treated 2x4s.

And since I guess the garage is my "reloading room" I built one of these contraptions from salvaged scrap pressure treated 2x4s.
Last edited:
Still trying to get mine set up.........almost there.......

I started way back when with a buddy's Dillon 450, then bought a square deal, then went single stage for a couple decades... now I'm loading my precision ammo on the LnL APThis was the setup I started with. Committed to loading .338 so had to go the single stage route. Now that I have both, I understand the pros and cons of each.View attachment 7685471
Completed a F-1 can.
8"x1.5", 2" chamber with 8 baffles. 4 single clipped and 4 double clipped.
Gonna test it out tomorrow.
No decent pics, but it turned out just as good as the one I helped @TampaBud compete a couple months ago.
Pics of his:

8"x1.5", 2" chamber with 8 baffles. 4 single clipped and 4 double clipped.
Gonna test it out tomorrow.
No decent pics, but it turned out just as good as the one I helped @TampaBud compete a couple months ago.
Pics of his:
Look at the middle of it, it’s not an even cone all around, like 40% of it is machined down a bit.Would someone explain the term (clipped) on the can to me.
I can't see a difference in the baffles.
With it uneven the gases become more turbulent inside which means they are leaving the can slower which is quieter.
I’ve seen marble slabs under peoples scales, and I’m familiar with the various Starrette, etc.flat plates.
What is everyone using for those? I’m wanting to get something to set my A&D scale on but don’t quite think I need a $300 block. Any thoughts?
What is everyone using for those? I’m wanting to get something to set my A&D scale on but don’t quite think I need a $300 block. Any thoughts?
I’ve seen marble slabs under peoples scales, and I’m familiar with the various Starrette, etc.flat plates.
What is everyone using for those? I’m wanting to get something to set my A&D scale on but don’t quite think I need a $300 block. Any thoughts?
If you don't want to spend the money, then you are likely stuck with the Chinese items on Amazon. You can get a 12 x 9 x 3 40lb granite surface plate for 70 bucks. Under 50 dollars for one 2" thick.
You can get 12 x 12 pices of samples and or cut offs from people that do counter tops.

They are dual purpose I use them to check primers on ammo.
They are dual purpose I use them to check primers on ammo.
I’ve seen marble slabs under peoples scales, and I’m familiar with the various Starrette, etc.flat plates.
What is everyone using for those? I’m wanting to get something to set my A&D scale on but don’t quite think I need a $300 block. Any thoughts?
I bought one of these....
Works great and is affordable.
Box of 168s give it stability.
My first ever reloaded ammo.........50 rounds, Lapua brass, 175 SMK over a couple different charges of Varget. Also 10 rounds of 160 gr. Warner Flatline over some BFE 223, to try in a GAP gun.......

Would someone explain the term (clipped) on the can to me.
I can't see a difference in the baffles.
Prior to clipping.
Double clipped.
Spife pointed out the basic clipping above.
Clipping makes a huge difference in noise level.
Thanks that picture shows the double clip. The first picture I could only see single.
That's just a cropped section of the first image I posted.
It's the lower left baffle in the pic.
Anyway, when I did mine the other day, I used a 1/4" center drill to start the hole in the cup.
I then used a larger one and finished off with the correct drill bit.
In hindsight, I could and should have skipped the extra work of using the smaller bit. It was just a waste of time.
(I tried going straight to the drill bit on the first cup, but even using light pressure, the drill bit will deflect and cause it to drill off center.
Thankfully, I was able to correct it.)
I've drilled a lot of things in my job.
A center drill then a step reamer is what I would recomend. A reamer will leave a cleaner finish and not grab like a drill bit.
A holding fixture could be a chore to get just right. Looks like you milled the "clipped " section? If you did I would mill the center cut near the hole diameter and then ream it.
If you can hold the tolerance milling it to finish diameter could be a thing and forget drilling?
Anyway your finished baffles look great.
Last edited:
I actually used a Grizzly mini lathe to drill them. The jaws expand nicely to hold the cup from the inside diameter.
I might buy the correct reamer for my next can.
For the clipping, I made a holding fixture from a 2x3 and used a hole saw to drill the diameter and then sliced it so it could clamp on to the cup.
That went into a Wilton milling vise.
Works pretty good and it only cost me 5 minutes of my time.
I might buy the correct reamer for my next can.
For the clipping, I made a holding fixture from a 2x3 and used a hole saw to drill the diameter and then sliced it so it could clamp on to the cup.
That went into a Wilton milling vise.
Works pretty good and it only cost me 5 minutes of my time.
I loaded up a pile of .32S&W Long for my Pardini, then found the second box of 400 bullets were semi-wadcutters, not full wadcutters.
I then spent half the day looking for my .303 British dies. I found all sorts of stuff but not the dies.
I then spent half the day looking for my .303 British dies. I found all sorts of stuff but not the dies.
Spent a little while loading some 45LC's for the Bisley. Forgot I had 1000 cast 255's on the shelf ") .
.


. I’ve started my reloading process. All I got done yesterday is;
• measured 12 of the cases neck widths and got the mean & medium (0.0136 / 0.013621)
• annealed 100 of the virgin Lapua brass LRP (AMP Mark II)
• expanded using .265 mandrel to obtain uniform neck openings
• got the SAC sizing die setup with .289 bushing & .2625 mandrel installed
• tested sizing die using 3 Hornady cases that I also put through the same processes
• confirmed setup on the Henderson Precision trimmer to 1.910”, trimming the Hornady cases
Tonight the goal is to size and trim all 100 of this 1st batch and anneal the next set of 100.
So it’s all set to at least that same baseline to start it’s life.Your annealing virgin brass?
Why?
Last edited:
I found a a 3D print file on Thingiverse for an AMP pilot organizer https://www.thingiverse.com/thing:4903491 , printed it out and annealed some 260 Rem brass.

Loaded for my daughter’s .243 win for the first time. Not sure why I waited so long. I guess because it only gets shot a few times a year and factory hunting ammo was dirt cheap and accurate.
Anyway, going with RL22 and Varget first with Hornady 100 gr BTSP. 20” 1:9.125
Anyway, going with RL22 and Varget first with Hornady 100 gr BTSP. 20” 1:9.125
And I just got the new counter top for the powder measuring table. It’s Corian, and it‘s much better then the particle board that the cabinet top is made of.
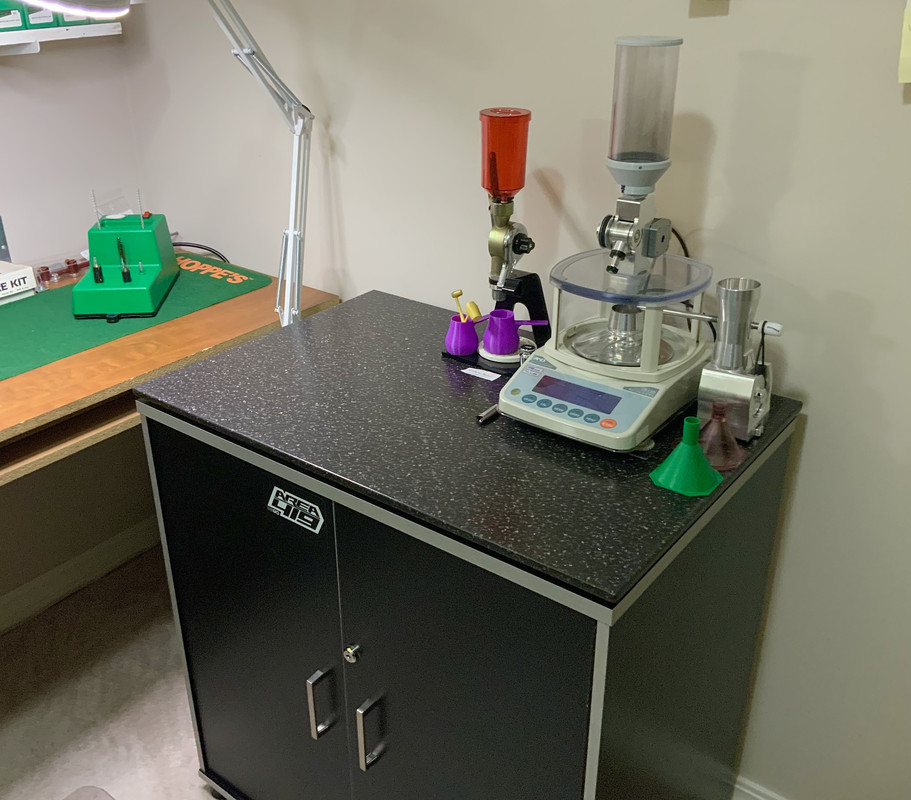
It is heavier and flat. Nice and very flat. And now I have room for the V4 A/T next to the V3.
It is heavier and flat. Nice and very flat. And now I have room for the V4 A/T next to the V3.
Last edited:
I didn't know this! So i have 100 virgin brass that i have camphor and deburred and it would be best if i annealed them first, does this mess with neck tension ?So it’s all set to at least that same baseline to start it’s life.
You don’t have to as it should come annealed from the factory, but it also doesn’t hurt. It may anneal further than it came from the factory, it may have come annealed even further than you’d make it meaning you wasted your time.I didn't know this! So i have 100 virgin brass that i have camphor and deburred and it would be best if i annealed them first, does this mess with neck tension ?
And it most certainly can effect the neck tension and the results down range. I always anneal before I run the over a mandrel before seating a billet the first time, seems to get the best consistency from the get go even if it’s just mental confidence to me.
I am new to this as well , but here's my experience.I didn't know this! So i have 100 virgin brass that i have camphor and deburred and it would be best if i annealed them first, does this mess with neck tension ?
500 new Lapua 6.5CM SRP.
.2632 Mandrel
Using a K&N force gauge with 140gr Berger Hybrids the seating pressure was in excess of 100 lbs.
Annealing then brushing the inside of the necks and using Redding dry neck lube on the advice of another member, cut my seating force in half.
I read not to exceed 70lbs seating force to avoid damaging the bullet jacket.
Cast Bullets. Cast for handgun is hard to beat, accurate, penetrates on game, higher velocities for same bullet weight and cheap.
Only issue, waiting for the casting pot to heat the metal. My big shop does not have indoor electricity so I use my 5K generator. It needs regular running anyway. Got everything squared away, the Honda 5K starts on the first pull, sit back and wait. Starts to rain, so I pull the generator in the shop but keep the all the doors open including the main, double garage door. Quits raining. Take generator back outside. (Unnoticed, the extension to the casting pot falls out.) Waiting another half hour, notice the lead seems to be getting hard Instead of fully melted. Sure enough, much of the lead has solidified. Find the plug, wait another half hour or more waiting on the lead. Finally I get to casting.
Only cast ..312 bullets (wanted to do some .357 but that will have to wait). Little RCBS mound drops great bullets. After waiting a good part of the afternoon, I was rewarded with about 150 really nice bullets just waiting to be sized and lubed and shot in our Single Six 32 H&H Mag.
