• Watch Out for Scammers!

    We've now added a color code for all accounts. Orange accounts are new members, Blue are full members, and Green are Supporters. If you get a message about a sale from an orange account, make sure you pay attention before sending any money!

Suppressors Form 1 Finished!, lots of pic's

257speed

Sergeant
Full Member
Minuteman
Dec 2, 2007
285
0
Alb, New Mexico
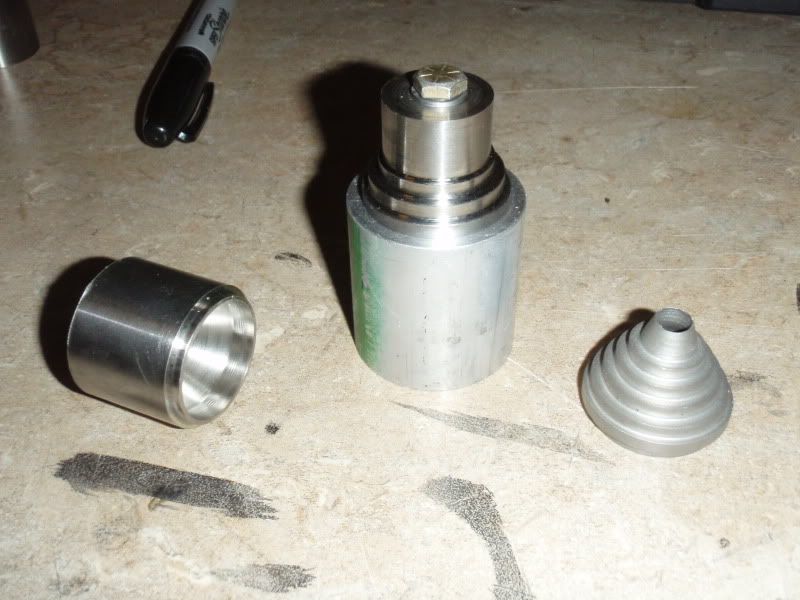
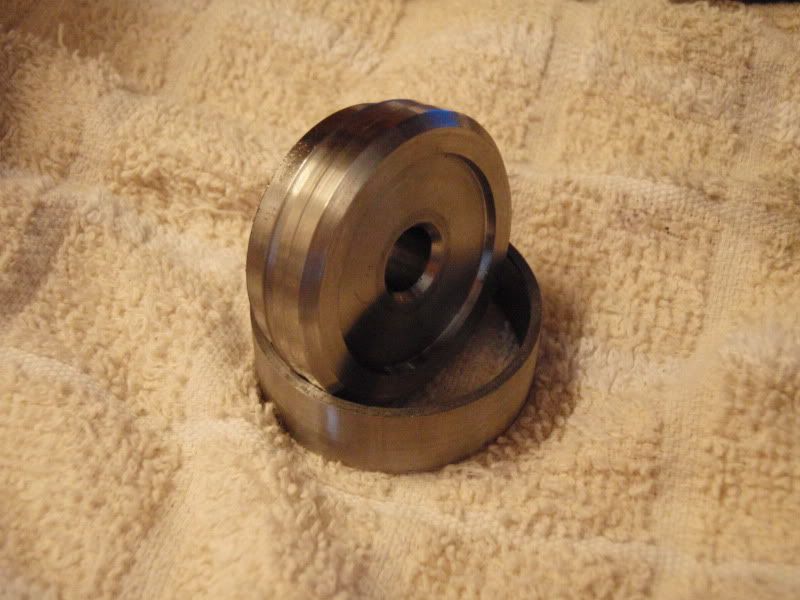
This has been my first form 1 and has been great fun. All work was done on <span style="font-weight: bold">manual</span> machines, since thats all I have access to. Started out with baffles first. Cut my 1.5" 304 bar into 1.200" sections. Put them in the lathe and faced both ends, then drilled the bore. Flipped them end for end and with the compound set at 30deg, cut the inside cone and the step for the spacer tube, which is 6al4v titanium. after all four went through this step. I then set up my mounting fixture and cut the steps. I turned down to my last step and once all were done, the baffles were removed from the fixture, mounted in the chuck, aligned on a center, and the 20deg angle cut on the first step. Forget to add that the baffles mouths were faced and then a small bevel milled into one side for gas deflection into the the next chamber. Baffle walls are .080" at the thinnest point.
P7260079.jpg


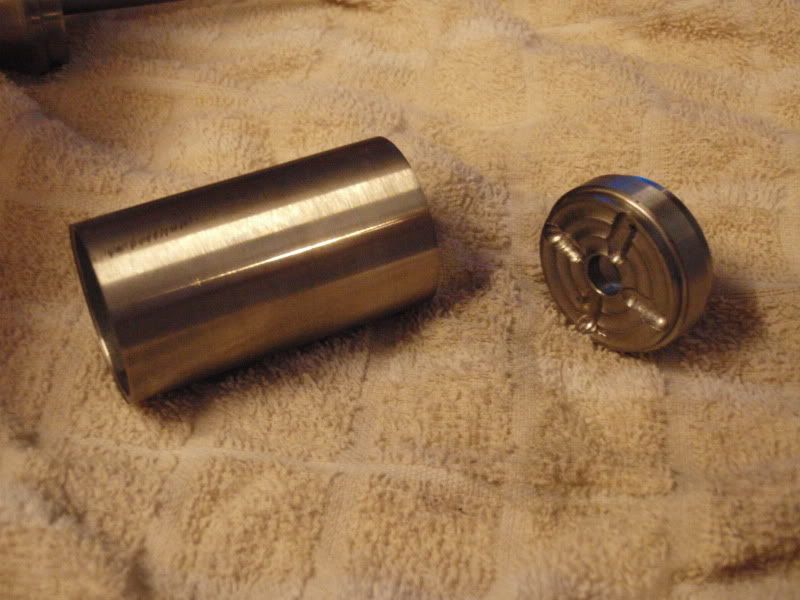
I then cut my barrel end cap (6al4v Ti) and made a false barrel end, which as you will see later, is used for mounting on the mandrel.
P8080093.jpg


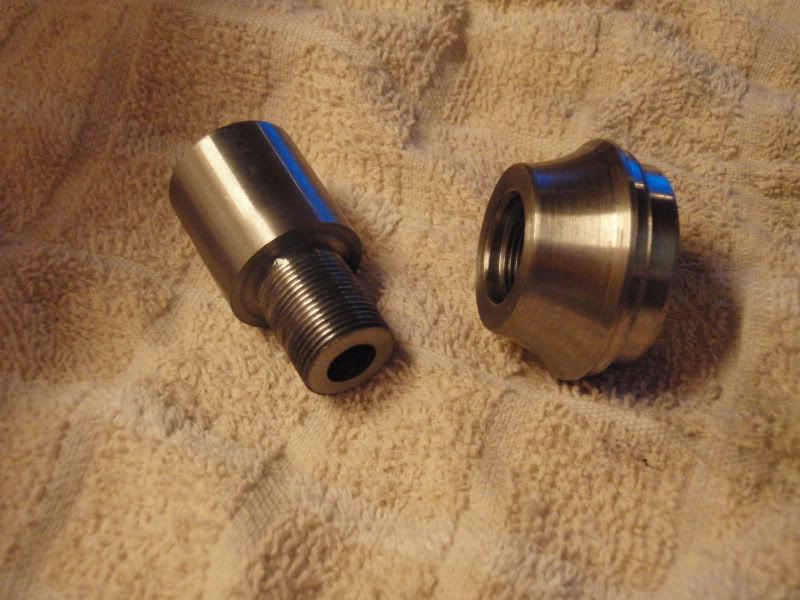
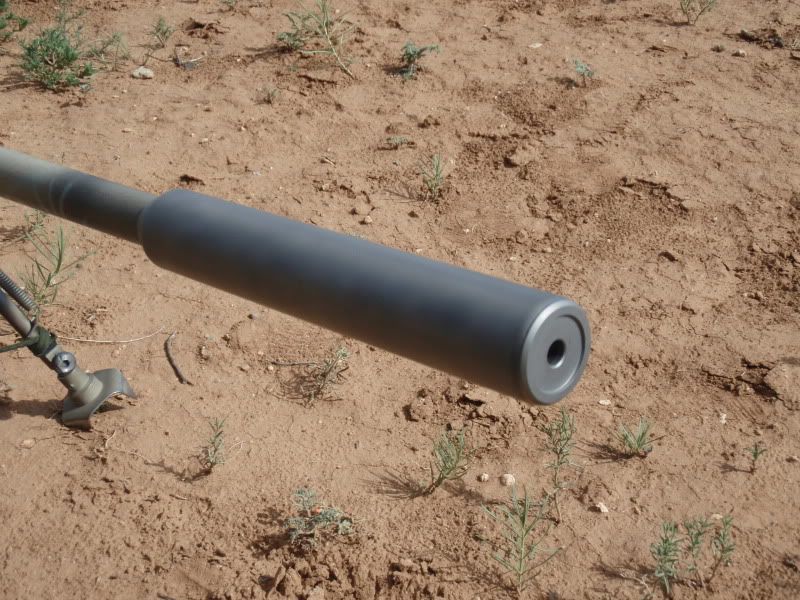
I then cut my muzzle end cap (6al4v Ti)
P8080089.jpg

P8080096.jpg

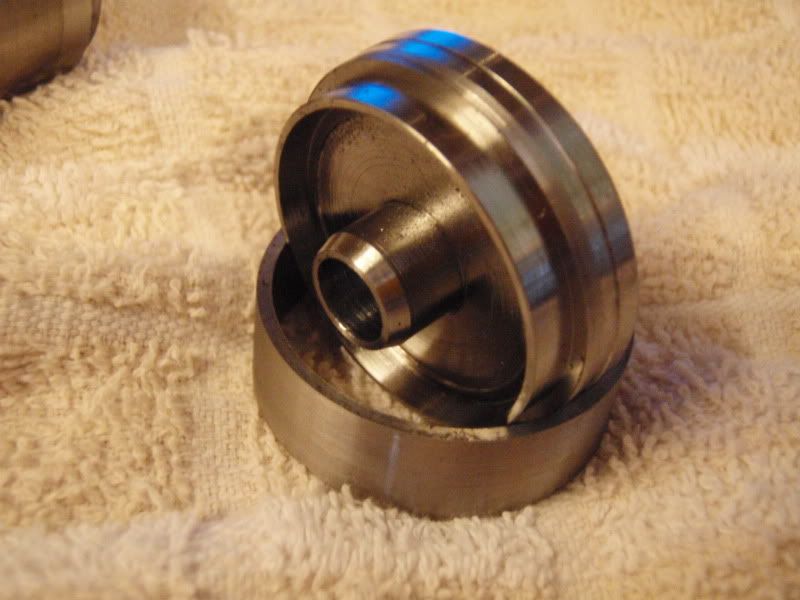
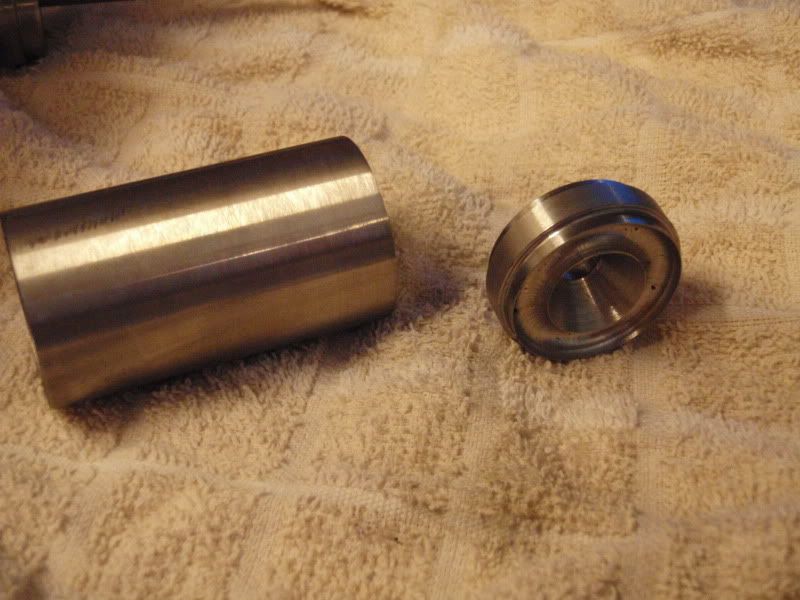
Next was the blast baffle (304 stainless) which has rings and slots on the face. Wanted to cause some turbulance here. Backside is a 60deg funnel.
P8080094.jpg

P8080095.jpg


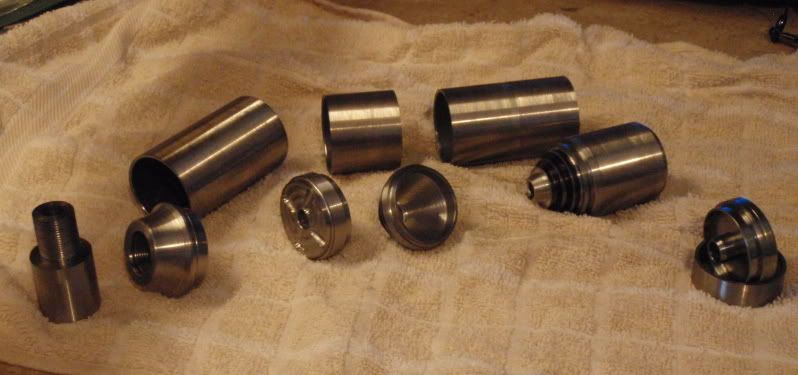
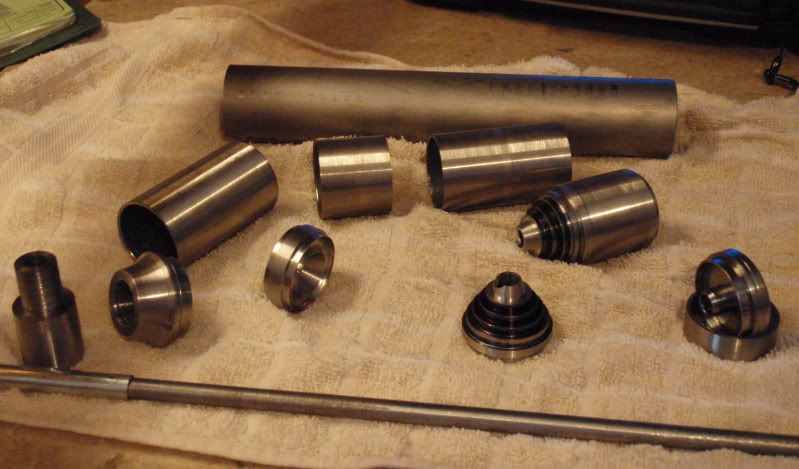
Here are all the parts together. All spacers are 6al4vTi and all the baffles are 304 stainless.
P8080088.jpg


All the pieces were assembled onto the mandrel and compressed with the locknut on the end. The mandrel was ground so that all pieces are tight and therefore centered on the mandrel. I then mounted the mandrel in the four jaw and a live center, dialed it in and outside turned the entire stack, with the exception of the steps on the end caps, so that it was a slip fit in the outside tube. This left the walls of my spacers at .045" and the outside tube is (6al4v Ti) .035".
P8080087.jpg


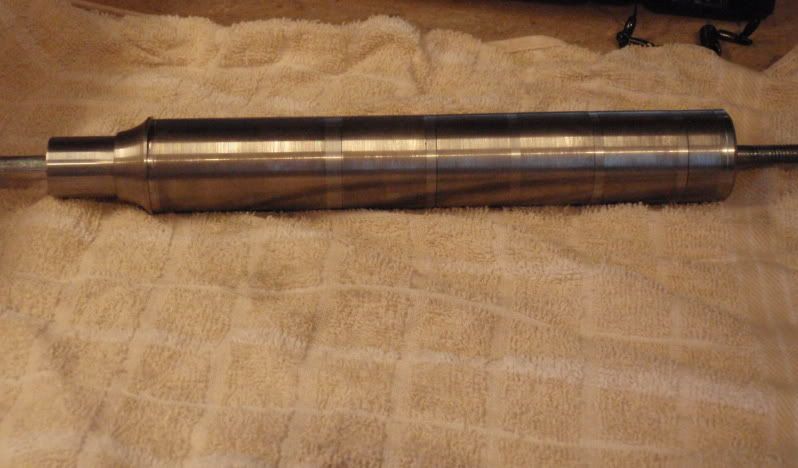
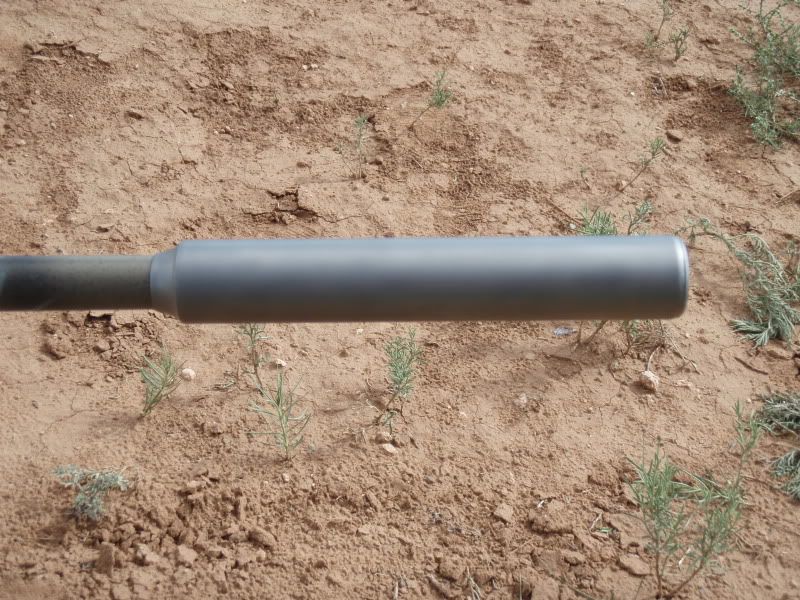
I then cut the length of my outside tube .040" longer than the gap between my end cap steps. With the outside tube slid over the stack and the nut tightened, this insures a nice tight compression between the end caps and the outside tube.
P8080091.jpg


Finally, the entire can mounted on the mandrel and ready for welding the end caps to the outside tube.
P8080097.jpg


All that remains is get the tube engraved Monday morning, and then to the welder Wed. morn. I will then pull it off the mandrel and do the final line bore for finish bore diameter. Bead blast it and test fire.
<span style="color: #3366FF"> answers to ??
have not weighed it yet
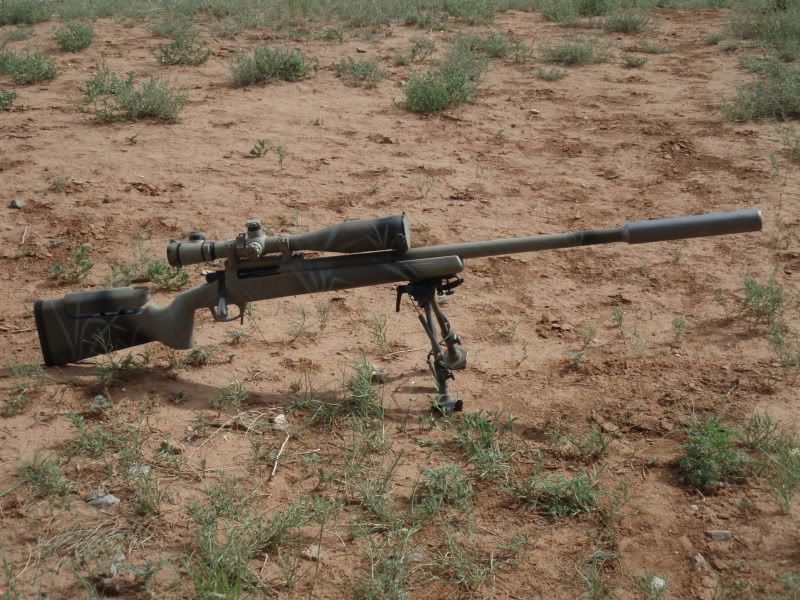
length is approx 9.3" x 1.5" dia.
Cal is .308, but will prob get used on my 7WSM most.
Threaded 5/8x24</span>
Thanks for reading


<span style="color: #FF0000"> <span style="font-weight: bold"> NEW PICS BELOW</span> </span>
 
Re: Form 1 almost done, lots of pic's

very nice work, im gathering materials for my 308 form1 thinking about titanium, one question why not titanium for all of it? too expensive or too hard to machine the baffles out of Ti?
 
Re: Form 1 almost done, lots of pic's

Originally I intended to use all Ti. Expense wasn't bad, as you can buy drops from your local machine shops for pretty cheap. E-bay has cheap Ti occasionally, but sometimes I worry about whether or not you are getting the type they are saying they have? The machine time for the Ti stepped cones was loooooong. If I had access to a cnc lathe like a DL, it wouldn't really matter, but on my manual lathe, it was a pain. So therefore, 304 stainless
grin.gif
 
Re: Form 1 almost done, lots of pic's

very interesting, thanks for the pics and info, would you post more pics when you get the welding done?
 
Re: Form 1 almost done, lots of pic's

very cool
 
Re: Form 1 almost done, lots of pic's

Not sure on the weight. It feels very light, but next week after the welding is done I will get a final weight.
 
Re: Form 1 almost done, lots of pic's

What is it going on? What is the bore size?

Ranb
 
Re: Form 1 almost done, lots of pic's

Nicely done.

So there's no internal welding, right? Just held in there with pressure against one another and then the end caps welded on?

 
Re: Form 1 almost done, lots of pic's

that is VERY cool! nicely done sir. Im looking into doing mine here at our local shop.
 
Re: Form 1 almost done, lots of pic's

How did you hold the assembly in compression when welding the outer tube?
 
Re: Form 1 almost done, lots of pic's

<div class="ubbcode-block"><div class="ubbcode-header">Originally Posted By: 858</div><div class="ubbcode-body">How did you hold the assembly in compression when welding the outer tube?

</div></div>

Look at his last 2 pics in the first post with the description, rod with nuts tightened down it appears.
 
Re: Form 1 almost done, lots of pic's

<div class="ubbcode-block"><div class="ubbcode-header">Originally Posted By: jasonk</div><div class="ubbcode-body"><div class="ubbcode-block"><div class="ubbcode-header">Originally Posted By: 858</div><div class="ubbcode-body">How did you hold the assembly in compression when welding the outer tube?

</div></div>

Look at his last 2 pics in the first post with the description, rod with nuts tightened down it appears. </div></div>

i didn't read too carefully. Got it.
 
Re: Form 1 almost done, lots of pic's

<div class="ubbcode-block"><div class="ubbcode-header">Originally Posted By: jasonk</div><div class="ubbcode-body">Nicely done.

So there's no internal welding, right? Just held in there with pressure against one another and then the end caps welded on?

</div></div>

That is correct. and thanks
 
Re: Form 1 almost done, lots of pic's

Only test fired in our shop. Will get it outside tomorrow hopefully. Sounded pretty good though.
 
Re: Form 1 almost done, lots of pic's

I'm so jealous....I've been researching 7x14" lathes all week
smile.gif
I need more hobbies....like I need another rifle.
 
Re: Form 1 almost done, lots of pic's

<div class="ubbcode-block"><div class="ubbcode-header">Originally Posted By: jasonk</div><div class="ubbcode-body">I'm so jealous....I've been researching 7x14" lathes all week
smile.gif
I need more hobbies....like I need another rifle. </div></div>JMO,but dont waste your money on a lathe that small.It wont do at least half of the things you want it to. If you look on some auction sites you can find nice size lathes in between $500 and $1000. You will want to try to find something with a spindle bore that is 1.5" or even a little bigger. Sure that little lathe wont be completely useless ,but I would almost guarantee you that it will frustrate you more than once.
 
Re: Form 1 almost done, lots of pic's

Who did your engraving of your info on the can?? Whats the total lenght and weight now that is done. That looks like any can on the market today. NICE JOB!!!!!
 
Re: Form 1 almost done, lots of pic's

I had a local machine shop CNC the engraving for me ($70). A friend of mine has a welding business and they are able to certify welds etc. He welded it for $40. Anyone who knows about welding Titanium will know that it isn't something the avg joe is going to weld on their own. The rest of the work was mine. The can finished out at 9.25" and weighs 18.5ozs. Going to shoot video tomorrow hopefully. Jason, look for auctions. With all the aerospace and ship yards up there, you could probably find a good used lathe that would do much more than a hobby lathe without much more money. Even if it is a bit more, its money well spent. I have never heard anyone say "I wish I had less lathe" lol.
 
Re: Form 1 almost done, lots of pic's

That's a beauty for sure....awesome!
 
Re: Form 1 almost done, lots of pic's

Took it out and shot it today. The video does not do the silencer or the unsilenced rifle justice. They were much quieter and louder than the camera portrays. I could easily shoot the 7WSM without hearing protection. Sorry the video is alittle lengthy, but I was by myself.
 
Re: Form 1 almost done, lots of pic's

Ear safe on a 7 WSM , is outstanding from a can that size and weight!!

Did you happen to mic the thing in several spots before you ever shot it then after a few rounds? All of mine grew as mch as .002" most only .001" then they all stoppped , I tin its from the initial stressing of the steel
 
Re: Form 1 almost done, lots of pic's

I took measurements every inch from front to rear, with a good mic. After 30 shots from 7WSM and 260, none had changed at all. That outside tube, I got from you jones. About a year ago on silencertalk.