• Watch Out for Scammers!

    We've now added a color code for all accounts. Orange accounts are new members, Blue are full members, and Green are Supporters. If you get a message about a sale from an orange account, make sure you pay attention before sending any money!

F T/R Competition Getting Into F-Class on the Cheap

Rocketvapor

Major Hide Member
Full Member
Minuteman
  • Dec 10, 2018
    1,959
    1,321
    South East Louisiana
    33596437578_c95cdb3f15_h.jpg
    33596437948_2bef392fc1_h.jpg


    Pictured is my entry into F-Class. It's a 22 Nosler so I'm stuck in F-Open with it.
    The list of 'High End' components :)
    X-Caliber 28" bull, 1:7 5R, No Gas port (25% off sale)
    15" ebay Float Tube
    BCA side charger and BCG
    Plain cheap lower
    MBT trigger
    Athlon 8-34X56 FFP scope (price matched, thank you Doug :) )
    TI-7 stock (was a return/clearance)
    Everything in the picture was a tad over $1000
    Including the home made wide bipod.

    I'll cover some mods I made in later posts.

    I started F-Class/Mid Range April 2018, bought a Bald Eagle Rest, then sold it and built the one in the picture.
    I'm slowly getting better and will eventually out grow this rig.
    So far my midrange scores are going up, sort of :(
    543-5X
    531-3X
    547-4X
    564-10X
    581-12X
    581-17X
    575-13X
     
    Last edited:
    It looks good to me those xcaliber barrels are excellent shooters.
     
    I'll start at the rear end of this thing.
    I cast some lead to fill the unused space in the stock.
    and some lead in the grip. Weight is a little over 20 pounds so I have some room in F-open.
    I also put a plastic shim between the stock and extension tube.
    Takes a good bit of force to move it now. locks in and don't got no wobble.
     

    Attachments

    • Heavy-stock.jpg
      Heavy-stock.jpg
      31.7 KB · Views: 66
    • Heavy-grip.jpg
      Heavy-grip.jpg
      17.9 KB · Views: 72
    • Stock-shim.jpg
      Stock-shim.jpg
      17.4 KB · Views: 71
    Last edited:
    Moving on to the upper/lower receiver.
    With No-Gas I'm using a sled and single loading long. I use my firing hand to pull back the BCG, remove the spent case (cut ejector spring), load a round, and drop the BCG with a home made ambi bolt release.
    I can hold the bolt handle and push the release and ride the bolt and push it in just to be sure.
    I also installed a push button safety but a clearance issue between the trigger and the left shoulder of the safety (fire position) caused some drag I could feel with the Larue MBT trigger. Had to relieve the shoulder just a little. BTW, I just LOVE the MBT. Installed one 0.005" shim on the forward pin and one of those little plastic thingies at the rear pin.
    I'm running a H3 buffer (for weight). Range experts claim that is why I'm having a failure to cycle and eject :)
     

    Attachments

    • No-Eject.jpg
      No-Eject.jpg
      31.6 KB · Views: 68
    • P1210647.jpg
      P1210647.jpg
      10.8 KB · Views: 61
    • P1210623.jpg
      P1210623.jpg
      7.7 KB · Views: 59
    • SafetyStackUp.jpg
      SafetyStackUp.jpg
      23 KB · Views: 64
    • TakeDownShim.jpg
      TakeDownShim.jpg
      4.4 KB · Views: 58
    Last edited:
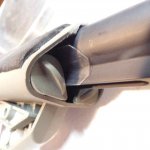
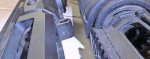
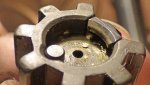
    I lapped the front of the receiver (looked like it needed it).
    I know, we had a long drawn out discussion on lapping.
    I do it. All the time.
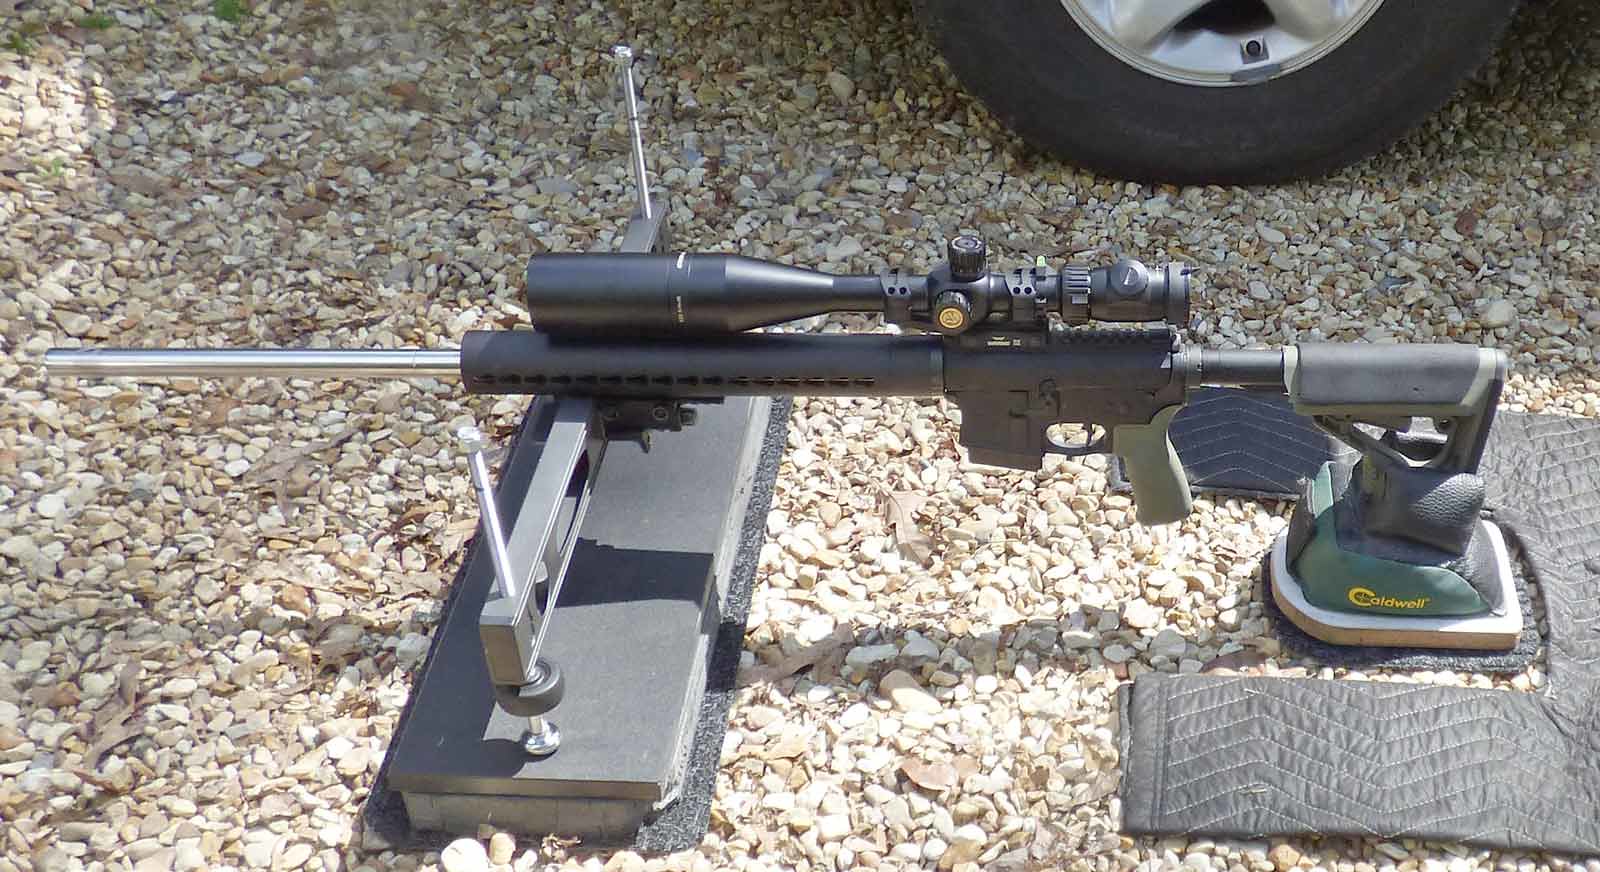
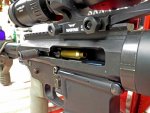
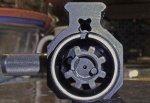
    I picked the BCA right side charging upper since I would be prone, No-Gas, and it seemed stronger.
    There where other but more costly options.
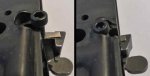
    I check for squareness by lapping a little with polish. Break through the anodize.
    Then lap for 360 contact. Not the 28" barrel in this pic.
    7051523

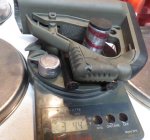
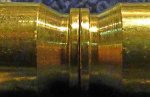
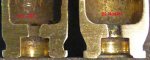
    For diameter fit I measure OD of the extension, check extension slop in the upper, then mask and spray a thin coat of High Temp paint. NO ONE Does that. Really thin shim stock (half thou or one thou) is hard to work with and if you do a thermal fit, LockTite is messy.
    Let that dry well and burnish with 800 grit paper for about a .002" increase (about 0.001" of paint).
    Do a warm/cold fit up then lock in place with a barrel nut with just a heavy hand tight. Let it sit.
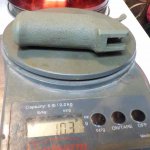
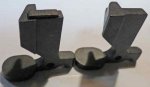
    Pic of another AR extension.

    sprayon-shim-jpg.7031646

    I found a super cheap round hand guard (heavy, sturdy, simple) on ebay but it came with an aluminum nut. Swapped out for a steel nut and saved it for a lighter build. The 15" Keymod was $32 shipped. The steel nut was $7.
    Did the lube, 50% 75%, 90% full torque thing and stopped at 50 ftlbs with a 'calibrated torque wrench' (and used the 'lever arm correction' No real reason for 50, just my target with a steel nut.
    After the nut was installed (No worry about gas tube alignment) I used a little Locktite on the tube, let it set then ran the lock ring up tight. It has a row of keymod holes on each side and the bottom but not on top.
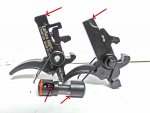
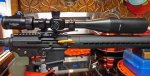
    Caught a 20 MOA mount on sale ($75) and put it on the receiver.
    index.php

    I originally started with a Bald Eagle mount and a home made 3.5 pound bag rider (lead filled), but now use a home made bipod (pics of that later).

    In the next installment :) what I did to make charging and extracting easier with a straight pull no-gas AR.
     

    Attachments

    • New-Upper.jpg
      New-Upper.jpg
      23.6 KB · Views: 59
    • Thickness.jpg
      Thickness.jpg
      13.2 KB · Views: 54
    Last edited:
    I like your style... ?

    So, what loads are you running with this rig? Since your single loading, you dont have to worry about the mag restricting the OAL. Running heavies? I bet you can push some 224 pills pretty quick without an OAL restriction and that Nosler case...
     
    My 'Style' is sort of dictated by my retirement income, and all kinds of spare time (Free Labor).
    I want this to be MY rifle, not like Your rifle.
    I'll get to the loads, and problems with brass later, but yes single load 80 and 88ELD out to about 2.440 with a little jump.
    I'm not shooting HOT but 2900 with the 88's 3000 with the 80's.
    At those speeds I get a tiny bit of wind advantage with the 88's @ 600.
     
    Last edited:
    I like it, my shooting income is limited too. I make decent money, but have three kids and in their teenage years and they require quite a bit of money, I'm workin on dentists and orthodontists now...

    But I like it that you made such a nice rig on the "cheap". May be considered "cheap" to some, but to me, I think it's a nice rig. Goes to show how you can make it happen regardless of cost. May take more time and more work, but it can be done.

    That's what I meant by I like your style. Meant in respect, I bet it shoots too.
     
    • Like
    Reactions: Rocketvapor
    Thanks.
    It shoots better than I do. Seems I've heard that before.
    Each time WE go out, WE do better :)
    I've even gotten some 99's (and some 94's) @ 600.

    It puts me in F-Open and you can imagine the looks I get on line next to some real F-Class guns.
    Some don't like to shoot next to an ejecting AR. Not a problem, mine doesn't toss hot brass. :)
    The No-Gas aspect of an AR rifle does take some getting used to. A rear charging upper is a pain to pull out a stuck case. Gas operation generates a lot of force to open the bolt. So much so that many folks dissed the rebated rim, soft brass initially made by Nosler. Complaints about swipes, blown primers and pulled rims.
    I've had my times with brass that was hard to extract. The side charger seems more suited to prone shooting.
    Early brass from Nosler often had Sharp rims, like they missed a processing step.
    They said "it's made like that just for the AR" (a Blond said that) :)
    I tried the 6mm Hagar/Nosgar necked/bumped/trimmed (with a 6.8 bolt) but now that I have some experience with the 22N case that's what I shoot most of the times. So far 5 and 6th fired cases only have a few culls due to loose pockets.

    Then brass started showing up with beveled rims and things got better.
    Some Factory ammo orders from vendors would still have sharp edges and require beveling at home.
    I still have some 62gr ammo that WILL get the treatment before being shot. The sharp edge gets knocked off when the extractor snaps over going into battery. Beveled brass, and some smoothing of the extractor, bolt face and ejector edges eliminated the brass shavings jamming up the bolt. I can now just blow the brass off with Brake cleaner. I'll post the other stuff I did to the bolt to help with extraction.
    I did find a picture of the Float tube and Warne mount with my current scope. Way off to the right is the old home made bag rider :)
     

    Attachments

    • 22N-Base.jpg
      22N-Base.jpg
      14.2 KB · Views: 51
    • P1220283.jpg
      P1220283.jpg
      14.8 KB · Views: 59
    • shaved.jpg
      shaved.jpg
      18.6 KB · Views: 60
    • P1220286.jpg
      P1220286.jpg
      10.9 KB · Views: 65
    • 223vs22N.jpg
      223vs22N.jpg
      14.7 KB · Views: 65
    • AthlonReceived.jpg
      AthlonReceived.jpg
      24.8 KB · Views: 65
    • Rider_3.jpg
      Rider_3.jpg
      9.9 KB · Views: 61
    Last edited: