• Frank's Lesson's Contest

    We want to see your skills! Post a video between now and November 1st showing what you've learned from Frank's lessons and 3 people will be selected to win a free shirt. Good luck everyone!

    Create a channel Learn more
  • Having trouble using the site?

    Contact support

Join me on my EPIC AR accuracy journey! From reloading to bullet hole @600yards! WITH PICS

I totally hear ya ptrlcop and I 100% appreciate and agree with your input. Thanks.

Sometimes, actually a lot of times, I'm testing my reloads so going for bullseye wasn't my objective that day. Some days it is, some days it isn't, and some days it's a mixture of going for both bulls and groups / testing reloads. It just depends on my objective for that day at the range. That particular day I was testing my 68 & 75grn loads out to 600yards so dealing with the crazy up & down winds that day made it hard to read how well my reloads was performing. Obviously as a reloader, having a dead still wind day is the best, but you can't win them all. Besides the fact the heat and mirage was ungodly. Oh well, it's all in good fun & a reason to blow off some ammo.


And just to keep ya honest, some Kipling....

We have forty million reasons for failure, but not a single excuse.

Rudyard Kipling (1865-1936)
 
Well, lets just say I had absolutely no intentions of picking up reloading equipment today... Just some bullets. Anyway, as I'm walking past the shelf guess what I see,,,,, a Dillon super 600 swager for $99 dollars brand spankin new. Someone forced me to buy it and his name was ME... LOL. It should really help for the crimped primers in this lake city brass & my AR ammo load development. Well, at least for speed of reloading that is. Next on my list is the Giraud power trimmer. Will keep you all informed for those looking to reload for their AR's / just starting out reloading for AR's & how well it works for me and crimped primer brass such as lake city brass..... This thing is HUGE! and is one serious PC of metal. Pictures do no justice for the size & weight of this pc of reloading equipment. There is no plastic on this bad boy. It screams = well constructed.

IMG_7648_zps618d090e.jpg


LOL! this is awesome!

http://www.youtube.com/watch?v=C34sRku4ASY

http://www.youtube.com/watch?v=LaZHeSUqQbk


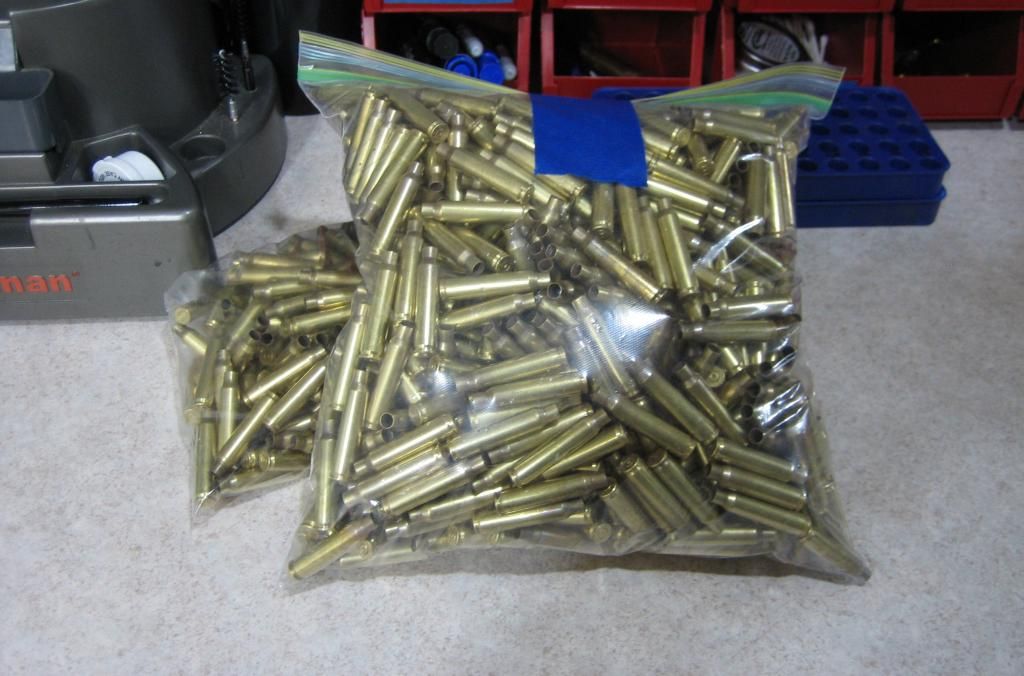
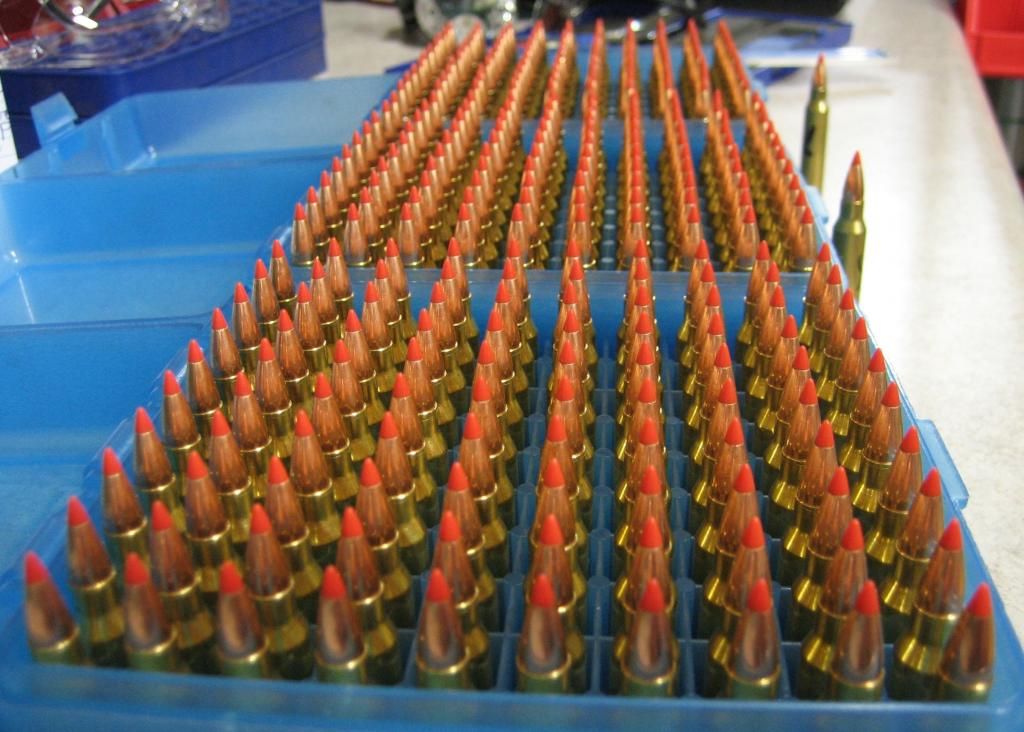
BAM! 1000pcs of lake city 5.56 brass! My AR's are having a little party right now! this should keep me busy for about the next 6,000 to 7,000 reloads. Lovin it...

IMG_7625_zpse0b71b2d.jpg
 
Last edited:
I totally hear ya ptrlcop and I 100% appreciate and agree with your input. Thanks.

Sometimes, actually a lot of times, I'm testing my reloads so going for bullseye wasn't my objective that day. Some days it is, some days it isn't, and some days it's a mixture of going for both bulls and groups / testing reloads. It just depends on my objective for that day at the range. That particular day I was testing my 68 & 75grn loads out to 600yards so dealing with the crazy up & down winds that day made it hard to read how well my reloads was performing. Obviously as a reloader, having a dead still wind day is the best, but you can't win them all. Besides the fact the heat and mirage was ungodly. Oh well, it's all in good fun & a reason to blow off some ammo.


I hear ya. My post could use some smileys I just didn't know how on my phone. I would say tossing 55gr pills in the wind you should be pretty stoked with those results.
 
Elfster. CHARGEMASTER. Optional. Pen. Straw. Mod.

I know some of you are going to go off the handle about using this & that type super expensive beam scale & to not to even use a chargemaster blah blah blah... This is NOT what this is thread even about. I like my chargemaster with the straw mod, this is just an option to fiddle around with for those that use such a mod (as an option)

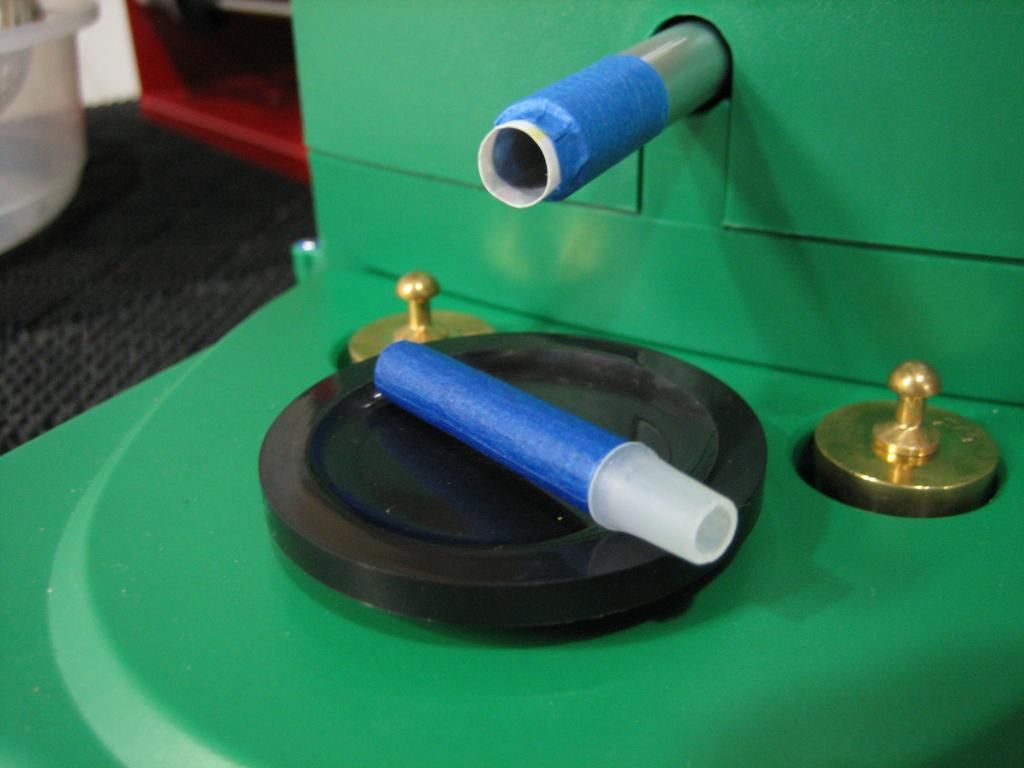
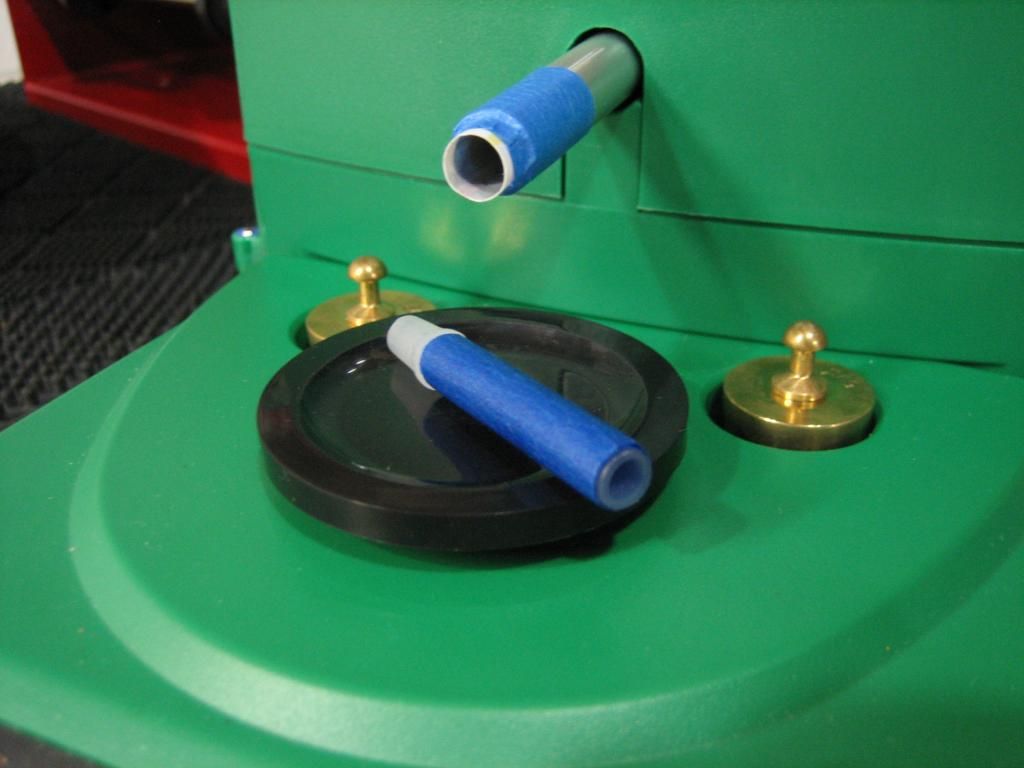
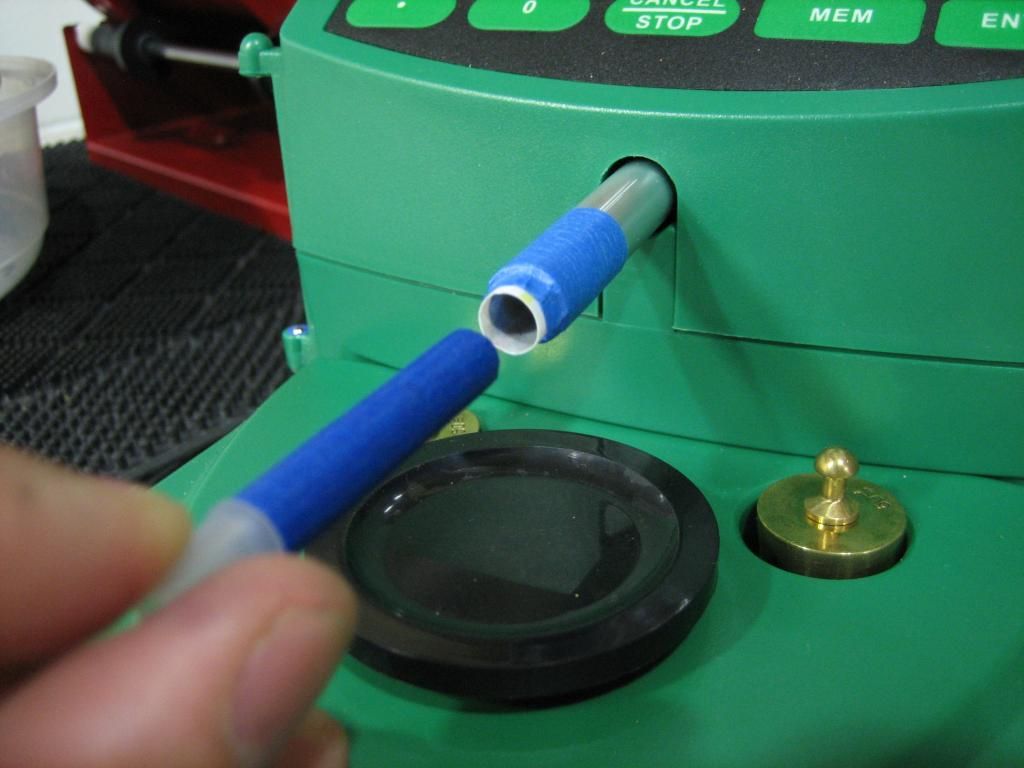
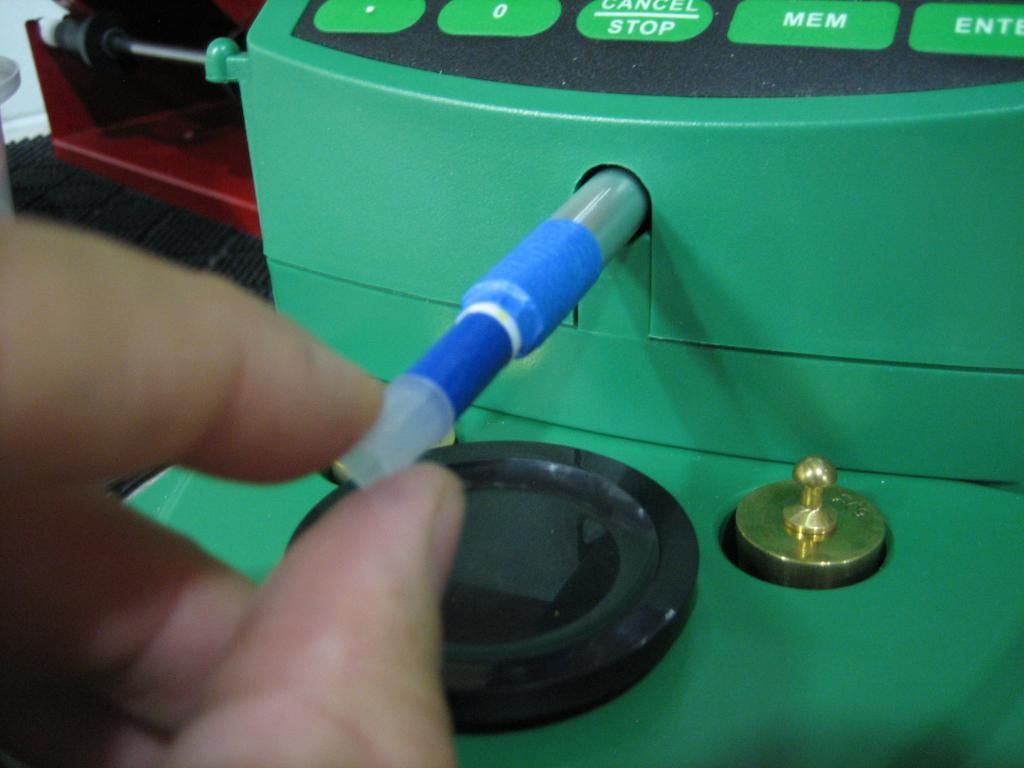
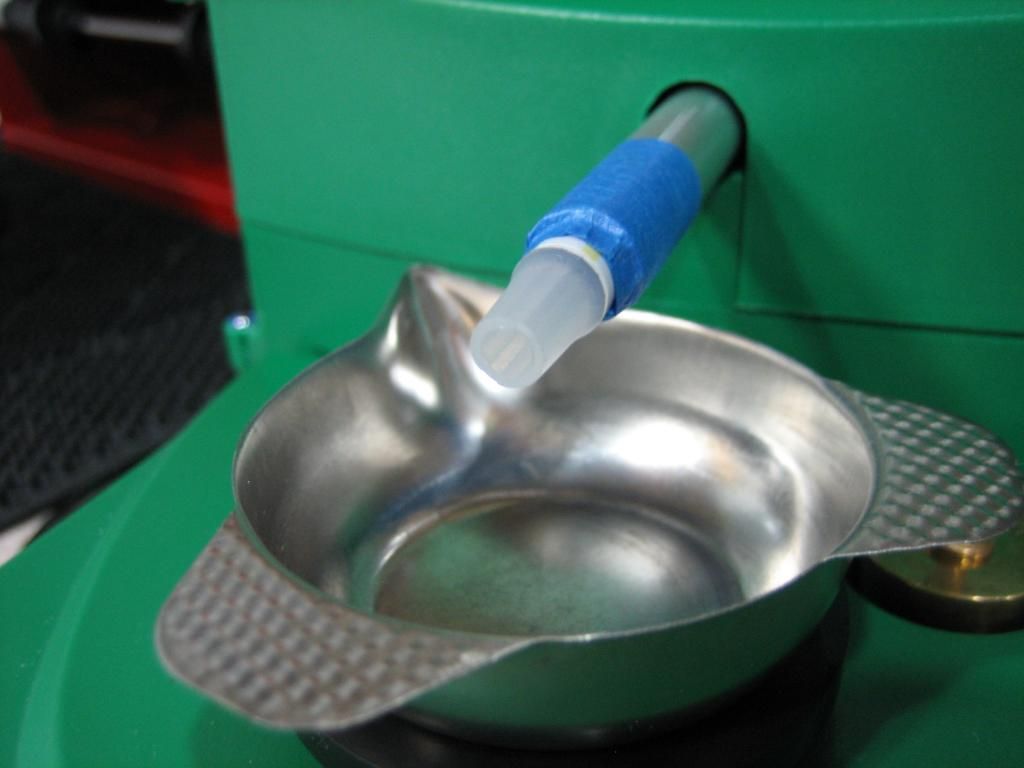
If you like to fiddle around like me, maybe give this a try. Don't get me wrong, I really like the McDonald's straw mod for the chargemaster and I still wanted to still keep this option for higher volume brass like .308 and above, AND for speed purposes, but I wanted an optional smaller diameter hole insert that I could easily insert & remove as an option for more precise / lower volume brass work like 5.56 reloading that would never under/over throw. As in never ever... LOL...... I still wanted the requirement of being able to use the classic straw mod so this is what I came up with.... I took the insert out of a soft touch bic pen, wrapped enough blue painters tape around the pen insert (as in the pic) just enough so the optional insert can easily be inserted & removed as an option. I just tried it with 100 total @ 23.8grn powder drops of varget for 5.56 reloading without a single under / over throw AND THAT WAS WITH VARGET, and it usually stopped dropping powder right after 23.7 @ 23.8 on the nose. It does take about an extra 2 to 3 seconds per charge, BUT from what I've tested so far there was no need to scoop any powder out from over drops so the extra time wasted is somewhat of a wash (for lower grn powder drops like 5.56 / might not be the best for drops 40grns or more but you can test it as an option if you like)..... When you're done dropping powder, put pan in place, put finger over the plastic insert hole so powder doesn't spill, pull out the optional plastic insert as powder drops in pan, & run the chargemaster empty for storage purposes when done dropping powder. This optional insert glides in and out really easy but you need to guage the correct amount of tape that you wrap around the insert. If you like to fiddle around, give it a try and see what you think. So far, I'm really happy with it.

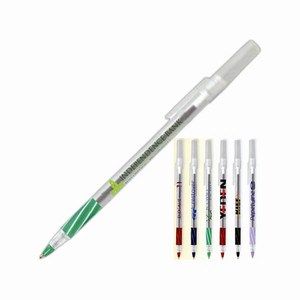
I took the insert out of this type of pen. The plastic pen insert is about 1-1/2" long give or take. Just an FYI, my straw mod is the same length:
bic-soft-feel-stick-pens_zps7eba7fe0.jpg


IMG_7657_zpsfcfb0b02.jpg


IMG_7665_zpsb89ba448.jpg


IMG_7668_zps077189ae.jpg


IMG_7675_zpscd6ceaf4.jpg


IMG_7677_zps55b95560.jpg


*******************************
EDIT:

OK GANG!! I was able to shave off a considerable amount of time while hopefully keeping the same consistent / accurate drops by simply re-programing the unit. I have yet to do a considerable amount of drops with this new programing, but i'll let you know after I drop this next 100rounds of ammo tonight. So far, it has been looking really good! This is what I came up with for the test

Was able to get 41.5grns varget down to 25 to 26 seconds (from 33 seconds)

was able to get 24.0grns varget down to 15 to 16 seconds (from 25seconds)

1. Turn the unit on.
2. When 0.0gn is on the display, press BOTH the ENTER and the EDIT MEM keys on the dispenser at the same time. If done properly ADJUST PARAMETER should scroll across the display

To change the setting, just use the number pad and type in the new setting. If you wanted to change the first setting to 7.00, you would type in 700. When you have the variable set, simply press ENTER to move to the next setting. You'll have to press enter a number of times (20+) to get through the rest of the settings, and then the unit will reboot itself.

Here are my settings:
HSP A1 -6.85
HSP B1 - 2.25
HSP C1 - 0.65


I'll let you know how tonight's 100 drops go & if I play around with these updated re-program settings anymore.

****************************************

BTW, I'm using this MOD of the MOD with the following video chargemaster re-program:
Reloading Tips - Reprogram your RCBS Chargemaster 1500, Straw Modification - YouTube
 
Last edited:
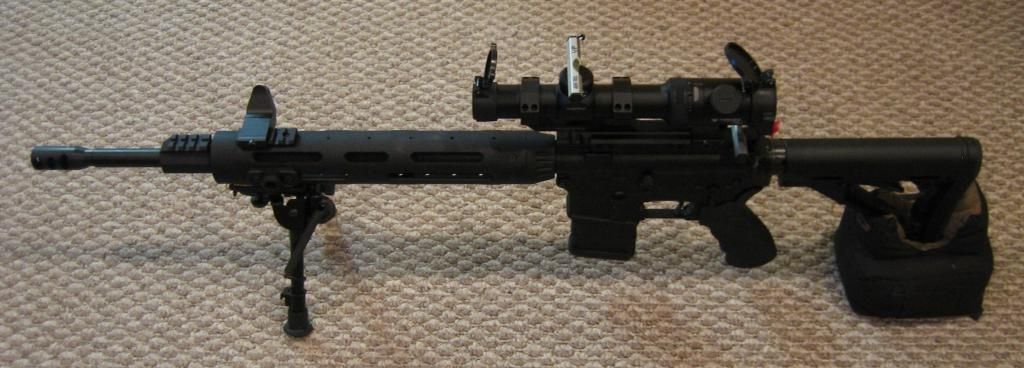
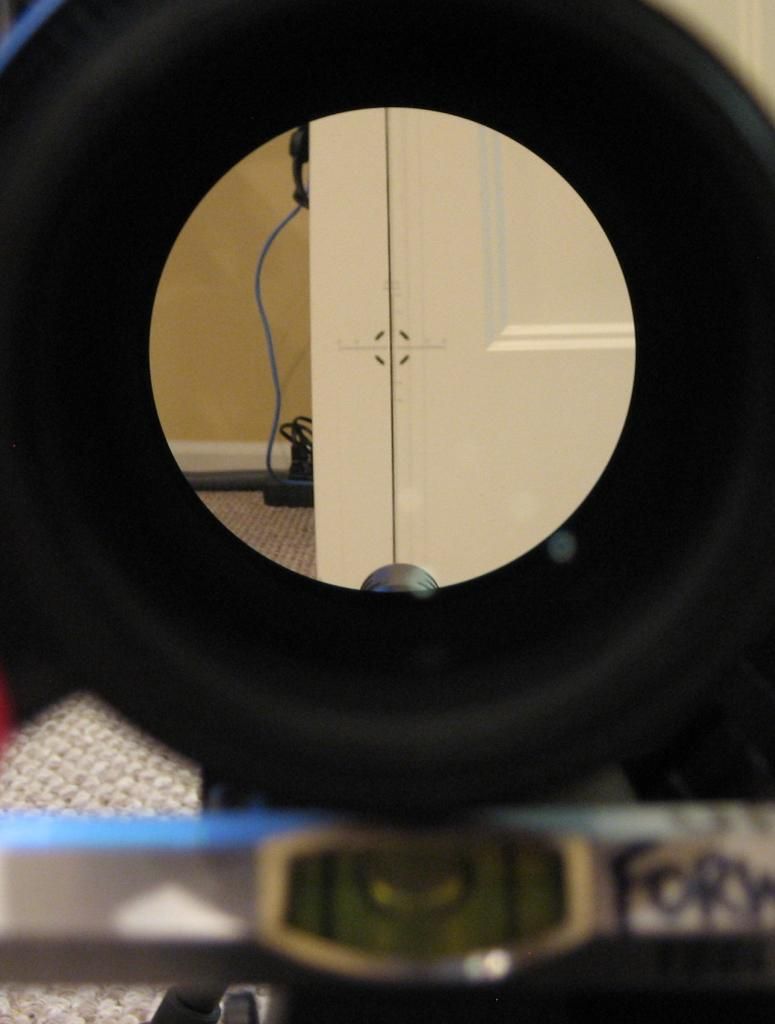
I recently had to re-mount & level my 1-4 vortex scope on my DPMS 3G1, so I figured I would share my technique for making sure your scope is 100% dead nuts level. I'm not saying this is what you should do, this is just what I do to make sure my scopes are tip top.

You will feel a little play when first mounting the scope mount base to the main picatinny rail and before you tighten the base screws, push the scope mount base forward before you tighten the base screws. This will help counteract recoil and improve accuracy.

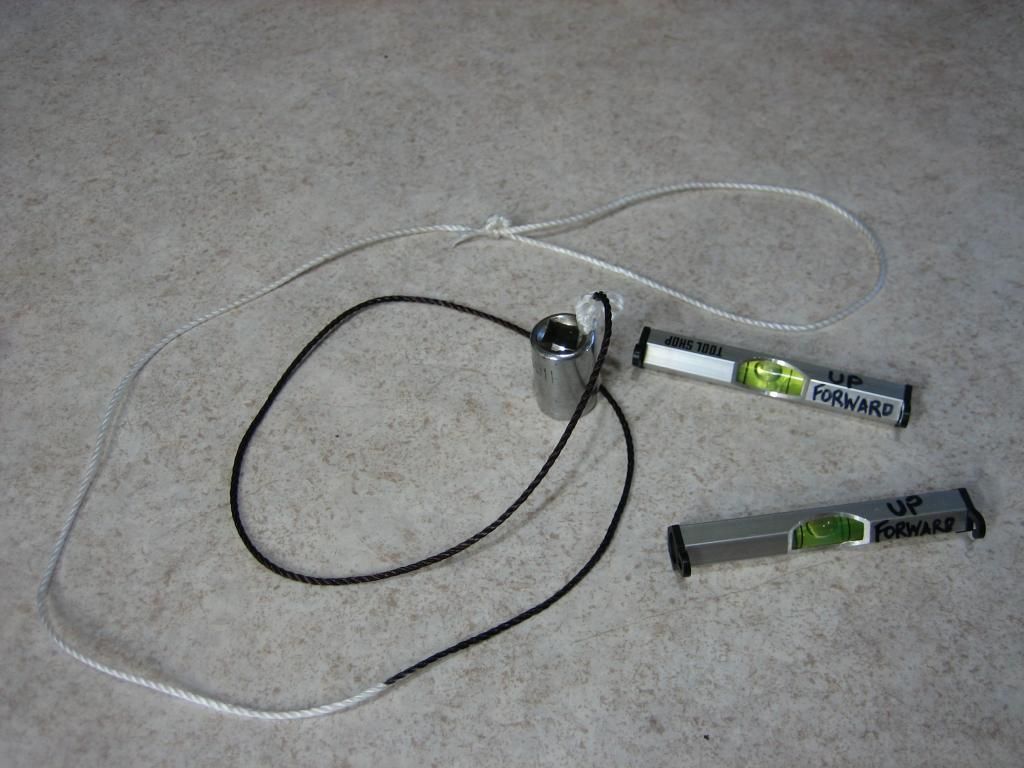
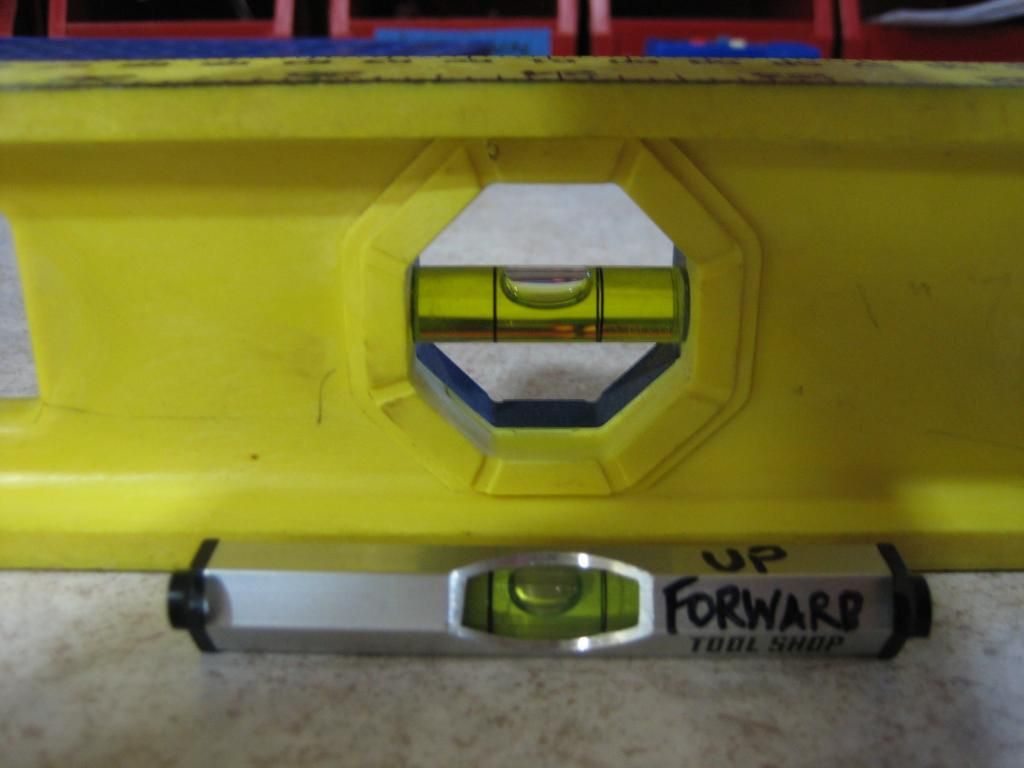
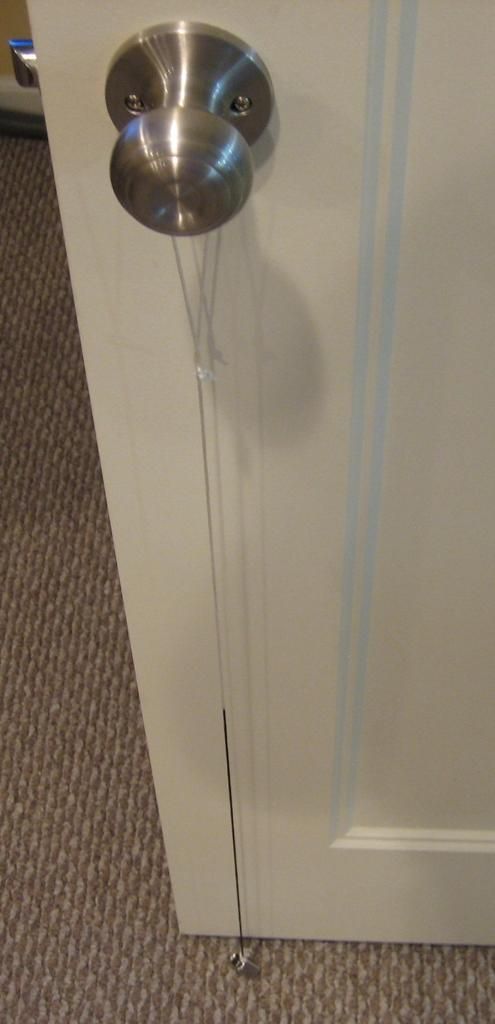
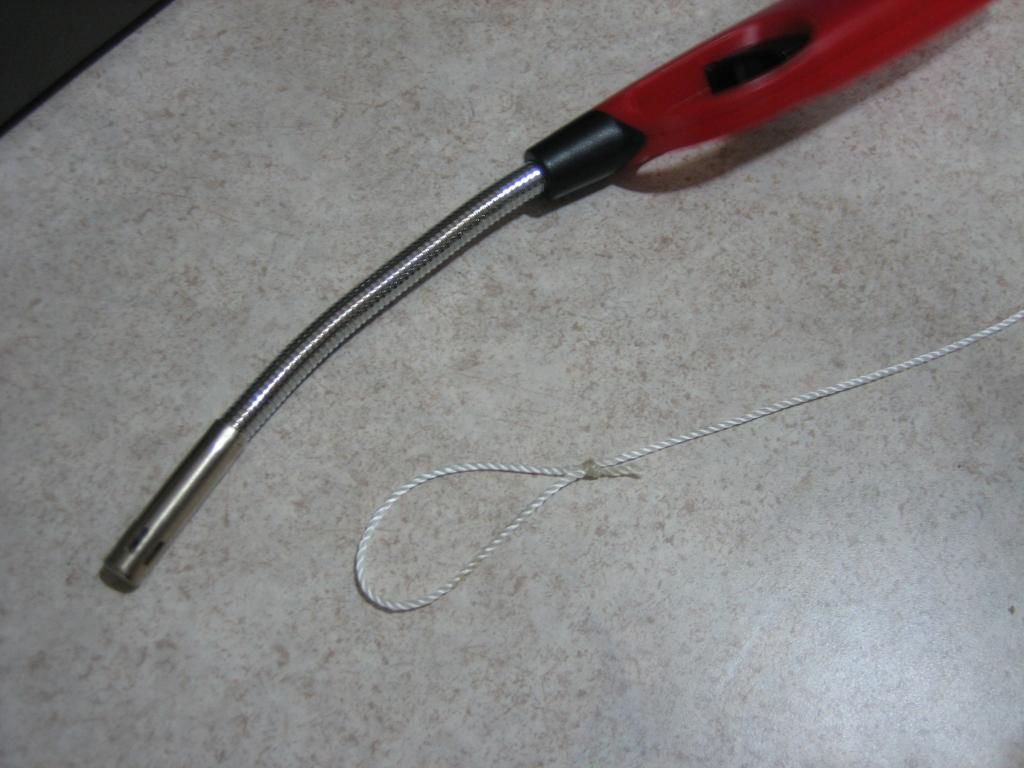
I picked up 2 total inexpensive $1.25 each line levels from a local big box hardware store. The smaller the better & especially if they are in a nice aluminum housing as pictured. The home-made plumb bob I made with some string I had laying around the house with a heavy nut I didn't need & colored the end of the string with a black magic marker:
IMG_7701_zpsaef0beae.jpg


Doesn't hurt to verify your inexpensive mini-levels with a more expensive level before you do anything:
IMG_7697_zps326b7f96.jpg


Put your home-made plumb bob on any door handle. Gravity will do the rest just like the bullet fired out of your rifle:
IMG_7720_zps3a3d2360.jpg


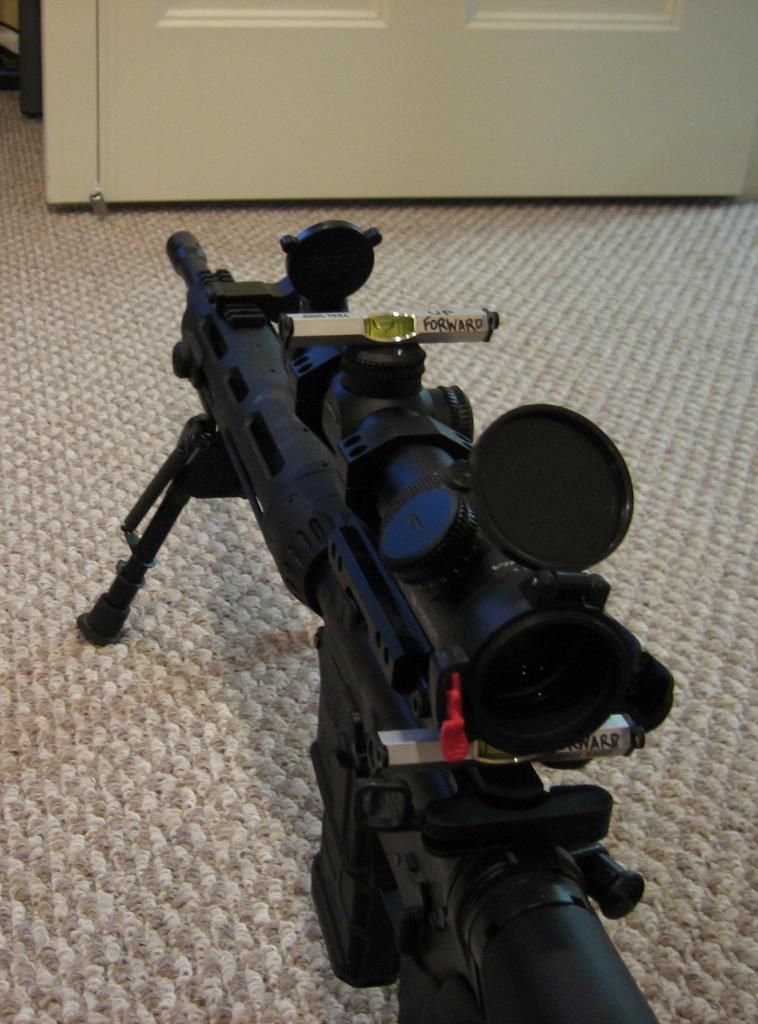
It helps big time to have a swivel style harris bipod to level your rifle left to right. Doesn't hurt to level the rifle front to back either while in your rear sandbag. The main key is to make sure the mini-level that sits on the main picatinny rail is 100% level, and to position the rifle 90degrees to the plumb bob as best as possible before you adjust the scope obviously as shown in these pics.
IMG_7762_zps10addd49.jpg


IMG_7727_zpse870b112.jpg


While the scope rings are still somewhat loose, adjust the crosshairs to match your plumb bob level line. Once they match perfectly, then tighten up your scope rings & you're ready to rock-n-roll. You might need to bring higher power scopes back further away from the plumb bob line than what is shown in this picture & might need to play around with your scope focus FYI:
IMG_7748_zps52ddc33d.jpg


Exactly what I have done with many rifles. Just need to have a solid mount and straight rail with adequate cant in the rail or mount to get you to the distance you want to shoot, depending on your zero. This means selecting the right scope to start with and make sure your reticle is centered in the scope when you start! Make sure your mount is pushed forward in the grooves on your rail and when lined up appropriately (like in the pictures), then loosen mount nuts and scope scews one at a time, alternating sides and corners, add small amount of blue Locktite to all and torque to specifications that come with your mount. There should be slight gaps on each side of the rings when you're done! This will minimize ring marks,if you end up needing to swap or upgrade your scope. Really very easy and takes less tan 15 min. to accomplish. Remember you get what you pay for in scopes and mounts, so buy the best you can afford on your budget and can always easily upgrade later.

I would highly recommend reading the Optics Selection Sticky in the Scope Section here on the Hide many times before you buy, so you have a better chance to get the right scope for the distance and type of shooting you plan to do! Will save you a lot of hassle in the long run. Precision rifles need the appropriate optic to perform at their best.

Good Shooting
 
Last edited:
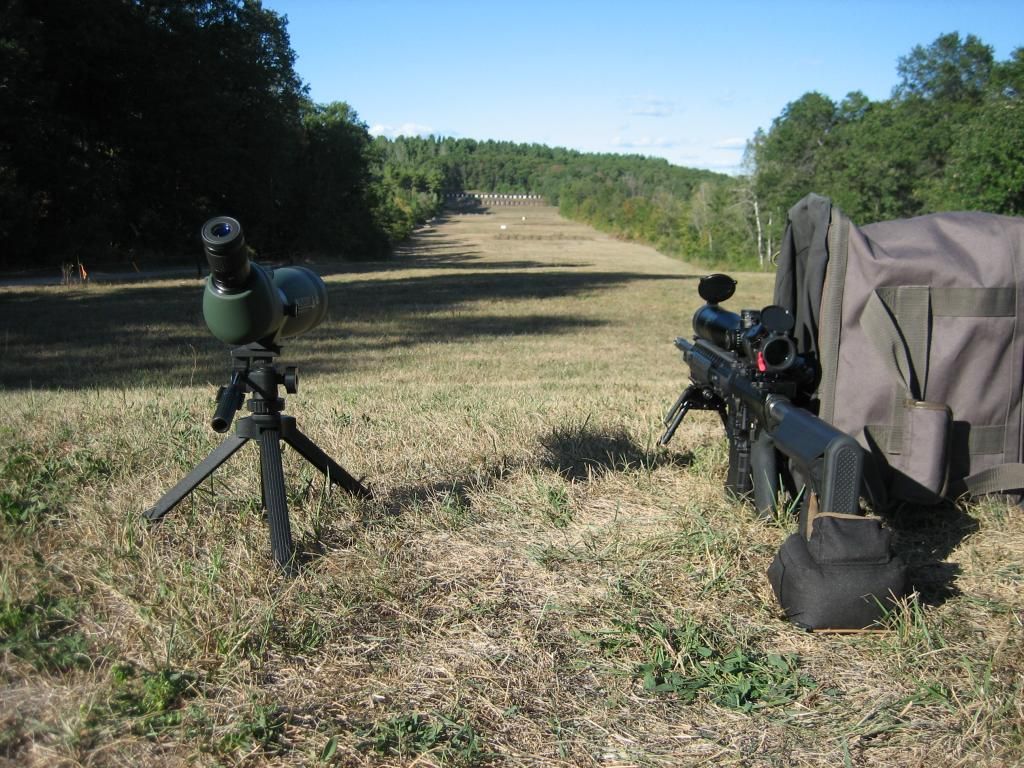
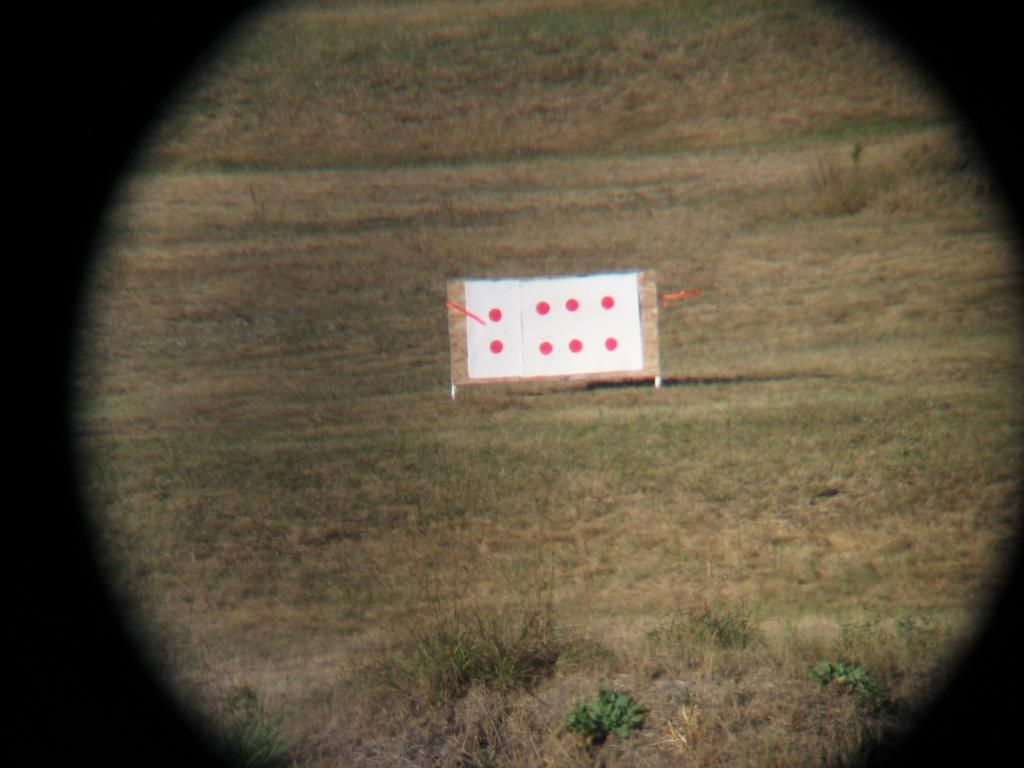
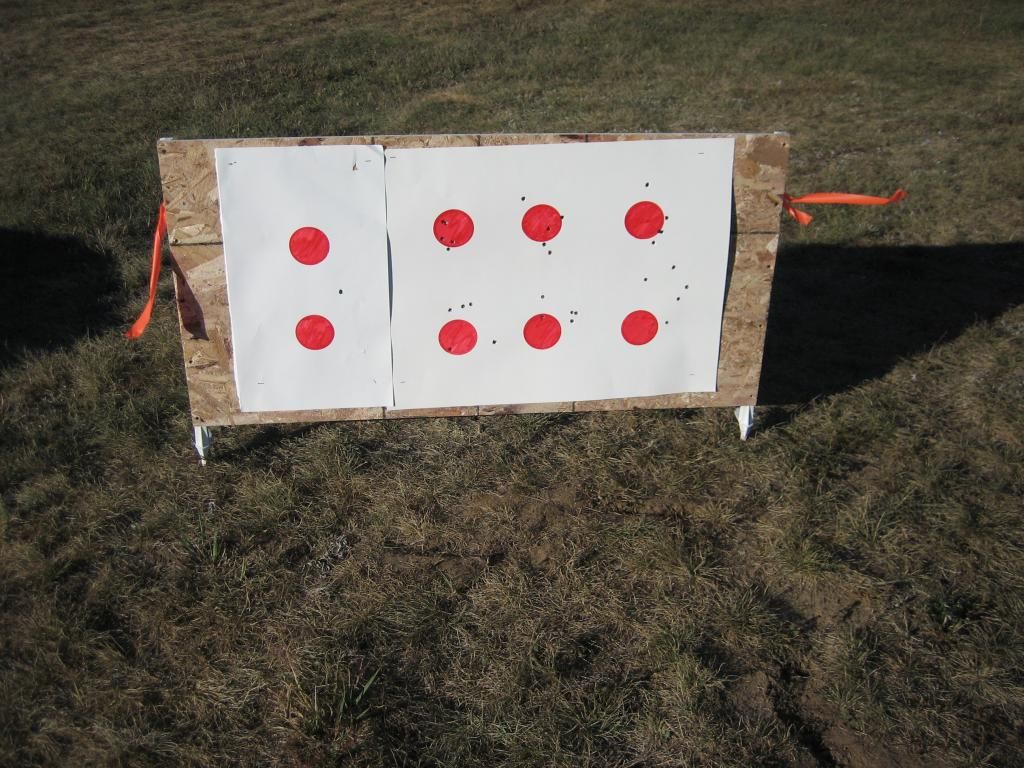
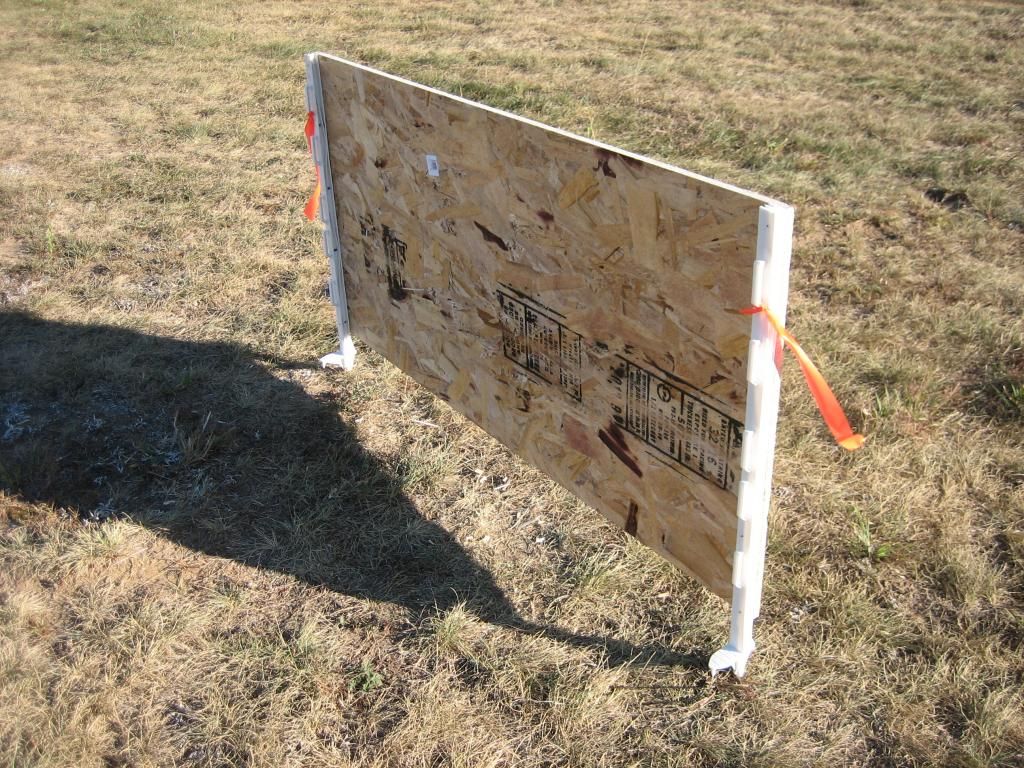
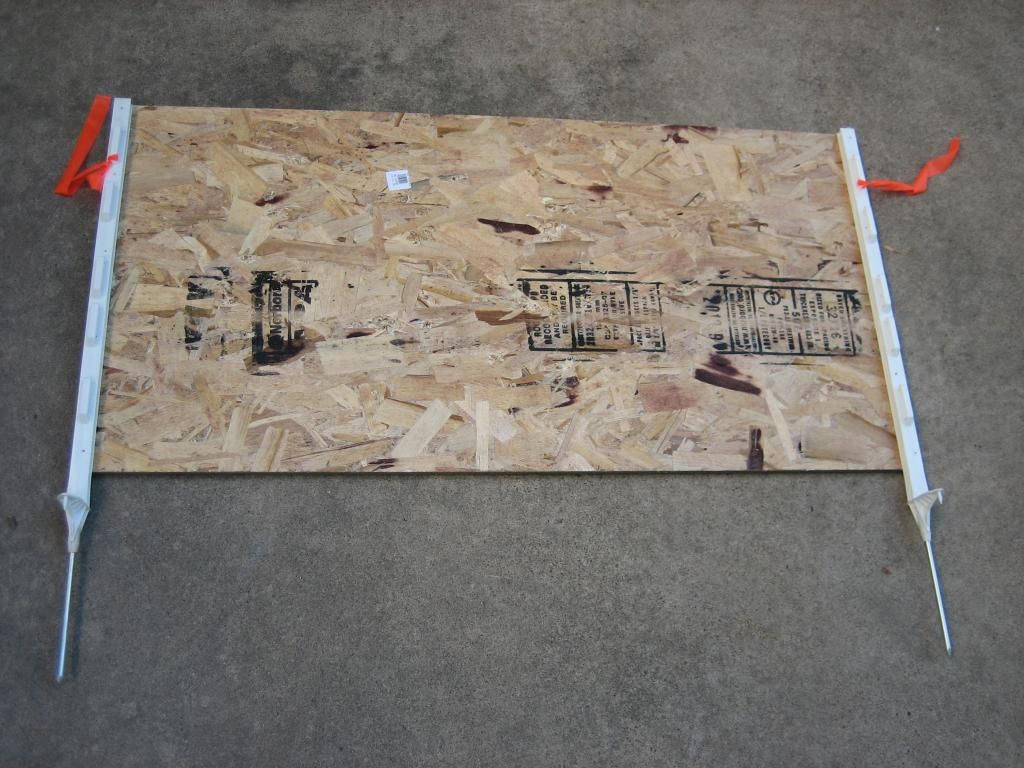
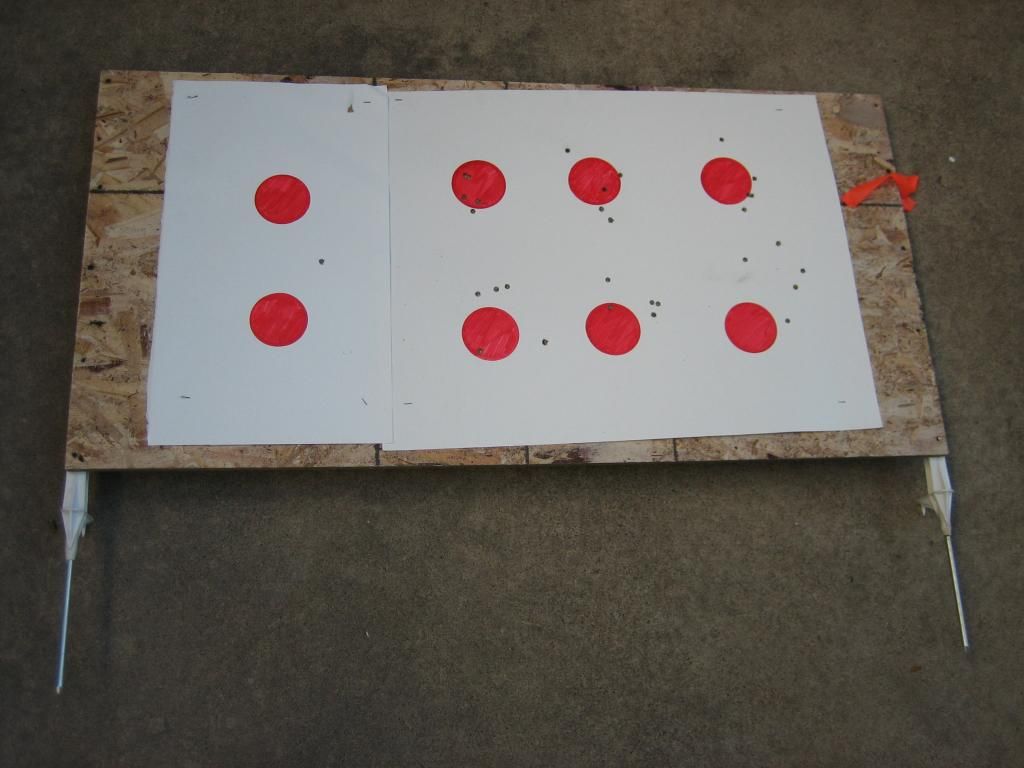
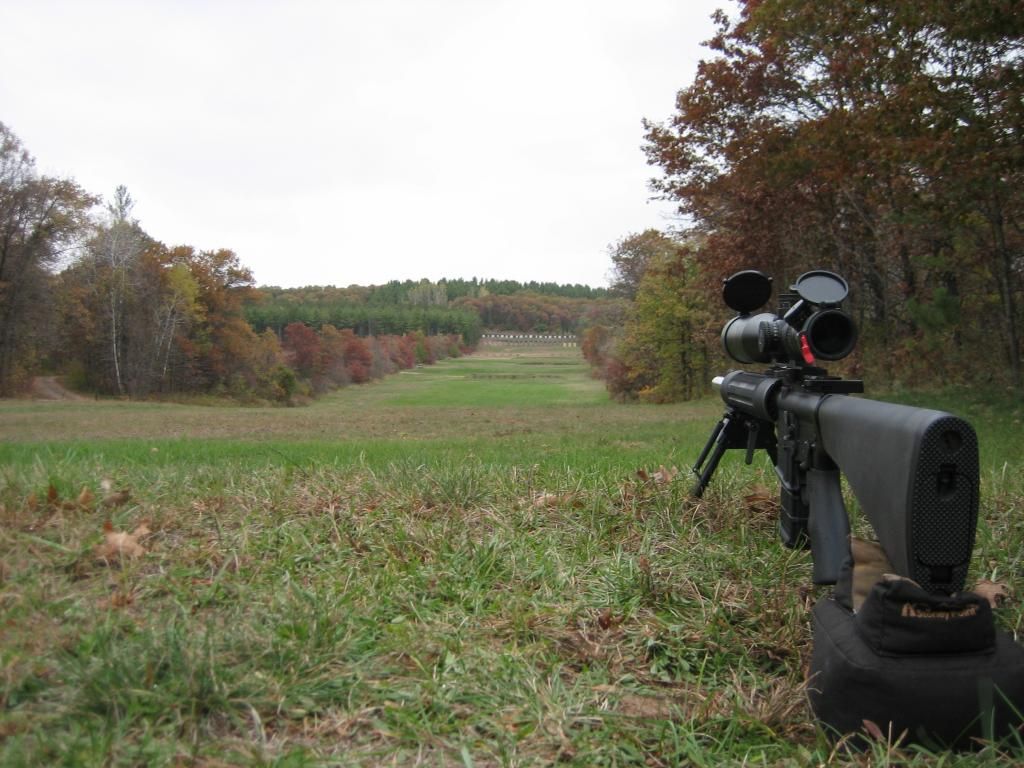
Wow, just got back from the 600yard range with my LMT MWS and man alive, WAS IT EVER WINDY!! Winds were easy over 15mph and pushing 20+mph spikes (as you can see the ribbon flags on my target flipping in the wind).... Very up & down type winds and was never dead still or even close to it. We didn't shoot 600yards due to wind as we didn't want to hit the wooden frames so we backed our targets off the 600yard line. It was still fun trying our best to shoot with the crazy up and down winds. I also wanted to test out the new portable target stand that I made out of some $2dollar each plastic garden stakes that have a metal spike tip & a $3dollar 1/2"x2'x4' pc of OSB plyood. I picked up the plastic garden stakes from menards for $2 each and just pre-drilled (so the plastic didn't crack) & screwed the OSB to the garden stakes with some drywall screws (screwed OSB to the plastic stakes from the OSB side into the plastic stakes).... I then just cut the extra length of the plastic garden stake off with a hacksaw so the entire 2'x4' stand can go in the back seat of my car. I was hoping to keep the stakes the full 4'long so I could have my wind ribbons nice and high, but I was forced to cut them down so I could get the stand IN / OUT of my car back seat. Was really easy to pull my car up to the spot in the picture and drive the stakes into the ground. Weight wise, the home-made stand isn't bad at all. The $9 target stand worked awesome and they have a built in "foot stomp" at the bottom of the stake to really drive it home into the ground. Once in the ground, the target stand was 100% rock solid with absolutely no movement even with today's crazy winds. I attached two ribbons on each side of the target stand to help gauge wind which was especially helpful with today's wind. I tried my best to zoom my camera with my konus 60x spotting scope which does the glass no justice. I can easily see my .308 bullet holes at 330meters / ~ 360yards. I think I'll even try out the new target stand at the 550yard mark next time I hit the range when it isn't so windy.

IMG_7838_zps8e20d004.jpg


This is the best I could get my camera to focus. By no means does this picture do my konus 60x spotting scope justice. You could easy see the .308 bullet holes at 330meters.
IMG_7849_zps23cf2462.jpg


IMG_7888_zpsaa9eccd9.jpg


IMG_7891_zpsb1bb55c2.jpg


IMG_7895_zps24707cc2.jpg


IMG_7897_zpse2758a5d.jpg


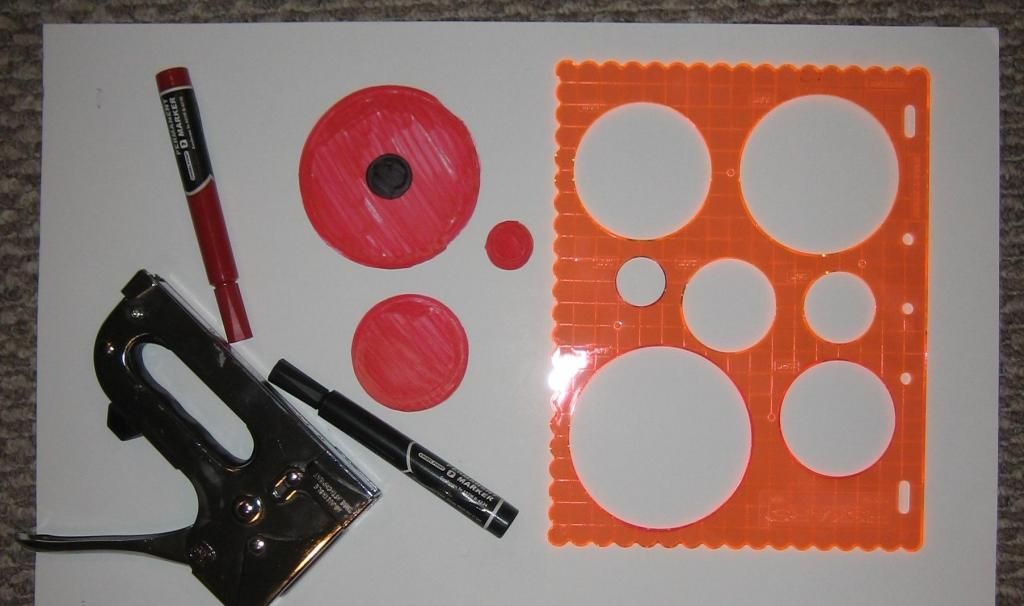
I got the 2'x3 heavy duty white paper (which is really nice to see bullet holes) for .50cent each from the dollar store. Markers are from the dollar store also. Circle stencil I got from joan-fabrics for $3.50.
IMG_6528_zps2050b52b.jpg
 
Last edited:
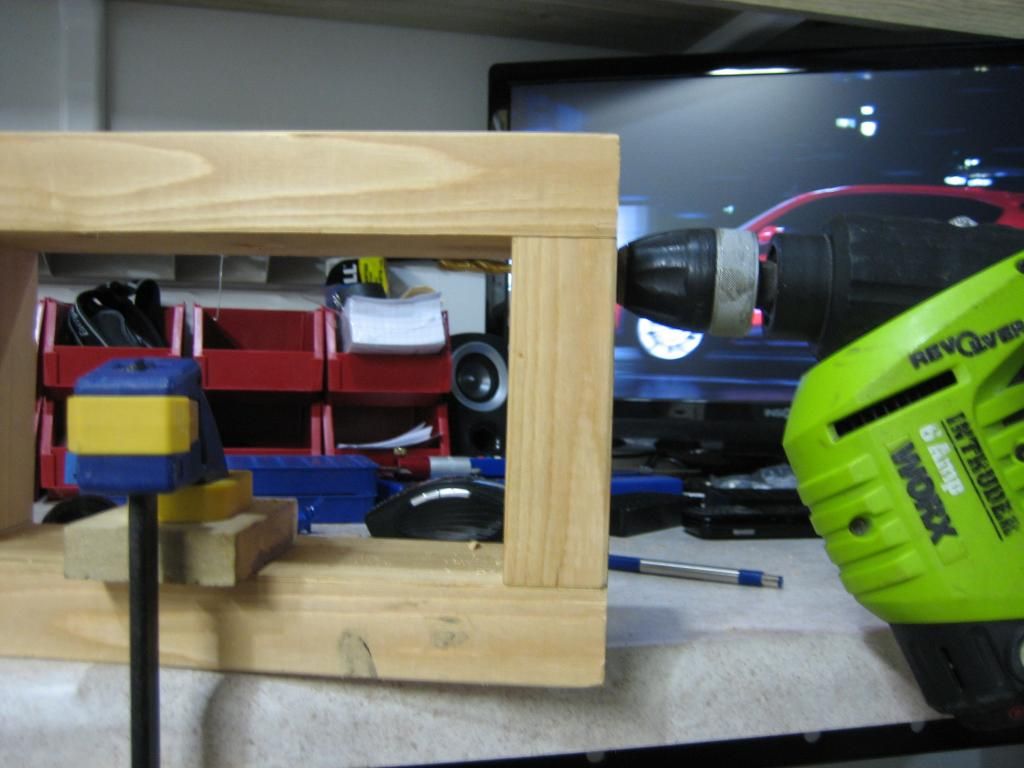
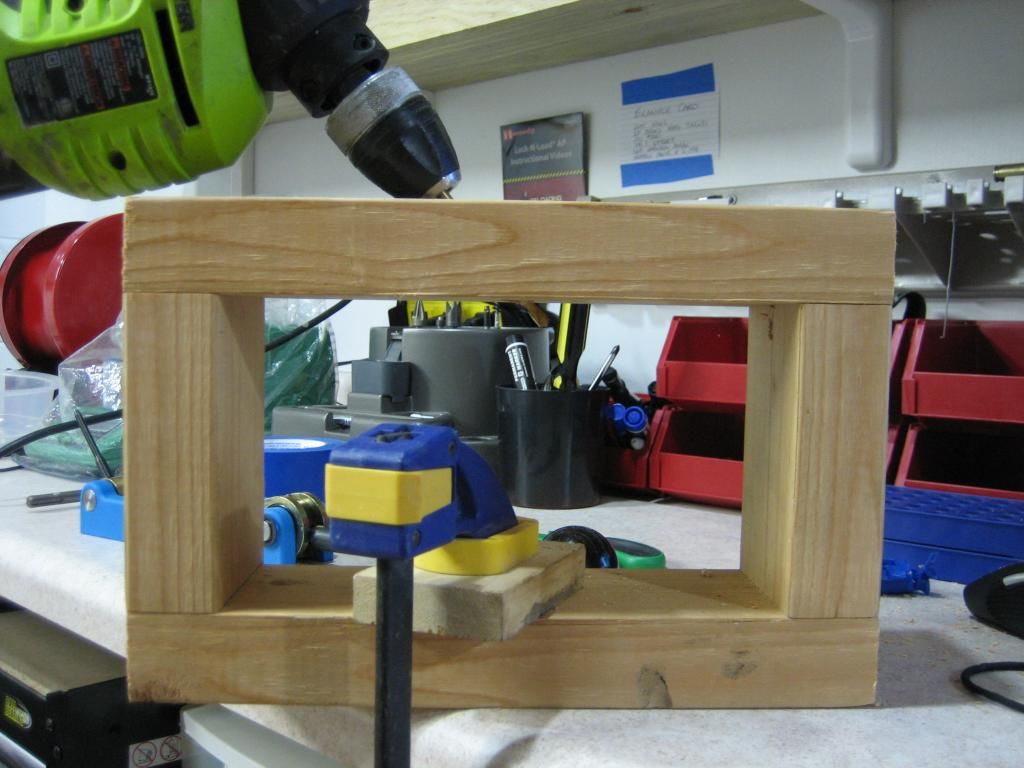
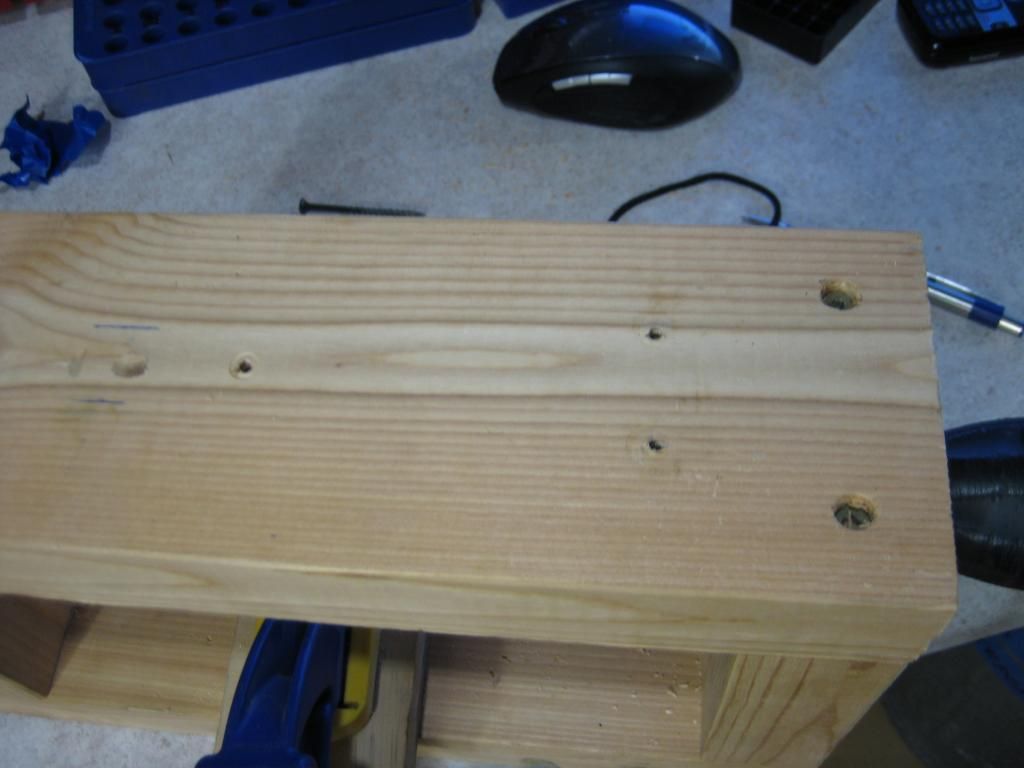
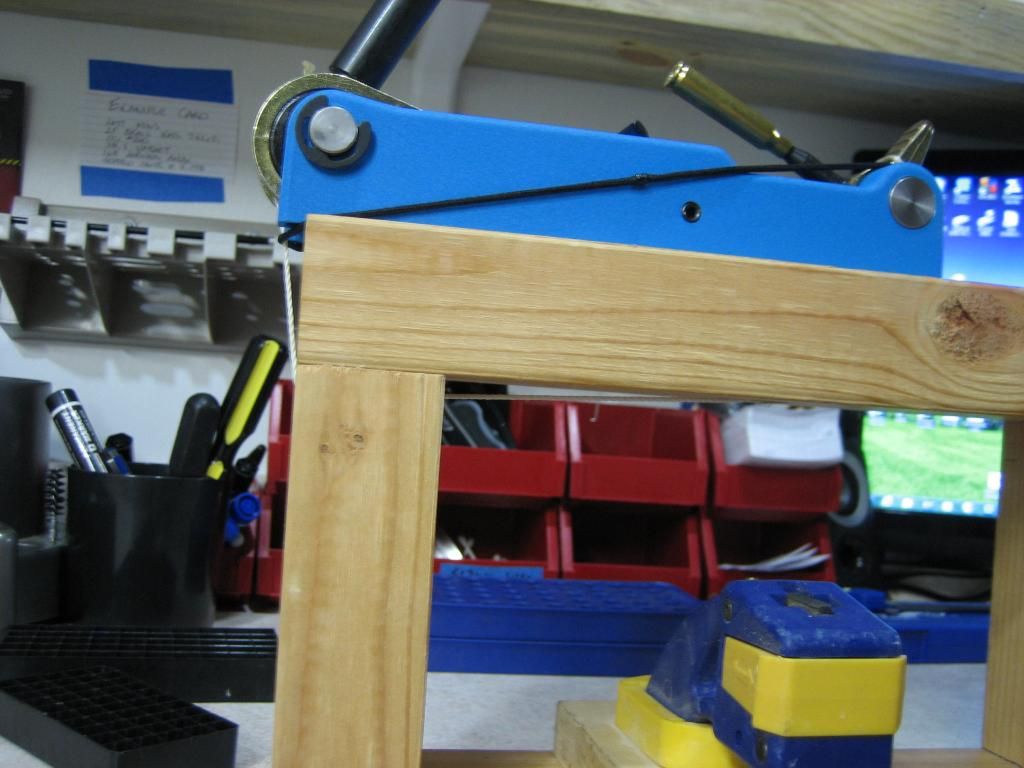
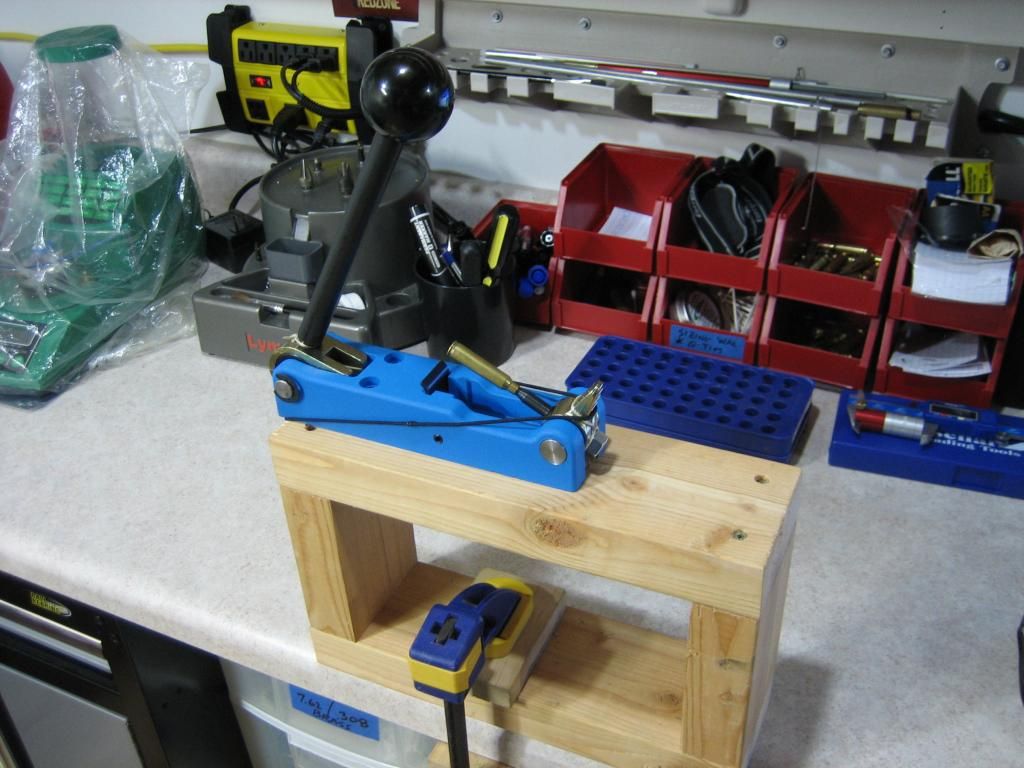
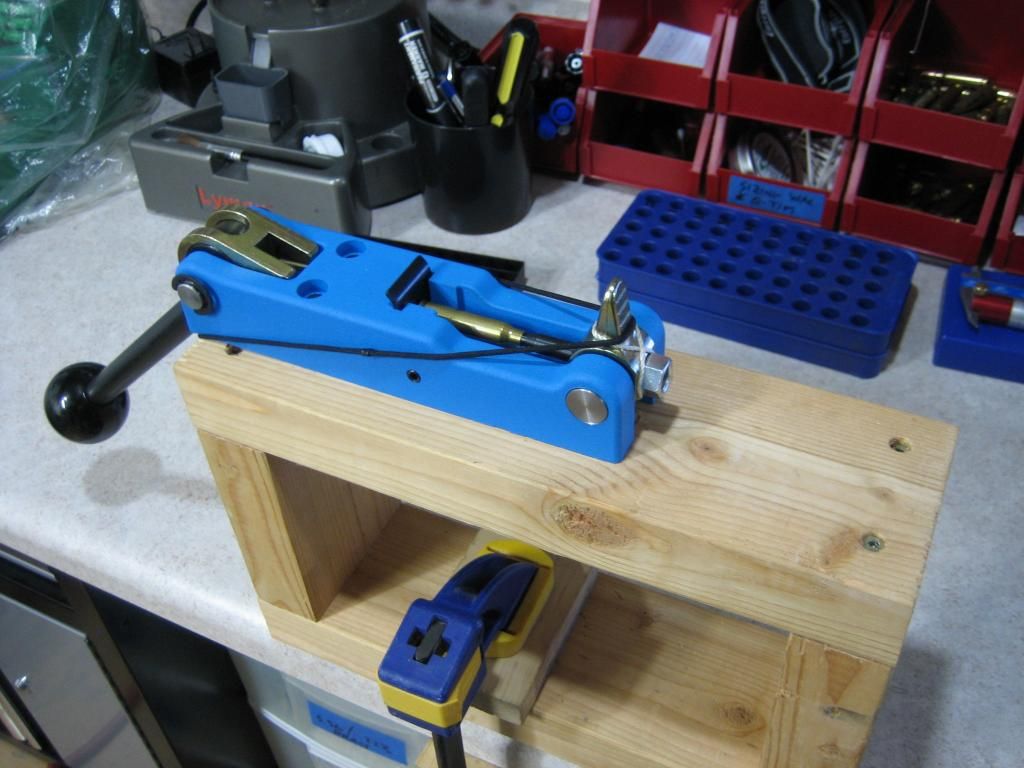
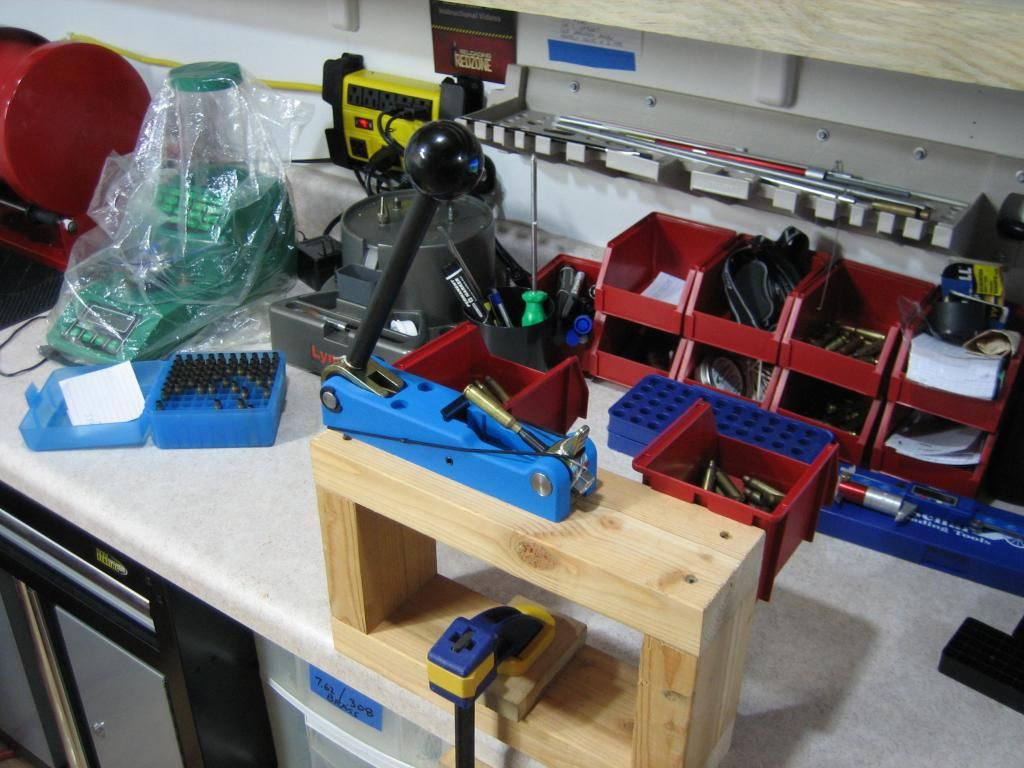
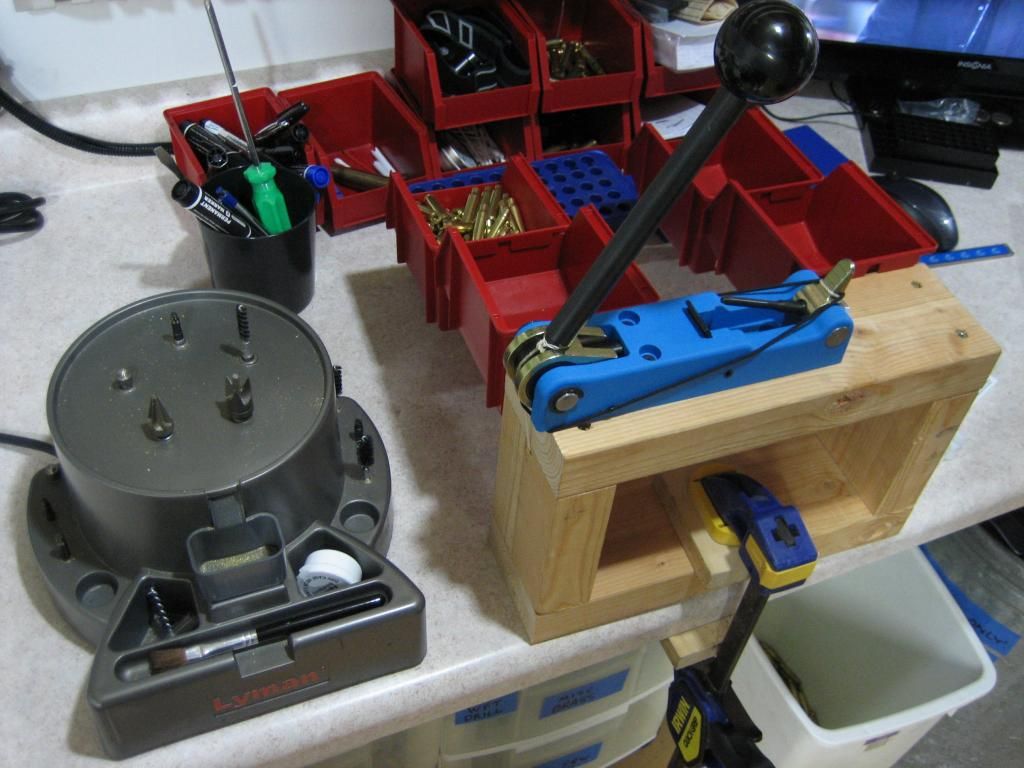
Well, I spent about 1 hour getting my automatic Dillon super 600 swager set up tonight. So far, it's awesome. I've done a few test pcs of brass and I think I have the brass adjusted just right for a perfect swage (for those that know more about the super 600 more than me, please give me some feedback on your process of adjusting the super 600 for the perfect swage). I seated a couple test primers and they seamed to seat perfect with no "gritty" feeling as the primer was seated. Anyway, I wanted to go with the automatic set up, but not the "auto eject" method that rockets the brass off the super 600 & into a bin on the other side of your bench as in the videos below... There was just something about "flinging" your brass across the room that doesn't "jive" so well with the word precision reloading & my own personal logic. Anyway, I went with the manual removal but with the automatic set up as in these pictures. I wanted the super 600 up higher off the bench so it was easier to use with the height of my bench, so I made a 12" x ~8" box out of a pc of 2x4 sitting in the corner of my garage (was also needed so the handle didn't hit the bench when lowered). This way I can just clamp the whole unit to the bench when needed, then remove it when I'm done swaging crimped primers. Enough talking, if you can't figure this out with these pictures, then I'll PM you my address for you to UPS your reloading equipment along with your man badge to my house, JK ;)

IMG_7907_zps592db581.jpg


IMG_7898_zps7dcb024a.jpg


IMG_7911_zpsf4ff62a7.jpg


IMG_7914_zps9646828e.jpg


IMG_7917_zps36132939.jpg


IMG_7938_zps57532de4.jpg


IMG_7935_zps87a4ab4c.jpg


Finished product! I love it when a plan comes together. Something as simple as screwing two .20cent plastic bins to the wood box turns something cool into awesome. Crimps beware!!!
IMG_7943_zps3b8e9d57.jpg


http://www.youtube.com/watch?v=C34sRku4ASY

http://www.youtube.com/watch?v=LaZHeSUqQbk
 
Last edited:
I finally got around to sorting 101 pcs of the 1000pcs of lake city 5.56 brass I purchased in the above / previous reply.. Nice part it is damn near 95% all 09year which is really nice. Very little sorting. Brass came out ultra clean after 3hours in the final tumbler wash. Trimmed all of the brass to 1.75 with the WFT, did the case prep, and hit the new Dillon super 600 swager... started out with 6pcs & seated the primers with no issues. So far, so good. All primers just below flush. What was nice is an extra set of bins just clipped onto the other bins that is screwed to the 2x4 wood box. These are actually some new primers that I just started using. CCI#41, which is the harder cup small rifle primers. So far, I've produced really really good results with these primers, which includes my 19 total sub-moa 5shot groups shot in a row. Looking good so far!

IMG_7976_zps7889e613.jpg


IMG_7989_zps3c40cd4d.jpg
 
Last edited:
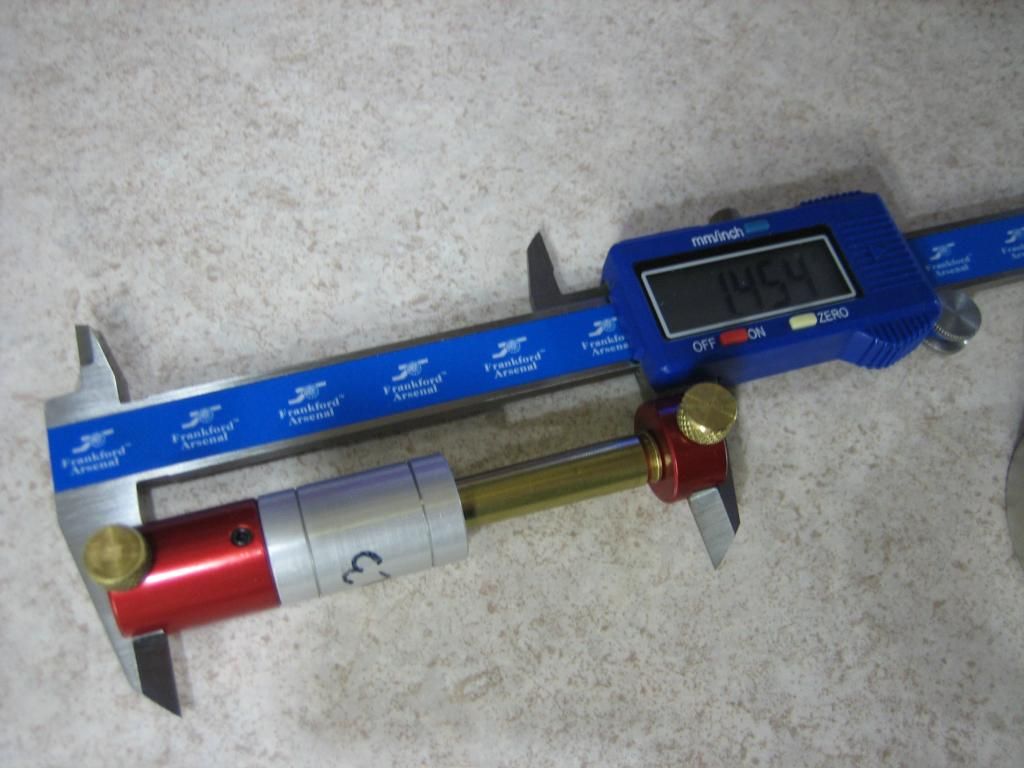
Sometimes the most simple and inexpensive items can make a HUGE difference. Measuring a consistent headspace measurement as a new reloader can be ultra frustrating. Something as simple and inexpensive as this base anvil can make a huge difference. With a little practice, you can get spot on headspace measurements while applying a small amount of "closing pressure on the calipers" & "lightly spinning the brass while in the insert" until you produce a consistent headspace measurement. As noted in the original post headspace section, the amount of "shoulder bump / headspace measurement" IS UP TO YOU! Each rifle is different! Do your homework!

Was just on sale @ midwayusa for $9!!

Hornady Lock-N-Load Bullet Comparator Anvil Base Kit
Amazon.com: Lnl Anvil Base Kit: Sports & Outdoors

IMG_8085_zps8fc0c016.jpg


IMG_8068_zps6f752eb4.jpg
 
Last edited:
OK GANG!! I was able to shave off a considerable amount of time while hopefully keeping the same consistent / accurate drops by simply re-programing the unit. I have yet to do a considerable amount of drops with this new programing, but i'll let you know after I drop this next 100rounds of ammo tonight. So far, it has been looking really good! This is what I came up with for the test

Was able to get 41.5grns varget down to 25 to 26 seconds (from 33 seconds)

was able to get 24.0grns varget down to 15 to 16 seconds (from 25seconds)

1. Turn the unit on.
2. When 0.0gn is on the display, press BOTH the ENTER and the EDIT MEM keys on the dispenser at the same time. If done properly ADJUST PARAMETER should scroll across the display

To change the setting, just use the number pad and type in the new setting. If you wanted to change the first setting to 7.00, you would type in 700. When you have the variable set, simply press ENTER to move to the next setting. You'll have to press enter a number of times (20+) to get through the rest of the settings, and then the unit will reboot itself.

Here are my settings:
HSP A1 -6.95
HSP B1 - 2.30
HSP C1 - 0.85


I'll let you know how tonight's 100 drops go & if I play around with these updated re-program settings anymore.


Elfster. CHARGEMASTER. Optional. Pen. Straw. Mod.

I know some of you are going to go off the handle about using this & that type super expensive beam scale & to not to even use a chargemaster blah blah blah... This is NOT what this is thread even about. I like my chargemaster with the straw mod, this is just an option to fiddle around with for those that use such a mod (as an option)

If you like to fiddle around like me, maybe give this a try. Don't get me wrong, I really like the McDonald's straw mod for the chargemaster and I still wanted to still keep this option for higher volume brass like .308 and above, AND for speed purposes, but I wanted an optional smaller diameter hole insert that I could easily insert & remove as an option for more precise / lower volume brass work like 5.56 reloading that would never under/over throw. As in never ever... LOL...... I still wanted the requirement of being able to use the classic straw mod so this is what I came up with.... I took the insert out of a soft touch bic pen, wrapped enough blue painters tape around the pen insert (as in the pic) just enough so the optional insert can easily be inserted & removed as an option. I just tried it with 100 total @ 23.8grn powder drops of varget for 5.56 reloading without a single under / over throw AND THAT WAS WITH VARGET, and it usually stopped dropping powder right after 23.7 @ 23.8 on the nose. It does take about an extra 2 to 3 seconds per charge, BUT from what I've tested so far there was no need to scoop any powder out from over drops so the extra time wasted is somewhat of a wash (for lower grn powder drops like 5.56 / might not be the best for drops 40grns or more but you can test it as an option if you like)..... When you're done dropping powder, put pan in place, put finger over the plastic insert hole so powder doesn't spill, pull out the optional plastic insert as powder drops in pan, & run the chargemaster empty for storage purposes when done dropping powder. This optional insert glides in and out really easy but you need to guage the correct amount of tape that you wrap around the insert. If you like to fiddle around, give it a try and see what you think. So far, I'm really happy with it.

I took the insert out of this type of pen. The plastic pen insert is about 1-1/2" long give or take. Just an FYI, my straw mod is the same length:
bic-soft-feel-stick-pens_zps7eba7fe0.jpg


IMG_7657_zpsfcfb0b02.jpg


IMG_7665_zpsb89ba448.jpg


IMG_7668_zps077189ae.jpg


IMG_7675_zpscd6ceaf4.jpg


IMG_7677_zps55b95560.jpg


*******************************
EDIT:

OK GANG!! I was able to shave off a considerable amount of time while hopefully keeping the same consistent / accurate drops by simply re-programing the unit. I have yet to do a considerable amount of drops with this new programing, but i'll let you know after I drop this next 100rounds of ammo tonight. So far, it has been looking really good! This is what I came up with for the test

Was able to get 41.5grns varget down to 25 to 26 seconds (from 33 seconds)

was able to get 24.0grns varget down to 15 to 16 seconds (from 25seconds)

1. Turn the unit on.
2. When 0.0gn is on the display, press BOTH the ENTER and the EDIT MEM keys on the dispenser at the same time. If done properly ADJUST PARAMETER should scroll across the display

To change the setting, just use the number pad and type in the new setting. If you wanted to change the first setting to 7.00, you would type in 700. When you have the variable set, simply press ENTER to move to the next setting. You'll have to press enter a number of times (20+) to get through the rest of the settings, and then the unit will reboot itself.

Here are my settings:
HSP A1 -6.85
HSP B1 - 2.25
HSP C1 - 0.65


I'll let you know how tonight's 100 drops go & if I play around with these updated re-program settings anymore.

****************************************

BTW, I'm using this MOD of the MOD with the following video chargemaster re-program:
Reloading Tips - Reprogram your RCBS Chargemaster 1500, Straw Modification - YouTube
 
Last edited:
ok... I think I have my finalized re-program settings for the pen insert... just dropped 100 for 100 perfect drops @ 24grns varget for some 5.56 vmax loads i'm working on... here are my finalized settings with the pen insert which shaved off about 10seconds per drop or about 16minutes for 100 total drops... this does a nice ultra slow trickle at the very last second.


Here are my settings:
HSP A1 -6.95
HSP B1 - 2.30
HSP C1 - 0.85
 
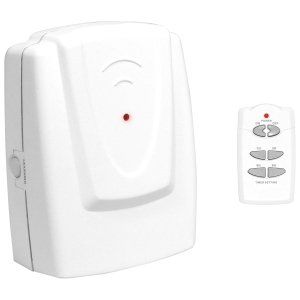
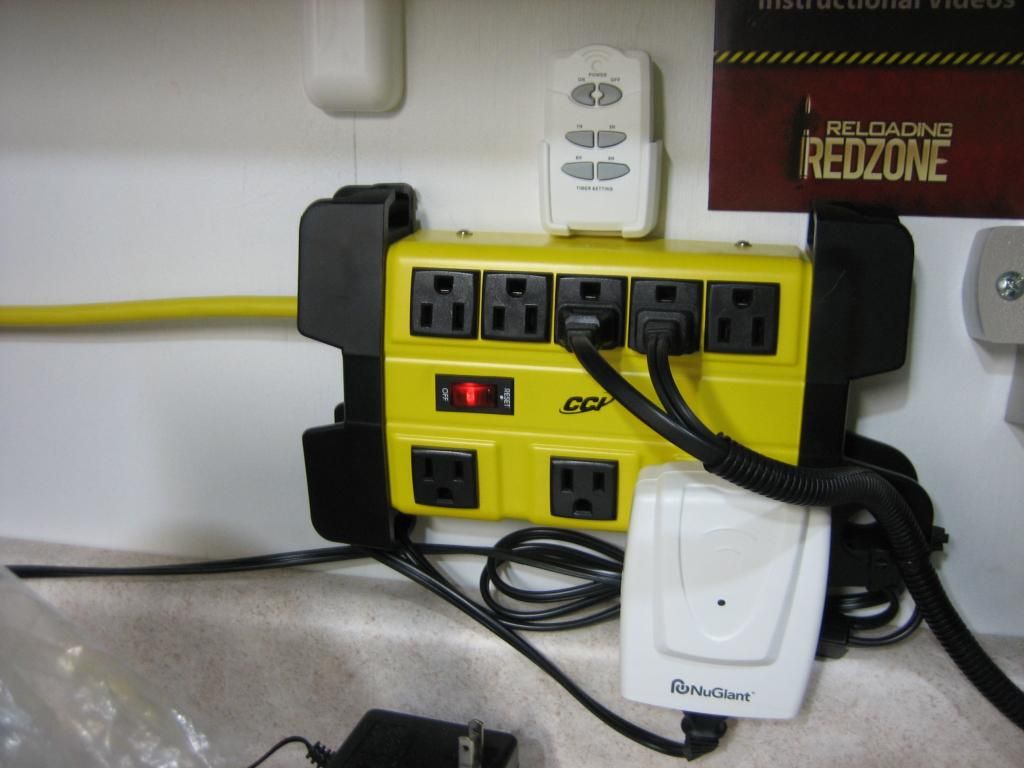
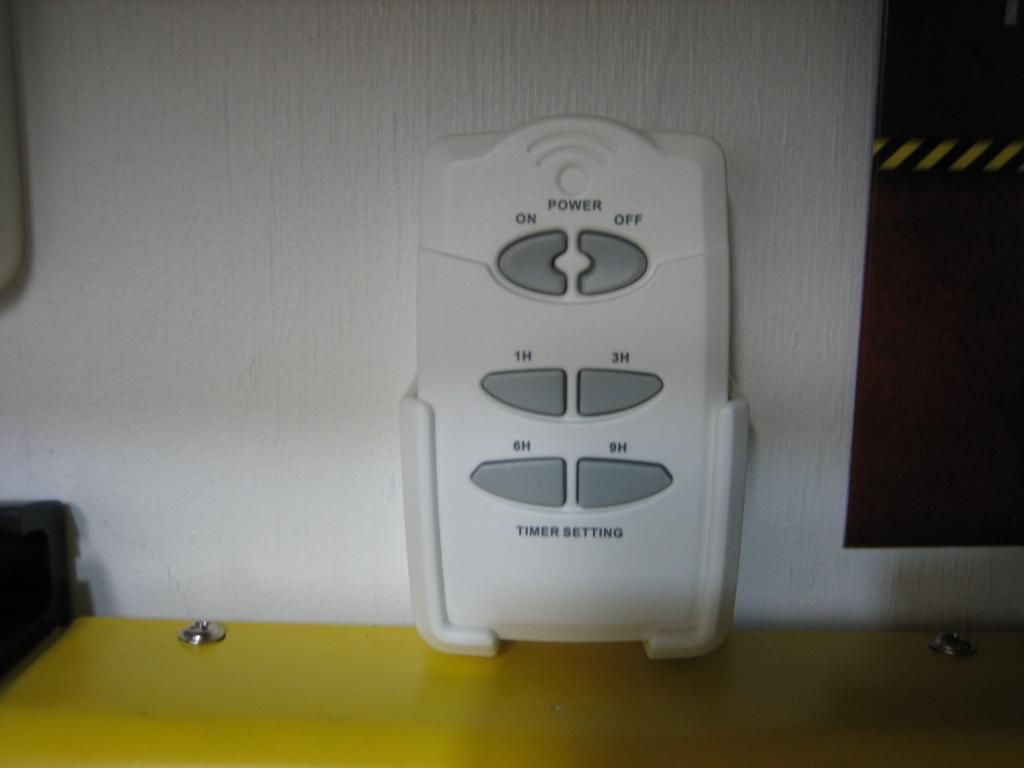
I just purchased one of these for my stainless steel thumler's thumbler for $15 with free shipping (was actually free once I used my discover card amazon points)... I'll let you all know how it all goes. Is it over the top for my reloading room? HELL YES IT IS :) !!! What I like about the unit is its perfect for 1hour for the first cleaning just enough to clean the brass for sizing, and then 3hours for the second cleaning to get the primer pockets clean. Should be at my house later this week and I'll keep you all updated with how it performs. If everything goes to plan, no more dealing with the crappy power chord switch & can hide under desk, mount the RF remote to the wall with the supplied remote cradle, hit the 1hour for the first cleaning for sizing or 3hour button for the 2nd cleaning for final cleaning / clean primer pockets, and go do some other stuff around the house.

21HfRAytFCL_zps7b7bff0e.jpg


Amazon.com: REMOTE Wireless Remote Control Wall Outlet.100ft Range(open space), Indoor use. Controls 120V/60Hz -: Everything Else

http://www.amazon.com/NuGiant-34000-Wireless-Remote-Control/dp/B004C1Q8PO

http://www.meritline.com/nugiant-34000-wireless-remote-control-wall-outlet---p-73415.aspx
 
Last edited:
Very nice, thank you for sharing everything in such detail. I consulted it a lot while I was starting my own epic AR journey. Just wish I could find some 55 or 60gr vmaxs in stock. Had to settle for 50s but they ought to work well for my 14.5 gun. Have you messed with heavier pills yet? Ive got a 20" barrel and a ton of 77s to try they just got really compressed after 23.6gr with 77smks.
 
Regards the tumbler timer. If you lack access to the cords elfsters idea is great. If your cords are readily accessible this item

Amazon.com : Belkin Conserve Socket F7C009q Energy-Saving Outlet : Electronics

is the one I have been using for two years now and it has proven very useful while being inexpensive and not taking up any bench space.

I should probably own the elfster model and eliminate crawling into my cabinet to push the start button but it has served well so far.
 
Are you using LC brass? They should be good to go up to 25 with Win Brass or other commercial brass. Are you loading to mag length and did you measure length to lands to get max COL?

Very nice, thank you for sharing everything in such detail. I consulted it a lot while I was starting my own epic AR journey. Just wish I could find some 55 or 60gr vmaxs in stock. Had to settle for 50s but they ought to work well for my 14.5 gun. Have you messed with heavier pills yet? Ive got a 20" barrel and a ton of 77s to try they just got really compressed after 23.6gr with 77smks.
 
Mixed headstamp. Loading to 2.24ish since the tips are really inconsistent on the grafs 77gr seconds. Im measuring to ogive since the tips are terrible. I noticed after 23.6gr they were getting snug in the mag so I measured them and at each incremental step the COL grew a little. Fixing to try out my new rcbs collet puller and use a powder drop tube and tap em a little then try again. Ive got 2k of LC but I don't have a swager yet...
 
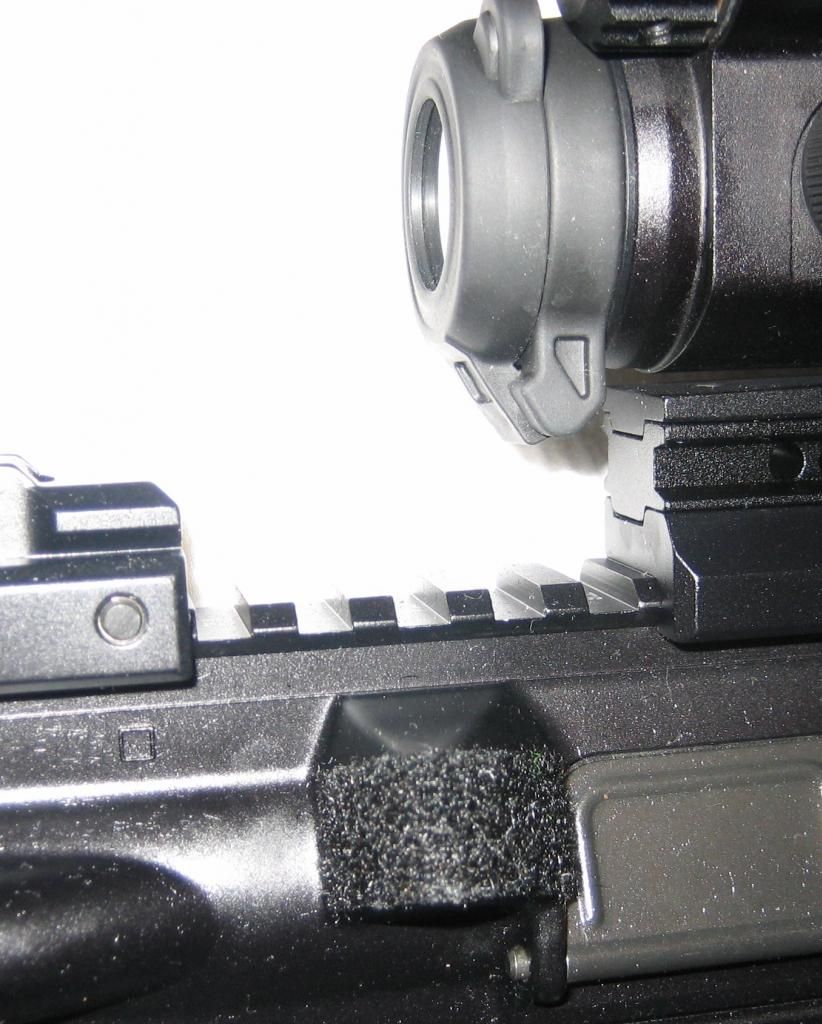
Most of you already know this little trick, but for those new to the game (even if you don't reload)...... put some Velcro (fuzzy side) on your brass deflector. Even if you don't reload, keep your brass as you never know..... you might end up reloaded down the road. This .25cent / 1min Velcro fix can save your brass from a serious dent on the side of the brass body = not good for reloading! All of my AR's sport the velcro mod. Trim the Velcro down with some scissors, clean off all oils from the deflector & and stick'er on :)

IMG_8115_zps33c12987.jpg
 
Last edited:
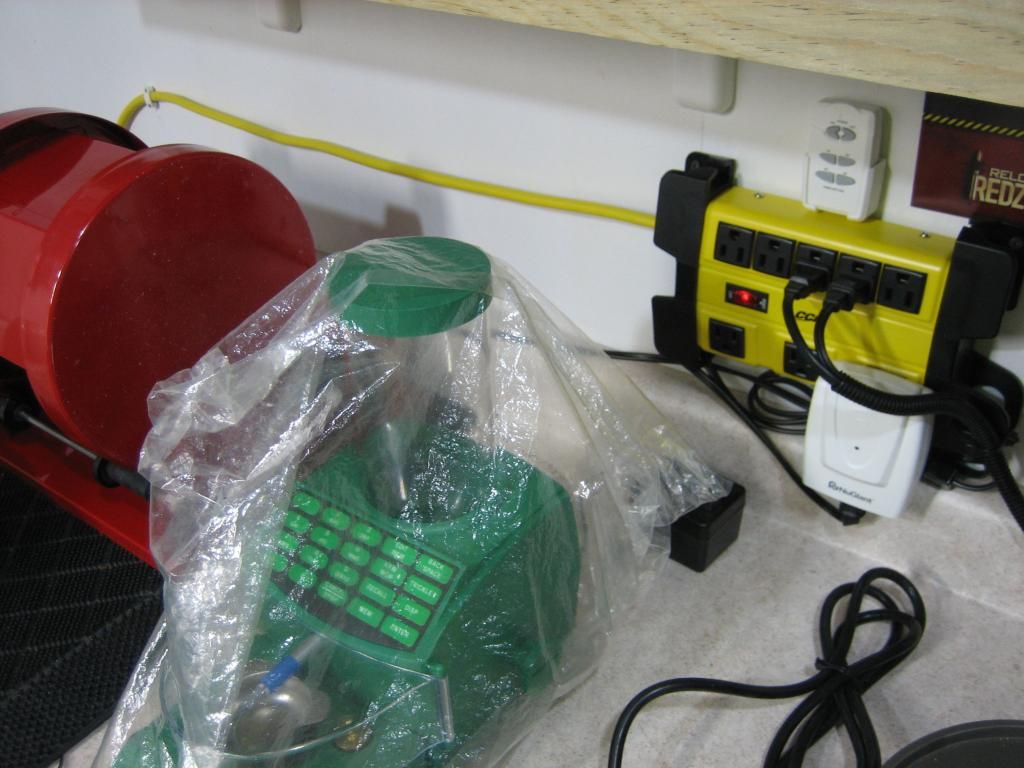
I got the new wireless remote switch for the tumbler... works great! A+ purchase! what I really like about it is I can turn the power off to my whole workstation by hitting the power button on the surge protector turning off all power and the unit keeps the "sync" settings even with the power turned off. timed the first 1hour run with the cell phone and it was right on the nuts turned off. just need to read the directions when you first get the unit as you need to sync the remote to the switch. once it is set up the unit is good to go. the manual on / off button works with a nice "click sound". 1hour for the first cleaning for sizing & 3hour for the 2nd and final cleaning (just long enough to get the primer pockets 100% clean)... It is also hard to plug your chord into the unit but i think they do this on purpose so the plug doesnt pull back out.... so far, so good with the product!

IMG_8131_zps9fd6ab9d.jpg


IMG_8135_zpsbeb75725.jpg


IMG_8142_zps2e460b56.jpg


I just purchased one of these for my stainless steel thumler's thumbler for $15 with free shipping (was actually free once I used my discover card amazon points)... I'll let you all know how it all goes. Is it over the top for my reloading room? HELL YES IT IS :) !!! What I like about the unit is its perfect for 1hour for the first cleaning just enough to clean the brass for sizing, and then 3hours for the second cleaning to get the primer pockets clean. Should be at my house later this week and I'll keep you all updated with how it performs. If everything goes to plan, no more dealing with the crappy power chord switch & can hide under desk, mount the RF remote to the wall with the supplied remote cradle, hit the 1hour for the first cleaning for sizing or 3hour button for the 2nd cleaning for final cleaning / clean primer pockets, and go do some other stuff around the house.

21HfRAytFCL_zps7b7bff0e.jpg


Amazon.com: REMOTE Wireless Remote Control Wall Outlet.100ft Range(open space), Indoor use. Controls 120V/60Hz -: Everything Else

Amazon.com: NuGiant 34000 Wireless Remote Control Wall Outlet: Electronics

Wall Outlet, NuGiant 34000 Wall Outlet | Meritline.com
 
Last edited:
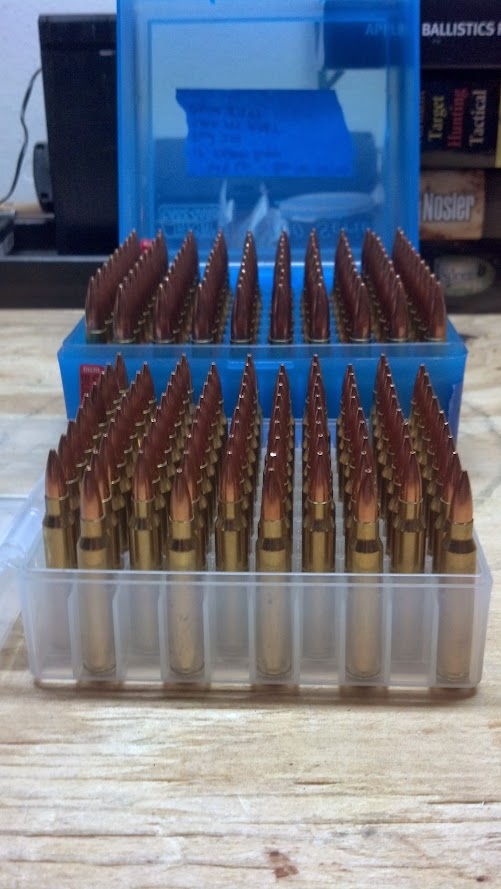
Thank you "Epic Thread" Hopefully I'm able to get to the range tomorrow and have some results to post. .223 in the front, and .308 in back.


IMG_20131006_013451_611.jpg


Edit: So the entire Houston area is about to take a bath......have to see what this afternoon looks like. 200 brand new loaded rounds....the suspense is killing me! Ok, I'll stop hijacking elfster's thread.
 
Last edited:
Post away my friend! No hijacking about it. Its what this thread is all about. Looking good so far!

What bullets are you using on the 308?

Thank you "Epic Thread" Hopefully I'm able to get to the range tomorrow and have some results to post. .223 in the front, and .308 in back.


IMG_20131006_013451_611.jpg


Edit: So the entire Houston area is about to take a bath......have to see what this afternoon looks like. 200 brand new loaded rounds....the suspense is killing me! Ok, I'll stop hijacking elfster's thread.
 
.308 Load
175 SMK
Varget 43.0 - 45.0 in .2 increments with 9 rounds at each
Fed 210 Primers
2.247" Ogive measurement (.020 off the lands)
1 fire FGMM brass for 50 and LC sorted brass for the rest

If the weather will give me a break today, I'm going to take both rifles out and shoot through all the ammo at 100 yards doing 3, 3-shot groups at each to find the charge weight the rifle likes. I've got a thread going on the bolt action board on this too. I guess I'll focus on it there instead of double posting it.
 
I think I just found an area of public land where I can shoot over 1000yards! Going to check it out next weekend or the weekend after, so you might have some kick ass range reports with the LMT MWS 7.62 over 1k incoming. Crossing fingers.
 
pretty good source of where I got this info so i'm think this should be a solid area... from what ive been told it's well over 1k and can drive next to the bullet path if you have a truck or suv. According to my calculations its damn near 4miles long. Looking forward to it!
 
Last edited:
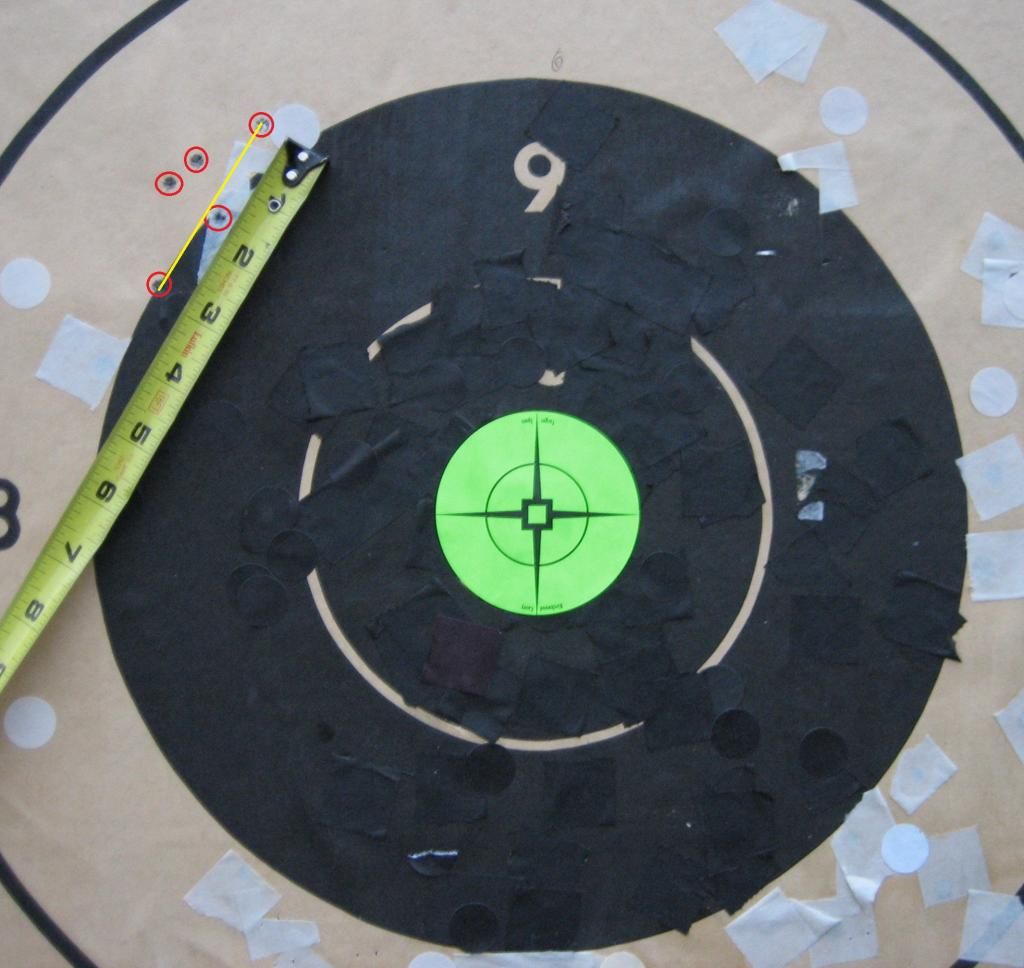
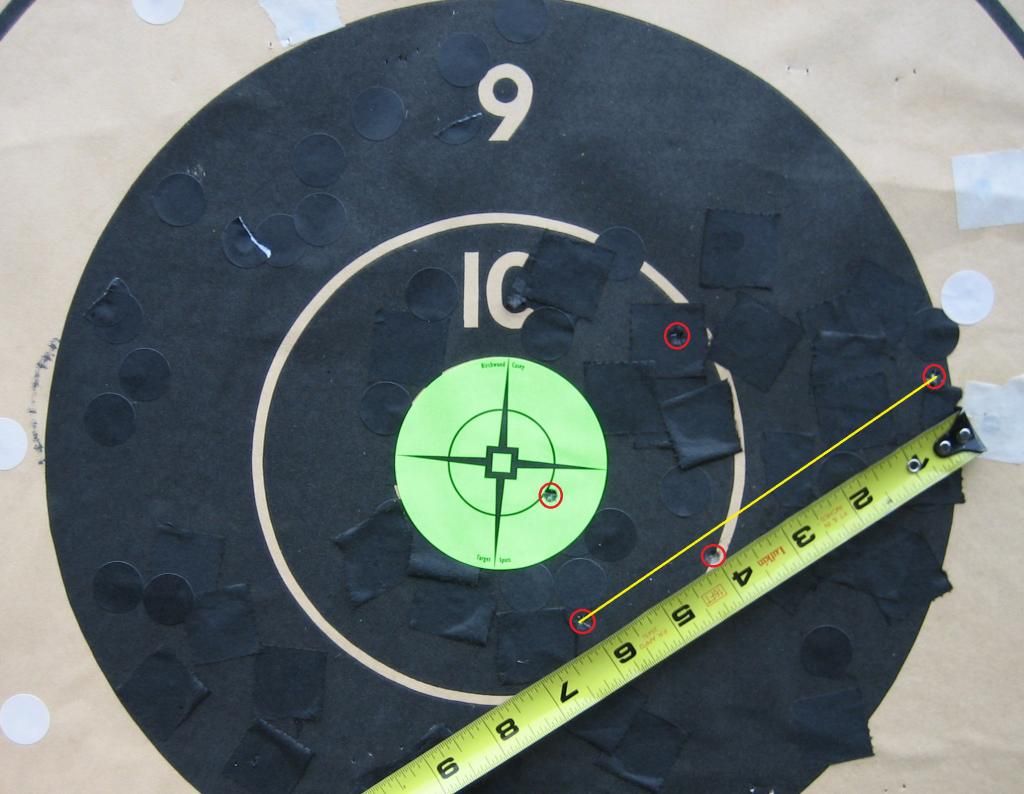
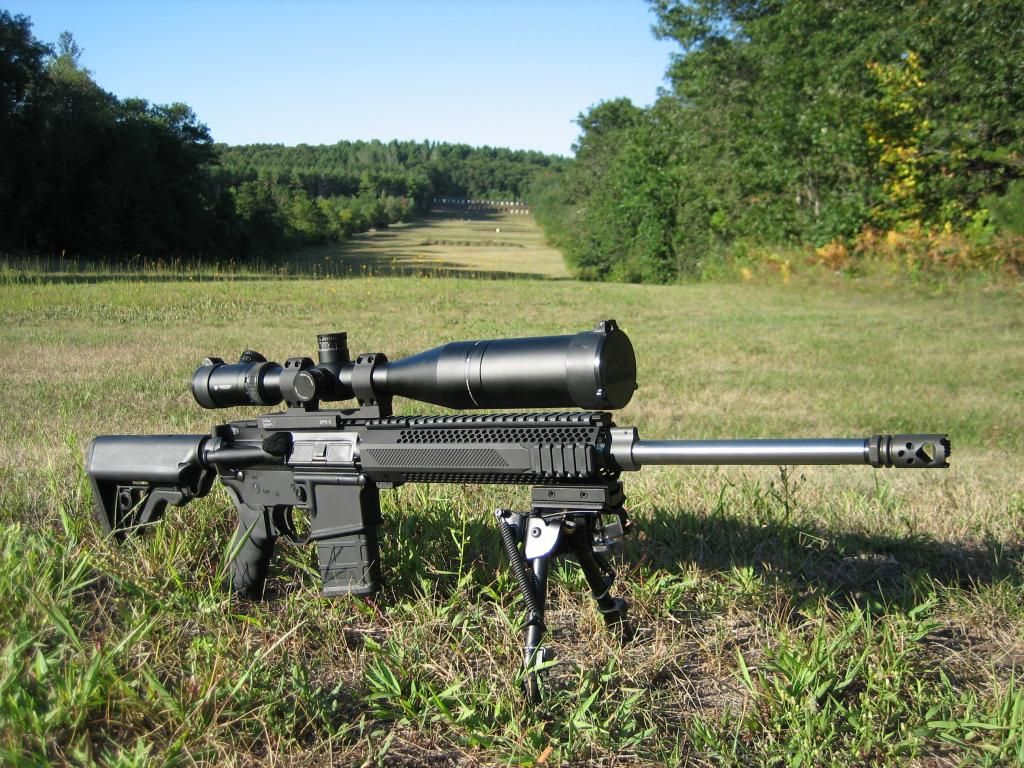
Just got back from shooting the new RRA 20" bull varmint with some rather good results using my go to ammo 60grns vmax with 23.8grns varget. Right out of the gate my sighter 5shot group was absolutely sick at about 2.875" (.4606moa). I would have to check my previous groups but I think this might be my personal best @ 600yards. My 2nd 5shot group wasn't too bad either right on the nuts @ 6" (.9612moa). Believe it or not we actually started to get SNOW (yes, snow) yesterday and today after my 2nd group and the wind really started to pick up. So far, so good.

102413rra20inch556_zpsbe4ad19a.jpg


sightertarget5shots600yards_zpse9c64658.jpg


finaltargetround25shots600yards_zpsc7d86bfc.jpg
 
Well, lets just say I had absolutely no intentions of picking up reloading equipment today... Just some bullets. Anyway, as I'm walking past the shelf guess what I see,,,,, a Dillon super 600 swager for $99 dollars brand spankin new. Someone forced me to buy it and his name was ME... LOL. It should really help for the crimped primers in this lake city brass & my AR ammo load development. Well, at least for speed of reloading that is. Next on my list is the Giraud power trimmer. Will keep you all informed for those looking to reload for their AR's / just starting out reloading for AR's & how well it works for me and crimped primer brass such as lake city brass..... This thing is HUGE! and is one serious PC of metal. Pictures do no justice for the size & weight of this pc of reloading equipment. There is no plastic on this bad boy. It screams = well constructed.

IMG_7648_zps618d090e.jpg


LOL! this is awesome!

Dillon Super Swage 600 AUTO EJECT Mod - YouTube

Automatic Dillon Super Swage 600 Modification - YouTube

Stupid question. Does the swager do 7.62x51 also or come with the parts to interchange? Or is it a separate part you buy.
 
bro!!! how is the reloading and shooting going!?!?

.308 Load
175 SMK
Varget 43.0 - 45.0 in .2 increments with 9 rounds at each
Fed 210 Primers
2.247" Ogive measurement (.020 off the lands)
1 fire FGMM brass for 50 and LC sorted brass for the rest

If the weather will give me a break today, I'm going to take both rifles out and shoot through all the ammo at 100 yards doing 3, 3-shot groups at each to find the charge weight the rifle likes. I've got a thread going on the bolt action board on this too. I guess I'll focus on it there instead of double posting it.
 
Simply AWESOME thread eflster!!

I can't thank you enough for posting this. Took me several hours to go through the entire thing, but WELL worth it! Bookmarking this for future reference!

One Q for you though. I see you like the 60 gr Vmax. Ever tried the 69gr Sierras, 77 gr Sierras, or Nosler custom competition in these same bullet weights? Might have better luck with the wind on the heavier 77s. Just a thought.
 
yes I have, and I've always had really good luck with 60grn vmax for some darn reason... ive had good luck with 69 and 75grn hornady bthp's also, but I'm able to get 60vmax soooo darn cheap.... using 60grn vmax @ 600yard is right at the maximum, but some of my best groups at 600yards have been with this flat based bullet... I know, it's crazy, but it performs really well with my 1:8 twist AR's.


Simply AWESOME thread eflster!!

I can't thank you enough for posting this. Took me several hours to go through the entire thing, but WELL worth it! Bookmarking this for future reference!

One Q for you though. I see you like the 60 gr Vmax. Ever tried the 69gr Sierras, 77 gr Sierras, or Nosler custom competition in these same bullet weights? Might have better luck with the wind on the heavier 77s. Just a thought.
 
I usually only use this tip for cleaning pistol ammo before storage, but if you had to crank out some AR rifle spray and pray ammo in bulk quantities & need to get the lube off the finished product OR just want your ammo looking ultra clean & purty...

you can purchase this non-chlorinated break cleaner for under $2 at menards! & will last a LONG time!! key word is NON-CLORINATED!!: http://www.menards.com/main/tools-h...ted-brake-parts-cleaner/p-1679707-c-10098.htm

you can purchase bulk / cheap white 100% cotton towels from walmart... spread the finished ammo out on the towel and spray down with non-chlorinated break cleaner and move the finished ammo around with the palm of your hand & then re-spray ammo again with the non-chlorinated break cleaner & fold over towel & pick up each end of the towel with each hand like a hammock (as in the video below)... re-spray and work ammo if needed... works wonders with pistol ammo also to make it look nice & new. The break cleaner will dry in an instant. I would only do this with bulk spray and pray ammo.. I would never do this with precision rifle ammo. Precision ammo should never have lube on the brass when seating the bullet.

go to 1:10 in this video for an example:
RELOADING TIPS.. Case failures what to look for when reloading pistol amunition. - YouTube
 
Last edited:
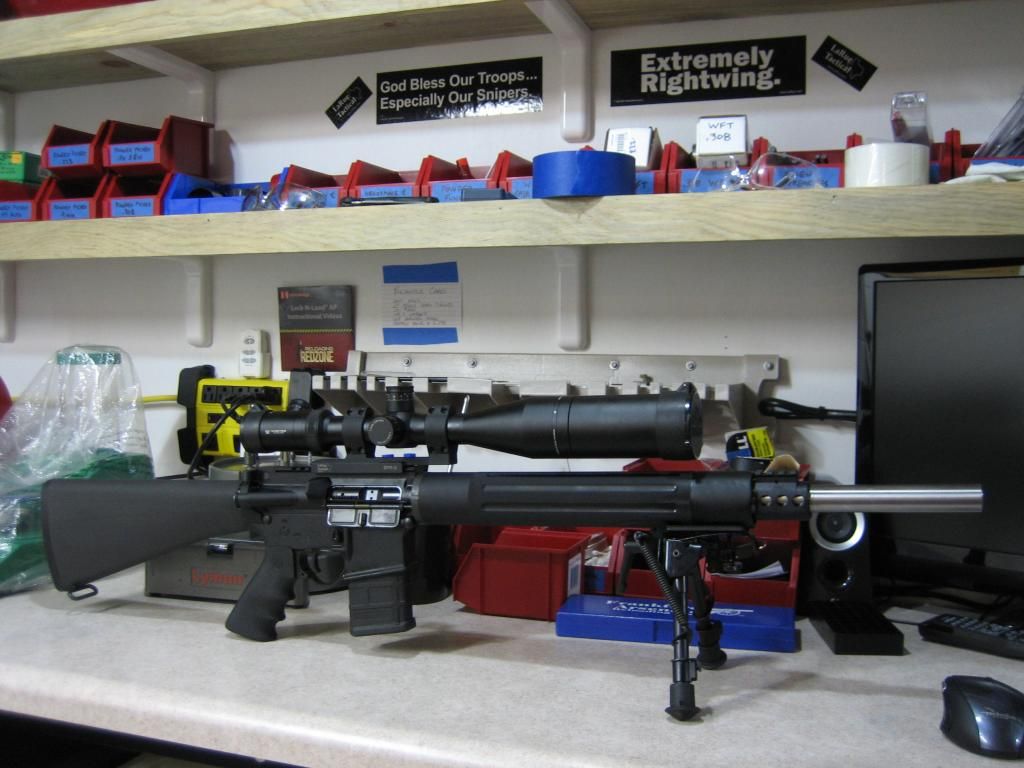
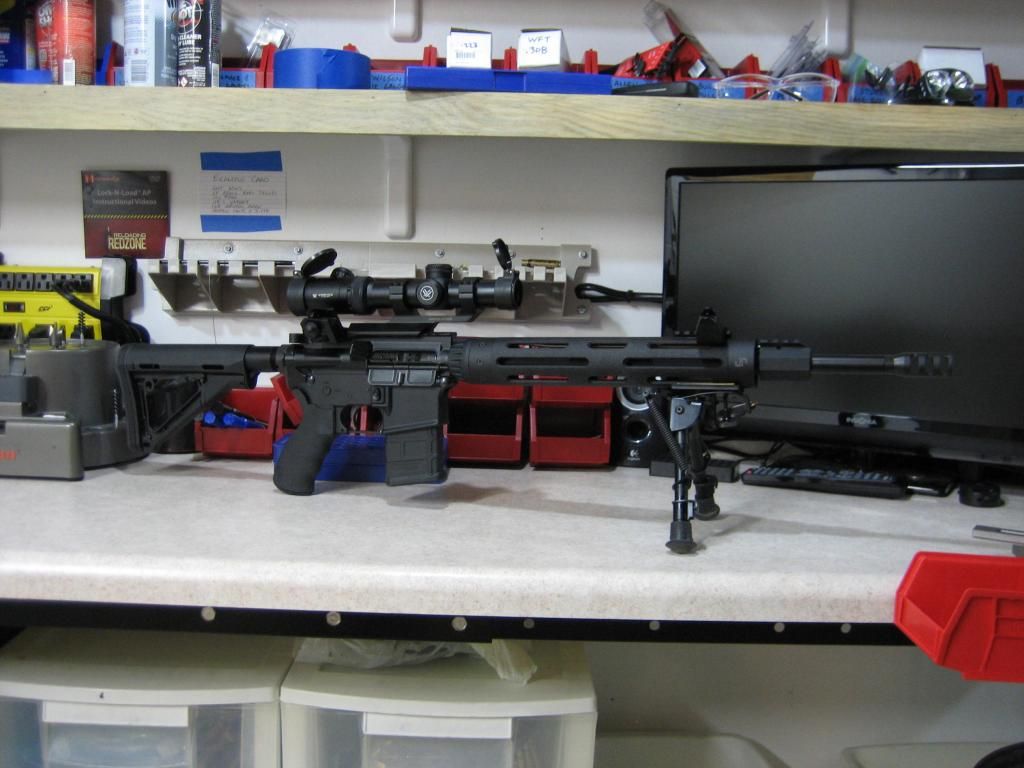
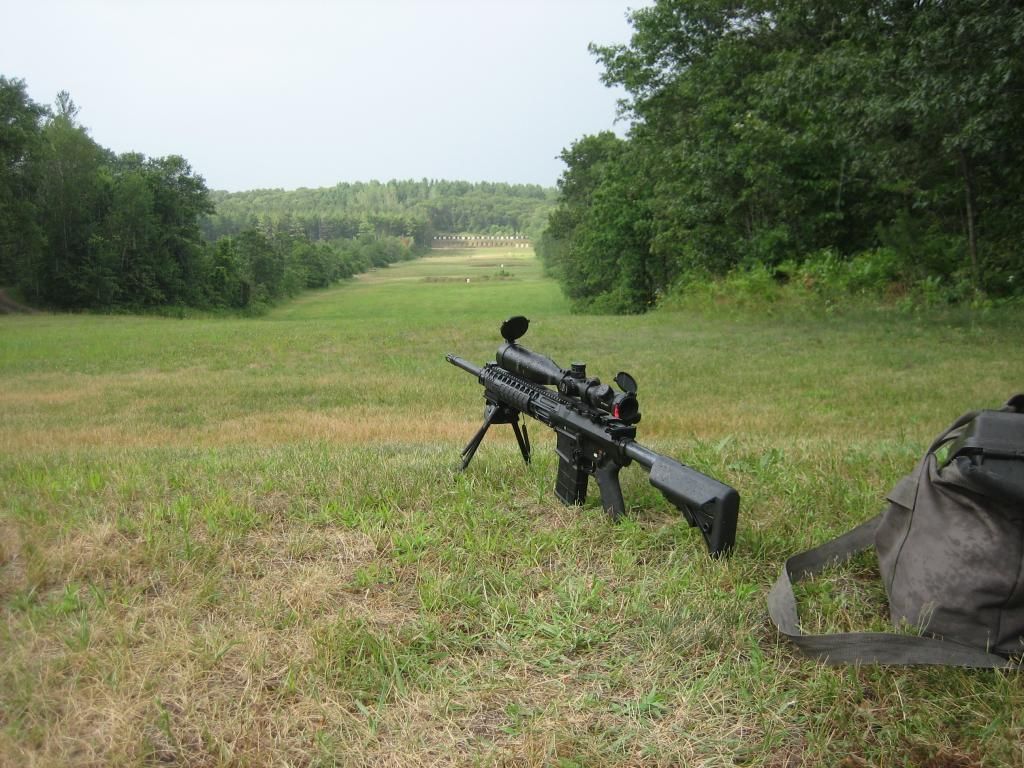
Figured I would post pics of my AR's. Each one was picked because of their specs... Not the way they look.... Looks don't produce small ass groups. I'm a big fan of rock river arm rifles as they are amazing rifles for the money. I'm a HUGE fan of 5.56 AR's with either 18" to 20" barrels & 1:8twist. IMO, anything over 20" is a waste for an AR rifle. The 4-16 vortex FFP scope is the same on each one... I just pop it off and transfer it to the rifle I'm shooting and is usually a click or two from zero with each rifle which is really nice... That goes for both my 7.62 & 5.56 rifles as the zero is damn near the same up to about 300yards, then the 5.56 starts to drop much faster in comparison to the 7.62.... It is a larue LT158 QD mount, but I think I'm going to get a bobro mount next.

Every single one of these rifles has shot sub-moa all day long on the shootout threads (6 total 5shot groups shot in a row under 1" @ 100yards):

5.56 ROCK RIVER ARMS ATH 18" STAINLESS STEEL HEAVY BARREL:
IMG_7280_zpsa128bd15.jpg


5.56 ROCK RIVER ARMS VARMINT 20" STAINLESS STEEL BULL BARREL:
IMG_8221_zpse578e531.jpg


5.56 DPMS 3G1 18" STAINLESS STEEL HEAVY BARREL:
IMG_7152_zps38ef80d6.jpg


7.62 LMT MWS 20" CHROME LINED HEAVY BARREL:
IMG_7101_zpsd3156083.jpg
 
Last edited:
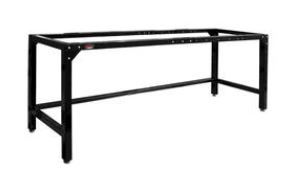
For those looking a reloading bench that is cheap, classy, and ultra durable finished top that can hold up to break cleaner for a little over $100 dollars which includes the metal bench frame (that also has adjustable feet for a level bench surface for an un-level floor)

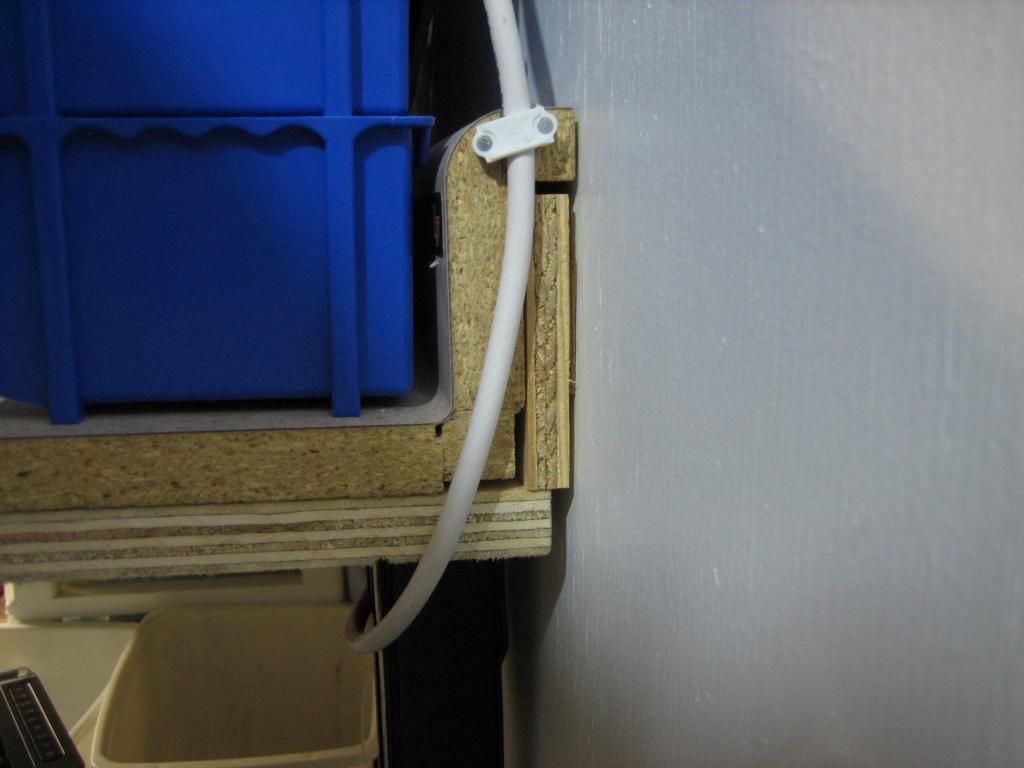
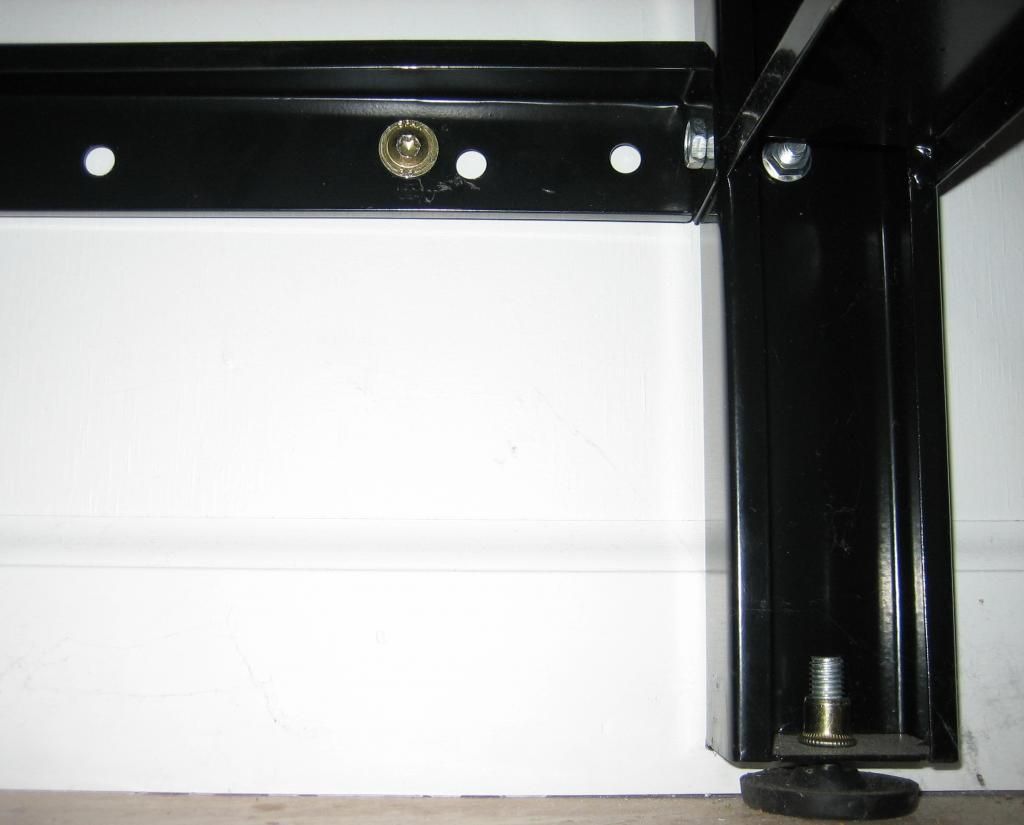
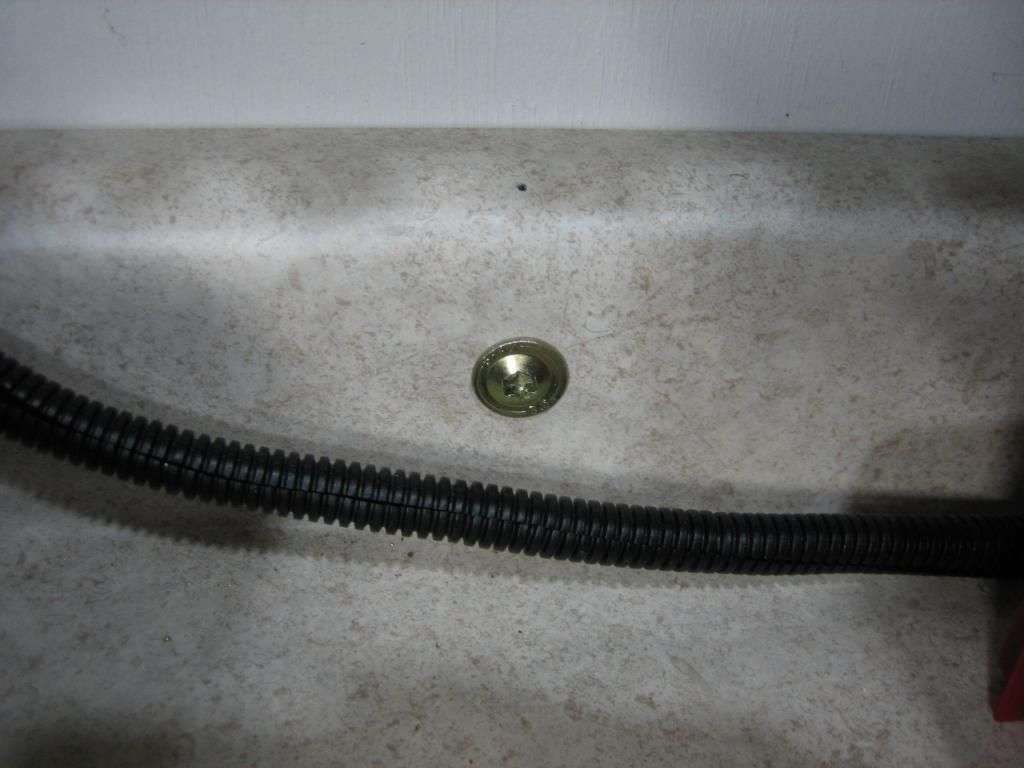
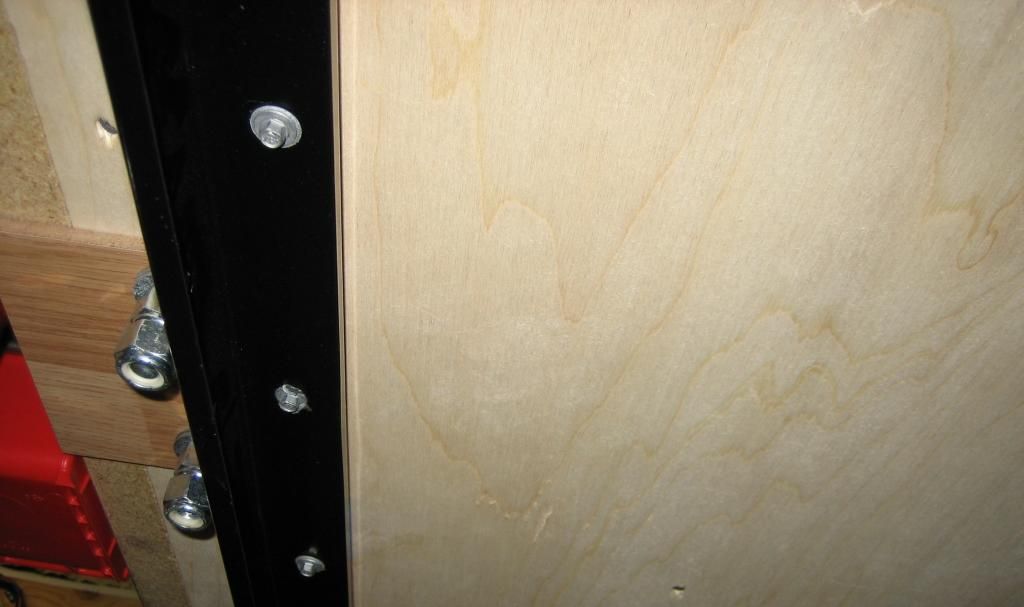
here you go! I can't make it any easier than this... I want to say my bench top cost me $35 dollars total with the 8' countertop on sale for $29bucks, and the 3/4"x2'x8' plywood for $6bucks... I already had the PL400 subfloor adhesive & 1-1/4" drywall screws to glue & screw the two together. I also had some 1/2" plywood that I ripped up for the backsplash filler as shown in the pics below and PL400 glued & screwed on from the back side with 3/4" screws (just need to obviously make sure the screw isn't too long to go thru the laminate surface).... This is also the metal bench frame that I purchased from menards that I screwed thru the metal frame & into the bottom side of the 1-1/2" thick finished bench top with some self tap 1" polebarn screws (polebarn screws will go right thru the metal frame & into the bench top from the bottom side & also got from menards). The entire bench was power lagged into the wall studs through the backsplash & also through the metal bench bottom / rear cross bar into the wall studs once the bench was level (using the adjustable bench feet).. Once you get the bench top screwed to the metal bench frame (push against the wall first before you do this), then obviously put a level on your new bench top left / right & front / back for a level bench surface (using the bench adjustable feet) before you power lag the entire bench into the wall studs!!

here is a link to the countertop that I got on sale for $29 at menards: http://www.menards.com/main/housewa...ral-limestone-countertop/p-1318715-c-3629.htm

link to metal bench frame (got on sale for $59 dollars): Adjustable Metal Workbench Frame at Menards
Capture_zpsa1a2519a.jpg


IMG_8359_zps47ef5075.jpg


pre-drill through the backsplash & into the studs (make sure they go into the studs!).. don't forget the bit for these power lag screws. I want to say I used 3/8"x5" for the backsplash & 3/8"x3" for the metal bench frame bottom / rear cross bar INTO the studs!!
1_zps9ab6a0ff.jpg


IMG_8368_zpsd9308487.jpg


IMG_8365_zps26d7a110.jpg


IMG_8355_zpsc0976441.jpg


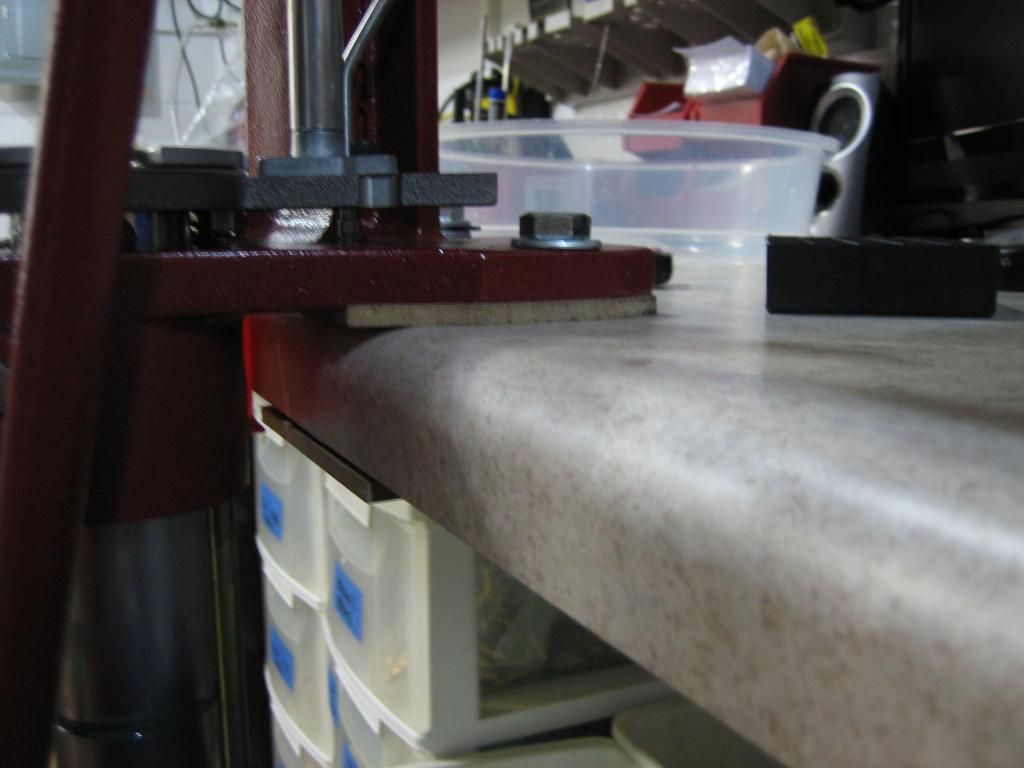
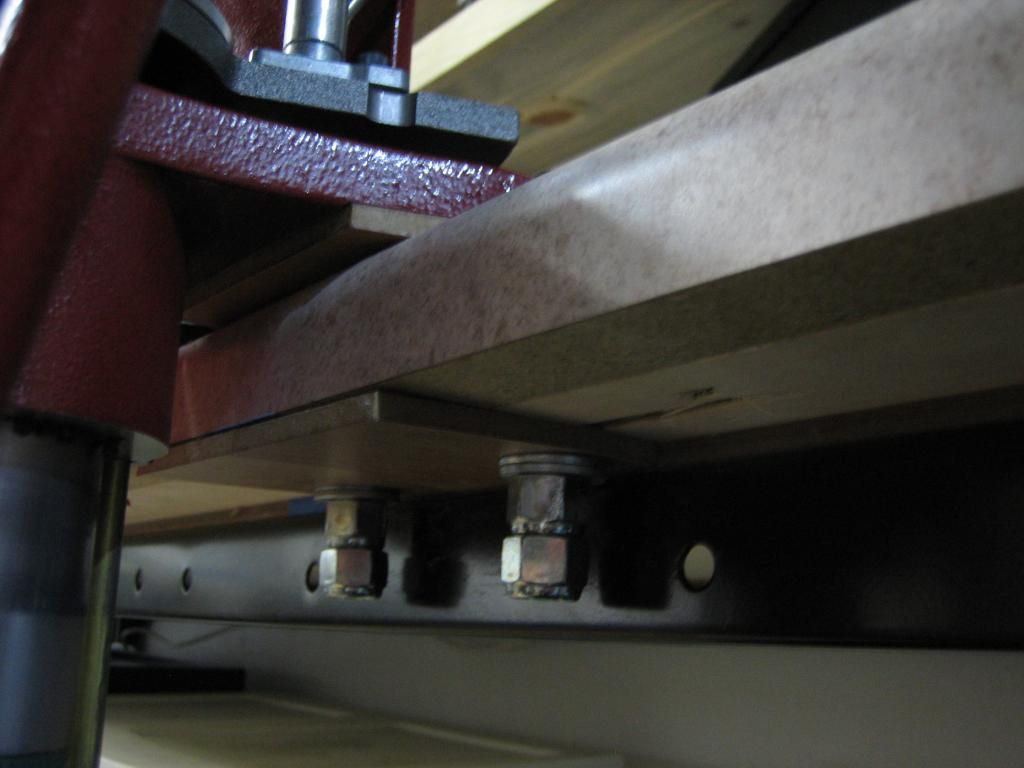
cut up some 1/4" laminate flooring for my press spacers & used 1/2" carriage bolts for the press with a double nut:
IMG_8356_zps61879656.jpg


IMG_8357_zps7ea1f990.jpg


screwed the metal bench frame to the bench top with self tap 1" polebarn screws:
IMG_8370_zpsd48c567f.jpg


if your bench top can hold up to break cleaner without destroying the surface, then you're GTG in my book
IMG_8221_zpse578e531.jpg
 
Last edited:
For those looking a reloading bench that is cheap, classy, and ultra durable finished top that can hold up to break cleaner for a little over $100 dollars which includes the metal bench frame (that also has adjustable feet for a level bench surface for an un-level floor)
Hey, elfster...

I don't know if you've covered this, but what is the safety protocol for reloading locations for those of us that haven't done it? Can it be done in the basement with the natural gas or propane water heater and/or furnace down there too?
 
Thats actually a good question and im not sure... I have an electric water heater but a natural gas furnace all of about 12feet away from my reloading area in the basement... I guess i never put much thought into it... Maybe one of the many firemen on sh can chime in on this subject.

I think the key point is making sure your powder and primers is in a non sealed metal or wood cabinet...... Yes, sami actually recommends a wood cabinet believe it or not...

Hey, elfster...

I don't know if you've covered this, but what is the safety protocol for reloading locations for those of us that haven't done it? Can it be done in the basement with the natural gas or propane water heater and/or furnace down there too?
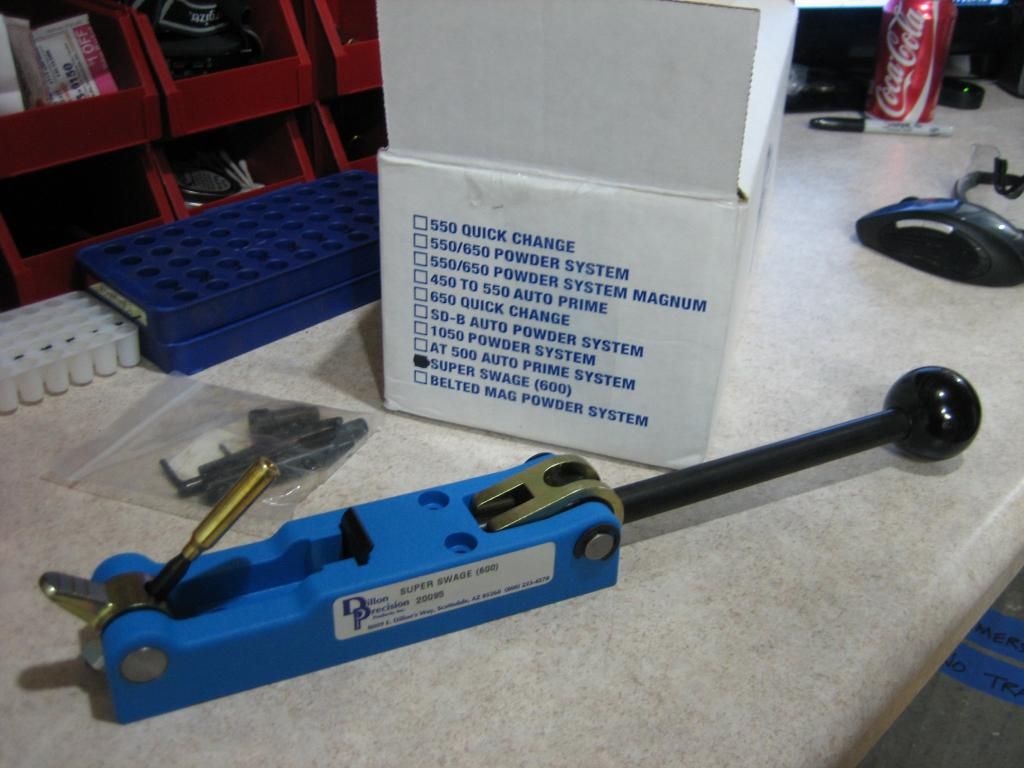
 
best I could find my friend:

***************************************************************************************
this is right from saami.org which kinda goes against all logic in my head, but whatever: 11-3.7 Smokeless propellants intended for personal use in quantities
not exceeding 20 lb. (9.1 kg) shall be permitted to be stored in original
containers in residences. Quantities exceeding 20 lb. (9.1 kg), but not
exceeding 50 lb. (22.7 kg), shall be permitted to be stored in residences
where kept in a wooden box or cabinet having walls of at least
1 in. (25.4 mm) nominal thickness.

http://www.saami.org/specifications.../download/SAAMI_ITEM_200-Smokeless_Powder.pdf

***************************************************************************************

Storage & Handling

Ammunition handloading has become increasingly popular in recent years. This page discusses properties of smokeless powder and offers recommendations for its storage. This information is intended to increase the knowledge of all concerned individuals and groups regarding smokeless powder.

The statements and recommendations made are not intended to supersede local, state, or Federal regulations. Proper authorities should be consulted on regulations for storage and use of smokeless powder in each specific community.

A leaflet entitled "SPORTING AMMUNITION PRIMERS: PROPERTIES, HANDLING, & STORAGE FOR HAND LOADING" supplements this page on smokeless powder.

•Properties of Smokeless Powder from S A A M I
•How to Check Smokeless Powder For Deterioration
•Considerations for Storage of Smokeless Powder
•Recommendations for Storage of Smokeless Powder


Properties of Smokeless Powders

Smokeless powders, or propellants, are essentially mixtures of chemicals designed to burn under controlled conditions at the proper rate to propel a projectile from a gun.

Smokeless powders are made in three forms:
1.Thin, circular flakes or wafers
2.Small cylinders
3.Small spheres
4. Single-base smokeless powders derive their main source of energy from nitrocellulose.

The energy released from double-base smokeless powders is derived from both nitrocellulose and nitroglycerin.

All smokeless powders are extremely flammable; by design, they are intended to burn rapidly and vigorously when ignited.

Oxygen from the air is not necessary for the combustion of smokeless powders since they contain sufficient built-in oxygen to burn completely, even in an enclosed space such as the chamber of a firearm.

In effect, ignition occurs when the powder granules are heated above their ignition temperature. This can occur by exposing powder to:
1. A flame such as a match or primer flash.
2.An electrical spark or the sparks from welding, grinding, etc.
3.Heat from an electric hot plate or a fire directed against or near a closed container even if the powder itself is not exposed to the flame.

Informaiton Provided by S A A M I
Sporting Arms and Ammunitaions Manufacturers' Institute, Inc.
FLINTLOCK RIDGE OFFICE CENTER, 11 MILE HILL ROAD
NEWTOWN, CT 06470-2359

When smokeless powder burns, a great deal of gas at high temperature is formed. If the powder is confined, this gas will create pressure in the surrounding structure. The rate of gas generation is such, however, that the pressure can be kept at a low level if sufficient space is available or if the gas can escape.

In this respect smokeless powder differs from blasting agents or high explosives such as dynamite or blasting gelatin, although smokeless powder may contain chemical ingredients common to some of these products.

High explosives such as dynamite are made to detonate, that is, to change from solid state to gaseous state with evolution of intense heat at such a rapid rate that shock waves are propagated through any medium in contact with them. Such shock waves exert pressure on anything they contact, and, as a matter of practical consideration, it is almost impossible to satisfactorily vent away the effects of a detonation involving any appreciable quantity of dynamite.

Smokeless powder differs considerably in its burning characteristics from common "black powder."

Black powder burns essentially at the same rate out in the open (unconfined) as when in a gun.

When ignited in an unconfined state, smokeless powder burns inefficiently with an orange-colored flame. It produces a considerable amount of light brown noxious smelling smoke. It leaves a residue of ash and partially burned powder. The flame is hot enough to cause severe burns.

The opposite is true when it burns under pressure as in a cartridge fired in a gun. Then it produces very little smoke, a small glow, and leaves very little or no residue. The burning rate of smokeless powder increases with increased pressure.

If burning smokeless powder is confined, gas pressure will rise and eventually can cause the container to burst. Under such circumstances, the bursting of a strong container creates effects similar to an explosion.

For this reason, the Department of Transportation (formerly Interstate Commerce Commission) sets specifications for shipping containers for propellants and requires tests of loaded containers - under actual fire conditions - before approving them for use.

When smokeless powder in D.O.T. approved containers is ignited during such tests, container seams split open or lids pop off - to release gases and powder from confinement at low pressure.

How to Check Smokeless Powder for Deterioration

Although modern smokeless powders are basically free from deterioration under proper storage conditions, safe practices require a recognition of the signs of deterioration and its possible effects.

Powder deterioration can be checked by opening the cap on the container and smelling the contents. Powder undergoing deterioration has an irritating acidic odor. (Don't confuse this with common solvent odors such as alcohol, ether and acetone.)

Check to make certain that powder is not exposed to extreme heat as this may cause deterioration. Such exposure produces an acidity which accelerates further reaction and has been known, because of the heat generated by the reaction, to cause spontaneous combustion.

Never salvage powder from old cartridges and do not attempt to blend salvaged powder with new powder. Don't accumulate old powder stocks.

The best way to dispose of deteriorated smokeless powder is to burn it out in the open at an isolated location in small shallow piles (not over 1" deep). The quantity burned in any one pile should never exceed one pound. Use an ignition train of slow burning combustible material so that the person may retreat to a safe distance before powder is ignited.


Considerations for Storage of Smokeless Powder

Smokeless powder is intended to function by burning, so it must be protected against accidental exposure to flame, sparks or high temperatures.

For these reasons, it is desirable that storage enclosures be made of insulating materials to protect the powder from external heat sources.

Once smokeless powder begins to burn, it will normally continue to burn (and generate gas pressure) until it is consumed.

D.O.T. approved containers are constructed to open up at low internal pressures to avoid the effects normally produced by the rupture or bursting of a strong container.

Storage enclosures for smokeless powder should be constructed in a similar manner: 1. Of fire-resistant and heat-insulating materials to protect contents from external heat. 2. Sufficiently large to satisfactorily vent the gaseous products of combustion which would result if the quantity of smokeless powder within the enclosure accidentally ignited.

If a small, tightly enclosed storage enclosure is loaded to capacity with containers of smokeless powder, the enclosure will expand or move outwards to release the gas pressure - if the powder in storage is accidentally ignited.

Under such conditions, the effects of the release of gas pressure are similar or identical to the effects produced by an explosion.

Hence only the smallest practical quantities of smokeless powder should be kept in storage, and then in strict compliance with all applicable regulations and recommendations of the National Fire Protection Association (scroll down to read).

Recommendations for Storage of Smokeless Powder


STORE IN A COOL, DRY PLACE. Be sure the storage area selected is free from any possible sources of excess heat and is isolated from open flame, furnaces, hot water heaters, etc. Do not store smokeless powder where it will be exposed to the sun's rays. Avoid storage in areas where mechanical or electrical equipment is in operation. Restrict from the storage areas heat or sparks which may result from improper, defective or overloaded electrical circuits.

DO NOT STORE SMOKELESS POWDER IN THE SAME AREA WITH SOLVENTS, FLAMMABLE GASES OR HIGHLY COMBUSTIBLE MATERIALS.


STORE ONLY IN DEPARTMENT OF TRANSPORTATION APPROVED CONTAINERS.


Do not transfer the powder from an approved container into one which is not approved.


DO NOT SMOKE IN AREAS WHERE POWDER IS STORED OR USED. Place appropriate "No Smoking" signs in these areas.


DO NOT SUBJECT THE STORAGE CABINETS TO CLOSE CONFINEMENT. STORAGE CABINETS SHOULD BE CONSTRUCTED OF INSULATING MATERIALS AND WITH A WEAK WALL SEAMS OR JOINTS TO PROVIDE AN EASY MEANS OF SELF-VENTING.


DO NOT KEEP OLD OR SALVAGED POWDERS. Check old powders for deterioration regularly. Destroy deteriorated powders immediately.


OBEY ALL REGULATIONS REGARDING QUANTITY AND METHODS OF STORING. Do not store all your powders in one place. If you can, maintain separate storage locations. Many small containers are safer than one or more large containers.


KEEP YOUR STORAGE AND USE AREA CLEAN. Clean up spilled powder promptly. Make sure the surrounding area is free of trash or other readily combustible materials
------------------------------------------------------------------------


10-3 SMOKELESS PROPELLANTS. 10-3.1 Quantities of smokeless propellants not exceeding 25 LB (11.3kg), in shipping containers approved by the U.S. Department of Transportation, may be transported in a private vehicle.

10-3.2 Quantities of smokeless propellants exceeding 25 lb (11.3kg) but not exceeding 50 lb (22.7 kg), transported in a private vehicle, shall be transported in a portable magazine having wood walls of at least 1-inc. (25.4-mm) nominal thickness.

10-3.3 Transportation of more than 50 lb (22.7 kg) of smokeless propellants in a private vehicle is prohibited.

10-3.4 Commercial shipments of smokeless propellants in quantities not exceeding 100 lb. (45.4kg) are classified for transportation purposes as flammable solids when packaged according to U.S. Department of Transportation Hazardous Materials Regulations. (Title 49, Code of Federal Regulations, Park 173.197a), and shall be transported accordingly.

10-3.5 Commercial shipments of smokeless propellants exceeding 100 lb (45.4 kg) or not packaged in accordance with the regulations cited in 10-3.4 shall be transported according to the U. S. Department of Transportation regulations for Class B propellant explosives.

10-3.6 Smokeless propellants shall be stored in shipping containers specified by U. S. Department of Transportation Hazardous Materials Regulations.

10-3.7 Smokeless propellants intended for personal use in quantities not exceeding 20 lb (9.1 kg) may be stored in original containers in residences. Quantities exceeding 20 lb (9.1 kg), but not exceeding 50 lb (22.7 kg), may be stored in residences if kept in a wooden box or cabinet having walls or at least 1-inc. (25.4-mm) nominal thickness.

10-3.8 Not more than 20 lb (9.1 kg) of smokeless propellants, in containers of 1-lb (0.45-kg) maximum capacity, shall be displayed in commercial establishments.

10-3.9 Commercial stocks of smokeless propellants should be stored as follows:
(a) Quantities exceeding 20 lb (9.1 kg), but not exceeding 100 lb (45.4 kg), shall be stored in portable wooden boxes having walls of at least 1-in (25.4-mm) thickness.
(b) Quantities exceeding 100 lb (45.4 kg), but not exceeding 800 lb (363 kg), shall be stored in non portable storage cabinets having walls of at least 1-in (25.4-mm) thickness. Not more than 400 lb (181 kg) may be stored in any one cabinet and cabinets shall be separated by a distance of at least 25 ft (7.63 m) or by a fire partition having a fire resistance of at least 1 hour.
(c) Quantities exceeding 800 lb (363 kg), but not exceeding 5,000 lb (2268 kg), may be stored in a building if the following requirements are met:
1. The warehouse or storage room shall not be accessible to unauthorized personnel.
2. Smokeless propellant shall be stored in nonportable storage cabinets having wood walls at least 1 inc. (25.4 mm) thick and having shelves with no more than 3 ft (0.92 m) separation between shelves.
3. No more than 400 lb (181 kg) shall be stored in any one cabinet.
4. Cabinets shall be located against walls of the storage room or warehouse with at least 40 ft (12.2 m) between cabinets.
5. Separation between cabinets may be reduced to 250 ft (6.1m) if barricades twice the height of the cabinets are attached to the wall, midway between each cabinet. The barricades shall extend at least 10 ft (3m) outward, shall be firmly attached to the wall, and shall be constructed of 1/4-inc. (6.4-mm) boiler plate, 2-in. (51-mm) thick wood, brick, or concrete block.
6. Smokeless propellant shall be separated from materials classified by the U.S. Department of Transportation as flammable liquids, flammable solids, and oxidizing materials by a distance of 25 ft (7.63mm) or by a fire partition having a fire resistance of at least 1 hour.
7. The building shall be protected by an automatic sprinkler system installed accordingly to NFPA 13, Standard for the Installation of Sprinkler Systems.

(d) Smokeless propellants not stored according to (a), (b) and (c) above shall be stored in a Type 4 magazine constructed and located according to Chapter 6.

Reprinted with permission from NFPA495-85, Standard for the Manufacture, Transportation, Storage and Use of Explosive Materials, (c) 1985, National Fire Protection Association, Quincy, MA 02269. This reprinted material is not the complete and official position of the NFPA on the referenced subject, which is represented by the Standard in its entirety.


Hey, elfster...

I don't know if you've covered this, but what is the safety protocol for reloading locations for those of us that haven't done it? Can it be done in the basement with the natural gas or propane water heater and/or furnace down there too?