OK old timers time to step up & help out !
AZYoungGun brought up a good point on a post in the bear pit:
I'd like to call to light the fact that some of us younger guys actually take this type of stuff seriously. I mean, hey, I just got done dropping $1600 on a nice rig and 500 rounds of ammo. I don't think that's funny at all. I'd personally like to continue to learn everything there is to know about this sport/hobby. Let's not close off us younger guys unless there's a good reason
So with that in mind I want to post some of the info I can think of to help out the new shooter.
I want them not to make bad buying decisions on gear, training and other stuff. So here goes my try at it.
Please add to it.
BUT DO NOT POST ANYTHING UNLESS YOU KNOW IT IS TRUE, HAVE USED IT OR KNOW IT WORKS !!!
Training:
Any local match is the best place to start. F-Class, Tactical rifle, High Power or a “Sniper Match”
Schools:
<span style="font-weight: bold">Rifles Only</span>
<span style="font-weight: bold">BlackWater Level 1</span>
<span style="font-weight: bold">Black Water Level 2</span>
<span style="font-weight: bold">Black Water Level 3</span>
<span style="font-weight: bold">McMillan Sniper School</span>
<span style="font-weight: bold">Shooter Ready</span>
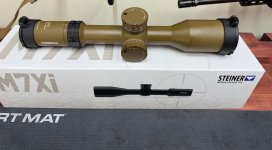
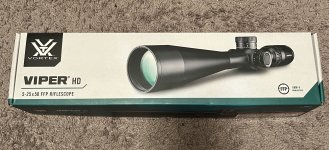
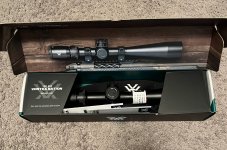
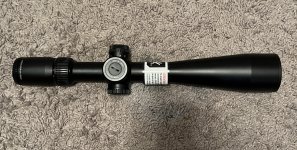
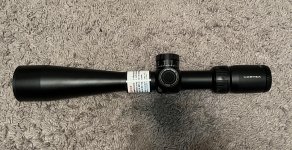
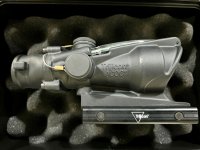
Optics
I feel the best way to get started is to buy a used or last years modal Scope. Look at the for sale section here at SH or some of the links I list below to find good prices.
Leupold will do reticule installs for under $215 if you find a duplex scope or any other reticule you want changed out.
I did just that. I Called Leupold at 1.503.526.1400 and found out that the install price for the new TMR is $199.95 in my Leupold Tactical VARI-XIII 3.5-10x40mm 45266 Duplex scope. So I shipped off a check with the scope for $215 for the install and shipping to them. After my scope arrived I was sent an e-mail from a costumer service rep. It only took 12 days from my house and back to have the scope done.
This is not a do all list but it’s a start
Quality Brands
<span style="font-weight: bold"> Schmidt and Bender </span>
<span style="font-weight: bold">Carl Zeiss</span>
<span style="font-weight: bold"> USO</span>
<span style="font-weight: bold"> Nightforce Optics </span>
<span style="font-weight: bold"> NEW Leupold Tactical Scopes</span>
<span style="font-weight: bold"> Premier Reticles </span>
<span style="font-weight: bold">Sightron</span>
Places to Buy optics
<span style="font-weight: bold">SWFA</span>
<span style="font-weight: bold">SWFA Sample List</span>
<span style="font-weight: bold"> Bear Basin </span>
Stocks
<span style="font-weight: bold">McMillan</span>
<span style="font-weight: bold"> Robertson Composites </span>
<span style="font-weight: bold">Choate</span>
<span style="font-weight: bold">SSS for Savage Arms Stocks ONLY</span>
Parts
<span style="font-weight: bold">Badger Ordance</span>
<span style="font-weight: bold">Tactical Precision Systems</span>
<span style="font-weight: bold"> Ken Farrell </span>
<span style="font-weight: bold">SSS for Savage Arms Parts</span>
Tactical Gear Suppliers
<span style="font-weight: bold"> Triad Tactical </span>
<span style="font-weight: bold"> Tactical Tailor </span>
<span style="font-weight: bold"> High Speed Gear inc. </span>
Out of towners

Canadians
http://oneshottactical.com/
Man that Sucked, Your turn
<span style="font-weight: bold">Basic rifle Marksmanship</span>
CBS Definition: CBS (Cold Bore Shot) is the first shot fired for the day from your rifle through a dirty bore, or from a barrel that has been fired and allowed to cool for at least 20 minutes.
CCBS Definition: CCBS (Clean Cold Bore Shot) is the first shot fired for the day from your rifle through a CLEAN bore.
Learning how your rifle will fire its first shot from a cold and "dirty or clean" bore is especially useful to hunters and tactical shooters, who by nature will experience long time intervals between shots. To become a better marksman The CBS CCBS shot is VERY IMPORTANT to your rifle data.
basic principles of marksmanship
The purpose of any good shooting position is to support the two basic principles of marksmanship
 Sight Alignment
Sight Alignment with iron sights is centering the tip of the front sight post in the center of the rear sight aperture both vertically and horizontally, and aligning this relationship with the shooter’s dominant eye.
FM23-10 Chapter 3
Sight Alignment With telescopic sights, sight alignment is the relationship between the cross hairs (reticle) and a full field of view as seen by the sniper.
The sniper must place his head so that a full field of view fills the tube, with no dark shadows or crescents to cause inaccurate shots. He centers the reticle in a full field of view, ensuring the vertical cross hair is straight up and down so the rifle is not canted. Again, the center is easiest for the sniper to locate and allows for consistent reticle placement.
Once this alignment has taken place the shooter should maintain the same head position and head pressure. This will help build consistency from shot to shot.
SIGHT PICTURE
Sight Picture for iron sights is the placement of the tip of the front sight post in relation to the target while maintaining sight alignment.
FM23-10 Chapter 3
Sight Picture. With telescopic sights, the sight picture is the relationship between the reticle and full field of view and the target as seen by the sniper. The sniper centers the reticle in a full field of view. He then places the reticle center of the largest visible mass of the target. The center of mass of the target is easiest for the sniper to locate, and it surrounds the intended point of impact with a maximum amount of target area.
There are many different ways to introduce a target. These different views are called holds. The different holds are not incorrect; they are just an individual’s way of viewing the target/sight relationship. The shooter should experiment and use what is most comfortable to them.
Correct sight alignment and correct sight picture will result in an impact on the target as desired.
 Trigger Control is the skillful manipulation of the trigger that causes the rifle to fire without disturbing sight alignment and sight picture.
Controlling the trigger is a mental process while pulling the trigger is a mechanical process.
Three elements of a Steady position:
 Support (Artificial & Bone)
 Muscular Relaxation
 Natural Point of Aim
The most stable platform in the world is the ground. What you have to do is; transfer the stability of the ground into your position through the use of artificial and bone support
Muscular Relaxation
 If you have good support, your muscles will be relaxed
 Less muscle tension means less movement
 Comfort equals relaxed
natural point of aim:
 Where your position is naturally pointing
 Your position must be adjusted so that your natural point of aim (NPA) is aligned with the target
This is what I do. Not the only way to skin the cat!!!
 I locate the target
 Place the weapon to point at the target and get to battery.
 At this time I look though my sights and see where the weapon is aimed at.
 Now I ajust my HOLE BODY AND WEAPON till the weapon and sights are pointing at the target.
 Close my eyes; reopen my eyes and if I need to move left or right I do so.
 Once that is done. I ajust the front suport " Sling, Bi-pod, sand bag, what ever it is" till my evevation is right on.
Now my NPA is right on target.
The following is a part of a class from the AMU that I have on NPA.
ADJUSTING NATURAL POINT OF AIM
1) Natural point of aim is the point at which the rifle sights settle when bone support and muscular relaxation are achieved. When in a shooting position with proper sight alignment, the position of the tip of the front sight post will indicate the natural point of aim. When completely relaxed the tip of the front sight post should rest on the desired aiming point.
2) If the natural point of aim is above or below the desired aiming point: move your body slightly forward or back using your non-firing elbow as a pivot point.
A) Pushing your body forward causes the sights to settle lower on the target.
B) Pulling your body back causes the sights to settle higher on the target.
3) Another way to adjust height is by varying the placement of the non-firing hand in relation to the handguard.
A) Moving the non-firing hand forward lowers the muzzle of the rifle.
B) Moving the non-firing hand back raises the muzzle of the rifle.
4) Varying the placement of the buttstock in the pocket of the shoulder will raise or lower the muzzle of the rifle.
A) Moving the stock higher in the pocket of the shoulder lowers the muzzle of the target.
B) Moving the stock lower in the pocket of the shoulder will raise the muzzle of the rifle.
5) The natural point of aim can be adjusted left or right. In the prone position by adjusting the entire position left or right in relation to the target. Keep in mind that when adjusting the position that the non-firing elbow remains in the same place and is used as the pivot point.
The inverted elbow support position is not as hard as it sounds. All it is, is this:
You want the hand guard of the rifle to rest in the “V” formed by the thumb and index finger of the non-firing hand. The non-firing wrist is straight with the rifle resting across the heel of the hand. The fingers can curl against the stock, but should apply only the minimum amount of pressure needed to prevent the hand from slipping on the hand guard.
Barrel is centered over crease in palm, wrist is very close to being directly under barrel. The non-firing elbow should be positioned as close to directly underneath the rifle as possible to create bone support and a consistent resistance to recoil. The non-firing elbow must be inverted in order to obtain a good prone position.
As these pic's show me doing at the SDM Instructor course.
6 Factors of a Solid Position
 Rifle Butt
 Firing Hand
 Stock Weld
 Elbows
 Breathing
Rifle Butt:
 Place the rifle butt firmly into the pocket formed in the shoulder. This reduces the effect of recoil, helps steady the rifle, and prevents the rifle butt from slipping in the shoulder during firing. The rifle should be brought to the head when placing it in the shoulder and not the head to the rifle. The closer the butt stock is place toward the neck, the more upright and vertical the head will be.
Firing Hand
 Placed high on the grip
 Firm handshake grip
 Trigger finger should be placed naturally on the trigger
 Proper placement of the firing hand on the grip allows the trigger to be moved straight to the rear without disturbing sight alignment.
Stock Weld
 This is where your face contacts the stock
 Head should be vertical and upright
 Consistent from shot to shot
 Purpose is to achieve proper achieve eye-sight alignment
 Look for excess skin forming a roll
Elbows
 The non-firing elbow should be positioned as close to directly underneath the rifle as possible to create bone support and a consistent resistance to recoil. The non-firing elbow must be inverted in order to obtain a good prone position.
 The firing elbow should be positioned naturally to provide balance to the position and create a pocket in the shoulder for the rifle butt
Breathing
 Breathing causes movement of the chest and a corresponding movement in the rifle and sights. To minimize this movement and the effect it has on your aim, learn to control your breathing and extend your natural respiratory pause for a few seconds during the final aiming and firing process. Do not extend your natural respiratory pause for an uncomfortable period. This can cause blurry vision and will decrease your ability to deliver well-aimed shots.
EFFECTS OF LIGHT
Light does not affect the trajectory of the bullet; however, it does affect the way the shooter sees the target through the scope. This effect can be compared to the refraction (bending) of light through a medium, such as a prism or a fish bowl. The same effect, although not as drastic, can be observed on a day with high humidity and with sunlight from high angles. The only way the sniper can adjust for this effect is to refer to past firing recorded in the rifle data book. He or she can then compare different light and humidity conditions and their effect on marksmanship. Light may also affect firing on unknown distance ranges since it affects range determination capabilities.
EFFECTS OF TEMPERATURE
Temperature affects the firer, ammunition, and density of the air. When ammunition sits in direct sunlight, the bum rate of powder is increased, resulting in greater muzzle velocity and higher impact. The greatest effect is on the density of the air. As the temperature rises, the air density is lowered. Since there is less resistance, velocity increases and once again the point of impact rise. This is in relation to the temperature at which the rifle was zeroed, if the shooter zeros at 50 degrees
and he is now firing at 90 degrees, the point of impact rises considerably. How high it rises is best determined once again by past firing recorded in the rifles data book. The general role, however, is that when the rifle is zeroed, a 20-degree increase in temperature will raise the point of impact by one minute; conversely, a 20-degree decrease will drop the point of impact by one minute.
EFFECTS OF HUMIDITY By Greg Langelius
As long as the humidity is in vapor form (oxygen and hydrogen molecules) it displaces air of a higher mass (oxygen and nitrogen, nearly in total), thereby decreasing overall density, and therefore offering reduced air resistance. The projectile covers the overall distance in less time, resulting in less drop. Drop is a factor of time-of-flight, period. Reduce the time, you also reduce the drop.
Therefore as humidity increases, POI is higher, and as it is reduced, POI is lower.
Now then, lest we get carried away with this, let us also recognize that the effect of humidity is actually pretty slight. I would suggest that a rough estimate of the overall difference between 0% humidity and 100% humidity would probably account for less than 1 MOA difference in drop at 1Kyd.
RANGE ESTIMATION METHODS
100-Yard / Meter-Unit-of-Measure Method. To use this methodThe shooter must be able to visualize a distance of 100 yards / meters on the ground. For ranges up to 500 yards / meters the shooter determines the number of 100-meter increments between the two objects it wishes to measure. Beyond 500 yards / meters, it must select a point halfway to the object and determine the number of 100-meter increments to the halfway point, then double it to find the range to the object.
Appearance-of-Object Method. This method is a means of determining range by the size and other characteristic details of the object. To use the appearance-of-object method with any degree of accuracy, the Shooter must be familiar with the characteristic details of the objects
as they appear at various ranges.
Range-Card Method. The shooter uses a range card to quickly determine ranges throughout the target area. Once the target is seen, the shooter determines where it is located on the card and then reads the proper range to the target. Also you can label your targets as "TRP" Target Reference Point.
Combination Method. Some times only one method of range estimation may not be enough for a shooter. Terrain with much dead space limits the accuracy of the 100-yard / meter method. Poor visibility limits the use of the appearance-of-object method. However, by using a combination of two or more methods to determine an unknown range, an experienced shooter should arrive at an estimated range close to the true range.
What the Mil-dot is and how it works
A milliradian is a unit of measure derived from the degrees of a circle.
(Note: in a 360 degree circle, there are 6283.2 milliradians, or 17.45 milliradians per degree.)
This means that a milliradian will subtend different distances at different ranges. For example:
The subtension of 1 mil equals 3.6 inches at 100 yards or 36 inches at 1,000 yards. In metric units, the correspondence is 1 mil equals 10 centimeters at 100 meters or 1 meter at 1,000 meters.
Knowing this subtension and knowing the size of the target (or a reference object near the target) allows the distance to the target to be estimated with considerable accuracy.
Mil-Relation Formula.
The mil-relation formula is the preferred method of range estimation. This method uses a mil-scale reticule located in binoculars, spotting scopes or rifle scopes with a Mil-dot recital. The shooter must know the target size in inches yards or meters. Once the target size is known, the team then compares the target size to the mil-scale reticule and uses the following formula:
Size of target in yards x 1,000 / Size of target in MIL's = range in yds
Size of target in inches x 27.778 / Size of target in MIL's = range in yds
Size of target in inches x 25.4 / Size of target in MIL's = range in meters
MIL-DOT HOLD OVERS AND UNDERS
MOA data / 3.438 = mil hold over/under
This is how you do it in steps:
1. Shoot your dope to ranges you will use your rifle at. Record your dope in MOA.
2. Pick a range as the set constant on the scope.
3. follow this conversion to get hold unders.
4. Follow this conversion th get hold overs
EXAMPLE MOA
Step 1.
100yds ZERO
150yds .75 MOA
200yds 1.75 MOA
250yds 3.50 MOA
300yds 4.25 MOA
350yds 5.75 MOA
400yds 7.25 MOA
450yds 8.50 MOA
500yds 10.75 MOA
550yds 12.25 MOA
600yds 14.00 MOA
700yds 18.00MOA
Step 2.
I WILL USE: 500yds as my set constant on the scope.
Step 3.
500yd MOA - 450yd MOA = MOA between 500 yds and 450yds / 3.438 = Mil-dot hold under
10.75- 8.50= 2.25 MOA
2.25MOA / 3.438= .65 Mil-dot Hold under
So if I want to shoot the 450yd target with 500yds dialed in the scope. All I need to do is hold .65 mills under and I will hit the 450yd target.
Step 4.
550yd MOA - 500yd MOA = MOA between 550 yds and 500yds / 3.438 = Mil-dot hold over
12.25 - 10.75 = 1.5 MOA
1.5MOA / 3.438 = .43 Mil-dot hold over
ANGLE FIRING from FM 23-10
3-11. ANGLE FIRING
Most practice firing conducted by the sniper team involves the use of military range facilities, which are relatively flat. However, as a sniper being deployed to other regions of the world, the chance exists for operating in a mountainous or urban environment. This requires target engagements at higher and lower elevations. Unless the sniper takes corrective action, bullet impact will be above the point of aim. How high the bullet hits is determined by the range and angle to the target (Table 3-3). The amount of elevation change applied to the telescope of the rifle for angle firing is known as slope dope.
FM 23-10 Chapter 3
Section III
EFFECTS OF WEATHER
For the highly trained sniper, the effects of weather are the main causes of error in the strike of the bullet. Wind, mirage, light, temperature, and humidity affect the bullet, the sniper, or both. Some effects are minor; however, sniping is often done in extremes of weather and all effects must be considered.
3-12. WIND CLASSIFICATION
Wind poses the biggest problem for the sniper. The effect that wind has on the bullet increases with range. This is due mainly to the slowing of the bullet's velocity combined with a longer flight time. This allows the wind to have a greater effect on the round as distances increase. The result is a loss of stability.
a. Wind also has a considerable effect on the sniper. The stronger the wind, the more difficult it is for him to hold the rifle steady. This can be partly offset by training, conditioning and the use of supported positions.
b. Since the sniper must know how much effect the wind will have on the bullet, he must be able to classify the wind. The best method is to use the clock system (Figure 3-19). With the sniper at the center of the clock and the target at 12 o'clock, the wind is assigned three values: full, half, and no value. Full value means that the force of the wind will have a full effect on the flight of the bullet. These winds come from 3 and 9 o'clock. Half value means that a wind at the same speed, but from 1,2,4,5,7,8, 10, and 11 o'clock, will move the bullet only half as much as a full-value wind. No value means that a wind from 6 or 12 o'clock will have little or no effect on the flight of the bullet.
3-13. WIND VELOCITY
Before adjusting the sight to compensate for wind, the sniper must determine wind direction and velocity. He may use certain indicators to accomplish this. These are range flags, smoke, trees, grass, rain, and the sense of feel. However, the preferred method of determining wind direction and velocity is reading mirage (see paragraph d below). In most cases, wind direction can be determined simply by observing the indicators.
a. A common method of estimating the velocity of the wind during training is to watch the range flag (Figure 3-20). The sniper determines the angle between the flag and pole, in degrees, then divides by the constant number 4. The result gives the approximate velocity in miles per hour.
b. If no flag is visible, the sniper holds a piece of paper, grass, cotton, or some other light material at shoulder level, then drops it. He then points directly at the spot where it lands and divides the angle between his body and arm by the constant number 4. This gives him the approximate wind velocity in miles per hour.
c. If these methods cannot be used, the following information is helpful in determining velocity. Winds under 3 miles per hour can barely be felt, although smoke will drift. A 3- to 5-mile-per-hour wind can barely be felt on the face. With a 5- to 8-mile-per-hour wind, the leaves in the trees are in constant motion, and with a 12- to 15-mile-per-hour wind, small trees begin to sway.
d. A mirage is a reflection of the heat through layers of air at different temperatures and density as seen on a warm day (Figure 3-21). With the telescope, the sniper can see a mirage as long as there is a difference in ground and air temperatures. Proper reading of the mirage enables the sniper to estimate wind speed and direction with a high degree of accuracy. The sniper uses the M49 observation telescope to read the mirage. Since the wind nearest to midrange has the greatest effect on the bullet, he tries to determine velocity at that point. He can do this in one of two ways:
(1) He focuses on an object at midrange, then places the scope back onto the target without readjusting the focus.
(2) He can also focus on the target, then back off the focus one-quarter turn counterclockwise. This makes the target appear fuzzy, but the mirage will be clear.
e. As observed through the telescope, the mirage appears to move with the same velocity as the wind, except when blowing straight into or away from the scope. Then, the mirage gives the appearance of moving straight upward with no lateral movement. This is called a boiling mirage. A boiling mirage may also be seen when the wind is constantly changing direction. For example, a full-value wind blowing from 9 o'clock to 3 o'clock suddenly changes direction. The mirage will appear to stop moving from left to right and present a boiling appearance. When this occurs, the inexperienced observer directs the sniper to fire with the "0" wind. As the sniper fires, the wind begins blowing from 3 o'clock to 9 o'clock, causing the bullet to miss the target therefore, firing in a "boil" can hamper shot placement. Unless there is a no-value wind, the sniper must wait until the boil disappears. In general, changes in the velocity of the wind, up to about 12 miles per hour, can be readily determined by observing the mirage. Beyond that speed, the movement of the mirage is too fast for detection of minor changes.
3-14. CONVERSION OF WIND VELOCITY TO MINUTES OF ANGLE
All telescopic sights have windage adjustments that are graduated in minutes of angle or fractions thereof. A minute of angle is 1/60th of a degree (Figure 3-22). This equals about 1 inch (1.145 inches) for every 100 meters.
EXAMPLE
1 MOA = 2 inches at 200 meters
1 MOA = 5 inches at 500 meters
a. Snipers use minutes of angle (Figure 3-22) to determine and adjust the elevation and windage needed on the weapon's scope. After finding the wind direction and velocity in miles per hour, the sniper must then convert it into minutes of angle, using the wind formula as a rule of thumb only. The wind formula is--
If the target is 700 meters away and the wind velocity is 10 mph, the formula is--
This determines the number of minutes for a full-value wind. For a half-value wind, the 5.38 would be divided in half.
b. The observer makes his own adjustment estimations, then compares them to the wind conversion table, which can be a valuable training tool. He must not rely on this table; if it is lost, his ability to perform the mission could be severely hampered. Until the observer gains skill in estimating wind speed and computing sight changes, he may refer to Table 3-4.
John

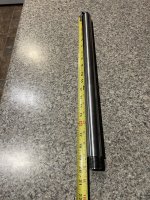
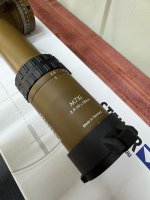
 after figuring out the barrel is 1:8 twist an not 1:10 like the manual says it is I started trying heavier bullets. 175,180,200,225. Even subsonic ammo is about a 50/50 shot of hitting a ipsc steel @100yds. Everything seems tight. No baffle strikes and what bullets have impacted paper are not keyhole.