• Watch Out for Scammers!

    We've now added a color code for all accounts. Orange accounts are new members, Blue are full members, and Green are Supporters. If you get a message about a sale from an orange account, make sure you pay attention before sending any money!

Converting a commercial crosshair Redfield to an M40 accurange Redfield

tokiwartooth

Sergeant
Full Member
Minuteman
Jul 30, 2012
265
139
57
Hixson, Tennessee
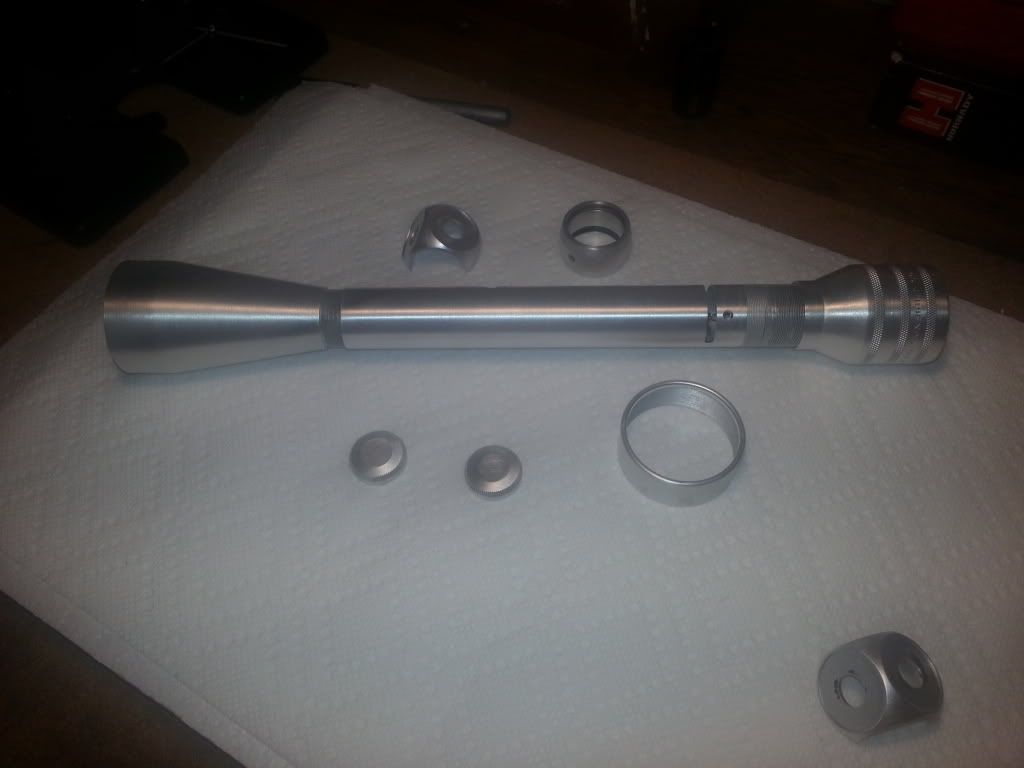
Have an interesting project I agreed to do for a forum member. I'm anodizing one of his Redfield gen 1 accurange scopes, and the other commercial gen 1 standard crosswire scope is getting "converted" to an accurange. This means building up the stadia wires on a standard crosswire reticle and adding a tombstone assembly, which is being provided from a sacrificial scope whose erector is junked, but has the tombstone intact.
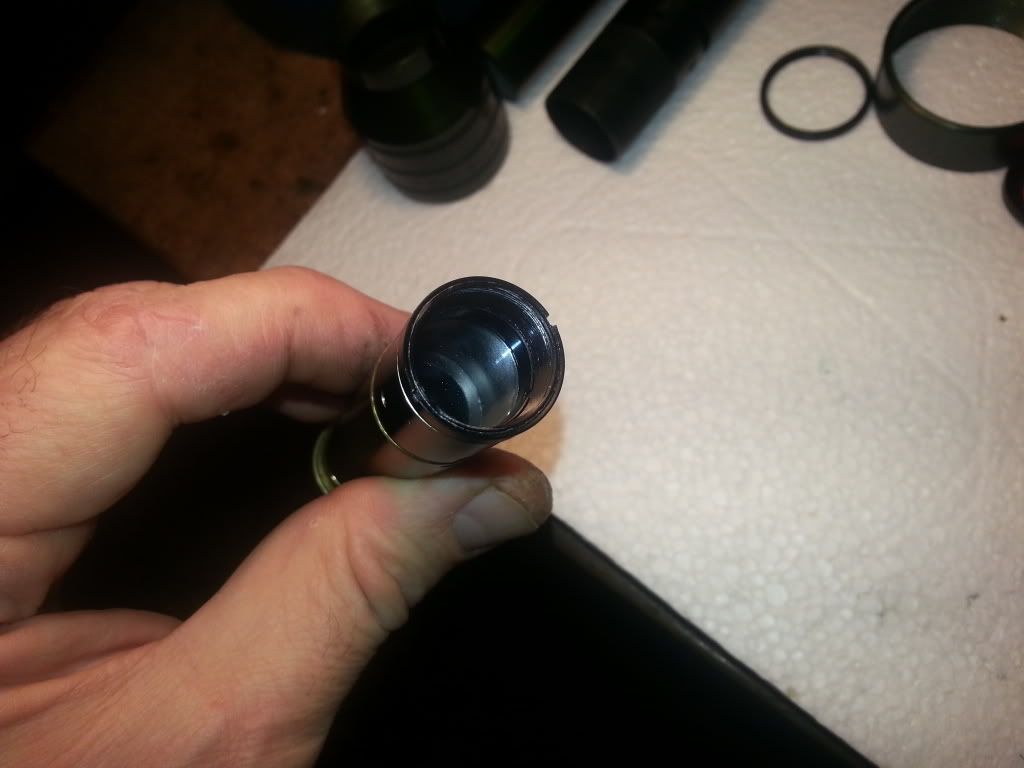
So, started on the tombstone harvesting, BUT, unfortunately the sacrificial scope had no eyepiece, so the erector was subject to the elements. When removing the erector, the tombstone etching plops out onto my work bench. So, It has to be repaired.

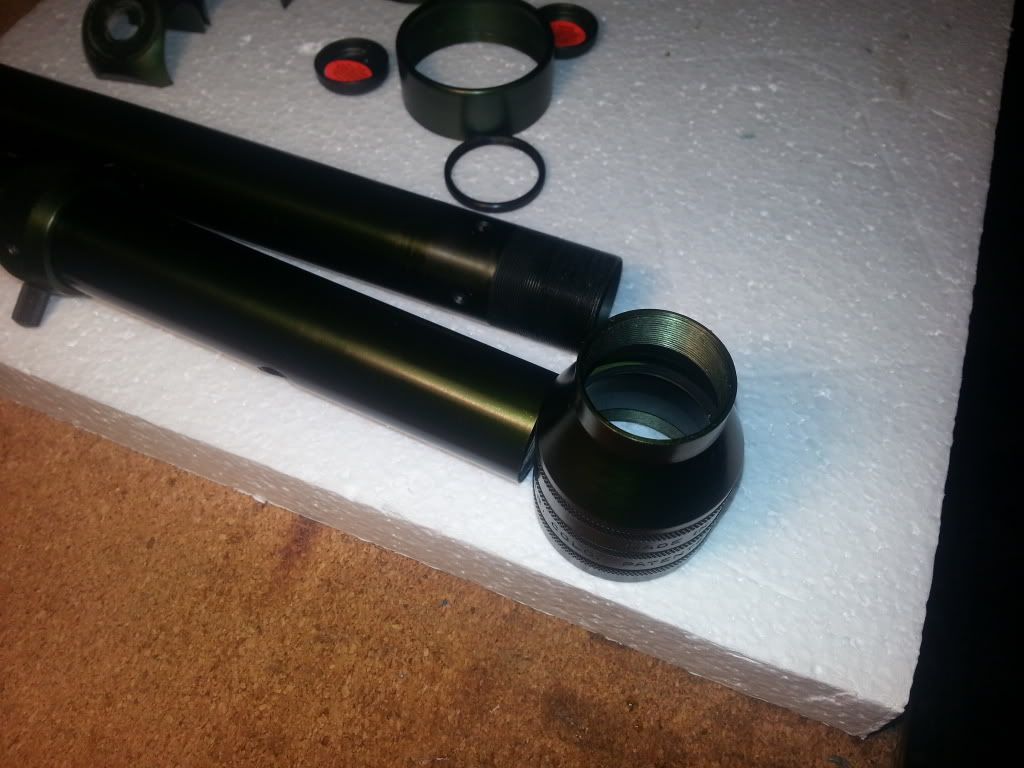
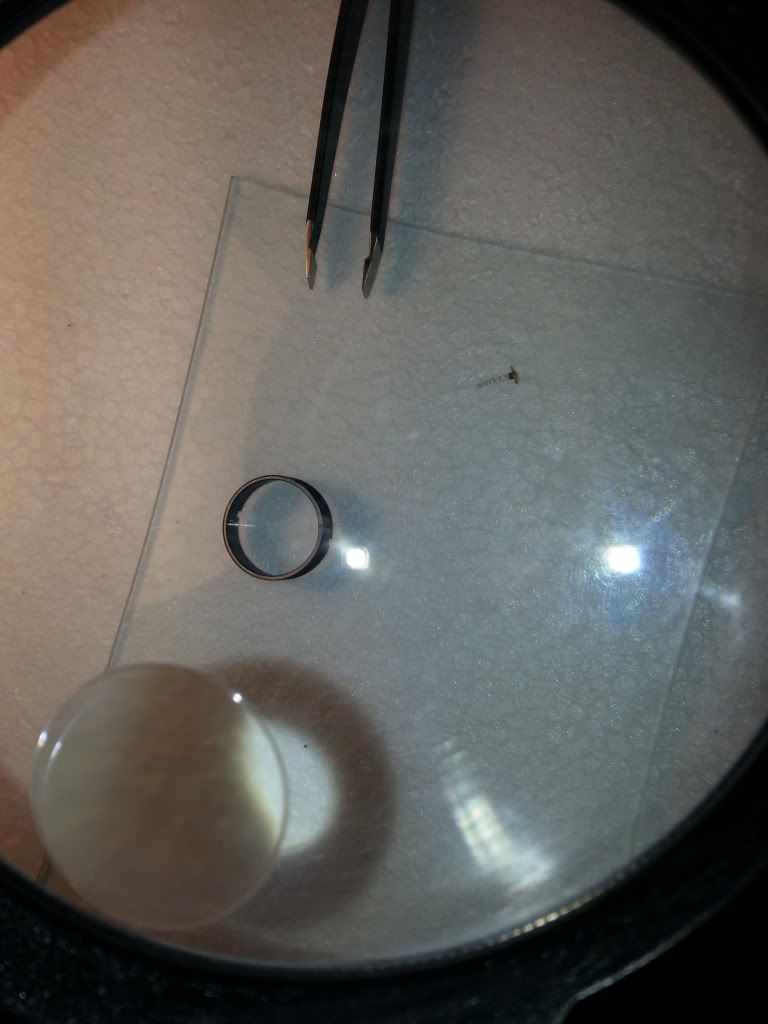
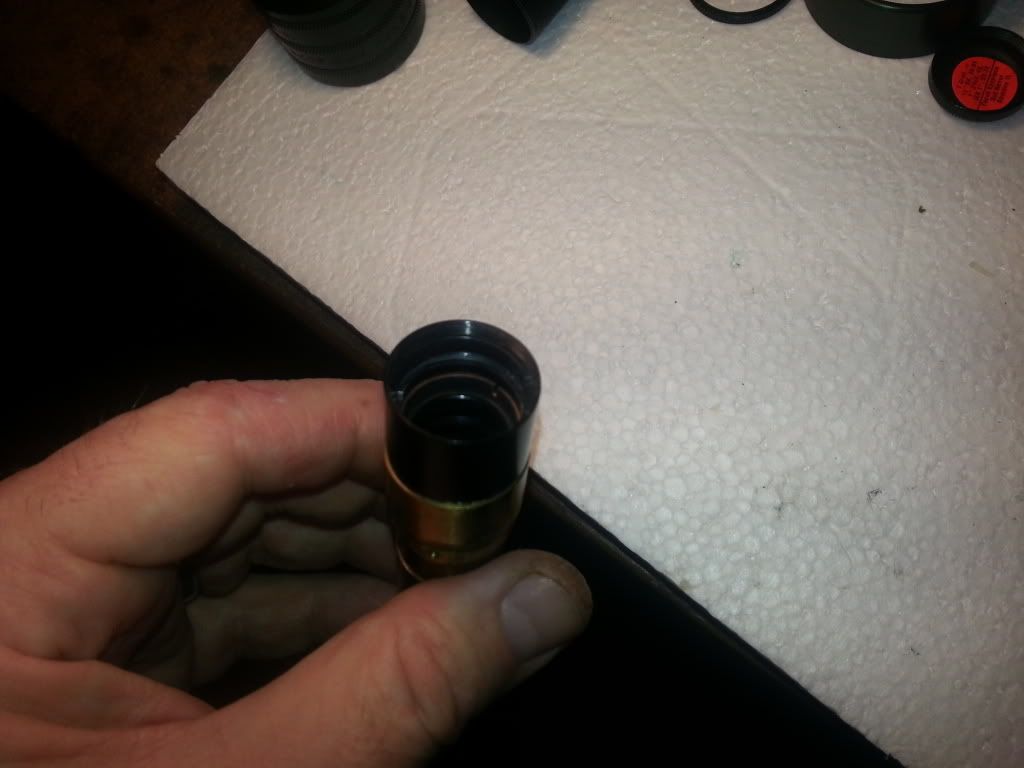
It's a two piece ring that holds the tombstone and allows it be adjusted for focus/parallex. Here is the tombstone and the ring it attaches to. You see the old glue that is used that failed and plagued Vietnam snipers. The glue that they used in gen 2 scopes is different. it's clear epoxy, which I used to re-attach the etching. Pic tonight.


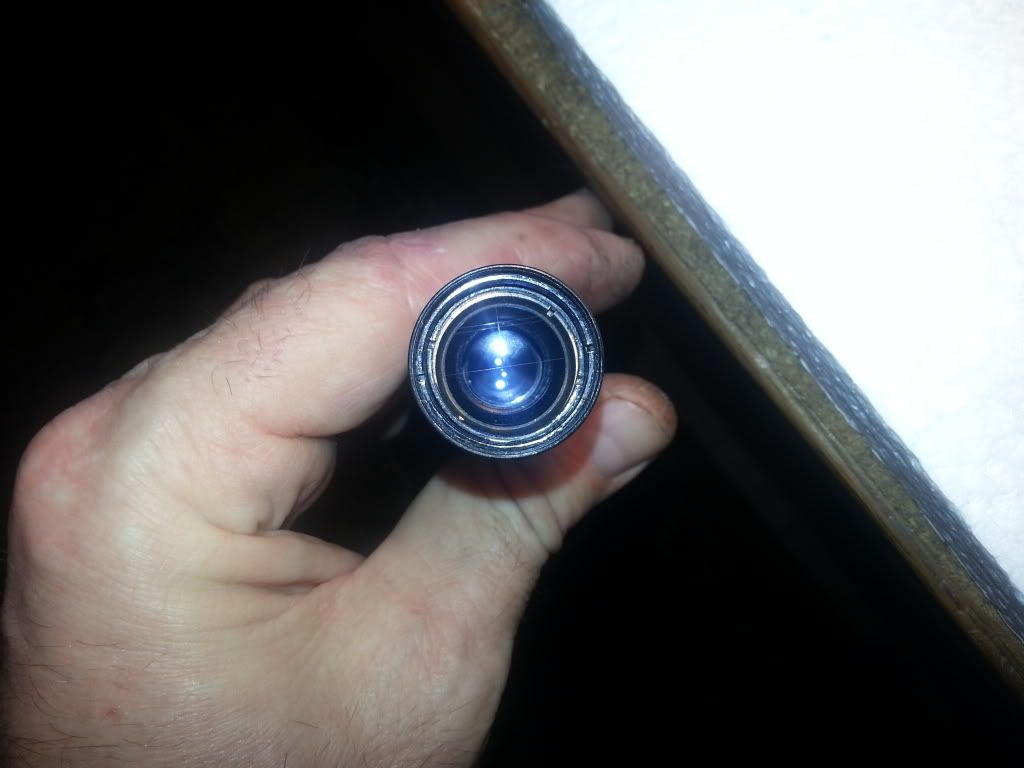
Tonight, I will post the process of converting the standard crosswire to an accurange.... Stay tuned.
 
Last edited:
Making an accurange reticle... (see my template under the brass ring?)
I "tack" it with CYA, and then use marine epoxy.

 
Last edited:
What is the tombstone made out of? Is it a piece of glass? or what?
Plastic. I think. I lost one about 2 weeks ago trying to do the same thing, so learned my lesson with overhandling. I actually lost this one too! if you pick it up with a tweezers, its shoots off. But, since I learned my lesson, I cleared all unnecessary crap out of the way and located it very quickly. In the future, I'm going to work on them inside of a box.

Here is the "conversion" scope, all taken apart. Figure I would start with this one. I do ONE scope at a time until it's back together. Also, no erector in this pic, I stick them in a dust free case right away. Some come apart very easily, others are a bitch. This one was in between. I have a *SECRET* for taking the bell off, and the objective glass out. Makes it a lot easier. You can use heat to break the glue, but too much heat on the objective or ocular end will cause the doublet lenses to also split since they are held together with Canada Balsam. That's another can of worms....


Here is the rebuilt reticle..
.0015 annealed and polished wire. What a pain in the nuts. There are no channels for the stadia wires, so, you have to line them up, and then look under magnification to make sure they're parallel and the correct distance apart. I have to walk away from it a couple of times as your eyes play tricks on you.

 
Last edited:
Ok kids, some more updated pics. Doing a little work while I run errands, drive my kids around. My wife has 3 store fronts, so she's busy on the weekend with those while I play Mr. Mom. I work in Manhattan during the week, so it's early mornings, late nights. Still find some time to do this stuff without a 15 month turnaround. LOL.

Anyway, etched the first scope. You can
see from the pics the different alloys that are used, hence why you see different colored parts on the original green scopes. Next step is some surface preparation, then Desmut with Muriatic Acid. Mount up the parts on their contacts, one more degreaser rinse, then into the electrolyte bath for 90 minutes.


Final metal prep before the tank tomorrow.

20131229_005128_zps73a0d0ea.jpg
 
Reticle installed in erector.
Pain
In
The
Balls
Gen 2 scopes are much easier... Stadia wires parallel, and perfectly parallel with crosswire.
All the lye and acid is eroding my finger tips EVEN though I wear nitrile gloves...

20131229_193856_zps868dd9ab.jpg


FOUR retaining rings!!!

20131229_193953_zps1af2472c.jpg


Tombstone in..

20131229_193927_zpsecaa13e4.jpg


OD green. Pic does it no justice. It's "olivey". Man, this dye is so much better than the Caswell. It literally uptakes in 5 seconds. Parts would have to sit in the Caswell for 20 minutes. Animaldoc sent me a few parts scopes, so I did a tube and bell just in case I had lost connections in the electrolyte bath. All came out nice. small occlusion on one tube, so I get swap in the better one for this job...:)

20131229_193604_zps326dfa31.jpg
 
Last edited:
Minor issue... A little kink in the bottom stadia wire. Gotta pull the reticle apart again and restring that bottom wire. I usually check the wiring before I put it together, but you can normally see defects with the naked eye. This one is so slight.

Also, you see from this pic there is some wiggle room to collimate the reticle. Gonna put up a big crosswire about 25 yards out and center before securing it with a drop of CYA (fancy chemist term for "Crazy Glue"). You can get different consistencies at hobby stores. Regular Crazy Glue is too viscous. You have to get one that flows better so that it goes into the threads a bit.

 
Last edited:
Mild interest here could you PM me a cost to anodize a scope and convert to tombstone? I'm sure my wife will shoot it down quicker than dick cheney's hunting buddy lol
 
Ok, the conversion is complete. Have to clean the lenses inside and out, tack glue some things.
But... Gotta tell you. Generation 1 reticle conversions are going to be more expensive. Takes about 4 times as long as a generation 2, and is much more risky. A real pain. Here some pics...

20140101_185936_zps37b34fcf.jpg

Aspect is off cuz of angle of camera, but you get the general idea....
20140101_190222_zps76dc9a5f.jpg
 
isn't the tombstone normally to the right of the vertical crosshair?
 
isn't the tombstone normally to the right of the vertical crosshair?
I think they compensate in accurange reticles where the vertical wire slots are actually a little bit to the left in the brass ring.
In the Gen 2, the accurange reticle ring is different than the standard x-hair ring. I assume its the same in the gen 1s.
 
Both scopes complete and shipped. In the end, it's quite a bit a labor to convert the generation 1 reticles. Redfield made improvements with the gen2, a major one being the ability to service the reticle. I don't think that was the case with gen 1s. On the gen2s, 4 long "micro carriage bolts" hold the reticle assembly to the erector. Very easy to take apart. The gen 2s use traditional lock rings and glue. A real bitch. I got a bit lucky with this scope as it didn't have a ton of adhesive applied. If it did, it would not have been possible to convert it without using parts that I have. Also, the x-wire brass rimg on standard x-wire are different than the Accurange on both versions.
The Anodizing dye I bought on EBay is excellent. A slight bit dark, but a TRUE OD Green. I imagine it will naturally lighten up. No streaking issues. Had a bit of streaking issues with Caswell dyes. Done with them.
The erectors are the biggest pain. Once they get dirty (one of these scopes had a tiny set screw bouncing around in it) they can't be cleaned. They are not serviceable. Only the lenses that face out. Same with the reticle on gen 1s. On gen2s, I can easily remove the whole reticle ring and clean the wire with acetone or electronics solvent, but you always run the risk of "warping" it. Then you have to restring it. I hate going near them. One of the reasons I won't re anodize my AR TEL. I could not duplicate that reticle if I were to accidentally damage it.
So, a bit of work, some limitations, but in the end, it's technically feasible to do *IF* a tombstone is available. I am going to try and fabricate a tombstone. If anyone know of someone who does "micro printing" on plastic media, it would be great.
 
I'm just brainstorming here and I may be way off base but regarding microprinting on a plastic media...would it be possible to use a laser jet printer to print on a clear projector film? I have no idea what the true tombstone is like so again I could be way off lol.
 
Resolution issues. I created a 12" x 12" tombstone in MS Paint. Pasted the image in Word and scaled it down to approximately the same size as a real one. Printed it out on paper and viewed under my magnifier. No good. Did this on a commercial grade printer at work.
Gonna need special equipment for this.
 
Not sure why Im just now checking this thread out, but I have to say...Great info Loki......Really neet to see how this whole process unfolds...Thanks!
 
Ok, the conversion is complete. Have to clean the lenses inside and out, tack glue some things.
But... Gotta tell you. Generation 1 reticle conversions are going to be more expensive. Takes about 4 times as long as a generation 2, and is much more risky. A real pain.

What is the difference between the Gen1 reticle and the Gen2 reticle? This looks awesome. I want to get this done. Will look great on my M40.
 
What is the difference between the Gen1 reticle and the Gen2 reticle? This looks awesome. I want to get this done. Will look great on my M40.
From a "user" perspective... nothing. From working on them.. everything. The erectors were completely redesigned by Redfield. Much easier to fix a reticle on the Gen 2s. The whole reticle unit screws out in the Gen 2s. Gen 1s use old school retaining rings, a bunch of them, and everything is glued. Have to heat the thing to break the glue bond. A real bitch to get apart.
 
Ok, here is the story with erector rebuilds...
It's possible. Did two parts erectors I had laying around. They come apart.
Completely clean the erector innards, and the two zoom housings/lenses.
Gen1s need to be torched. It's the only thing that breaks the glue, so your crosshair is going to have to redone unless I can screw it out after applying Acetone.
This is mainly if you have an erector where the glass has been compromised by internal grease, dirt/mold, or the small doublets separating, and there is no other option. I also have replacement glass for the internal erector lenses.

I'm also experimenting with some etched glass crosshair reticles I have access to. They are a perfect fit for Gen 1s as replacements.

Jeez guys, if I could duplicate this tombstone, I can convert any scope to an Accurange.
 
Couple of gen 1s ready to go to their respective owners

20140126_183103_zps85987311.jpg


Next batch... Stripped and just out of the aluminum brightening solution after their roughing up with a green pad. These will be next run, next weekend.

20140126_182808_zps4e6b9491.jpg
 
Very nice work. I'm impressed. There's not a lot of people who have the guts to mess with those old scopes!

Maybe its the lighting, but the finish looks more green than yellowish?
 
Both of those scopes look outstanding. Question I have is can you fix the windage and elevation turrets as you repair these? I have two Redfield scopes and none of the reticles move when you move the turrets.
 
Very nice work. I'm impressed. There's not a lot of people who have the guts to mess with those old scopes!

Maybe its the lighting, but the finish looks more green than yellowish?

The're actually darker. They are Olive Drab Green. One is OD Green from Bright Dyes. The other is OD Green from U.S. Specialty Corp.
I've tried to find the original contract anodizing firm (a company called CAI Technologies) but no luck. Mixing dyes just results in disaster. I really like the U.S. Specialty Corp dye, it takes up in seconds. I'm going to order brown and gold from them to see if I can mix out a lighter, duller parkerized type green. This is way down the road.
 
Both of those scopes look outstanding. Question I have is can you fix the windage and elevation turrets as you repair these? I have two Redfield scopes and none of the reticles move when you move the turrets.

The reticles DON'T move on these scopes... They are constantly centered. The field of view (FOV) should move. Place the scope in a vise (carefully). Unscrew the turret adjustment screw all the way (on Gen 1s they come out, on Gen 2s they do not). Screw down until you see movement in your field of vision. STOP. Now count your turns until it bottoms out, divide by 2, and back it out that many turns. It's now centered. Repeat for other.
If there is NO movement in the FOV, There's a small leaf spring that tends to get displaced or stuck. It's a straightforward fix but the scope needs to come apart for it.
Think how a "governor screw" works.... Same concept here with these turret screws. It's pretty archaic.
 
Last edited:
The "Holy Grail" of color... I think I'm going to try a Brown/Gold mix to try and achieve this.....


My first run at duplicating this..... Many of you said "too gold..." I think the brown will blunt it some...